Free tools Windows power users keep installed
One-click scans. No signup required.
Some links on this page are affiliate links: if you buy through them we may earn a commission, at no extra cost to you.
A thickness planer will not truly flatten a twisted or bowed board by itself. The reliable workaround is to establish a stable, flat reference surface before planing—and the right setup depends on whether the board is cupped, bowed, twisted, oversized, or merely crooked along one edge.
A thickness planer will not truly flatten a twisted or bowed board by itself. Its rollers can press the stock flat while it passes through the machine, but the wood may spring back afterward—leaving you with a thinner board that is still warped. The reliable workaround is to create a stable, flat reference surface first.
| # | Preview | Product | Price | |
|---|---|---|---|---|
| 1 |
|
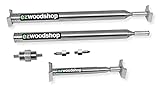
Extendable Measuring Stick Tool | Pinch Stick for Woodworking | No Numbers, No Mistakes | Carpentry,... | $34.95 | Buy on Amazon |
As an Amazon Associate I earn from qualifying purchases.
What’s actually slowing this PC down?
Pick the symptom - the matching free tool is one click away.
The best method depends on the defect and the equipment available:
| Board problem | Best workaround |
|---|---|
| Nearly straight lumber | Acclimate it, select the straightest stock, and remove only what is necessary |
| Slight or moderate cup | Use straight edge runners on a planer bed |
| Twist or bow | Use a shimmed plywood or MDF planer sled |
| Slab wider than the planer | Use a router flattening jig |
| Crooked edge | Use a table-saw jointing sled or a straightedge with a flush-trim bit |
| Short, small, or tear-out-prone stock | Use a router table as an edge jointer |
| Small work or severe local high spots | Use winding sticks, a straightedge, and a sharp hand plane |
Diagnose the lumber before machining it
Do not begin by feeding a warped board into the planer. First determine whether the defect is cup, bow, twist, or a combination of problems. The diagnosis determines whether the board needs support underneath, a straight reference edge, or hand work before it goes near a machine.
#1 Best Overall
- Cut perfect-fitting trim for molding, windows, floors, walls.
- Includes one extendible rod to reach 47" in length.
- Includes add-on extendible rod to reach 94" in length.
- Includes one Mini Measure Stick for capturing small spaces 3" - 8"
- Bonus Tool: EZ Pinch Stick for squaring up large cabinets.
Check for twist with winding sticks
Place two short, straight bars across the board at separated positions. Sight across the nearer stick toward the farther one. If their top edges appear parallel, that section is not showing significant twist. If one end of the farther stick appears higher or lower than the corresponding end of the nearer stick, the board has wind.
Move the sticks along the board to see where the twist begins and ends. This also helps distinguish twist from a simple bow or cup. A straightedge placed along the length checks for bow, while looking across the width reveals cup.
The Tool Desk
Outbyte PC Repair FREEClear out junk files and repair common Windows errorsFree Scan →Outbyte Driver Updater FREEFix the driver behind crashes, sound loss and screen glitchesFind Drivers →You can make winding sticks from straight scrap, but a stable contrasting pair is convenient and easier to read. Woodworking winding sticks are particularly useful when you flatten boards regularly; they are a diagnostic tool, not a substitute for a jointer.
Trim strategically when you can
If the project allows the board to be shortened or narrowed, do that before flattening whenever practical. Removing the most stressed or twisted section first can reduce waste and the amount of material you must remove. For slabs and wide panels, leave extra material at the edges so flattening does not leave you at the finished dimension too soon.
Nearly straight lumber: select and acclimate it
If a board is already close to straight, the most efficient “trick” is to avoid correcting more distortion than necessary. Let the lumber acclimate to the temperature and humidity of the shop, then inspect it again before milling. Wood can move as its moisture content changes, so flattening it immediately after bringing it indoors may not be the final correction.
Choose the straightest boards for parts that need reliable flatness. Mark the face you intend to reference, take light planer cuts, and stop as soon as the surface is flat enough for the project. A pencil grid or series of diagonal lines across the face makes it easy to see where the cutter is removing material.
Slightly cupped stock: use edge runners on a planer
For a board with a manageable cup, attach two straight runners along its edges. The runners should sit on the planer bed and stand slightly proud of the board. The feed rollers then load the runners instead of forcing the cupped board temporarily flat.
- Choose runners that are straight, rigid, and long enough to support the board throughout the cut.
- Attach one runner along each edge using glue, double-sided tape, or another secure method that cannot shift in the machine.
- Position the board so the runners form a flat support plane beneath it.
- Take light passes until the exposed face is flat from edge to edge.
- Remove the runners, turn the board so the newly flattened face is down, and plane the opposite face.
Do not use loose runners or supports that could catch in the planer. The runners must remain fixed as the board enters, passes through, and exits the machine.
When a wide cupped board should be ripped first
A very wide or severely cupped board may require so much material removal that flattening it in one piece wastes thickness. One alternative is to rip it into narrower, manageable pieces, flatten each piece with edge runners, and then re-establish straight edges before rejoining them.
This sacrifices some visual continuity and requires careful orientation during glue-up. However, it can preserve more usable thickness than forcing a badly cupped wide board through an undersized planer setup.
Twisted or bowed stock: build a shimmed planer sled
A planer sled creates the flat underside that the board lacks. The sled supports the workpiece while shims prevent it from rocking, allowing the planer to flatten the upper face without simply following the original distortion.
What you need
- A flat plywood or MDF platform slightly longer and wider than the board
- A trailing cleat or stop to prevent the board from sliding forward
- Small wedges or shims
- Double-sided tape or another reliable way to secure the shims
- A planer with enough width and height capacity for the complete sled and workpiece
How to set up the sled
- Place the board on the sled with the face you want to flatten facing upward.
- Press down at opposing corners and along the edges to find rocking and gaps.
- Insert wedges or shims beneath the low areas until the board is stable. The goal is to stop movement, not to force the board into a new shape.
- Install or position the trailing cleat so the board cannot slide as the planer rollers engage it.
- Remove each shim one at a time, apply double-sided tape, and put it back in the same position. Secure every support before machining.
- Mark the upper surface with pencil lines. Take shallow, light passes until the lines disappear consistently and the face is flat.
- Remove the board from the sled, turn the newly flattened face downward, and plane the opposite face to parallel thickness.
Never rely on loose shims. Vibration and feed pressure can move them, allowing the board to shift or the cutter to take an unexpected bite. A simple sled can use a plywood platform, a stop, and small hot-glued supports. An adjustable sled with leveling bars or an integrated clamp-on straightedge takes longer to build but is faster to set up for repeated work.
Support a long or heavy sled as it enters and exits the planer. Infeed and outfeed support makes the assembly easier to control and helps prevent the sled from tipping or producing problems at the ends of the board.
Boards wider than the planer: flatten them with a router jig
When a slab or panel exceeds the planer’s capacity, do not force it through an undersized machine. A router flattening jig is the appropriate solution for oversized work.
Basic jig construction
Build a flat plywood base or platform with two parallel side rails. A router carriage spans the rails and allows the router to travel across the workpiece. Mount the router to a rigid plate or carriage and fit an appropriate surfacing or flat-bottom bit. Connect dust collection if the router and setup allow it.
Place the slab on the base, shim it until it cannot rock, and trap it with cleats. The cleats should hold the workpiece securely without obstructing the router’s travel or cutter path.
Flattening procedure
- Set the router bit just high enough to skim the highest point.
- Move the carriage back and forth across the board in overlapping passes.
- Take shallow cuts rather than trying to remove the entire defect in one pass. A conservative limit is no deeper than 1/8 inch per series of passes.
- Lower the router slightly and repeat until the entire face is flat.
- Inspect for ridges between passes and sand or make a final light routing pass as needed.
- Flip the workpiece if both faces need flattening, then repeat the process from the newly established reference face.
Router flattening leaves broad cutter marks that may require sanding. The method is effective for wide slabs and panels, but the jig must be flat, the carriage must move smoothly, and the workpiece must be secured against rocking. A router sled is not a reason to use a loose carriage, excessive cutting depth, or an unclear cutter path.
Correct a crooked edge without a jointer
Face flattening and edge straightening are separate jobs. Once you have a flat reference face—or when the board only needs a straight edge—you have several alternatives to a jointer.
Do these 3 things before closing this tab:
1Fix the driver behind crashes, sound loss and screen glitches2Clear out junk files and repair common Windows errors3Scan for outdated or missing drivers - takes under a minuteTable-saw jointing sled
A jointing sled provides a straight reference side against the table-saw fence while the crooked edge overhangs the sled. Secure the board with hold-down clamps, then make a controlled cut that removes the crooked edge.
- Place the board on the sled with its straighter edge against the fence.
- Allow the crooked edge to overhang the sled where the blade will remove it.
- Secure the board so it cannot shift as the sled moves.
- Set the cut to remove only the irregular edge.
- Make the cut with the sled fully supported and the blade path clear.
A sled with a T-slot and hold-down hardware can make clamping more repeatable. Keep the workpiece and clamps clear of the blade, and do not use a setup that leaves the board unstable at the start or end of the cut.
Straightedge and bearing-guided flush-trim bit
If the stock is too thick for a convenient table-saw cut, clamp a straight piece of plywood or another reliable straightedge to the board. Leave a small amount of crooked edge exposed beneath the straightedge. A bearing-guided flush-trim bit follows the straightedge while its cutter removes the waste.
Secure the straightedge firmly, confirm that the bearing—not the irregular board edge—is the guide, and take a controlled pass. The router bit must have sufficient cutting length for the stock, and the workpiece must be supported on both sides of the cut.
Short or tear-out-prone pieces: use a router table as an edge jointer
Short, small, or highly figured stock can be difficult to control on a conventional jointer and may be prone to tear-out. A router table can straighten an edge when the piece is manageable and securely guided.
Offset the outfeed side of the router-table fence by approximately 1/16 inch. Align the outfeed fence flush with the cutter’s path, then feed the board slowly so the outfeed side supports the newly cut edge. Use multiple lighter passes if removing the full offset at once would be too aggressive.
This is an edge-jointing technique, not a replacement for every operation performed by a conventional jointer. Use appropriate push blocks or other safe control methods, keep your hands away from the cutter, and avoid pieces too short or narrow to guide safely.
Independent reader supportYour contribution helps us test, update, and keep practical guides available for everyone.Hand-plane method: the equipment-light option
A sharp hand plane can flatten small boards, remove local high spots, and reduce the amount of shimming needed on a planer sled. It is also a useful first step when a board has severe twist but only a limited amount of stock can be removed.
Quick wins for a faster PC:
Fix the driver behind crashes, sound loss and screen glitchesFind Drivers →Repair Windows errors before they cause bigger problemsFix Now →Scan for outdated or missing drivers - takes under a minuteDriver Scan →- Use winding sticks to identify the high and low corners.
- Use a straightedge to check lengthwise flatness.
- Mark the high areas with pencil.
- Plane only the marked high spots with controlled strokes.
- Recheck with the winding sticks and straightedge.
- Continue until the board sits more securely on a sled or is flat enough for the intended use.
For severe twist, removing obvious high spots by hand first can significantly reduce the amount of shimming required. A scrub plane can remove material quickly, while a long jointer plane can help establish a broad reference surface. A power plane, marking gauge, belt sander, or palm sander may also be part of a large-slab workflow.
Hand planing is not a guaranteed quick fix. The effort depends on the board’s length, width, hardness, grain direction, existing distortion, plane sharpness, and required final thickness. Treat it as a practical method for suitable stock and as useful preparation for machine flattening—not as a promise that every board can be flattened quickly by hand.
A practical decision process
- Inspect the board. Identify cup, bow, twist, crooked edges, or combinations of defects using winding sticks and a straightedge.
- Check dimensions. Confirm the board and any sled fit within the machine’s width and height limits.
- Decide whether to trim first. Shortening or ripping away the worst section may save material.
- Choose the reference method. Use runners for a manageable cup, a shimmed sled for twist or bow, and a router jig for oversized stock.
- Stabilize everything. Secure shims, cleats, clamps, runners, and straightedges before cutting.
- Take light passes. Use pencil marks to monitor material removal and preserve as much thickness as possible.
- Establish the second face. Once one face is flat, turn it down and plane or rout the opposite face.
- Straighten the edges separately. Select a table-saw sled, flush-trim setup, router-table method, or hand plane according to the board’s size and risk of tear-out.
Safety and setup checklist
- Stay within the planer, router, table-saw, bit, and sled capacity.
- Inspect every jig for flatness, rigidity, and adequate support.
- Secure shims and supports; never send loose pieces through a machine.
- Use a trailing stop or cleat where necessary to prevent board movement.
- Support long sleds and heavy boards at the infeed and outfeed sides.
- Keep clamps, cleats, fingers, and straightedges outside the cutter path.
- Take shallow cuts and use dust collection and appropriate eye, hearing, and respiratory protection.
- Check the workpiece for embedded metal, loose knots, or other hazards before cutting.
- Mark the face with pencil lines so you do not remove more material than necessary.
- Stop and reset the setup if the board rocks, shifts, or contacts a support unexpectedly.
Are purchased winding sticks necessary?
No. Two straight, matching pieces of scrap can work if their edges are truly straight and their contrast makes the offset easy to see. A purchased pair is a convenience: stable, straight, and ready to use when you are diagnosing twist repeatedly. They are most valuable before machining, because recognizing wind early helps you choose between edge runners, a shimmed sled, hand-planing, or a different cut plan.
Frequently Asked Questions
Can a thickness planer flatten twisted lumber by itself?
A planer can make two faces parallel only after one face has been made stable and flat. Rollers may press a warped board against the planer bed temporarily, but the board can spring back after the cut. Use runners or a secured sled to establish the first reference face.
Crashes, No Sound, or Screen Glitches?
Random freezes, missing sound and display glitches usually trace back to one bad driver. Find and replace yours safely.Free scan · under a minutePC Slower Than It Used to Be?
A free scan shows the junk files, broken settings and background clutter dragging Windows down - then fixes them in one click.Free scan · Windows 10 & 11How do you plane a cupped board without a jointer?
Use straight edge runners that sit on the planer bed and stand slightly proud of the cupped board. Secure the runners, take light passes until one face is flat, then remove the runners, flip the board, and plane the second face.
What is the best way to flatten a slab wider than a planer?
A router flattening jig is generally the better choice because it can be built larger than a planer. Use parallel rails, a rigid router carriage, secure shims and cleats, and shallow overlapping passes.
Can a router table replace a jointer for straightening edges?
Yes, if the workpiece is manageable and the router table is set up correctly. Offset the outfeed fence by about 1/16 inch, align it flush with the cutter path, and feed slowly. Use another method for stock that is too short, narrow, or unstable to control safely.
The Bottom Line
To true lumber without a jointer, first create a reliable reference surface: runners for cup, a secured shimmed sled for bow or twist, and a router flattening jig for oversized slabs. Straighten edges with a table-saw sled, straightedge and flush-trim bit, or router table. Diagnose the defect first, secure every support, take light cuts, and preserve as much stock as possible.
Recommended Free Tools
Quick Recap
Product prices and availability are accurate as of the date/time indicated and are subject to change. Any price and availability information displayed on Amazon at the time of purchase will apply.

