If you already own a router, the easiest reliable version of a traditional mortise-and-tenon joint is to rout the mortise with a spiral upcut bit, rout the tenon with a straight bit, and round the tenon’s corners by hand. The method is machine-assisted rather than foolproof: repeatable layout, a test cut, and a controlled fit are what make it work.
If you already own a router, the simplest reliable way to make a mortise-and-tenon joint is to rout the mortise with a spiral upcut router bit, rout the tenon with a straight bit, and trim the tenon’s square corners by hand. The method is easier than a fully hand-cut joint because the router does the repetitive cutting. It is not foolproof: accurate layout, a stable fence or guide, a test cut, and a controlled fit are what make the joint work.
This version is a machine-assisted traditional joint. You can use it for table and chair components, cabinet doors, frames, rails, workbenches, and other assemblies where the stock is thick enough to accept a useful mortise. For a first attempt, make the joint in matching scrap before cutting the project parts.
As an Amazon Associate I earn from qualifying purchases.
The Tool Desk
Outbyte PC Repair FREERepair Windows errors before they cause bigger problemsFix Now →Outbyte Driver Updater FREEFix the driver behind crashes, sound loss and screen glitchesFind Drivers →Why this method is easier
A traditional mortise-and-tenon joint has a projecting tenon cut on one workpiece and a matching cavity cut into the other. The router method simplifies both operations:
- A router and fence establish the mortise location repeatedly.
- A router bit removes the tenon cheeks in controlled passes.
- The tenon can be adjusted gradually instead of being cut perfectly in one operation.
- Only the tenon corners require hand fitting, because a round router bit leaves rounded mortise ends.
The result is a conventional integral mortise and tenon, not a loose-tenon joint. A loose-tenon system cuts a mortise in both pieces and uses a separate piece of hardwood as the tenon. That alternative is often even faster for repeated work, but it requires a dedicated jig or joinery machine and compatible tenon stock.
#1 Best Overall

- Robust tool used for chopping out joints as well as cutting mortises
- Excellent cutting performance is reached by side tapering in height and length from tip to shoulder for sidewall clearance
- The blade is forged from Cr-Mn steel and heat treated up to 59 HRc
- The handle is made of dark stained and waxed beech wood with steel ferrule and hoop
Tools and materials
- Router with a fence, edge guide, or router table
- Spiral upcut router bit sized for the intended mortise width and with sufficient cutting length for the required depth
- straight router bit for cutting the tenon cheeks
- Bench chisel or woodworking rasp for rounding the tenon corners
- Marking knife or sharp pencil, square, rule, and marking gauge if available
- clamps and a stable work surface
- Matching scrap for test cuts
- wood glue and a mallet with a non-marring face
- Eye protection, hearing protection, and suitable dust protection
Do not choose the router-bit diameter first and force the joint dimensions to fit it. Decide how wide and deep the joint needs to be for the stock and the load, then select a bit that matches. The tenon must leave enough wood around it to avoid weakening or splitting the workpiece.
How to make the joint
1. Lay out both mating parts from the same references
Mark the mortise and tenon locations before switching on a tool. Reference both pieces from the same face and edge wherever possible. This matters more than elaborate measuring: if the fence and layout are registered from inconsistent faces, the joint can be accurately cut and still end up misaligned.
Do these 3 things before closing this tab:
1Repair Windows errors before they cause bigger problems2Fix the driver behind crashes, sound loss and screen glitches3Clear out junk files and repair common Windows errorsMark the joint centerline, the mortise length, and the required depth. Transfer the relevant marks to the mating workpiece. For a blind mortise, mark the maximum plunge depth on the router bit or use the router’s depth stop. Leave adequate material at the end of the mortise and around the tenon.
2. Set up the mortise cut
Install the spiral upcut bit and secure the workpiece. Use a router table for a narrow mortise—up to about 1/4 inch is a practical guide for this setup—or use a plunge router for a wider or deeper mortise. A plunge router gives better control when the cutter must enter the workpiece, particularly as the size of the cut increases.
Set the fence or edge guide so the bit is centered on the layout. Set the bit height for the required mortise depth. If the mortise is deeper than one comfortable pass, make several shallow passes rather than trying to remove all the material at once.
On a router table, start and stop marks on the fence or workpiece can help control the cut. A temporary plywood skin can also provide a consistent reference for the first pass and reduce the need to repeatedly change the router height. Whatever setup you use, clamp or hold the work securely and keep your hands away from the cutter’s path.
Quick wins for a faster PC:
Scan for outdated or missing drivers - takes under a minuteDriver Scan →Repair Windows errors before they cause bigger problemsFix Now →3. Cut and inspect a test mortise
Use scrap that matches the project stock in thickness and, ideally, species. Cut one test mortise before touching the finished parts. Check four things:
Rank #2

- Premium Quality Blades: Made from high-quality Chrome Vanadium (Cr-V) steel, cryogenically treated for enhanced strength and wear resistance.
- Traditional Forging: Forged using traditional drop-forging methods for superior durability and performance.
- Precision Grinding: Blades are ground with a small taper to prevent wedging, with a 25-degree front bevel and recommended higher secondary bevel for hard woods.
- Ergonomic Handles: Made from domestically harvested European Ash, sanded and hand-finished with friction shellac for protection, comfort, and control.
- Durable Construction: Thick double solid stainless-steel ferrules and a leather washer prevent splitting; top ferrule is pinned for added security.
- Is the mortise centered or located exactly where the layout requires?
- Is its width compatible with the tenon you plan to cut?
- Is it deep enough without breaking through the workpiece?
- Does the fence setup place every mortise at the same distance from the reference edge?
Make any fence, bit-height, or workholding changes now. Once the setup is correct, cut the remaining mortises without disturbing the reference. Repeatability is the main reason this process feels easy.
4. Rout the tenon cheeks
Lay out the tenon on the mating piece, including its shoulders. Install a straight router bit and set its height to remove material from one cheek. Make a controlled pass, turn or reposition the workpiece as appropriate, and make the matching pass on the opposite face.
Because material is removed from both faces, a small height adjustment affects both sides of the tenon. Take light passes and measure after each adjustment. Do not assume that a large bit-height change removes material from only one side.
Cut the tenon cheeks first and the shoulders afterward. To cut the shoulders, hold the workpiece on edge and back it with scrap to reduce tear-out. A shoulder that is not square can prevent the joint from closing even when the tenon thickness is correct.
5. Adjust the fit gradually
Test the tenon in the scrap mortise before trying the finished joint. The desired fit is snug, but not forced. The tenon should enter with firm hand pressure or gentle mallet taps. A useful partial-fit check is that friction should be sufficient to lift the mating piece, while the joint should still be capable of final assembly without excessive force.
If the tenon is too tight, remove a small amount from its cheeks and test again. Use several small adjustments rather than one aggressive cut. Avoid enlarging the finished mortise unless there is a clear layout or cutting error; adjusting the replaceable or accessible tenon usually preserves the joint’s intended position.
Rank #3
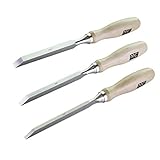
- 3 SIZES PROFESSIONAL DESIGN: Our designers designed this set of mortise chisels with carpenters’ safety and efficiency in mind, positioning professional users for any challenging woodworking projects, our well-made carving blades set includes 3 different size of 1/4”, 3/8”,1/2”, exactly designed for your woodworking demands
- SHARP CHISEL for ALL WOOD: The chisel blade is precisely beveled with an extremely sharp edge which can be used immediately after opening the package and without further sharpening, and the chrome vanadium steel keeps a sharp edge much longer, perfect for hardwood like oak, elm, birch, and softwood like spruce, pine fir, and laminated wood
- PREMIUM WOOD HANDLE: The chisel handles are made of high-quality European hornbeam wood known for its strength, toughness, and attractive grain, compared to a plastic handle, our wooden handle give a perfect balance to the chisel, has a comfortable feel and rustic look
- WIDELY USAGE: Our Wood chisels is varied in use and application, the sharp wood chisel can cut mortises, shave rough surfaces, chop out corners and scrape off glue and we have 3 different sizes perfect for your woodworking , whether you are a professional carpenter or a wood work artist
- SATISFACTION SERVICE: Our wood chisel is well-packaged, and we will try our best to help you until you are 100% satisfied, if you have any questions, contact us freely
Never drive a badly oversized tenon into a blind mortise. Excessive pressure can split the workpiece. A blind mortise also needs room for glue and displaced air. An entirely air-tight cavity can resist assembly hydraulically, making a correctly positioned joint seem impossibly tight.
6. Round the tenon corners
A router-cut mortise has rounded ends. The tenon, however, usually has square corners after routing. Clamp the tenon in a vise and remove the square corners with a sharp bench chisel or a woodworking rasp until the profile matches the mortise ends.
You do not need to round the entire tenon. Remove only enough corner material for the tenon to seat fully. Work slowly and keep the shoulder intact. Check the fit frequently, especially near the final depth.
7. Dry-assemble, then glue
Assemble the complete joint dry before applying adhesive. Confirm that:
- The shoulders close against the mating surface.
- The pieces sit in the intended orientation.
- The assembly is square or at the required angle.
- The tenon does not bottom out before the shoulders close.
- Clamps can reach the joint and can be installed without shifting it.
When the dry fit is correct, apply an even coat of wood glue to the mortise walls and the tenon. Do not flood a blind cavity. Assemble promptly, clamp the parts, and check square again before the glue sets. Remove squeeze-out according to the glue manufacturer’s directions.
Recommended Free Tools
Router-cut mortise and tenon versus loose-tenon systems
A loose-tenon joint is often the easiest option when you want the same mortising operation on both workpieces. Instead of cutting a projecting tenon, you rout matching mortises and insert a separate hardwood tenon. The approach is useful for furniture, doors, workbenches, cabinet doors, and post-and-rail construction.
Rank #4

- 6 piece set comes on a wooden presentation box
- Blades are made from fine-grained, nicely tempered chrome-manganese steel and hardened to Rc 59
- Contains the following sizes: 6, 10, 12, 16, 20 and 26 mm
- Bevel ground at a 25 degree bevel.
- Handles are made from stained European Beech
| Method | Best suited to | Advantages | Main limitation |
|---|---|---|---|
| Router-cut traditional mortise and tenon | A router owner making custom joints | Uses common router equipment and produces the exact joint described here | Needs careful setup and hand rounding of the tenon corners |
| Drill-powered loose-tenon jig | Beginners who own a drill | Repeatable mortises without a router | Requires a dedicated jig, cutter, and compatible tenons |
| Beadlock-style jig | Budget-conscious loose-tenon work | Approachable equipment cost and simple concept | Overlapping holes make the process slower |
| Dedicated DOMINO-style joiner | Frequent or production-quality joinery | Fast, repeatable, twist-resistant mortises and matching tenons | High purchase cost and dedicated consumables |
| Hand-cut mortise and tenon | Traditional work or no-power-tool shops | Maximum craft control and minimal machinery | More layout, sawing, chopping, and fitting skill |
Drill-powered alternatives
A drill-powered MortiseMate-style system is an option if you do not own a router. Its product information describes a corded- or cordless-drill-powered mechanism with an auto-indexing step-down action, micro-adjustment screws for mortise width, and compatibility with 6 mm, 8 mm, and 10 mm loose tenons. It is intended for workpieces approximately 1/2 inch to 1-1/2 inches thick. Confirm the current model’s specifications before buying.
A Beadlock-style jig uses a drill or drill/driver to make overlapping holes that form a mortise for matching tenon stock. It can be a lower-cost entry into loose-tenon joinery, but drilling many overlapping holes takes longer than using a dedicated loose-tenon joiner.
A DOMINO-style system is the premium speed-and-repeatability choice. The first precisely positioned tenon can prevent rotation; subsequent wider mortises can provide alignment clearance. That makes the system efficient for repeated work, but its cost is difficult to justify for an occasional joint.
What’s actually slowing this PC down?
Pick the symptom - the matching free tool is one click away.
How strong is this joint?
There is no universally strongest mortise-and-tenon method. Strength depends on the stock dimensions, grain direction, tenon length and thickness, glue coverage, fit, and the forces placed on the finished assembly.
A properly made loose-tenon joint can provide strength and stability comparable to traditional mortise-and-tenon construction in many furniture applications. Traditional integral mortise-and-tenon joints remain advantageous for some structural uses. Choose the joint from the load and the available material—not from the convenience of the tool alone.
Safety checklist
- Wear safety glasses and hearing protection when routing or drilling.
- Use dust extraction or suitable dust protection, and provide adequate ventilation.
- Secure the workpiece and keep the router’s base or table fence stable.
- Make shallow passes when removing substantial material.
- Keep hands clear of the bit and use push blocks or other appropriate router-table accessories.
- Wait for the bit to stop completely before moving the workpiece or clearing chips.
- Disconnect power before changing router bits or making adjustments.
- Keep the chisel sharp and cut away from your hands when rounding the tenon.
The practical answer
For a router owner, this is probably the easiest traditional mortise-and-tenon workflow: rout repeatable mortises, rout the tenon in gradual passes, round the corners, and tune the fit on scrap before glue-up. If you own only a drill and want the most approachable dedicated solution, a drill-powered loose-tenon jig is worth considering. If you make joints frequently, a dedicated loose-tenon machine offers the greatest speed and repeatability.
The important promise is not that the joint is effortless. It is that the process is repeatable. Accurate references, a test cut, a snug-but-not-forced fit, and a dry assembly will do more for the result than buying a larger or more expensive tool.
Free tools Windows power users keep installed
One-click scans. No signup required.
Best Value

- Premium Blades: Drop forged CR-V steel with heat-treated edges ensures sharp precision and long-lasting durability, can be used to make finish or paring cuts on wood surfaces, as well as cut mortises
- Beveled Edge for Versatility: 25° Bevel edge for woodworking multi-purpose use, ideal for soft wood, hard wood, and laminated wood products
- Ergonomic PVC Handle: HURRICANE wood chisel set with Lightweight yet durable regular size impact PVC Handle, feels natural in your hand for everyday fixes, yet tough enough for mallet strikes—great for door locks or DIY use
- Safety & Portability: This four sizes (1/4"; 1/2"; 3/4"; and 1") chisel set with blade guards protects edges during storage
- Widely Function: this HURRICANE wood chisel set empowers beginners to tackle DIY projects while meeting the demands of hobbyists & Home use
Frequently Asked Questions
How tight should a mortise-and-tenon joint be?
A snug fit that needs hand pressure or gentle mallet taps is appropriate. The tenon should not require heavy force. A partial fit should create enough friction to lift the mating piece, but the final assembly must close fully without splitting the stock or trapping excessive air and glue.
Can I cut the mortise with a router table?
Yes, provided the router is secured and guided correctly. A router table is practical for narrow mortises up to about 1/4 inch wide. For larger mortises, a plunge router can offer better control when entering the workpiece.
Why do the tenon corners need to be rounded?
Round only the tenon corners that interfere with the rounded ends of the routed mortise. A bench chisel or woodworking rasp is sufficient; remove small amounts and test the fit often.
What if I do not own a router?
Use a drill-powered loose-tenon jig such as a MortiseMate-style system or a Beadlock-style jig. These cut matching mortises for a separate tenon, but they are alternatives to—not the exact equipment used in—the router-based traditional joint.
Windows Errors? Fix Them Before They Spread
Repair common Windows errors and clear accumulated junk for a smoother, more stable PC - no reinstall needed.Free scan · no reinstallOutdated Drivers Are Slowing You Down
One free scan finds every outdated or missing driver and matches the right update for your exact hardware.Free scan · exact hardware matchThe Bottom Line
The easiest mortise-and-tenon joint is made easy by repeatable setup, not by skipping precision. Rout the mortise, cut the tenon gradually, round its corners, test-fit on matching scrap, and glue only after the assembly closes squarely without excessive force.
Quick Recap
Product prices and availability are accurate as of the date/time indicated and are subject to change. Any price and availability information displayed on Amazon at the time of purchase will apply.

