The most useful knots are not necessarily the strongest knots ever made. They are the small practical toolkit that covers common jobs: stopping a rope, binding material, attaching a line to an object, joining two ropes, and tensioning a line. For construction, camping, boating, hauling, and everyday repairs, the 11 knots below provide a dependable starting point—provided each one is correctly tied, dressed, set, inspected, and used within the limits of the rope and the task.
Important: None of these instructions makes an ordinary rope suitable for fall protection, lifting people, rescue, scaffolding, suspended loads, or other life-safety work. High-consequence applications require the equipment, procedures, and training specified for that activity.

As an Amazon Associate I earn from qualifying purchases.
First, know what kind of knot you need
Choosing a knot becomes much easier when you identify the job first. The terminology below is useful when reading rope instructions or discussing a task with a crew:
- Stopper knot: Prevents a rope from pulling through an opening, pulley, ring, or other restriction.
- Binding knot: Holds an object together or binds rope ends around a bundle.
- Hitch: Attaches a rope to a post, pole, ring, cleat, carabiner, or another object. A hitch generally depends on the object for its function.
- Bend: Joins two ropes or two rope ends.
- Bight: A U-shaped section of rope made without crossing or passing an end through it.
- Standing end: The inactive part of the rope leading to the remaining coil or load.
- Working end: The end being used to tie the knot.
REI’s knot terminology and climbing-knot guide provides a useful explanation of these distinctions. In the list below, “dress” means arranging the strands so they lie neatly without crossing in unintended places; “set” means tightening the knot deliberately so it holds its intended shape.
#1 Best Overall
- Crafted from the highest quality materials
- Built for performance and durability
- Made in china
Quick comparison: the 11 knots
| Knot | Category | Best everyday use | Main warning |
|---|---|---|---|
| Overhand | Stopper | Simple stop, temporary tie, knot component | Can jam after heavy loading; not for life safety |
| Figure-eight | Stopper | Clear, easy-to-inspect rope end stop | Technical climbing versions require training and checks |
| Square (reef) knot | Binding | Binding equal-size ends around a bundle | Not for joining ropes or securing heavy loads |
| Bowline | Fixed loop | Loop around an object or at the end of a line | May loosen when unloaded in some situations |
| Clove hitch | Hitch | Quick attachment to a post, pole, or similar object | Can slip or roll in unsuitable configurations |
| Two half hitches | Hitch | Securing a line to a post, ring, or grommet | Hitches must be formed neatly in the same direction |
| Taut-line hitch | Adjustable hitch | Adjustable tent guyline or utility line | Can creep if tied incorrectly or lightly loaded |
| Sheet bend | Bend | Joining two ropes, including different diameters | Use task-specific guidance for technical loads |
| Timber hitch | Hitch | Dragging poles, logs, or other long objects | Slack or jerking can loosen it |
| Trucker’s hitch | Tensioning system | Tightening tarps, guylines, and ordinary loads | Not a certified cargo-restraint or fall-protection system |
| Cleat hitch | Boating hitch | Securing a line to a boat cleat | Requires a suitable, properly installed cleat and line |
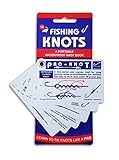
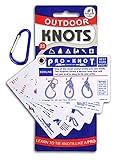
Useful practice aid: A compact set of waterproof knot-tying cards can be useful on a jobsite, in a tool bag, or at camp because it provides a visual reminder without requiring a phone or internet connection. A reference card is a learning aid—not a substitute for activity-specific training.
1. Overhand knot
The overhand knot is the simplest stopper knot and a useful building block for more complicated knots. It is suitable for preventing the end of a light-duty rope or cord from passing through a hole, loop, or fitting, and it can make a temporary tie when a simple knot is all that is needed.
How to tie it
- Form a loop by crossing the working end over the standing part.
- Pass the working end through the loop.
- Pull both parts to snug the knot.
Dress it so the strands lie cleanly, then set it with a firm pull. Leave an adequate tail rather than trimming the rope immediately.
Do not use it for: fall protection, lifting, rescue, or any application where a jammed knot would be difficult to remove or failure could injure someone. An overhand knot can jam after a heavy load, and knot performance depends on the rope and loading conditions. Published climbing discussions, including the American Alpine Club’s rope information, illustrate why approximate strength figures should not be generalized to every rope.
2. Figure-eight knot
The simple figure-eight is a clearer, bulkier stopper than the overhand. It is easy to recognize during an inspection and is useful at the end of a rope to keep it from running through a ring or hardware opening.
How to tie it
- Make a loop near the working end.
- Pass the working end around the standing part.
- Bring it back through the original loop, following the shape of a figure eight.
- Dress the strands and pull the standing part and working end to set it.
The figure-eight is also the foundation for variants such as a figure-eight on a bight and a rewoven figure-eight. Those versions are used in technical settings, including climbing tie-ins, but a household explanation of the simple knot is not climbing instruction. Climbing requires suitable certified equipment, an activity-specific method, partner checks, and hands-on instruction. REI likewise cautions that written knot guidance cannot replace proper instruction and experience.
Do not use it for: assuming that any figure-eight configuration is automatically suitable for a harness, anchor, hoisting system, or rescue application.
Recommended Free Tools
3. Square knot, or reef knot
The square knot is a binding knot, not a general-purpose rope-joining knot. It works best when binding equal-size rope ends around a bundle, package, dressing, or similar object where the knot is pressed against the material.
How to tie it
- Place the right working end over the left and tuck it under: “right over left.”
- Now place the left working end over the right and tuck it under: “left over right.”
- Pull the four rope parts evenly and dress the knot flat.
A useful memory phrase is “right over left, left over right.” If both crossings are made in the same direction, the result is a less reliable granny knot rather than a properly formed square knot.
Do not use it for: joining two ropes under load, especially when their diameters differ, or securing a heavy object. Scouting’s knot-training material identifies the square knot as a binding knot and warns against using it to hold a heavy load.
4. Bowline
The bowline creates a fixed loop that normally does not tighten around an object when the rope is loaded. It is useful for making a loop at the end of a line or attaching rope around a post, tree, anchor point, or other suitable object.
Do these 3 things before closing this tab:
1Clear out junk files and repair common Windows errors2Fix the driver behind crashes, sound loss and screen glitches3Repair Windows errors before they cause bigger problemsHow to tie it
- Form a small loop in the standing part, leaving enough working end to complete the knot.
- Pass the working end up through the loop.
- Take it around the standing part.
- Pass it back down through the original loop.
- Pull the working end while holding the loop and standing part, then dress and set the knot.
The common memory aid is “the rabbit comes out of the hole, around the tree, and back into the hole.” The finished loop should be clear, with the tail exiting in the expected direction and enough tail remaining for the use.
A bowline can loosen when unloaded or when repeatedly shaken in some configurations. Do not use a casually tied bowline for climbing, fall protection, rescue, or other life-safety work. Those activities may require a specific bowline variant, a backup, a prescribed tail length, and a partner inspection. Follow the rules of the relevant discipline instead of relying on a general-purpose version.
5. Clove hitch
The clove hitch attaches a line quickly to a cylindrical object such as a post, pole, pipe, or suitable carabiner. It is also commonly used when starting or ending lashings. It can be convenient because it is quick to tie and, in many ordinary situations, relatively easy to untie after loading.
How to tie it around a post
- Wrap the working end around the post.
- Cross the working end over the standing part.
- Wrap around the post again.
- Tuck the working end under the second wrap and pull both parts to set the hitch.
You can also form two loops in the rope, place one loop over the other, and slide them onto the end of a post. That method only works when the end of the object is accessible.
The Tool Desk
Outbyte Driver Updater FREEFix the driver behind crashes, sound loss and screen glitchesFind Drivers →Outbyte PC Repair FREERepair Windows errors before they cause bigger problemsFix Now →Dress the two turns so they sit neatly beside one another. Do not use it without checking the object, rope direction, and loading conditions. A clove hitch can slip or roll on some surfaces, particularly when the object is the wrong diameter, the rope is slick, or the load changes direction. In a high-consequence application it may need a backup or a different attachment method.
6. Two half hitches
Two half hitches provide a straightforward way to secure a rope to a post, ring, grommet, or similar object. They are especially useful when the rope has already been passed around the object and you need to finish the attachment.
Rank #3
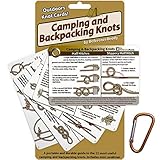
- EASY-TO-FOLLOW KNOT ILLUSTRATIONS: Clear, color-coded diagrams walk you through each knot step-by-step with plain-language descriptions and real-world usage tips, turning this compact pocket knots book into a confidence-boosting trail coach for campers who want skills they can actually use outdoors.
- JUST THE KNOTS THAT MATTER: The 22 knots were selected by knot pros for camping and backpacking scenarios encountered by campers, day hikers, thru-hikers, backpackers, scouts, preppers, and wilderness survivalists who care about weight. Why carry a knot book full of stuff you don't need?
- INCLUDES MINI CARABINER: Comes with a small carabiner for clipping your cards to your pack, bug-out bag, or bushcraft gear. Use it to keep them close at hand and your backpacking essential knots will always be at the ready.
- ULTRA-PORTABLE TRAIL-READY DESIGN: Slim, pocket-sized cards tuck easily into your pants pocket, hip belt, or first aid kit so this pocket survival guide book for knots is always with you outdoors, making it a grab-and-go backup brain for campers who like to travel light and stay prepared.
- PERFECT GIFT FOR SURVIVALISTS AND ADVENTURERS: ReferenceReady knot cards make a thoughtful, confidence-boosting present for anyone who loves outdoor books and wants practical trail-ready knowledge that work off the grid. It's an especially great gift for outdoorsy boys and girls, so you can teach and learn wilderness survival skills together.
How to tie it
- Pass the working end around the object and bring it over the standing part.
- Pass the working end through the opening created beside the standing part to form the first half hitch.
- Repeat the same turn and tuck to form the second half hitch.
- Slide both hitches neatly against the object and pull the standing part to snug them.
Both half hitches should be formed in the same direction and should sit neatly against each other. Inspect the finished knot before loading it.
Do not use it as a universal substitute for a purpose-designed anchor or attachment. If the rope is repeatedly slackened, pulled in different directions, or loaded in a way that tends to roll the hitches away from the object, choose a more suitable hitch and test it first.
7. Taut-line hitch
The taut-line hitch is an adjustable hitch for a line that needs to become tighter or looser without being completely untied. It is particularly useful for tent guylines, tarp lines, and similar relatively light-duty tensioning tasks.
How to tie it
- Wrap the working end around the fixed or loaded standing line.
- Make two wraps around the standing line on the side nearest the load.
- Make a third wrap on the outside of the first two, nearer the free end.
- Dress the wraps so they lie neatly, then pull the free end to snug the hitch.
When correctly tied, the hitch should slide when deliberately pushed but grip when the line is tensioned. Adjust it by sliding the hitch along the standing line, then retension the guyline.
Do not rely on it without testing for creep. Slick rope, the wrong diameter combination, poor dressing, or insufficient tension can cause it to slide. Scouting describes it as a practical way to tighten or loosen a tent guyline, but it should be retied if it does not hold reliably.
8. Sheet bend
The sheet bend is a bend for joining two ropes. It is particularly useful when the ropes are different sizes, which is one reason it should not be confused with the square knot. A square knot binds; a sheet bend joins.
What’s actually slowing this PC down?
Pick the symptom - the matching free tool is one click away.
How to tie it
- Form a bight in the thicker or larger rope.
- Pass the working end of the thinner rope up through the bight.
- Take it around the back of both parts of the bight.
- Tuck the working end under itself, beside the bight—not back through the bight.
- Pull the standing parts to dress and set the bend.
For a more secure configuration in appropriate circumstances, a doubled sheet bend adds another turn, but the correct choice depends on the rope and the job.
Do not assume that a sheet bend is suitable for every heavily loaded or technical system. For lifting, rescue, climbing, or industrial rigging, use the bend and procedure specified by a qualified source for the exact rope and application.
Rank #4
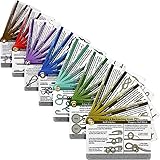
- COLLECT THEM ALL: The complete collection of 7 of ReferenceReady's renowned waterproof knot tying guides.
- SEVEN DIFFERENT ACTIVITIES: Seven pocket-sized knot books, one for each of these outdoor activities: camping & backpacking, rock climbing, boating & sailing, horse riding, easy fishing knots, saltwater fishing, and fly fishing.
- CLEAR ILLUSTRATIONS: Contains easy-to-follow diagrams and usage tips for 76 of the best fishing and rope knots, from basic fishing and boat knots to the essential knots for camping and survival scenarios.
- WATERPROOF: Completely waterproof, super thick premium plastic card stock for unmatched durability.
- Just grab the portable, durable, waterproof pocket guide for that day's activities and get outside!
9. Timber hitch
The timber hitch grips a log, pole, or other long object and can be loosened relatively quickly after use. It is useful for controlled dragging, positioning, or hauling of suitable objects, and it can also start certain lashings.
How to tie it
- Pass the working end around the object.
- Bring the working end around the standing part.
- Wrap the working end around itself several times, working back toward the object.
- Pull the standing part to tighten the coils against the object.
The coils should be neat and should tighten in the direction of pull. Test the hitch with a gradual load before moving the object.
Do not use it as a blanket recommendation for suspended loads or life safety. Scouting’s guidance notes that jerking the line or allowing it to go slack can loosen a timber hitch. Controlled loading is important; sudden shock loading or slack can change the knot’s behavior.
10. Trucker’s hitch
The trucker’s hitch is a tensioning system that creates useful mechanical advantage. It can tighten tent guylines, tarps, ridgelines, and some ordinary loads when rope is being used instead of a purpose-built strap or cam buckle.
A practical tying sequence
- Secure one end of the rope to a fixed point using a suitable knot or hitch.
- In the free section of rope, form a small fixed loop. A slipped overhand or other appropriate loop can serve for ordinary, noncritical tensioning.
- Pass the working end around the second anchor point or through the tie-down point.
- Bring the working end back through the loop to create a pulley-like arrangement.
- Pull the working end to tension the line.
- Lock the tension with two half hitches or another suitable finishing method.
Keep the rope aligned with the direction of pull and inspect the loop and finishing hitch before releasing the tension. The system multiplies pulling force, so it is possible to overload the rope, anchor, tarp eyelet, or object being tied down without realizing it.
Do not treat a trucker’s hitch as a certified cargo restraint, climbing system, fall-arrest system, or substitute for rated tie-down equipment. REI describes it for tent guylines, tarp ridgelines, and tying down a kayak when rope is used instead of cam straps; those examples do not establish suitability for commercial transport or high-consequence loads.
Free tools Windows power users keep installed
One-click scans. No signup required.
11. Cleat hitch
The cleat hitch is designed for securing a line to a boat cleat. It solves a specific boating problem and is different from tying a rope around a post or making a loop.
How to tie it
- Take the line around the base of the cleat, starting from the direction of the load.
- Make turns around the cleat in a controlled figure-eight pattern, crossing over the top as needed.
- Finish with a locking turn around one horn.
- Make a final tuck or reverse turn so the working end is secured, then leave an adequate tail.
The line should be wrapped around the cleat rather than merely looped over one horn. The cleat must be properly installed, and the line must be suitable for the boat, dock, load, and conditions.
Do not assume that knowing a cleat hitch qualifies someone to operate a boat or manage a mooring system. U.S. Coast Guard-related boating education materials list the cleat hitch among core boating knots, alongside the clove hitch, square knot, bowline, sheet bend, round turn with two half hitches, and figure-eight knot. Boating safety also depends on vessel handling, line selection, weather, fittings, and local procedures.
How to practice these knots safely
Skill comes from tying and inspecting each knot repeatedly, not from reading a diagram once. Use this practice routine:
Windows Errors? Fix Them Before They Spread
Repair common Windows errors and clear accumulated junk for a smoother, more stable PC - no reinstall needed.Free scan · no reinstallCrashes, No Sound, or Screen Glitches?
Random freezes, missing sound and display glitches usually trace back to one bad driver. Find and replace yours safely.Free scan · under a minute- Start with soft rope or cord. Choose a visible, flexible length that is large enough to handle comfortably. Practice cord is not automatically suitable for climbing, rescue, lifting, or fall protection.
- Learn the purpose before the sequence. Say “stopper,” “binding,” “hitch,” “bend,” or “tensioning system” before tying. This reduces the chance of choosing a familiar knot for the wrong job.
- Tie each knot slowly. Keep the working end and standing part identifiable. Avoid allowing loops to twist unexpectedly.
- Dress every knot. Make the strands parallel and remove unnecessary crossings. A knot that looks different from the example deserves another inspection.
- Set it gradually. Apply increasing hand tension in a noncritical environment. Never test an experimental knot over people, valuable equipment, traffic, or an edge.
- Inspect the finished knot. Check the knot’s shape, the direction of loading, the rope tails, and whether the knot has crept or rolled.
- Practice untying. Learn how the knot behaves after light loading. Some knots become difficult to release after heavy loading, which is itself an important limitation.
- Repeat until you can tie it under mild pressure. On a construction site, the right knot is only useful if you can tie it consistently and recognize a poorly formed version.
If you prefer a longer reference than pocket cards, an illustrated knot-tying book can provide more diagrams and variations. It should remain a supplement to competent instruction for climbing, rescue, rigging, or boating—not a replacement for it.
Rope and knot safety checklist
- Inspect the rope for cuts, melted areas, abrasion, chemical damage, flattening, severe glazing, contamination, or other signs of failure.
- Confirm that the rope’s material, diameter, construction, and condition suit the task.
- Consider whether the load is steady, moving, cyclic, wet, shock-loaded, or likely to change direction.
- Use enough tail beyond the knot for the particular rope and application; do not rely on a dangerously short tail.
- Keep knots dressed and set. A knot tied in a different shape may behave differently from the intended knot.
- Test ordinary utility knots gradually before committing to the task.
- Do not use a general knot guide as a substitute for certified climbing, rescue, industrial rigging, fall-protection, or boating instruction.
- Never experiment with a life-support system. Use approved equipment and the exact procedures required by the activity, employer, manufacturer, and applicable regulations.
Knot performance is not determined by the name of the knot alone. Rope material, diameter, construction, moisture, friction, loading direction, and shock loading all matter. Even published strength comparisons are approximate and tied to particular test conditions; they should not be applied indiscriminately to another rope or use.
Frequently Asked Questions
What is the best knot for tying two ropes together?
The sheet bend is the most useful general starting point, especially when the ropes differ in diameter. It is a bend, while the square knot is primarily a binding knot. For technical, heavily loaded, or life-safety applications, use the procedure specified by a qualified source for the exact rope and task.
Is a square knot safe for heavy loads?
No. A square knot is intended for binding equal-size rope ends around a bundle or similar object. It should not be used to join ropes under heavy load or as a critical attachment.
Quick wins for a faster PC:
Clear out junk files and repair common Windows errorsFree Scan →Scan for outdated or missing drivers - takes under a minuteDriver Scan →Repair Windows errors before they cause bigger problemsFix Now →What knot is best for a tent guyline?
A taut-line hitch allows a guyline to be adjusted while tensioned. A trucker’s hitch can provide additional tension for suitable ordinary applications. Test either knot and retie it if it creeps; neither automatically replaces rated equipment where that is required.
Can these knots be used for climbing or lifting?
Not based on this guide alone. Climbing, rescue, fall protection, lifting, and industrial rigging require activity-specific training, approved equipment, inspection, and procedures. Ordinary rope and a familiar knot are not automatically suitable for those systems.
The Bottom Line
Learn the purpose and limitations of each knot: use stopper knots to stop a line, binding knots to bind, hitches to attach, bends to join ropes, and tensioning systems to create controlled tension. The right knot is only one part of a safe rope job—rope condition, loading, dressing, inspection, and task-specific training matter just as much.
Quick Recap
Product prices and availability are accurate as of the date/time indicated and are subject to change. Any price and availability information displayed on Amazon at the time of purchase will apply.

