The Tool Desk
Outbyte PC Repair FREERepair Windows errors before they cause bigger problemsFix Now →Outbyte Driver Updater FREEScan for outdated or missing drivers - takes under a minuteDriver Scan →Plant potatoes when the soil is workable, moderately moist rather than muddy, and about 50°F or warmer—not on one fixed calendar date. In many regions, that means early spring, often roughly two to three weeks before the average last frost. The correct window depends on your local climate, soil drainage, and growing season. Cold, wet soil can cause seed pieces to rot before they emerge, while a late freeze can damage new foliage.
Use your local average last-frost date as a starting point, then check the soil itself. For regional examples and additional growing guidance, see the University of Minnesota potato-growing guide. Treat example dates from other regions as examples—not as a nationwide planting schedule.
As an Amazon Associate I earn from qualifying purchases.
When to plant potatoes
Potatoes are a cool-season crop, but they should not be planted into soil that is frozen, waterlogged, or too cold. Wait until:
- The soil has thawed and can be worked without forming sticky clumps.
- The soil is moderately moist, not muddy or saturated.
- The soil temperature is approximately 50°F or higher.
- The forecast and local frost pattern give emerging shoots a reasonable chance of avoiding a hard freeze.
A soil thermometer can help if spring conditions are borderline, although experienced gardeners can often judge readiness from local conditions and soil texture.
Use local timing instead of a universal date
Planting windows vary considerably. University of Minnesota guidance places planting around early April in the Twin Cities, with later planting in northern Minnesota. Oregon has different windows for inland, valley, and coastal areas, while Utah State recommends planting approximately 14–21 days before the local average last frost when soil conditions are suitable.
#1 Best Overall

- VARIETY TYPE: Yukon Gold is a determinate potato variety, meaning tubers form in one main layer near the seed piece and mature uniformly for a concentrated harvest window, ideal for home gardens and raised beds
- CERTIFIED QUALITY: Blue Tag Certified seed potatoes ensure disease-free, true-to-type stock that is Non-GMO, providing reliable performance and peace of mind for healthy, high-yielding harvests
- APPEARANCE AND FLAVOR: Features smooth golden yellow skin with creamy yellow flesh and a rich, buttery, slightly sweet flavor profile that makes these potatoes a kitchen favorite for countless recipes
- GROWING CHARACTERISTICS: Easy to grow for beginners and experienced gardeners alike, these short-season potatoes mature in 50-60 days and produce heavy yields when planted 4-6 inches deep with 12-inch spacing
- CULINARY VERSATILITY: Perfect for mashing, roasting, baking, frying, soups and stews thanks to their creamy texture that holds shape beautifully while absorbing flavors, delivering golden, crispy exteriors and soft interiors
These differences matter: a date that works in Minnesota or Oregon may be wrong for the Gulf Coast, desert Southwest, Pacific Northwest, or a high-elevation garden. In warm climates, potatoes may be grown as a late-winter or early-spring crop before summer soil temperatures become excessive. Some regions also permit a second planting in late summer.
Tuber formation is strongest when soil temperatures are approximately 60–70°F. When soil temperatures approach 80°F, tuber formation declines. If a late hard frost is forecast after your potatoes emerge, cover the plants temporarily with frost cloth or another breathable protective covering and remove it after temperatures moderate. Do not let heavy material crush the foliage.
| Situation | Practical timing approach |
|---|---|
| Cool or temperate spring | Plant once soil is workable and near 50°F, commonly around two to three weeks before the average last frost. |
| Cold, wet spring | Wait. Planting into saturated soil increases the chance of seed-piece rot. |
| Warm-summer climate | Plant in late winter or early spring so tubers develop before soil becomes excessively hot. |
| Long, mild growing season | Consider a second late-summer planting if local conditions allow enough time for the chosen variety to mature. |
| High-elevation or northern garden | Use local frost and soil conditions rather than dates from lower or warmer regions. |
What to plant: seed potatoes, not ordinary grocery potatoes
For the normal home-garden method, potatoes are grown from tubers or pieces of tubers—not from botanical seed. Start with certified seed potatoes or certified seed tubers from a reputable garden supplier. Certification reduces the risk of introducing viruses and soil-borne diseases.
Supermarket potatoes are a poor default for planting. They may have been treated with sprout inhibitors, and they can carry diseases that are not obvious when you buy them. Saving potatoes from a previous crop can also carry pathogens into the next planting. If you are buying your first crop, compare certified seed potatoes suited to your region and intended harvest.
Choose a variety for its use and maturity
- Russets: generally dry-fleshed and useful for baking, frying, and mashing.
- Red, white, and yellow potatoes: range from waxy to all-purpose and work well for boiling, roasting, salads, and general cooking.
- Early varieties: mature sooner and can suit short growing seasons or an early new-potato harvest.
- Midseason and late varieties: usually need more time but may be better choices for a full storage crop.
Match maturity to the length of your local growing season. A late variety planted too late may produce foliage without enough time to finish sizeable tubers before heat, drought, or frost ends growth.
Prepare the seed pieces
Small seed potatoes approximately 1–1¼ inches in diameter can be planted whole. Cut larger tubers into pieces approximately 1¼ inches across, or about 2 ounces, with at least one eye per piece. Two or three eyes are preferable when practical.
Windows Errors? Fix Them Before They Spread
Repair common Windows errors and clear accumulated junk for a smoother, more stable PC - no reinstall needed.Free scan · no reinstallCrashes, No Sound, or Screen Glitches?
Random freezes, missing sound and display glitches usually trace back to one bad driver. Find and replace yours safely.Free scan · under a minute- Use a clean knife and a clean cutting surface.
- Cut the tuber into pieces of reasonably similar size.
- Leave the cut pieces at room temperature for several days so the cut surfaces dry and form a protective layer.
- Plant only firm, healthy pieces; discard pieces that are soft, badly damaged, or visibly diseased.
Pre-sprouting, also called chitting, is optional. It can encourage faster emergence, but it is not required for a successful crop. If you chit, handle the sprouts carefully; broken sprouts reduce the advantage of the process.
Prepare the planting site
Choose a sunny location with fertile, loose, well-drained soil. Drainage is especially important because standing water around seed pieces and developing tubers promotes rot and disease.
Potatoes commonly perform well in sandy or sandy-loam soil. Heavy clay should be improved with appropriate organic matter and should never be worked while wet, when digging can create dense clods and long-lasting compaction. Aim for slightly acidic soil; approximately pH 6–6.5 is a useful target, although potatoes can tolerate somewhat lower pH.
Rank #2
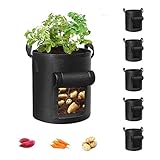
- Durable Material: Made of 300g thick non-woven fabric that can be reused for more than 3 years.
- Excellent Drainage: Breathable material ensures rapid drainage and provides ideal growth environment.
- Reinforced Handle: Strong polypropylene webbing with X-shaped stitching provides support.
- Preventing Root Circling: Good ventilation and breathability prevent root circling.
- Visualization Design: Visualization window allows you to determine when plants are mature for harvest.
Before adding fertilizer, use a vegetable-garden soil test kit or a local laboratory test. Potatoes have substantial nutrient needs, but a universal fertilizer rate is inappropriate without knowing your soil. Excess nitrogen can produce abundant foliage at the expense of tuber development and can contribute to quality problems.
Never use a “weed and feed” product in a potato bed. Its herbicide component may injure or kill vegetable plants.
Rotate the crop
Do not plant potatoes where potatoes, tomatoes, peppers, eggplants, or tomatillos have recently grown. These crops share several diseases and pests. A three- to four-year rotation away from this group helps reduce the buildup of soil-borne pathogens.
How to plant potatoes step by step
- Prepare the bed. Remove weeds and loosen the soil in a bed or shallow furrow.
- Lay out the seed pieces. Put the eyes or sprouts facing upward and the cut side down.
- Set the depth. Cover the pieces with approximately 3–5 inches of soil. In some soils and planting systems, 4–6 inches is appropriate. Leave enough room to add soil later as the plants grow.
- Space the pieces. Leave approximately 10–12 inches between seed pieces. Closer spacing generally produces smaller tubers; wider spacing can favor larger potatoes.
- Space the rows. Use approximately 30–36 inches between rows, or as little as 24 inches where space and cultivation methods require it.
- Water gently. Water enough to settle the soil around the pieces, but do not saturate the bed.
Planting too deeply in heavy, wet soil can delay emergence and increase the chance of rot. Planting too shallowly makes tubers more likely to become exposed to light later, so depth and timely hilling work together.
Hill the plants as they grow
When shoots emerge and the stems reach approximately 8–12 inches tall, mound soil around the base of the plants. Hill sooner if developing tubers are becoming exposed. Repeat once or twice as the plants grow, building approximately 6–8 inches of additional soil along the plants overall.
Hilling:
- Provides covered soil in which additional tubers can develop.
- Prevents potatoes from being exposed to light.
- Helps manage drainage around the developing crop.
Do not eat green potatoes. Light exposure causes green chlorophyll and is associated with potentially harmful glycoalkaloid accumulation. Cover exposed tubers promptly; heavily green potatoes should be discarded rather than trimmed casually.
Can straw replace hilling?
Clean straw or another suitable organic mulch can supplement or replace some hilling in an appropriate growing system. Straw can moderate soil temperature, conserve moisture, suppress weeds, and produce clean, well-shaped tubers. The important condition is adequate, continuous cover: exposed tubers can still turn green. Add or reposition mulch as it settles and inspect the bed after heavy rain or wind.
Watering and feeding
Keep moisture reasonably even, particularly while tubers are forming and enlarging. Approximately 1 inch of water per week is a general reference, but actual needs depend on rainfall, soil, temperature, and plant size. Sandy soil may need more frequent irrigation; clay soil may absorb water slowly and remain wet longer.
- Water deeply at the soil surface rather than repeatedly wetting the foliage.
- Check the soil below the surface before irrigating again.
- Avoid repeated cycles of severe drought followed by heavy watering, which can reduce quality and contribute to tuber problems.
- Use a soil test to guide fertilizer choices.
Potatoes often need more fertilizer than many vegetables. A balanced, test-guided program is safer than applying a large amount at planting. Side-dressing during hilling can provide nutrients when the crop needs them without placing all the fertilizer beside the seed pieces at once.
Do these 3 things before closing this tab:
1Scan for outdated or missing drivers - takes under a minute2Clear out junk files and repair common Windows errors3Fix the driver behind crashes, sound loss and screen glitchesRank #3

- Premium Quality Seeds: Harvested from high-quality harvests to ensure freshness and flavor!
- Rainbow Carrots thrive in loose, well-drained soil, so preparing the soil adequately before planting contributes to a successful and abundant harvest.
- Step by Step Instructions: Conveniently packaged with clear, easy-to-follow instructions, ensuring that you can enjoy your rainbow carrots with every Harvest!
- Great for Gifting: Share the joy of these tasty rainbow carrots with friends and family – an ideal gift for any occasion.
- Expertly Selected Varieties: Axel's Garden Seeds sources only the finest and most unique seed varieties, offering you access to a world of possibilities for your home garden.
Growing potatoes in containers or grow bags
Containers are useful where garden soil is poor or space is limited, but they need adequate drainage and closer monitoring. A container approximately 18 inches wide and 3 feet deep can support the greatest production. Smaller containers can still grow potatoes, but they generally yield less and dry out faster.
To grow potatoes in a container:
- Use a container with drainage holes and fill it with several inches of loose growing medium.
- Place the seed pieces with eyes facing upward.
- Cover them with several inches of medium.
- As foliage grows, add more medium around the stems, leaving the growing tips exposed.
- Keep the container evenly moist without leaving it waterlogged.
Potato grow bags are one practical container option. Choose a bag large enough for the number of seed pieces you intend to plant, and remember that dark containers can heat up quickly in direct sun. Container potatoes also require more frequent watering than an in-ground bed during hot or windy weather.
Pests and diseases to watch for
Inspect plants regularly rather than waiting for damage to become severe. Common problems include Colorado potato beetles, cutworms, potato scab, early blight, and late blight.
Colorado potato beetles
Look for adults, larvae, and orange egg masses on the undersides of leaves. Removing small infestations by hand can be effective in a home garden. If a pesticide is necessary, identify the pest first and follow the product label and local recommendations; repeated use of the same active ingredient can encourage resistance.
Scab, blight, and rot
- Potato scab: is more likely to be troublesome under certain soil conditions, including overly alkaline conditions and uneven moisture. Crop rotation, certified seed, and appropriate soil management help reduce risk.
- Early blight: commonly appears as leaf spotting and progressive foliage decline. Good spacing and removal of diseased plant material improve airflow and sanitation.
- Late blight: can spread rapidly during cool, wet weather and can destroy foliage and tubers. Suspected late blight warrants prompt advice from local extension or a plant-diagnostic service rather than casual treatment of an unidentified problem.
- Seed-piece rot: is favored by cold, wet soil. Use healthy seed, let cut pieces toughen, and wait until the soil is workable and adequately warm.
Good spacing, careful irrigation, clean planting stock, crop rotation, and prompt removal of diseased material are the foundation of prevention. Use any pesticide strictly according to its label and local rules.
Independent reader supportYour contribution helps us test, update, and keep practical guides available for everyone.When to harvest potatoes
New potatoes
Begin checking for new potatoes approximately 7–8 weeks after planting, depending on variety and growing conditions. Dig carefully beside one plant or lift it gently to collect small, immature tubers while leaving neighboring plants to continue growing.
Mature potatoes for storage
For mature potatoes, wait until the vines have dried or died back and the tubers have reached full size. Choose a dry day. Loosen the soil with a spading or digging fork outside the hill, then lift the plant and search through the soil by hand. A garden spading fork can help, but keep it well away from the center of the hill to reduce punctures.
Separate potatoes that are cut, pierced, badly bruised, or otherwise damaged. Use damaged tubers promptly rather than storing them with sound potatoes.
Free tools Windows power users keep installed
One-click scans. No signup required.
Cure and store the crop
- Place mature potatoes in a dark, well-ventilated area for approximately 2–3 weeks so the skins toughen and minor harvest wounds heal.
- Move sound potatoes to cool, dark, humid storage after curing.
- Aim for an approximate storage range of 38–45°F, recognizing that the ideal temperature varies with the intended use and storage conditions.
- Prevent freezing, exclude light, and provide ventilation.
- Check periodically and remove rotting tubers before the problem spreads.
Light storage areas can turn potatoes green, so darkness is not optional. Do not wash potatoes before long-term storage; brush off loose soil and wash them when you are ready to use them.
Rank #4

- Set includes 43 lightly assorted Vegetable and Herb seeds!
- All Seeds are Heirloom, 100% Non-GMO!
- High Germination Rate within 7-14 days
- Great way to stock up for the next planting season! Includes Freedom Farms Vegetable Set Mylar Bag for Optimal Seed Packet Storage!
- Wonderfully producing plants - Current stock will last for years when stored in a dry - cool place!
Potato-growing troubleshooting
| Problem | Likely causes | What to do |
|---|---|---|
| Seed pieces rot before emergence | Cold, wet soil; overwatering; diseased seed; freshly cut pieces planted before the cut surface dried. | Use certified seed, let cut pieces toughen, improve drainage, and wait for workable soil near 50°F. |
| Plants emerge, then turn black after a freeze | Late frost or hard freeze damaged tender foliage. | Protect emerging plants when a hard frost is forecast. Wait to assess recovery; healthy underground portions may produce new shoots. |
| Potatoes turn green | Tubers were exposed to light because soil or mulch cover was insufficient. | Hill or mulch before tubers are exposed. Discard heavily green potatoes rather than eating them. |
| Large plants but few potatoes | Excess nitrogen, excessive heat, poor timing, drought stress, or an unsuitable variety. | Use a soil test, avoid overfertilizing with nitrogen, maintain even moisture, and choose a variety suited to the local season. |
| Small tubers | Too-close spacing, short growing season, heat, drought, or harvesting too early. | Allow storage varieties to mature, maintain moisture during tuber enlargement, and increase spacing in the next crop if appropriate. |
| Leaf spots spread quickly in cool, wet weather | Possible blight or another foliage disease. | Improve airflow, avoid wetting foliage, remove affected material where appropriate, and seek local diagnostic guidance before treating. |
| Potatoes are damaged during digging | Fork used too close to the hill or tubers dug without loosening surrounding soil. | Start outside the hill, lift the soil gradually, and separate damaged potatoes for prompt use. |
A simple planting checklist
- Check your local average last-frost date and regional extension recommendations.
- Wait for soil that is workable, moderately moist, and approximately 50°F or warmer.
- Buy certified seed potatoes rather than relying on supermarket potatoes.
- Cut large tubers into approximately 1¼-inch pieces with at least one eye.
- Let cut pieces dry and toughen for several days.
- Plant eyes upward, 3–5 inches deep, 10–12 inches apart.
- Leave approximately 24–36 inches between rows according to your space and cultivation method.
- Hill when stems reach 8–12 inches, and repeat as needed.
- Maintain even moisture without saturating the soil.
- Rotate potatoes away from tomatoes, peppers, eggplants, and tomatillos for three to four years.
- Harvest new potatoes from around seven to eight weeks, or wait for vine dieback for storage potatoes.
- Cure mature potatoes in darkness and store them cool, ventilated, and above freezing.
Frequently Asked Questions
Can I plant potatoes before the last frost?
Often, yes. Potatoes can be planted approximately two to three weeks before the local average last frost if the soil is workable and about 50°F or warmer. However, emerging foliage can be damaged by a hard freeze, so use local guidance and protect shoots when necessary.
How deep should potato seed pieces be planted?
Cover seed pieces with approximately 3–5 inches of soil at planting. Depending on soil texture and the hilling method, 4–6 inches may also be appropriate. Add more soil later as the plants grow rather than planting extremely deep in cold, heavy soil.
Why should I hill potatoes?
Hilling adds covered soil around growing stems, gives developing tubers room, improves drainage, and prevents exposure to light. Potatoes that turn green from light exposure should not be eaten.
What’s actually slowing this PC down?
Pick the symptom - the matching free tool is one click away.
How long do potatoes take to grow?
New potatoes may be ready approximately 7–8 weeks after planting, depending on variety and weather. Storage potatoes should remain in the ground until the vines dry or die back and the tubers reach mature size.
Can I grow potatoes in a grow bag?
Yes. Use a well-drained, appropriately sized bag, cover the seed pieces with several inches of growing medium, and add more medium as foliage grows. Smaller containers usually produce less and dry out faster than a large in-ground bed.
The Bottom Line
Plant potatoes when the soil—not the calendar—says the time is right: workable, well drained, moderately moist, and approximately 50°F or warmer. Start with certified seed, plant eyes upward, hill as stems grow, keep moisture even, and harvest early for new potatoes or after vine dieback for storage.
Quick Recap
Product prices and availability are accurate as of the date/time indicated and are subject to change. Any price and availability information displayed on Amazon at the time of purchase will apply.
Recommended Free Tools

