The Tool Desk
Outbyte Driver Updater FREEFix the driver behind crashes, sound loss and screen glitchesFind Drivers →Outbyte PC Repair FREERepair Windows errors before they cause bigger problemsFix Now →Durable commercial window installation starts with the right system-specific detail—not a one-size-fits-all sequence. Identify the window, wall construction, exposure, jurisdiction, and approved project documents before work begins. Then coordinate the opening, anchors, flashing, sealants, and water-resistive barrier (WRB) as one assembly, following the manufacturer’s instructions and the project’s design.
1. Identify the window system and governing documents
First establish what is being installed and how it connects to the wall. A punched window with a mounting flange in a wood-frame wall is not installed like an exposed storefront, window wall, or curtain-wall assembly. Those systems differ in support, anchorage, movement, and water-management details; a flange-window detail should not be applied to a storefront by analogy.
Before installation, review the approved shop drawings, manufacturer’s instructions, WRB and flashing details, anchor schedule, sealant requirements, and the project’s inspection and testing requirements. Confirm the applicable jurisdiction, code adoption, exposure conditions, and any project-specific tolerances. If the approved documents conflict or leave a high-exposure condition unresolved, refer the detail to the responsible design professional rather than improvising in the field.
Standards have defined scopes. ASTM E2112-23 is useful background for fenestration installation, but its stated scope is primarily residential and light-commercial windows, doors, and skylights—not a complete specification for every commercial façade system. In Canada, CSA A440.6:26 addresses certain high-exposure fenestration, including exposed storefronts and window walls, but excludes commercial entrance systems and most curtain wall. Its application depends on the jurisdiction, code adoption, and project requirements. Neither standard automatically governs every project.
Quick wins for a faster PC:
Scan for outdated or missing drivers - takes under a minuteDriver Scan →Repair Windows errors before they cause bigger problemsFix Now →#1 Best Overall
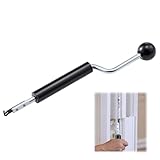
- Designed for Spiral Balancers: this window tension tool is specifically designed for double-hung or sash windows equipped with spiral balancers; Its precision tip fits perfectly without any modification, making your window balance repair project straightforward from the start
- Effortless Removal and Installation: gripping, turning, and installing window balance rods becomes manageable with this tool; It allows for the safe removal of old spiral balance springs and the precise pre-winding and installation of new balancers, facilitating smooth window balance replacement
- Comfortable Grip and Enhanced Control: featuring a padded handle, this tool offers a secure and comfortable grip while working with spiral balancers; The enhanced control helps maintain stability and accuracy when adjusting window tension
- Sturdy Construction for Longevity: crafted from quality metal materials, this window repair tool is built to last; It withstands repeated use, serving as a reliable aid for your home window balance repair or replacement tasks
- Helpful Usage Tips and Maintenance: for optimal results, it is recommended to use this tension tool vertically after removing the window sash; Please avoid over-tightening the spiral balancer during operation; After completing the repair, applying lubricant to the sash pulleys and weatherstripping can help maintain smooth window operation
2. Coordinate trades and installation sequence
Plan the work so that the rough opening, supporting substrate, WRB, flashing, frame, anchors, glazing, and exterior finish can be installed in the order shown by the approved detail. A sequence that blocks access to a flashing lap, damages a WRB tie-in, or conceals an unfinished connection can undermine the assembly even if the window itself is properly set.
ASTM E2112-23 addresses construction sequence and trade coordination as part of fenestration installation. Assign responsibility for each transition between trades, including who installs and inspects flashing and who protects completed work. Keep installed flashing and sealants protected from weather, site traffic, and damage from subsequent work.
3. Inspect and prepare the opening
Before setting the unit, compare the opening and supporting substrate with the approved drawings and product requirements. Check dimensions, condition, support, and the specified plumb, level, square, and tolerance requirements. The reviewed standards address rough openings, shimming, anchorage, flashing, inspection, and moisture entrapment, but they do not establish one set of tolerances for every product and project; use the project and manufacturer documents.
Rank #2

- Perfect for any toolbox - 3 Sizes to meet all of your individual needs. Easy carry storage tote bag & 2 High Quality Pry Tools included! Great for multiple jobs and applications such as, Precise Alignment and Leveling. Air lift non-marking shim for window, door, cabinet installations, appliances, HVAC, plumbing.
- Save time and money - Allowing a single installer to do the job of many. Our Shim Bags will help hold in place and level counter tops, door frames, window frames, cabinetry, and more!
- Commercial design, consumer minded price - With rounded corners, stiff durable edges, smooth exterior and internal stiffener for easier insertion, our wedges are designed for ease of use. Quick easy push button air valve for precise leveling with one finger. FITS into tight 3/32 inch gaps and opens to 2 1/2 inches wide with one hand pump operation. 300 POUND load rating for maximum weight capacity.
- Protection for material-Will not damage, leave marks, or scuff material it comes into contact with unlike pry tools, wooden shims or other wedges used to lift, level, plumb, shim and align material.
- Customer Satisfaction guarantee: Full warranty included. If you don’t love it, just return it for a complete refund! Note: Do not overinflate to avoid any damage to the bag or valve.
- Confirm that the substrate is sound and suitable for the specified anchors, flashing, and sealants.
- Resolve damaged, uneven, or otherwise unsuitable conditions before the unit is installed.
- Verify how the opening connects to the wall’s WRB and drainage or barrier strategy.
- Confirm that required inspection points will remain accessible before concealment.
4. Verify material compatibility
Check that the specified frame, fasteners, coatings, flashing, sealants, and adjoining substrates are compatible for their intended use. Do not select a sealant or flashing product solely because it is commonly used on another job; product instructions, the project detail, substrate conditions, and exposure control what is appropriate.
AAMA 2400-10, a guide specifically for mounting-flange windows in wood-frame construction using exterior barrier methods, requires chemical compatibility among materials in contact and calls for corrosion-resistant fasteners within its scope. It also treats flashing and sealing as part of the overall WRB design. Verify that this guide applies to the project and check the current project requirements rather than treating its 2010 edition as universally governing.
5. Install flashing and water management for the specified system
Follow the approved detail to connect the window opening to the wall’s water-shedding design. Flashing laps and WRB transitions should direct water outward; do not block designed drainage paths or create a detail that traps water. Install materials in the specified order and protect them until adjacent work is complete.
Rank #3
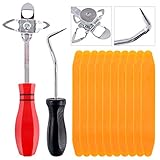
- 【One Convenient Tool Set】The great tool contains 3 kinds of essential tools, allowing you replace or install the window seals, gasket become easier. 1 piece cotter pin puller, 1 piece windshield installing Tool, 10 piece windshield stick setting tool, totally 12 piece. The perfect tool, saving your installation time.
- 【 Offset Windshield Installing Tool】Multifunctional design for various sizes,you could turn the screw too switch the size. Easy to operate: Step 1: adjust the suitable size you need, insert the head of the tool into the windshield lock strip Step 2: put the molding through the hole of tool. Step 3:Flattening tools and push it forward. Please press the insert to prevent displacement while pushing the tool.
- 【Windshield Stick Setting Tool】Made of ABS plastic , non-corrosive and non-conducting, durable and reusable,ergonomic design. Suitable for installing the rear window seals or gaskets without marring or otherwise damaging the rubber parts. Pretty great for detailing places, you also could use them to caulk or clean armor guard off windows.
- 【Cotter Pin Puller】Made of Stainless Steel, with a sharp and bent probe hook tip,the concave-convex handle, comfort to grip. Great windshield installation tool for removing O-rings, installing the windshield trim and pulling seals, rubber, windshield gaskets, glass and strips.
- 【Reliable After-sale Service:】We offer you reliable after-sales service. If you have any questions about our products or any problems with your packages, please feel free to contact us. We will reply you within 12 hours and we will try our best to solve the problems until you are satisfied.
For a flange-mounted window in wood-frame construction
AAMA 2400-10 describes two flashing approaches within its limited scope. Method A begins with sill flashing, followed by jamb and head flashing. Method B begins with sill and jamb flashing before the window is set, then completes its prescribed head detail. Select the method specified for the work and follow its full sequence; do not mix steps from the two methods. These are not storefront installation instructions.
For storefronts and other high-exposure assemblies
Use the approved system detail, manufacturer’s instructions, and responsible design professional’s documents. CSA A440.6:26 addresses design and installation considerations for covered high-exposure fenestration and identifies shop-drawing review and mock-up or field testing as performance-improvement processes. Use the applicable project requirements to decide which review and testing steps are required.
Outdated Drivers Are Slowing You Down
One free scan finds every outdated or missing driver and matches the right update for your exact hardware.Free scan · exact hardware matchPC Slower Than It Used to Be?
A free scan shows the junk files, broken settings and background clutter dragging Windows down - then fixes them in one click.Free scan · Windows 10 & 116. Set, shim, and anchor the unit
Position and support the window as detailed. Install shims and anchors at the specified locations, using the fastener type, spacing, embedment, and substrate identified by the approved documents. Do not substitute fasteners or anchor into an unsuitable substrate based on field preference; anchorage and support must suit the actual system and structural design.
Rank #4

- Glass Seal Rope-In Tool 1/4" Cord for weatherstripping installation
- Use the rope in tool when working with rubber gasket set glass.
Account for structural demands and differential movement at joints and anchors. AAMA 2400-10 states this principle for its flange-window application; for other systems, follow their approved design and manufacturer requirements. Avoid field adjustments that restrain movement or alter the designed load path.
Independent reader supportYour contribution helps us test, update, and keep practical guides available for everyone.7. Complete perimeter seals and WRB transitions
Complete head and jamb transitions in the sequence required by the system detail, integrating flashing with the WRB so water is directed to the exterior. Apply sealant only where specified and only after compatibility with adjoining materials has been confirmed. Keep intended drainage openings clear.
For the flange-window details in AAMA 2400-10, the selected method determines where sealant and flashing belong. Follow that method consistently rather than combining its procedures. For a storefront or another commercial assembly, use its own approved detail; a flange-window sealant pattern is not a substitute.
What’s actually slowing this PC down?
Pick the symptom - the matching free tool is one click away.
Best Value

- 【Versatile Tool for Countless Jobs】From tooling freshly applied sealants and scraping away old caulk to pushing vinyl into window channels, stirring paint, or setting and removing auto glass from rubber gaskets – this windshield tool is a true workhorse. A must-have for caulkers, glaziers, painters, and auto glass installers.
- 【Tapered Both Ends - Reaches Tight Crevices Easily】Windshield stick both ends feature tapered tips (0.4in / 10mm wide) that slide effortlessly into the narrowest gaps for scraping, prying, or smoothing sealants. Whether you're working on windshields, window frames, or weather stripping, the slim profile of window glazing tools gives you precision and control.
- 【Safe on Surfaces – No Scratches Glass or Metal】Made from a high-strength, flexible plastic, auto glass tool won't scratch glass or painted metal surfaces. The material won't absorb liquids, so cleanup is a breeze, just wipe it off and it's ready for the next job.
- 【Tough POM Material – Built to Last】Crafted from POM, a high-hardness plastic that wear resistance, non-conductivity, and corrosion resistance. This windshield stick tool stands up to daily abuse – prying, scraping, and tooling – without cracking or deforming. Safe, reliable, and extremely durable.
- 【10 Pack Bone Sticks – Always Have a Backup】You get 10 windshield installation tool in one pack, perfect for pros and DIYers who want extras on hand. Each stick measures 7.78 inch (197 mm) in length, with a tapered width of 0.4 inch (10 mm). Commonly referred to as bone sticks, tapered end windshield stick tool also great for many other crafts and shop uses.
8. Inspect, document, and test
Inspect the work at the project’s required hold points, especially before flashing, anchors, or frame-to-wall connections are concealed. Record findings and corrections using the project’s documentation process.
- Check the installed position, shimming, and anchors against the approved details.
- Inspect flashing laps and WRB tie-ins for continuity and damage.
- Check specified sealant joints for continuity and confirm drainage paths remain open.
- Record damage or deviations and obtain the required resolution before concealment.
- At completion, confirm that the installation matches the approved documents and inspection plan.
Where the project specifies mock-up or field testing, use its method and acceptance criteria. CSA A440.6:26 describes mock-up and field testing in its high-exposure context. CSA A440.4-2018 describes air- and water-leakage testing of installed units, including evaluation of both product performance after installation and the frame-to-wall interface. Check whether that edition applies to the project; the specification determines the required test and pass criteria.
How to choose between permitted installation approaches
If the design permits more than one approach, compare the actual assembly and its constraints rather than choosing by habit. The project documents and responsible design professionals determine which options are acceptable; the cited sources do not establish one universally best method or product.
- System and wall: flange window, storefront, window wall, or another assembly, matched to the wall construction.
- Exposure and jurisdiction: site conditions and applicable codes or adopted standards.
- Water management: how the detail connects flashing to the WRB and preserves drainage.
- Support and movement: substrate capacity, anchorage, structural demands, and movement accommodation.
- Material compatibility: suitability of flashing, sealants, fasteners, coatings, and adjoining materials.
- Verification: inspection access and any specified shop-drawing review, mock-up, or field testing.
Why a standard is not a performance guarantee
A general installation practice is not a substitute for project-specific design or quality control. ASTM E2112-23 expressly says it does not provide fail-safe installation methods or assurance against installation deficiencies, nor does it ensure delivered performance. Durability therefore depends on matching the approved detail to the product and wall, installing it in the specified sequence, and verifying the completed work against the project’s acceptance criteria.
Free tools Windows power users keep installed
One-click scans. No signup required.
Quick Recap
Product prices and availability are accurate as of the date/time indicated and are subject to change. Any price and availability information displayed on Amazon at the time of purchase will apply.