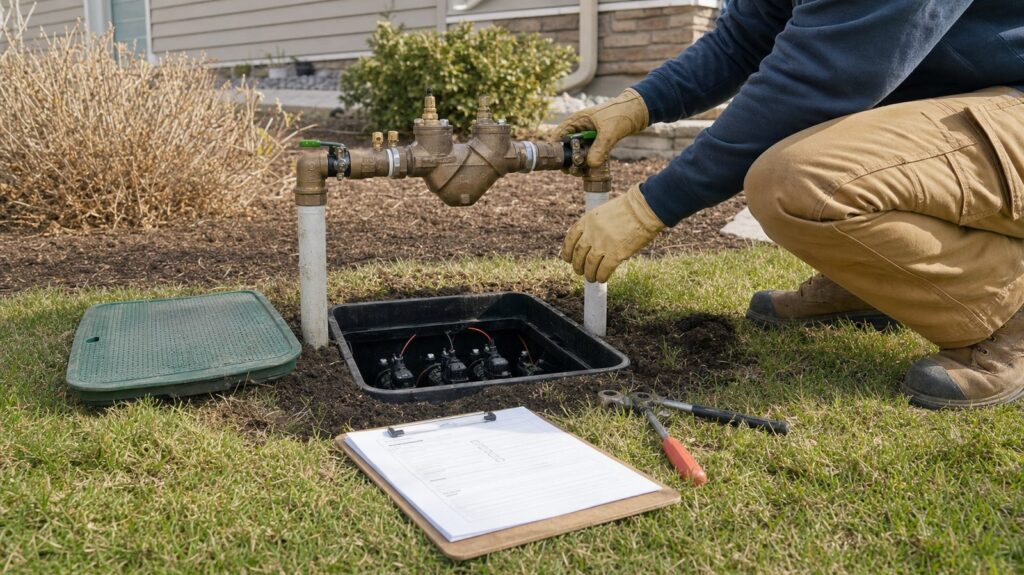
Turn your lawn sprinkler system back on in spring only after the local freeze risk has passed, the soil has thawed, and the lawn or planting beds actually need supplemental water. The safe process is not just opening one valve. You need to close winter drain points, bring pressure back slowly, inspect the backflow preventer, run every zone, fix leaks or damaged heads, and update the controller before summer demand hits.
On our job sites, we treat sprinkler startup like recommissioning any other site utility. Water under pressure will find weak fittings, cracked risers, loose clamps, damaged valves, and poorly protected piping. Taking 45 to 90 minutes to start the system carefully can prevent a flooded valve box, a washed-out planting bed, or a repair that becomes much more expensive after sod, mulch, fencing, patios, or grading work is finished.
As an Amazon Associate I earn from qualifying purchases.
For most residential systems, professional spring activation runs about $60 to $150 in 2026, with some larger or more complicated systems landing closer to $150 to $250. A careful DIY startup costs little beyond time and small parts, but backflow testing, electrical faults, mainline leaks, and permitted plumbing work belong with qualified irrigation or plumbing professionals.
Free tools Windows power users keep installed
One-click scans. No signup required.
When to Turn Your Sprinkler System Back On
The right time depends on soil temperature, frost risk, plant demand, and your local watering rules. In colder U.S. markets, sprinkler startups are commonly scheduled from late March through May, and some high-elevation or northern properties wait into early June. Warmer regions may start earlier, but the same rule applies: do not pressurize exposed irrigation parts if a hard freeze is still likely.
#1 Best Overall

- Lead free brass and stainless steel wetted parts are suitable for measuring potable drinking water pressure test. Compatible with water pump, drip irrigation pressure regulator, rv tank, pipe tester, outdoor spigot, hose faucet, garden hose, regulator valve, washing machine outlets, ice maker, RO system, sprinker and etc.
- Circular dial is enclosed in a 304 stainless steel case for corrosion resistance. Glycerin filled inhibits pointer flutter and prevents damage to the internal mechanics from vibration and pulsation.
- Measures pressure with dual scale (0-100 psi/0-700 kPa). Display accuracy is + or - 3/2/3% over the entire range of the gauge.
- IP67 waterproof prevent condensation inside caused fogging of the window. Offer clear reading.
- Lower mount male connection with 1/4" NPT thread.
Before opening the system, confirm three things. First, nighttime temperatures should be consistently above freezing. Second, the ground should be thawed enough that buried lines are not surrounded by frozen soil. Third, the turf, shrubs, or beds should actually need irrigation. Early spring rainfall often covers plant needs, and watering too early can waste money while encouraging shallow rooting.
Above-ground components are the weak link. Backflow assemblies, vacuum breakers, copper risers, PVC fittings, hose bib connections, and exposed valve piping can crack if water is restored and then freezes overnight. If your system has a pressure vacuum breaker mounted 12 inches or more above the highest downstream sprinkler head, it is especially exposed to weather and should not be rushed back into service.
Tools and Checks Before You Open a Valve
You do not need a truck full of equipment for a basic homeowner startup. You do need enough control to open valves slowly, inspect each zone, and shut the system down quickly if something fails.
Do these 3 things before closing this tab:
1Clear out junk files and repair common Windows errors2Fix the driver behind crashes, sound loss and screen glitches3Repair Windows errors before they cause bigger problemsHave these items ready before you begin: a flathead screwdriver for test cocks and some controller terminals, an adjustable wrench or valve key for the main shutoff, a notepad or phone for zone notes, flags or marking paint for problem heads, spare nozzles and filters, a small brush, and a few replacement sprinkler heads that match your existing type. If you have drip irrigation, keep extra emitters, goof plugs, couplings, and 1/4-inch tubing on hand.
Walk the property before pressurizing the system. Look for cracked heads, mower-damaged risers, open valve boxes, missing caps, exposed pipe, animal damage, sunken heads, and places where winter settling changed the grade. Check patios, sidewalks, driveways, fences, and new planting work. If construction or landscaping has happened since fall, assume at least one sprinkler head or lateral line may have been disturbed.
At the controller, check the date, time, backup battery, station labels, and stored program. Many spring problems are not plumbing problems at all. A dead backup battery, a changed watering restriction, or a daylight-saving time mismatch can make a good system behave badly.
Step-by-Step: How to Turn the Sprinkler System Back On
The goal is to refill the irrigation mainline slowly, avoid pressure shock, and inspect the system before it runs unattended. Plan on 2 to 5 minutes per zone for testing. A 6-zone system usually takes 45 to 75 minutes if you are walking the property and making notes.
1. Close Manual Drain Valves and Test Cocks
Start by finding the manual drain valves that were opened during winterization. These may be near the main irrigation shutoff, in valve boxes, at low points in the yard, or near the backflow assembly. Close them before adding water. If you forget this step, the system may dump water into a basement drain, crawlspace, valve box, or low spot in the yard and make you think there is a major break.
If your backflow preventer has small test cocks, confirm they are in the correct closed position before pressurizing. On many devices, the slot on the test cock is perpendicular to the opening when closed. If you are unsure, stop and check the device manual or have a certified tester handle it.
2. Set the Controller to Manual Off
Do not let the controller start a zone while the mainline is filling. Put the controller in manual off, rain off, or standby mode. You want the mainline pressurized first, then you can test one zone at a time.
Check that the station count still matches the property. If last year’s notes say zone 5 is the front beds and this year zone 5 appears dead, the label matters when you are diagnosing the problem or calling for repair.
PC Slower Than It Used to Be?
A free scan shows the junk files, broken settings and background clutter dragging Windows down - then fixes them in one click.Free scan · Windows 10 & 11Crashes, No Sound, or Screen Glitches?
Random freezes, missing sound and display glitches usually trace back to one bad driver. Find and replace yours safely.Free scan · under a minute3. Open the Main Shutoff Slowly
This is the step that prevents many expensive spring repairs. Open the irrigation shutoff about one-quarter turn and pause. Let the mainline begin filling gradually. You may hear air moving and water entering the line. Wait until the sound settles and pressure stabilizes, then continue opening the valve fully.
Opening the main valve too fast can create water hammer. Water hammer is a pressure surge caused when fast-moving water stops or changes direction suddenly. In an irrigation system, that shock can crack PVC fittings, damage valves, loosen threaded connections, and expose weak spots left by winter freeze damage.
Rank #2

- IP67 Waterproof: The circular dial is enclosed in a 304 stainless steel case for corrosion resistance. The PRV-Tex Vent design can reduce fogging of windows inside or moisture damage from the infiltrating water such as being installed in environments exposed to moisture or rain. Offer clear reading and rain-resistant.
- Wetted Materials: lead free brass, stainless steel, and food grade silicone sealing ring. Suit for measuring potable drinking water pressure.
- Compatible with water pump, drip irrigation pressure regulator, RV tank, pipe tester, outdoor spigot, hose faucet, garden hose, regulator valve, washing machine outlets, ice maker, RO system, sprinkler, etc.
- The red max pointer allows you to record spikes in pressure when you are away from the gauge. Just adjust the red max pointer to rest above the black pointer before testing your pressure. When the gauge reads pressure the black hand will drag the red max pointer and the pointer will record the max pressure seen on the gauge. To reset the max pointer, just turn it down to zero above the black pointer and test again. The structure adopts a long-lasting design to support 10,000 times of use.
- Measures pressure with dual scale (0-200 psi/0-14 bar). Display accuracy is + or - 3/2/3% over the entire range of the gauge. 3/4" female hose thread(FHT) is typically utilized in garden hose thread(GHT).
If you hear violent banging, see water moving at the meter while all zones are off, or notice water rising in a valve box, shut the system down and investigate before continuing.
4. Inspect the Backflow Preventer
The backflow preventer protects the potable water supply from irrigation water. Lawn irrigation is a cross-connection risk because fertilizer, soil, bacteria, pesticides, and stagnant water can be pulled back toward drinking water piping during a pressure drop. Treat this assembly as life-safety plumbing, not as an optional sprinkler part.
Recommended Free Tools
Look for dripping, spraying, cracks, split brass or plastic, missing caps, and damage around unions or threaded connections. A small amount of brief discharge during pressurization can be normal on some assemblies, but continued leaking is not. If the body is cracked, a valve will not hold, or the device fails a required test, stop using the system until it is repaired or replaced.
Many jurisdictions require backflow devices on irrigation systems, and many require testing by a certified tester annually or on another local schedule. New or altered irrigation and backflow work commonly requires permits and inspections. The exact rule varies by city, county, water utility, and device type, so confirm locally before changing the assembly or adding a new system.
5. Run Each Zone for 2 to 5 Minutes
Use the controller’s manual run feature and test one zone at a time. Two to five minutes is usually enough to see whether heads pop up, pressure is stable, spray patterns are correct, and water is not pooling. Do not run all zones from the garage while staying inside. Walk the property with every zone operating.
For each zone, record the zone number, area served, visible problems, and likely repair. A note like “Zone 3, left side yard, head by gate broken, low pressure at rear rotor” is much more useful than “sprinklers need work.” It helps you buy the right parts or get a better repair estimate.
What’s actually slowing this PC down?
Pick the symptom - the matching free tool is one click away.
6. Adjust Heads, Clean Nozzles, and Check Coverage
Do not judge a zone only by whether water comes out. Check coverage. A properly adjusted lawn zone should generally have head-to-head coverage, meaning one sprinkler reaches close to the next sprinkler. Dry triangles between heads, overspray onto pavement, mist blowing across the driveway, and spray hitting siding are signs that the system needs adjustment.
Clean clogged nozzles and small filters. Straighten tilted heads. Raise heads that are buried below turf or mulch. Replace cracked bodies, broken caps, and damaged risers. If pressure is high enough to create mist instead of droplets, consider pressure-regulated spray bodies or pressure-regulating nozzles. High pressure wastes water, reduces usable coverage, and can make the lawn look watered while the root zone stays uneven.
Spring Startup Cost in 2026
A homeowner can usually do the basic startup for the cost of time and minor parts. Professional service is worth pricing when you want backflow testing, documented inspection, repairs, controller programming, or warranty-level accountability before the irrigation season starts.
| Service or Repair | Typical 2026 Cost | What Drives the Price |
|---|---|---|
| Professional spring startup or activation | $60-$150 common; complex systems can run $150-$250 | Number of zones, access, inspection depth, local labor rates |
| Annual sprinkler maintenance plan | $140-$400 | Seasonal visits, zone count, backflow testing, repair discounts |
| Typical sprinkler repair | $100-$400 average | Parts, labor, digging, valve access, diagnosis time |
| Sprinkler head replacement | $65-$120 each | Head type, nozzle type, riser condition, labor minimums |
| Valve replacement | $120-$300 typical; some ranges run $69-$371 | Valve box access, wiring, manifold condition, parts |
| Pipe or line leak repair | $150-$450 | Depth, pipe material, landscaping disturbance, leak location |
| Controller or timer repair/replacement | $100-$350 | Controller type, wiring, transformer, smart-controller setup |
| Backflow testing | Often $75-$150; some areas $100-$300 | Certified tester availability, utility paperwork, local rules |
| Backflow repair or replacement | Repair $150-$500; replacement $450-$1,700 | Device type, size, code requirements, accessibility, plumbing work |
Labor for sprinkler repair commonly falls around $50 to $100 per hour, while emergency calls can climb to $150 to $300 per hour. The biggest cost drivers are zone count, buried pipe depth, frozen or cracked parts, hard-to-reach valve boxes, controller age, drip-line complexity, municipal backflow paperwork, and whether landscape or hardscape must be disturbed.
Quick wins for a faster PC:
Fix the driver behind crashes, sound loss and screen glitchesFind Drivers →Repair Windows errors before they cause bigger problemsFix Now →From a construction standpoint, timing matters. If you are installing new sod, planting beds, mulch, fencing, patios, walkways, or grading, activate and test irrigation first. Finding a buried leak after fresh sod is down or after a paver edge is set adds repair labor and damages finished work.
Common Problems After Winter
Winter exposes weak irrigation parts. Freeze expansion can crack fittings. Settled soil can bury heads. Mowers and snow equipment can damage caps and risers. Spring startup is the first real test.
Low Pressure in One Zone
Low pressure in one zone can point to a cracked lateral line, clogged filter, stuck valve, damaged head, failed pressure regulator, or too many nozzles on the zone. Look for soggy ground, bubbling soil, weak heads at the far end of the zone, or water draining from a low point after the zone shuts off.
Rank #3

- Brass and Stainless Steel wetted parts for measuring non-corrosive liquid and gas pressure. Such as water, oil pressure test. Compatible with pool sand filter, water pump, well pump and etc..
- Circular dial is enclosed in a 304 stainless steel case for corrosion resistance. Glycerin filled inhibits pointer flutter and prevents damage to the internal mechanics from vibration and pulsation.
- Measures pressure with dual scale (0-100 psi/0-700 kPa). Display accuracy is + or - 3/2/3% over the entire range of the gauge.
- IP67 waterproof prevent condensation inside caused fogging of the window. Offer clear reading.
- Lower mount male connection with 1/4" NPT thread
If one zone is weak but the others are normal, the problem is usually local to that zone. If several zones are weak, look upstream at the mainline, master valve, backflow preventer, pressure regulator, or water supply.
The Tool Desk
Outbyte Driver Updater FREEFix the driver behind crashes, sound loss and screen glitchesFind Drivers →Outbyte PC Repair FREEClear out junk files and repair common Windows errorsFree Scan →Heads Do Not Pop Up
Heads that fail to pop up may be clogged, buried, physically broken, or short on pressure. Clean around the cap, remove debris from the nozzle and filter, and check whether the riser moves freely. If several heads in the same zone stay low, suspect a pressure or flow problem rather than three separate head failures.
Water Pools or a Zone Will Not Shut Off
Pooling can be caused by a broken head, cracked pipe, low-head drainage, or a valve that is not closing. A zone that will not shut off often points to debris in the valve, a torn diaphragm, a failed solenoid, or controller wiring that is keeping the valve energized. Shut off the water supply if the zone continues running after the controller is off.
Misting and Overspray
Misting usually means pressure is too high at the head or the nozzle is wrong for the application. Overspray wastes water and can stain fences, wet siding, create slippery walks, and send treated water into the street. Pressure-regulated heads, matched precipitation nozzles, and better arc adjustment can improve coverage without increasing run time.
Backflow, Permits, and Water Safety
Backflow requirements are the part of sprinkler startup homeowners most often underestimate. Irrigation water can contain fertilizer, soil, bacteria, lawn chemicals, and stagnant water. If pressure in the public or household supply drops, that contaminated water can be drawn backward unless the system has proper backflow protection.
Requirements vary by jurisdiction, but common rules include an approved backflow prevention device, installation by a qualified person, permits for new or altered irrigation plumbing, inspections, and certified testing at required intervals. Some utilities require annual test reports. Others have different schedules based on device type or hazard classification.
Do not relocate, bypass, remove, or rebuild a backflow preventer casually. If the device is cracked, leaking continuously, installed too low, missing required clearance, or due for certification, call a qualified irrigation contractor, plumber, or certified backflow tester. A failed backflow device is not just a lawn problem; it is a water-supply protection issue.
Update the Watering Schedule Before Summer
After the system works mechanically, reset the controller for spring conditions. Many homeowners leave the previous July schedule in place, which can mean too much water in April and May. Cooler weather, spring rain, and lower evaporation usually call for a reduced watering budget.
Set the date and time, confirm watering days allowed by your utility, and enable rain or freeze sensors. If your controller has seasonal adjust, start lower in spring and increase only as weather and plant demand require. For example, a lawn that needs 100 percent of its summer schedule in July may only need 30 to 60 percent during a cool, wet spring period.
Water efficiency is not a small issue. Residential outdoor water use in the United States is nearly 8 billion gallons per day, mostly for landscape irrigation, and as much as half can be wasted through overwatering and inefficient systems. Replacing a standard clock timer with a WaterSense-labeled irrigation controller can save an average home nearly 8,800 gallons per year. WaterSense-labeled products are designed to be at least 20 percent more water-efficient while maintaining performance.
A smart controller is not a substitute for a sound system. It cannot fix a broken head, a leaking valve, or a bad nozzle layout. But once the hardware is working, weather-based scheduling can reduce waste and help keep watering aligned with actual site conditions.
Independent reader supportYour contribution helps us test, update, and keep practical guides available for everyone.When to DIY vs. When to Hire a Pro
A careful homeowner can handle a basic startup on many systems. DIY makes sense if the system was professionally winterized, the backflow assembly is intact, valves are accessible, the controller powers up normally, and you are comfortable walking each zone and making minor head or nozzle adjustments.
DIY tasks usually include closing drains, slowly opening the main valve, checking the controller clock and battery, running zones manually, cleaning nozzles, replacing simple spray heads, adjusting arcs, and documenting repairs. Keep replacement parts matched to the existing system. Mixing random nozzles, rotors, and spray bodies can create poor coverage and uneven precipitation rates.
Rank #4
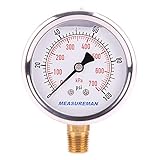
- Accurate Pressure Monitoring: It measures pressure between 0 and 100 psi/kpa in gas and liquid systems. It is ideal forboth industrial and domestic uses
- Durable Construction: Its glycerin filing and 304 stainless steel casing provide long-lasting performance while minimizing the effects of pulsation and turbulence
- Dual-Scale Display: It has a 2.5-inch dial, which is clear. For a variety of applications, it provides accurate readings in both psi and kPa
- Compatible with Standard Connections: It is simple to install on a range of systems with non-corrosive media to brass, as it comes with a 1/4-inch NPT lower mount
- Versatile Application: It is appropriate for measuring gas and water pressure in HVAC, plumbing, and other non-corrosive settings
Hire a pro when the issue moves beyond inspection and simple parts. Stop and call for help if the backflow preventer fails a test, the backflow body is cracked, water moves at the meter while all zones are off, you see a mainline leak, multiple zones have weak pressure, the controller has electrical faults, valves buzz or will not shut off, or the repair requires plumbing permits. Also bring in a professional before major landscape work when irrigation needs to be modified, capped, sleeved under hardscape, or re-zoned.
A good spring service visit should produce clear findings, not just a quick turn-on. Ask for zone-by-zone notes, visible repair locations, backflow status, controller settings, and a prioritized repair list. That documentation helps you decide what must be fixed now, what can wait, and what should be coordinated with broader landscape or construction work.
A Practical Spring Startup Checklist
Use this checklist before the first automatic watering cycle of the season.
- Wait until frost risk has passed and the soil has thawed.
- Walk the property and look for broken heads, exposed pipe, damaged valve boxes, and settled grade.
- Close manual drain valves and confirm backflow test cocks are in the proper position.
- Set the controller to manual off before pressurizing.
- Open the main irrigation shutoff one-quarter turn, wait for the line to fill, then open fully after pressure stabilizes.
- Inspect the backflow preventer for cracks, leaks, and required test status.
- Run each zone manually for 2 to 5 minutes.
- Check pop-up action, pressure, leaks, pooling, misting, spray direction, and head-to-head coverage.
- Clean nozzles and filters, straighten tilted heads, and mark broken components.
- Update controller date, time, watering days, seasonal adjust, rain sensor, and freeze sensor settings.
- Record repairs by zone before calling for service or buying parts.
The main point is control. Bring water back slowly, watch the system under pressure, and make decisions zone by zone. That is how our crews avoid turning a simple spring startup into a flooded yard or a last-minute repair during the first hot week of the year.
Do these 3 things before closing this tab:
1Clear out junk files and repair common Windows errors2Scan for outdated or missing drivers - takes under a minute3Repair Windows errors before they cause bigger problemsBottom Line
Turning a sprinkler system back on in spring is a measured process: wait for safe weather, close drains, pressurize slowly, verify backflow protection, test each zone, correct coverage, and reset the controller for current conditions. A homeowner can handle the basics, but backflow work, mainline leaks, electrical issues, failed valves, and permitted plumbing repairs need qualified help.
If your system is older, had freeze damage, or sits under areas planned for new sod, planting, patios, fencing, or grading, do the startup before the finish work begins. It is much cheaper to repair irrigation while the site is open than after the landscape is dressed and the hardscape is complete.
Frequently Asked Questions
When should I turn my sprinkler system back on in spring?
Wait until the local last frost risk has passed, the soil has thawed, and the lawn or planting beds need supplemental water. In many colder U.S. markets, that means late March through May, and some areas wait into early June.
How much does sprinkler spring startup cost in 2026?
Professional spring startup commonly costs $60 to $150, with larger or more complex systems sometimes running $150 to $250. DIY startup is mostly time plus small parts, unless repairs or backflow testing are needed.
Crashes, No Sound, or Screen Glitches?
Random freezes, missing sound and display glitches usually trace back to one bad driver. Find and replace yours safely.Free scan · under a minuteWindows Errors? Fix Them Before They Spread
Repair common Windows errors and clear accumulated junk for a smoother, more stable PC - no reinstall needed.Free scan · no reinstallCan I turn my sprinkler system on myself?
Yes, if the system is accessible, undamaged, and you are only closing drains, slowly opening the main valve, testing zones, cleaning nozzles, and adjusting heads. Call a pro for failed backflow tests, mainline leaks, electrical faults, valve problems, or permitted plumbing work.
Why do I need to open the sprinkler main valve slowly?
Opening the valve too fast can cause water hammer, a pressure surge that may crack fittings, burst pipe, or damage irrigation valves. Open the shutoff about one-quarter turn first, let pressure stabilize, then open it fully.
Do I need a backflow test before using my sprinkler system?
Many utilities and jurisdictions require certified backflow testing annually or on another local schedule. Requirements vary, so check with your water provider or local building department before assuming the device is optional.
What should I do if one sprinkler zone has low pressure after winter?
Run that zone manually and look for soggy soil, bubbling, broken heads, clogged nozzles, or a valve that is not opening fully. If several zones are weak or the meter moves when zones are off, shut the system down and call a professional.
Quick Recap
Product prices and availability are accurate as of the date/time indicated and are subject to change. Any price and availability information displayed on Amazon at the time of purchase will apply.

