Verdict: The Snapmaker U1 is one of the most interesting affordable multicolor 3D printers available on paper—and potentially an excellent fit for construction workshops, makers, educators, and small studios that produce frequent multicolor parts, labels, jigs, or prototypes. Its SnapSwap system changes complete toolheads instead of repeatedly feeding different filaments through one nozzle. That makes color changes fast and sharply reduces purge waste.
The catch is that the U1 is a first-generation product whose software ecosystem, enclosure strategy, long-term reliability record, and retail availability deserve more scrutiny than its impressive hardware specifications. Buy it for efficient four-material printing; delay it if you need a fully enclosed machine, mature software, or immediate availability with minimal setup risk.
What makes the Snapmaker U1 different?
The U1 is a fused-deposition modeling printer with a 270 × 270 × 270 mm build volume, four included toolheads, Klipper-based firmware, Wi-Fi and USB transfer, a built-in camera, and support for Snapmaker Orca and OrcaSlicer. Its headline feature is SnapSwap: the printer physically exchanges toolheads during a print.
That distinction matters. The U1 is a tool changer, not a conventional automated material system that sends multiple filaments through one hot end.
Quick wins for a faster PC:
Repair Windows errors before they cause bigger problemsFix Now →Fix the driver behind crashes, sound loss and screen glitchesFind Drivers →Clear out junk files and repair common Windows errorsFree Scan →#1 Best Overall

- 【4-Toolhead System with 5-Second Tool Changer】 Powered by the SnapSwap system, Snapmaker U1 multi-color 3D printer features four independent toolheads with filaments preloaded and preheated, enabling true multi color printing without manual filament swaps or purging. The automatic tool changer reduces tool change time from around 2 minutes to just 5 seconds. Its robust locking mechanism has been validated through over 1,000,000 swaps with zero failures, making it easier and faster to create functional parts, detailed prototypes, and finished models in a single print.
- 【5X Faster Printing, 5X Less Waste】 Unlike traditional filament-changing systems, Snapmaker U1 3D printer swaps toolheads instead of repeatedly loading, unloading, and purging filaments. This minimizes wasted material during filament changes, reducing filament waste by up to 5X and enabling up to 5X faster multi-color and multi-material printing. Printing with Snapmaker U1 means less waste, lower operating costs, and higher productivity for makers, workshops, small businesses, and professional creators.
- 【True Multi-Material & Mixed-Material Printing】 Snapmaker U1 3D printer combines rigid and flexible materials, water-soluble supports, and engineering materials in a single print. Create functional parts, multi-color articulated models with easy-to-remove or soluble supports, and even colorful shoes using TPUs with different Shore hardness ratings. Four independent toolheads automatically switch between materials with no manual intervention. Compatible with PLA, PVA, TPU, PETG, PCTG, ABS, ASA, PA, PC, and more for greater design freedom and more capable prototypes and end-use parts.
- 【Smart Calibration】 Automatic toolhead offset calibration, vibration compensation, fine-tuned extrusion, and perfect first-layer work together to deliver smooth, dimensionally accurate and reliable print quality with minimal manual adjustment.
- 【Easy to Use for Beginners & Professionals】 With a built-in model library, Snapmaker Orca — custom open-source slicing software, makes it easy to get started with 3D printing. Combined with automatic filament management, AI-powered print monitoring, a 3.5-inch touchscreen, and remote app control, Snapmaker U1 simplifies every step from setup to finished print, making it suitable for beginners, hobbyists, or professionals. Snapmaker U1 includes a one-year warranty.
- Conventional multicolor printer: one nozzle unloads one filament, loads another, and purges the previous color before printing again.
- Snapmaker U1: each toolhead has its own extrusion path and can remain loaded with its own filament. The printer swaps the active hot end instead of repeatedly forcing every material through one nozzle.
- Premium tool changer: machines such as the Original Prusa XL use the same broad principle, but generally cost much more and target a more expandable prosumer market.
For a workshop making color-coded fixtures, signage, inspection aids, or prototype assemblies, the U1’s advantage is not merely visual color. Separate toolheads can make it more practical to combine model material with support material and can reduce the chance that one material contaminates another during repeated changes.
It does not eliminate waste or contamination completely. The printer still needs nozzle wiping, priming, clearing, calibration, and sometimes a prime or wipe tower.
See Snapmaker’s U1 specifications.
Why tool changing can beat filament switching
Single-nozzle systems
Single-nozzle multicolor systems are often cheaper and easier to understand. Their weakness appears when a model changes color frequently. The machine must unload and reload filament, heat and purge the nozzle, and often create a purge tower or deposit discarded material elsewhere. A detailed multicolor model can therefore consume a surprising amount of filament and spend a large part of its print time changing colors.
The problem becomes more significant when materials have different temperatures or handling characteristics. Flexible TPU, support materials, and moisture-sensitive filaments are less convenient when they repeatedly share the same extrusion path.
The U1 approach
With the U1, a red PLA toolhead, a black PLA toolhead, a support-material toolhead, and another material can remain loaded simultaneously. The printer parks one assembly and retrieves another. Snapmaker’s design therefore attacks the two biggest costs of multicolor printing: changeover time and purge material.
Tom’s Hardware reported color changes of roughly 10–12 seconds on a beta unit. In one comparison, its U1 completed a three-color figure plate three hours faster than a Bambu Lab P1P, despite making 90 color swaps, and used a four-gram prime tower. That is useful evidence of the design’s potential, but it was one reviewer’s test on beta hardware and should not be treated as a universal result for every model, material, or slicer profile. Read the Tom’s Hardware review.
Does the U1 really print at 500 mm/s?
Its published maximum toolhead speed is 500 mm/s, and maximum acceleration is 20,000 mm/s2. Those are important motion-system capabilities, but they are not promises that every print will run at 500 mm/s.
Actual productivity depends on layer height, geometry, cooling, nozzle size, material, volumetric flow, and the quality target. The hot end is rated for a maximum flow of 32 mm3/s, while Snapmaker’s published comparison used specified PLA settings including a 0.2 mm layer height, 200 mm/s outer-wall speed, and 250 mm/s infill speed.
PC Slower Than It Used to Be?
A free scan shows the junk files, broken settings and background clutter dragging Windows down - then fixes them in one click.Free scan · Windows 10 & 11Outdated Drivers Are Slowing You Down
One free scan finds every outdated or missing driver and matches the right update for your exact hardware.Free scan · exact hardware matchThe more meaningful U1 speed advantage is complete-job productivity: fast tool swaps plus less purging plus four materials already loaded. For a single-color bracket, the U1 may not be dramatically more productive than another modern CoreXY printer. For a heavily segmented four-color part, the difference can be substantial.
Rank #2

- 【Perfect Compatibility】BIQU CryoGrip Pro Glacier Build Plate is perfect suitable for Snapmaker U1 3D Printer, compatible with PLA(45-55℃), PETG(60-70℃), ABS(100℃), PA and other filaments. (NOTE: Glacier printing adhesion not as good as Frostbite with PLA and PETG).
- 【Honeycomb Handle Design】The Glacier Build Plate adopts sleek honeycomb handle design, isolates heat from the print area. At a 100°C heat bed temperature, the temperature in the handle area remain slow enough to touch, enabling immediate print removal without cool down, saving your efficient time.
- 【Unparalleled Adhesion】CryoGrip Pro Glacier Build Plate has unparalleled first layer adhesion. The substrate has high magnetism, strong adsorption and fixation, so there is no need to worry about printing failure caused by the first layer falling off and enjoy perfect printing effect without warping, greatly improving the printing success rate.
- 【Easy to Removable and Clean】The printed model can be easily removes by bending the plate. If a print sticks too firmly, please place the plate in a freezer for 10 minutes to assist with removal. A simple wipe with water/soap/alcohol can easily restore its adhesion.
- 【Special Material Texture Printing】CryoGrip Pro Glacier Build Plate sandwiched with 7 layers of cobalt oxide coating, consisting of Base Plate, Base Coat, Intermediate Coating, and Top Coat. The build plate have Impact resistant, Corrosion Resistant, Long life span.zero risk of repeated bending causing coating to peel off. The surface texture is delicate, making the bottom of the printed part smoother.
How much waste does it save?
Snapmaker says laboratory testing found that the U1 used approximately 17% to 47% of the filament required by other single-head printers for comparable multicolor prints under similar conditions. Its marketing describes this as up to five times less waste.
Those figures should be read as manufacturer testing, not as a guaranteed household result. Waste varies with:
- the number and length of color changes;
- model geometry and infill;
- purge and wiping settings;
- nozzle condition;
- prime-tower requirements;
- material compatibility and temperature differences;
- slicer behavior; and
- failed prints and calibration routines.
The fairest way to evaluate savings in your own shop is to weigh four categories separately:
- the finished part;
- the prime tower;
- wipe, purge, and nozzle-clearing waste; and
- failed prints or calibration waste.
The U1’s strongest claim is therefore dramatically reduced purge waste, not zero waste.
Read Snapmaker’s product explanation and the specification notes.
Print quality: promising, but not yet a reliability verdict
Independent coverage suggests that U1 output can be competitive with substantially more expensive printers. In a direct comparison with the Bambu Lab H2C, Creative Bloq found the finished prints difficult to distinguish by quality, although both machines experienced some failures and build-plate releases. See the Creative Bloq comparison.
The useful questions for a serious buyer are not simply whether one sample looks good. Check:
What’s actually slowing this PC down?
Pick the symptom - the matching free tool is one click away.
- layer consistency across the entire build;
- alignment at tool-change boundaries;
- color bleed and seam visibility;
- small lettering and fine details;
- overhangs and bridges;
- articulated parts;
- HueForge-style multicolor surfaces;
- TPU and other flexible materials; and
- whether toolhead offsets remain stable over long prints.
A tool changer introduces a new failure category: a head that does not seat, lock, or measure correctly. Symptoms can include a first layer at the wrong height, shifted layers after a swap, misaligned colors, or a nozzle collision. The U1’s automated calibration should reduce setup work, but it cannot make a dirty nozzle, wet filament, poor adhesion, or a bad slicer profile disappear.
Materials: the missing cover changes the answer
The base U1 is not a fully enclosed engineering-material printer. Snapmaker’s official guidance lists the following ranges conditionally:
Rank #3
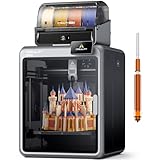
- Smarter Multicolor Printing with CFS: Creality K2 Pro Combo 3d printer works seamlessly with the CFS Smart Filament System, enabling up to 16-color and multi-material printing. Auto filament identification, intelligent feeding, and moisture-proof storage provide a hassle-free, worry-free printing experience.
- 300×300×300mm Large Build Volume: Creality K2 Pro 3D Printer offers a 300x300x300mm large build volume, ideal for printing big prototypes or multiple small parts in one batch. Increase productivity and reduce wait times with efficient batch printing. Perfect for ambitious creators and professionals.
- 600mm/s Ultra High-Speed: This Creality 3d printer powered by FOC step-servo motors system and linear rails, the K2 Pro achieves up to 600 mm/s print speeds with 20,000 mm/s² acceleration. Experience smooth, precise, high-speed performance while saving hours on production.
- Active Chamber Heating for More Stable Prints: K2 Pro can maintain a stable chamber temperature up to 60°C, preventing corner warping with filaments like ASA/PPA. It perfectly meets the temperature needs of professional materials , ensuring premium print quality. The K2 Pro supports a variety of printing materials such as PLA, ABS, ASA, PPA-CF, PET-CF, etc.
- Package Including & Worry-free Auto Leveling: The package contains the following items: 1* Creality K2 Pro 3D Printer + 1* Creality CFS + 1* 500g Hyper RFID Filament + 1* Creality K2 Pro Hardened Steel Nozzle. By probing only the areas where your model will be printed, this 3D printer can automatically and intelligently levels your print bed dramatically reducing setup time while ensuring perfect first-layer adhesion and reliable, high-quality results every time.
| Configuration | Officially listed material range |
|---|---|
| Without top cover | PLA, PETG, TPU, PVA, and PCTG |
| With optional top cover | PET, ABS, ASA, PA, and PC are included in the stated compatibility range |
| With top cover and hardened-steel nozzle | Carbon-fiber- and glass-fiber-reinforced polymers are listed as supported |
The cover is therefore more than a cosmetic accessory. It affects the practical material range, particularly for users printing ABS, ASA, nylon, or polycarbonate. Those materials can still require careful temperature management, ventilation, drying, and profile tuning. “Compatible” does not mean every combination will be equally easy or produce ideal dimensional stability.
A hardened nozzle is necessary for abrasive carbon-fiber- or glass-fiber-filled materials. Standard PLA, PETG, TPU, and PVA users may not need one.
Free tools Windows power users keep installed
One-click scans. No signup required.
TPU, PVA, nylon, and polycarbonate also make moisture control important. Wet filament can cause popping, stringing, weak layers, rough surfaces, inconsistent extrusion, and failed loading. The U1’s reduced purge design does not solve wet-filament problems.
Check the current material and nozzle conditions before ordering.
Software is the likely weak point
The U1 supports Snapmaker Orca and standard OrcaSlicer, but not Snapmaker Luban. Existing Snapmaker owners should not assume that the U1 will fit into the company’s older unified software workflow. Snapmaker’s FAQ confirms the slicer limitation.
New owners should begin with Snapmaker Orca because its profiles and toolhead mappings are intended for the U1. Experienced users may prefer standard OrcaSlicer if they need familiar tools or more control, but third-party support should be treated as a workflow to verify rather than an assumption of complete parity.
The software experience includes several separate tasks that should not be collapsed into the vague claim that the printer is “easy to use”:
- installing the correct slicer and printer profiles;
- painting colors or assigning tools to model bodies;
- assigning support materials;
- checking toolhead order and material mapping;
- reviewing purge, wipe, and prime-tower behavior;
- slicing and previewing every planned swap;
- sending the job by Wi-Fi or USB;
- monitoring the print through the camera; and
- recovering if a swap, loading operation, or print fails.
Early launch testing found software functions that did not initially work as expected on beta units. Tom’s Hardware and TechRadar both reported beta hardware or software quirks while Snapmaker was gathering feedback before retail shipments. Those observations are evidence of first-generation risk, not proof that every later retail unit has the same defects. Tom’s Hardware and TechRadar should be read with their review dates and unit status in mind.
Snapmaker’s FAQ described a planned open-source release for its modified Klipper/Moonraker software before March 2026. That planned release should not be presented as proof of current open-source status without checking the latest repository or official documentation.
Rank #4

- High-Speed Precision: Experience unparalleled speed and precision with the Bambu Lab A1 3D Printer. With an impressive acceleration of 10,000 mm/s², the A1 delivers blazing-fast printing while maintaining exceptional accuracy and detail in your prints.
- Multi-Color Printing with AMS lite: Unlock your creativity with vibrant and multi-colored 3D prints. The Bambu Lab A1 3D printers make multi-color printing accessible and reliable for everyone, bringing your designs to life in stunning detail. Note: AMS lite required, get A1 Combo or buy AMS lite seperately.
- Full-Auto Calibration: Say goodbye to manual calibration hassles. The A1 3D printer takes care of all the calibration processes automatically, ensuring optimal performance for every print. Enjoy a seamless printing experience with precise Z-offset, bed-leveling, and more.
- Active Flow Rate Compensation: Achieve consistently smooth prints with active flow rate compensation. The algorithm actively compensates the flow rate according to the readings to extrude with accuracy, ensuring flawless prints.
- Easy and Quiet 3D Printing: Experience effortless printing with the Bambu Lab A1 FDM 3D printer. Its user-friendly interface and simplified touchscreen make it easy to use. The 1-Clip quick swap nozzle ensures convenient maintenance and provides versatile printing options. Enjoy a quiet printing environment with active motor noise canceling, allowing you to focus on your work while the A1 FDM 3D printer brings your ideas to life
Setup and a sensible first-print plan
Assembly appears relatively minimal, broadly comparable to setting up a modern CoreXY printer. The likely workflow is:
Do these 3 things before closing this tab:
1Fix the driver behind crashes, sound loss and screen glitches2Clear out junk files and repair common Windows errors3Scan for outdated or missing drivers - takes under a minute- Remove the printer from its packaging.
- Install the four toolheads.
- Attach spool holders, filament tubes, and cables.
- Load each filament into the automatic filament system.
- Connect over 2.4 GHz Wi-Fi or prepare a USB flash drive.
- Install Snapmaker Orca.
- Run the printer’s calibration routines.
- Confirm toolhead offsets and flow behavior.
- Print a simple single-color test.
- Progress to two-color, four-color, and finally mixed-material jobs.
First-print checklist
Do not make a large, complex four-material model your first print. Use one material first, then two colors, then four colors. Before attempting TPU, PVA, nylon, or PC, verify profiles, dry the filament, and confirm that every toolhead loads, unloads, seats, and prints at the expected height.
Calibration and automation
The specification lists a broad set of automated systems:
- mesh bed leveling;
- input-shaping and vibration calibration;
- automatic flow compensation;
- pressure-advance calibration;
- automatic toolhead-offset calibration;
- coordinate-measuring calibration;
- filament runout detection;
- power-loss recovery;
- toolhead swap-error detection;
- build-plate presence and obstruction detection; and
- air-printing detection.
These features can reduce setup and improve consistency, particularly when four toolheads must remain aligned. They are not a guarantee against failure. Keep the nozzles clean, use a suitable material profile, dry hygroscopic filament, clean the build plate, and inspect the toolhead seating mechanism when a print changes height or alignment after a swap.
Workspace requirements
The U1 measures 584 × 499 × 730 mm and weighs 18.2 kg. Its 730 mm height is easy to underestimate, especially after adding space for filament routing, ventilation, and the optional cover.
The Tool Desk
Outbyte PC Repair FREEClear out junk files and repair common Windows errorsFree Scan →Outbyte Driver Updater FREEScan for outdated or missing drivers - takes under a minuteDriver Scan →Before buying, measure:
- table width and depth;
- ceiling or shelf clearance;
- door and cabinet swing;
- rear cable and tube clearance;
- spool access;
- clearance for the top cover;
- ventilation space; and
- room for a filament dryer.
No unsupported noise rating is included here, so buyers should not assume the U1 is quieter than competing printers without independent measurements.
Independent reader supportYour contribution helps us test, update, and keep practical guides available for everyone.Real cost: the base printer is not every buyer’s configuration
When checked on August 18, 2026, Snapmaker’s US store listed the U1 at $849, reduced from $999, but marked it unavailable. The optional top cover was listed at $149 on sale, normally $249, with shipping shown for November 1–15. Prices, stock, currency, and delivery dates are region- and date-sensitive; verify them immediately before publication or purchase. Check the official US listing.
Adding the printer and cover produced a pre-tax, pre-shipping total of $998 at those sale prices. That is effectively the former $999 printer list price, but with the enclosure purchased separately.
Other listed prices were:
- hardened-steel hot-end bundle: $49 sale, normally $79;
- SnapDryer bundle: $119 sale, normally $169;
- U1 Care: $99 sale, normally $119;
- SnapSpeed PLA: $22.99 per 1 kg roll;
- PETG: $19.99 per 1 kg roll;
- ABS: $22.99 per 1 kg roll; and
- TPU: $39.99 per 1 kg roll.
The printer supports standard 1.75 mm filament, so buyers do not have to use Snapmaker-branded filament. Official filament RFID recognition is a convenience, not a requirement. A dryer is most relevant for TPU, PVA, nylon, and other hygroscopic materials; a hardened nozzle is relevant to abrasive composites; and U1 Care is a protection decision rather than a performance upgrade.
Recommended Free Tools
Best Value

- High-Speed Precision: Experience unparalleled speed and precision with the Bambu Lab A1 Mini 3D Printer. With an impressive acceleration of 10,000 mm/s², the A1 Mini delivers blazing-fast printing while maintaining exceptional accuracy and detail in your prints.
- Multi-Color Printing with AMS lite: Unlock your creativity with vibrant and multi-colored 3D prints. The Bambu Lab A1 Mini 3D printers make multi-color printing accessible and reliable for everyone, bringing your designs to life in stunning detail. Note: AMS lite required, get A1 Mini Combo or buy AMS lite seperately.
- Full-Auto Calibration: Say goodbye to manual calibration hassles. The A1 Mini 3D printer takes care of all the calibration processes automatically, ensuring optimal performance for every print. Enjoy a seamless printing experience with precise Z-offset, bed-leveling, and more.
- Active Flow Rate Compensation: Achieve consistently smooth prints with active flow rate compensation. The algorithm actively compensates the flow rate according to the readings to extrude with accuracy, ensuring flawless prints.
- Easy and Quiet 3D Printing: A1 mini 3D printer offers easy printing with a user-friendly interface and simplified touchscreen. Setup for your first print takes just 20 minutes thanks to its pre-assembled design. The 1-Clip quick swap nozzle allows for convenient maintenance and versatile printing options. Plus, enjoy a quiet printing environment with active motor noise cancellation, ensuring ≤48 dB noise levels.
How the U1 compares with alternatives
| Alternative | Best for | Main trade-off against the U1 |
|---|---|---|
| Bambu Lab A1 Combo | Lower-cost entry and a mature consumer workflow | Uses filament switching, so heavily multicolor jobs can produce more purge waste and cross-contamination |
| Anycubic Kobra S1 Combo | Users who want an enclosed multicolor alternative | Different hardware, slicer, support experience, and material workflow |
| Bambu Lab H2C | Existing Bambu users wanting a premium, integrated ecosystem | Much higher cost, although it offers broader expansion with the appropriate configuration |
| Original Prusa XL | Prosumer workshops wanting an expandable five-toolhead platform | Much larger and more expensive |
Creality’s multicolor systems may offer attractive pricing, but compare enclosure, slicer maturity, support, and actual tool-change behavior rather than choosing on price alone.
Creative Bloq’s U1-versus-H2C comparison found similar apparent print quality, while favoring the H2C for users already invested in Bambu’s ecosystem and the U1 for lower-cost simplicity. The comparison should be treated as review evidence, not a universal ranking.
Who should buy the Snapmaker U1?
Buy it if:
- you print frequent multicolor models;
- purge waste is a major concern;
- you want four loaded colors or materials without paying Original Prusa XL prices;
- fast physical tool changes matter;
- you want a 270 mm build volume;
- you are comfortable learning a newer slicer workflow;
- you do not require a complete enclosure immediately; and
- you accept first-generation ecosystem risk.
Avoid or delay it if:
- you mostly print single-color parts;
- you want the most mature, frictionless ecosystem;
- you need an enclosed chamber from day one;
- you print large volumes of abrasive engineering material;
- you need more than four active colors without reloading;
- you require extensive long-term reliability data;
- you dislike proprietary or rapidly changing software; or
- the machine is unavailable in your region.
Bottom line
The Snapmaker U1’s hardware strikes hard because it solves a real multicolor-printing problem at its source. Four dedicated toolheads make color and material changes much faster than conventional filament switching, while reducing the purge waste that can make multicolor printing expensive and slow.
That makes the U1 especially compelling for multicolor hobbyists, prop builders, educators, and small workshops producing prototypes or visual parts. It is less compelling as a general-purpose first printer for someone who mostly prints single-color PLA or wants the most mature software and support ecosystem.
Buy the U1 for its tool-changing efficiency. Budget separately for the cover, hardened nozzle, dryer, filament, and protection if your work requires them—and check stock before treating the listed price as a real purchase option.
Frequently Asked Questions
Is the Snapmaker U1 a zero-waste 3D printer?
No. It dramatically reduces purge waste during color changes, but it can still produce waste from nozzle clearing, wiping, priming, calibration, prime towers, and failed prints.
Does the Snapmaker U1 include an enclosure?
The base machine does not include a complete top cover. Snapmaker listed the optional U1 top cover at $149 on sale, normally $249, when checked August 18, 2026.
Can the U1 print ABS, nylon, or polycarbonate?
Snapmaker lists those materials with the optional top cover. Carbon-fiber- and glass-fiber-filled materials additionally require the appropriate hardened-steel nozzle. Drying, ventilation, and material-specific tuning remain necessary.
Does the U1 use Snapmaker Luban?
No. The U1 supports Snapmaker Orca and OrcaSlicer rather than Snapmaker Luban.
Is 500 mm/s the U1’s normal print speed?
No. It is the published maximum toolhead speed. Real print speed depends on material, geometry, layer height, cooling, volumetric flow, and quality settings.
The Bottom Line
Bottom line: The Snapmaker U1 is a strong buy for users who will exploit four fast, dedicated toolheads. It is a weaker choice for enclosure-first, software-first, or availability-first buyers.
Quick Recap
Product prices and availability are accurate as of the date/time indicated and are subject to change. Any price and availability information displayed on Amazon at the time of purchase will apply.




