The Tool Desk
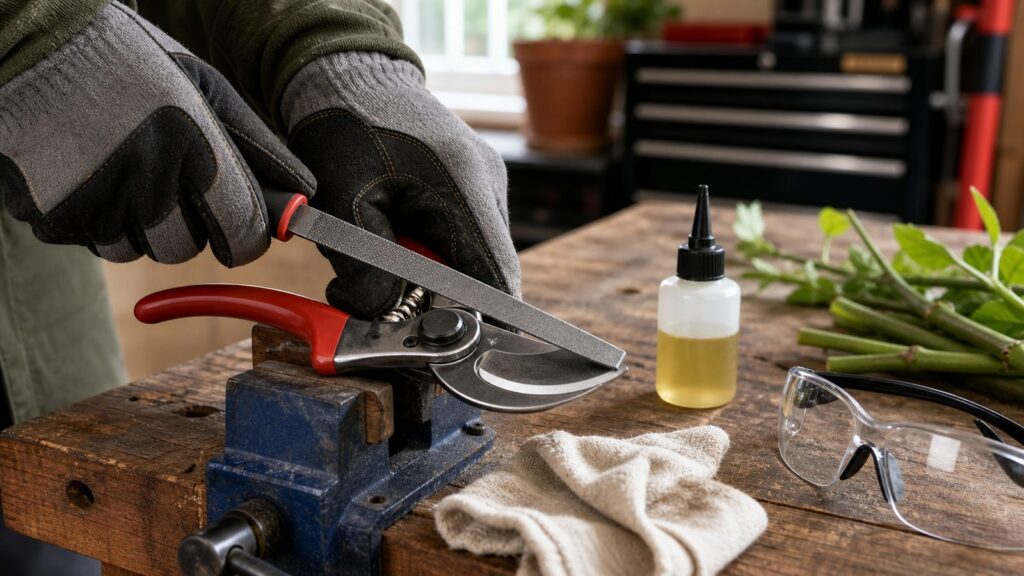
Outbyte Driver Updater FREEFix the driver behind crashes, sound loss and screen glitchesFind Drivers →Outbyte PC Repair FREERepair Windows errors before they cause bigger problemsFix Now →Dull garden shears are not just frustrating. They crush stems, tear bark, make your hands work harder, and leave ragged wounds that take longer for plants to close. The fix is usually simple: clean the tool, secure the blade, follow the factory bevel with a file or diamond sharpener, remove the burr, disinfect, oil, and adjust the pivot.
For most homeowners, sharpening a pair of hand pruners takes 15 to 30 minutes the first time and less than 10 minutes once you understand the blade geometry. A basic DIY sharpening setup costs about $10 to $45. A fuller maintenance kit with alcohol, oil, steel wool, gloves, eye protection, rags, and a clamp or Bench vise usually lands around $25 to $75 if you are starting from scratch. Professional sharpening is still inexpensive, commonly around $8 to $20 for hand pruners, $12 to $25 for loppers, and $15 to $30 for manual hedge shears in the U.S. in 2026.
On our job sites, we treat shears the same way we treat any cutting tool: identify the edge, clean before sharpening, remove the least metal needed, and never ignore safety. The goal is not to make the blade look shiny. The goal is to restore the original cutting geometry so the tool closes cleanly without binding.
As an Amazon Associate I earn from qualifying purchases.
What’s actually slowing this PC down?
Pick the symptom - the matching free tool is one click away.
Know What Kind of Shears You Are Sharpening
Before you touch a file to the blade, identify the tool. The sharpening method changes depending on how the blades meet. This is where many homeowners damage otherwise good tools.
Bypass pruners
Bypass pruners, also called secateurs, work like scissors: one sharpened blade passes closely beside a thicker hook or counter-blade. These are the best choice for live stems and green growth because they make a cleaner cut.
#1 Best Overall

- Tungsten Carbide Blade for Fast, Effective Sharpening – Features a durable tungsten carbide sharpening edge that restores a sharp, clean blade in just a few strokes, helping pruners, loppers, shears, and knives cut smoothly with less resistance.
- Works on a Wide Range of Garden & Outdoor Tools – Ideal for sharpening pruning shears, loppers, hedge clippers, axes, machetes, lawn tools, folding saws, and household knives, making it a versatile addition to any gardener’s or landscaper’s toolkit.
- Compact, Lightweight & Portable Design – Slim, pocket-sized sharpener is easy to carry in tool belts, garden aprons, or backpacks for quick touch-ups in the field, ensuring your tools stay sharp during pruning, landscaping, and outdoor projects.
- Safe, Non-Slip Ergonomic Handle – Designed with a comfortable, slip-resistant grip that provides better control and increased safety while sharpening, preventing slips and ensuring steady, accurate sharpening angles.
- Extends Tool Life & Improves Cutting Performance – Regular sharpening with this tool helps maintain clean, smooth cutting edges that reduce hand fatigue, enhance tool efficiency, and promote healthier, cleaner cuts when working with plants and branches.
Most bypass pruners are single-bevel tools. That means you sharpen the outside beveled face only. The flat inside face should stay flat. After sharpening, you make one or two very light passes on the flat side only to remove the burr. Do not create a second bevel on the inside face.
Anvil pruners
Anvil pruners cut by pressing one sharpened blade down onto a flat anvil. They are useful for dead wood, dry stems, and rougher cutting. The cutting blade still needs a clean bevel, but the anvil surface also matters. If the anvil is grooved, chipped, or no longer square, the tool may crush material even after the blade is sharp.
Windows Errors? Fix Them Before They Spread
Repair common Windows errors and clear accumulated junk for a smoother, more stable PC - no reinstall needed.Free scan · no reinstallOutdated Drivers Are Slowing You Down
One free scan finds every outdated or missing driver and matches the right update for your exact hardware.Free scan · exact hardware matchManual hedge shears
Manual hedge shears have two long blades and are built for shaping soft hedge growth, not chewing through thick branches. A practical branch limit for many manual hedge shears is about 1/2 inch. For thicker wood, use bypass loppers, a pruning saw, or a powered hedge trimmer rated for the material.
Hedge shears need even sharpening along both blades and proper alignment. If the blades are bent, wavy, or loose at the pivot, sharpening alone will not fix the cut.
Grass shears
Grass shears are lighter-duty tools for trimming turf edges and fine green material. They dull quickly if used against soil, gravel, edging stone, or concrete. Treat them like small scissors: clean the blades well, follow the existing bevel, and avoid removing more metal than necessary.
Tools and Supplies You Need
You do not need a shop full of equipment. A simple file or diamond sharpener is often better than a high-speed grinder because it gives you control and keeps the blade cool.
- 6-inch smooth file or mill file: Good for larger hedge shears and heavier pruner blades.
- Pocket diamond sharpener: Good for bypass pruners, grass shears, and touch-ups. Many portable garden-tool sharpeners sell in the $10 to $45 range, with some diamond sharpeners around $40.
- Sharpening stone: Useful for refining the edge and removing burrs.
- Permanent marker: Marks the bevel so you can see whether you are following the existing angle.
- Bench vise or clamp: Holds the tool steady. A moving blade is a cut hazard and makes rounded, uneven edges more likely.
- Gloves and eye protection: Wear cut-resistant gloves if you have them, plus safety glasses.
- Rags, stiff brush, and steel wool: For sap, dirt, and light rust.
- 70% isopropyl alcohol or ethanol: Fast disinfecting between plants, especially after cutting diseased material.
- Light machine oil or garden-tool oil: For the pivot and a thin protective film on carbon-steel blades.
- Wrench or screwdriver: For pivot adjustment or disassembly if your tool is serviceable.
Avoid aggressive grinding unless you know exactly what you are doing. High-speed grinders can overheat the edge, remove too much metal, round the tip, and change the blade profile. If you use any powered tool, use eye protection, keep the blade secure, make light passes, and stop before heat builds up.
Clean the Shears Before Sharpening
Sharpening a dirty blade is like sanding over mud. Sap, soil, rust, and plant residue clog stones and files, hide chips, and make it harder to see the bevel. Cleaning also keeps disease from moving around the garden.
Rank #2

- ONE TOOL FOR EVERY BLADE: Tired of a drawer full of single-purpose sharpeners? The Orange Ninja 7-in-1 garden tool & knife sharpener puts a razor edge back on axes, hatchets, machetes, pocket knives, pruners, hedge shears - One lightweight tool for your garden, workshop, and camping pack. One purchase replaces four or five separate sharpeners.
- KEEPS YOUR GARDEN TOOLS CUTTING CLEAN: Dull pruners crush stems instead of slicing them, and that tears your plants. Run pruning shears, loppers, and hedge shears across the Orange Ninja a few times and they bite clean again - healthier cuts and far less fighting your tools. It’s the garden tool sharpener reviewers are most surprised actually works on hand tools.
- EASIER THAN A SHARPENING STONE: No whetstone, no balancing the blade at a perfect angle. The fixed tungsten-carbide slots set the angle for you, so a few steady pulls do what a sharpening stone takes real practice to pull off. Go slow and let the slot guide the edge - that’s the whole technique, and it’s why buyers call it easier than a stone.
- POCKET-SIZED FOR CAMP AND EDC: A dull blade in the field is a safety problem, not just an annoyance. At 1.5 oz the Orange Ninja slips into a pocket, pack, or tackle box, so your pocket knife and camp knives stay field-sharp wherever you go — light enough to forget you’re carrying it until you need it.
- BUILT FOR THE BLADES IT’S MADE FOR Honest truth: this is built for pocket knives, pruners, shears, axes & straight blades — not for, lawn mower blades, or serrated edges. Stick to the blades it’s designed for and the hardened tungsten elements keep them sharp through years of regular use. Right tool, right job, right edge.
- Brush off soil and dry debris. Use a stiff brush and rag. Pay attention to the pivot area and the inside faces of the blades.
- Remove sap. Use rubbing alcohol on a rag, or a mild cleaner if the buildup is heavy. Work until the cutting edge is visible from heel to tip.
- Remove light rust. Use fine steel wool or a rust eraser. Heavy pitting near the cutting edge may be a sign the blade needs replacement.
- Disassemble only if needed. Full disassembly is useful at the start, middle, and end of pruning season, or when the pivot is packed with grime. Routine touch-ups usually do not require taking the tool apart.
- Dry the tool. Do not sharpen wet, slippery handles or blades.
If the shears were used on diseased plants, disinfect before and after sharpening. For between-plant work, 70% isopropyl alcohol or ethanol is fast because it can be wiped or dipped on pruning equipment without a long soak. A 10% bleach solution can disinfect, but it needs at least a 3-minute soak, then rinsing and drying. Bleach is also more corrosive, so we reserve it for cases where it makes sense and never leave it sitting on metal.
Find and Mark the Factory Bevel
The factory bevel is the sloped face that forms the cutting edge. Your job is to refresh that angle, not invent a new one. On many pruning shears, the bevel is roughly in the 20- to 30-degree range, but the exact number matters less than matching the tool in your hand.
Use a permanent marker to color the existing bevel. Then place your file or diamond sharpener flat against that bevel and make two light test strokes. If the marker disappears evenly across the bevel, your angle is right. If the marker disappears only at the very edge or only at the shoulder of the bevel, adjust your hand angle before continuing.
This marker trick is simple, but it prevents the most common sharpening mistake: rolling the edge. A rounded edge may look polished, but it will not cut cleanly.
How to Sharpen Bypass Pruners
Bypass pruners are the tool most homeowners care about, and they are also the easiest to mess up by sharpening both sides. Remember the rule: sharpen the beveled outside face, then lightly remove the burr from the flat inside face.
Step-by-step method
- Lock the pruners open. If your pruners have a latch, open the tool fully. If needed, remove the spring so the handles do not fight you.
- Clamp the tool securely. Use a bench vise or clamp. Position the beveled face where you can make controlled strokes away from your body.
- Mark the bevel. Color the bevel with a permanent marker from heel to tip.
- Follow the bevel. Place the file or diamond sharpener on the bevel and push from the hinge area toward the tip. Use light, consistent strokes.
- Count your strokes. Start with 5 to 10 strokes, then inspect. Counting keeps you from overworking one section.
- Work the full edge. Keep the sharpener in contact with the bevel through the curve of the blade. Do not dig into the tip.
- Check for a burr. A small wire edge will form on the flat inside face. You can usually feel it with a fingernail, but do not test sharpness with your fingertip.
- Remove the burr. Lay the stone or file nearly flat on the inside face and make one or two very light passes. The goal is only to knock off the burr, not to create a second bevel.
- Wipe clean and test. Cut a small green twig, a strip of paper, or the shaved edge of a pencil. The tool should cut cleanly without crushing.
If the pruners still crush stems after sharpening, look at the pivot. Sharp blades perform poorly when the hinge is loose, dirty, or overtightened. The cutting blade and hook should pass close together without scraping hard or binding. Tighten or loosen the pivot nut in small increments, then test again.
How to Sharpen Anvil Pruners
Anvil pruners are less delicate than bypass pruners, but they still need the right geometry. The blade should meet the anvil squarely. If the blade is sharp but the anvil is worn into a groove, the cut will still feel poor.
- Clean and inspect the anvil. Look for grooves, cracks, missing chunks, or a loose anvil plate.
- Clamp the cutting blade. Keep the edge facing away from your body.
- Sharpen the bevel. Follow the existing bevel with a file or diamond sharpener. Use light strokes from heel to tip.
- Keep the meeting face flat. Do not round the back of the blade where it contacts the anvil.
- Dress the anvil only if appropriate. If the anvil has a minor raised burr, flatten it lightly. If it is deeply grooved or replaceable, replacement is usually better.
- Adjust and test. The blade should meet the anvil firmly without side play.
Anvil pruners are often used on dead, dry material, which is harder on edges. If you cut dry branches often, plan on touch-ups every few work sessions instead of once a season.
Rank #3

- ONE-STOP GARDEN TOOL SHARPENER: The Garden Tool Sharpener restores and sharpens most blades to their sharpest condition in just a few strokes, ensuring peak performance with minimal effort - an ideal solution for maintaining razor-sharp edges on a vast array of tools including lawn mower blades, axes, hatchets, machetes, pruners, hedge shears, and scissors.
- VERSATILE & EASY TO USE: Our Garden Tool Sharpener is designed to sharpen a variety of single-edged, hard-to-sharpen items in your tool shed such as lawnmower blades, pruning shears, limb loppers, hoes, shovels, and scythes. This GardenSharp tool not only quickly sharpens very dull or damaged blades, but also hones razor-sharp edges.
- DIAMOND-HONED TUNGSTEN CARBIDE SHARPENER: AccuSharp sharpening blades are crafted from diamond-honed tungsten carbide, one of the hardest known materials. With its unique design, the sharpening blades can be reversed doubling its life span.
- DEPENDABLE & LONG-LASTING CONSTRUCTION: Most users report an average of 5 to 10 years between blade replacements. AccuSharp Garden Tool Sharpeners are double-beveled and can be cleaned easily with soap and water or in your dishwasher. Crafted with high-quality materials, this tool sharpener is built to last, providing years of reliable sharpening.
- SAFE & ERGONOMIC DESIGN FOR COMFORT: Featuring a unique, ergonomic handle, the AccuSharp fits neatly in either hand to accommodate both right-handed and left-handed users. It includes a full-length guard that protects your fingers throughout the sharpening process. The comfortable and secure grip makes the sharpening process both safe and easy for anyone to use.
How to Sharpen Manual Hedge Shears
Manual hedge shears need a longer, more even edge than hand pruners. The work is not difficult, but it rewards patience. Uneven sharpening can create a blade that grabs in one area and misses in another.
- Clean both blades completely. Hedge shears collect sap along the full blade length. Remove it before sharpening.
- Inspect alignment. Open and close the shears slowly. The blades should pass closely along their length. If they gap badly, sharpening will not solve the problem.
- Clamp one blade at a time. Secure the tool so the blade cannot flex while filing.
- Mark the bevel. Use a marker along the full length.
- File from the pivot toward the tip. Use long, smooth strokes that follow the bevel. Keep stroke pressure consistent.
- Count strokes per section. For example, use 6 strokes near the heel, 6 in the middle, and 6 near the tip, then inspect. Repeat only where needed.
- Repeat on the second blade. Match the same approach so the two blades stay balanced.
- Remove burrs lightly. Use one or two flat passes on the back side of each blade.
- Oil the pivot and test. The shears should open smoothly and cut clean hedge growth without folding it over.
If long hedge shears are bent or badly out of alignment, hire a sharpening service or replace them. A professional can often correct minor alignment issues, but stamped low-cost blades with permanent twist are rarely worth chasing.
Disinfecting, Oiling, and Adjusting After Sharpening
A sharp edge is only one part of a working tool. The pivot, spring, handles, and blade surfaces all affect the cut.
Disinfecting
Use 70% isopropyl alcohol or ethanol when moving from a diseased plant to a healthy plant. Wipe or dip the blades, then let them dry. This is quick enough to use during real pruning work.
If you use a 10% bleach solution, soak the tool for at least 3 minutes, then rinse and dry it thoroughly. Bleach left on steel encourages corrosion, especially around pivots and springs.
Lubricating
Add one or two drops of light machine oil to the pivot. Open and close the tool 10 to 20 times to work the oil in, then wipe away excess. For carbon-steel blades, wipe a very thin film of oil over the blade before storage. The blade should not be wet with oil; it should just have a protective film.
Free tools Windows power users keep installed
One-click scans. No signup required.
Pivot adjustment
For bypass pruners, the blade and hook should pass close together without a visible gap. If the pivot is too loose, the stem can wedge between the blades and tear. If it is too tight, the tool binds and wears faster. Adjust the nut or screw in small steps, then test on a twig.
What Sharpening Should Cost in 2026
Sharpening is almost always cheaper than replacing a quality tool. The exception is a low-cost, non-serviceable pair of shears with bent blades, cracked handles, or a loose pivot that cannot be tightened.
Rank #4

- VERSATILE – The most versatile sharpener in the market to sharpen and hone both single and double beveled blades including knife, mower blade, pruner, loppers, hedge shears, axe, machete, hatchet, scissors, edged tool, etc.
- SUPERIOR SHARPENING PERFORMANCE – As blades vary from different angles, shape, single or double bevel, etc., to fulfill the best sharpening performance for each blade / tool edge, this item is constructed of 5 sharpening parts including 3 different slots of preset optimal sharpening angle, one specially designed tungsten carbide bar, and one ceramic bar.
- DURABLE – All sharpening abrasive materials pass 10,000 times field use test. NEVER WEARS OUT
- SAFE & COMFORTABLE USE – Oversized handle allows for use with gloves. Large hand guard to protect your hands from hurting by blades. Rubber over-molded handle and base provide secure and comfortable grip.
- 3 YEARS of Commitment and Superior After-Sale Service: SHARPAL, headquartered in California, USA, with branches in Germany and Australia, provides easy and effective sharpening solutions. All products undergo rigorous testing to ensure top-tier performance and durability.
| Option | Typical 2026 Cost | Best For | Watch Outs |
|---|---|---|---|
| Basic DIY sharpener | $10-$45 | Touch-ups on pruners, grass shears, and light hedge shears | Requires correct bevel technique |
| Full DIY maintenance kit | $25-$75 | Homeowners maintaining several tools each season | Cost rises if you need a vise or clamp |
| Professional hand-pruner sharpening | $8-$20 | Higher-quality bypass or anvil pruners | May cost more with rust, chips, or parts replacement |
| Professional lopper sharpening | $12-$25 | Large bypass or anvil loppers | Shipping can change the value on mail-in work |
| Professional manual hedge-shear sharpening | $15-$30 | Long blades, alignment issues, expensive tools | Bent blades may still need replacement |
| Replacement tool | Under $30 for budget tools; $40-$170+ for better sets | Cracked handles, bent stamped blades, non-serviceable pivots | Cheap replacements may dull quickly |
A current professional-grade garden tool set can run around $169, while basic pruning-shear sets can be under $30. That price spread matters. We would not spend $25 sharpening a $12 tool with a loose riveted pivot. We would absolutely spend $15 maintaining a quality pruner with replaceable blades, springs, and hardware.
Independent reader supportYour contribution helps us test, update, and keep practical guides available for everyone.When to DIY, Hire a Pro, Repair, or Replace
The right decision depends on tool value, damage, and whether the tool has serviceable parts. Use this as a practical field guide.
Quick wins for a faster PC:
Clear out junk files and repair common Windows errorsFree Scan →Scan for outdated or missing drivers - takes under a minuteDriver Scan →Repair Windows errors before they cause bigger problemsFix Now →| Tool Condition | Best Choice | Reason |
|---|---|---|
| Lightly dull, no chips, pivot works | DIY sharpen | Fast, low-cost, low-risk with a file or diamond sharpener |
| Sap buildup and minor rust | Clean, then DIY sharpen | Most performance loss may be dirt and friction |
| Quality pruners with replaceable blade | DIY or pro sharpen | Worth preserving; replacement parts extend life |
| Deep nicks or rolled edge | Hire a pro | Removing damage evenly takes more skill and metal control |
| Long hedge shears with blade gap | Hire a pro or replace | Alignment matters as much as sharpness |
| Bent blade, cracked handle, loose non-serviceable pivot | Replace | Sharpening will not restore safe cutting geometry |
| Powered hedge-trimmer blades | Hire a pro unless trained | Multiple teeth, spacing, and safety risks make DIY less attractive |
For expensive Felco-style, ARS-style, or other professional pruners, professional sharpening can be a smart annual service. For low-end tools with riveted pivots and soft stamped blades, replacement may be the better value once the tool bends or loosens.
Safety Notes Before You Start
Garden shears look simple, but a freshly sharpened bypass blade can open a hand quickly. Treat sharpening like any other tool operation.
- Clamp the blade. Do not hold a loose blade in one hand while filing with the other.
- Push away from your body. Work from the hinge toward the tip where the tool shape allows it.
- Wear eye protection. Small filings, rust, and wire burrs can break loose.
- Use gloves wisely. Cut-resistant gloves help, but do not let bulky gloves reduce control around the edge.
- Do not test with fingers. Use paper, a twig, or controlled visual inspection.
- Respect powered tools. Grinders and rotary tools require guards, stable workholding, and eye protection. Stop if the blade gets hot.
- Work in good light. You need to see the bevel, burr, and pivot clearly.
No permit is required to sharpen hand garden tools at home, but common shop safety still applies. If you are using powered equipment in a garage or shed, keep cords clear, secure the work, and keep sparks away from rags, solvents, and dry yard debris.
Common Mistakes That Make Shears Cut Worse
The fastest way to ruin a decent pair of shears is to remove metal without understanding the blade. Watch for these mistakes.
Recommended Free Tools
- Sharpening both sides of a bypass blade. This changes the geometry and can make the blades push stems apart instead of slicing.
- Using heavy grinder pressure. Heat and aggressive grinding can soften or damage the edge.
- Skipping the pivot. A sharp blade still cuts poorly if the hinge is loose, dirty, or overtightened.
- Sharpening over sap and dirt. Residue clogs the file and hides damage.
- Forgetting to disinfect. Dirty pruning tools can carry disease from one plant to another.
- Leaving bleach or water on the blade. Moisture and bleach residue accelerate corrosion.
- Cutting oversize branches. Manual hedge shears are not loppers. Forcing them through thick wood rolls the edge and strains the pivot.
- Relying on foil tricks. Folded aluminum foil may wipe off residue, but it is not a substitute for a real file, stone, or diamond sharpener.
How Often to Sharpen Garden Shears
For seasonal home use, sharpen and service pruning tools at the start, middle, and end of pruning season. That schedule works well for most homeowners because it catches rust, sap, loose pivots, and dull edges before they become bigger problems.
If you prune weekly, cut dry wood, maintain hedges, or work around sandy soil, touch up the edge more often. A 2-minute touch-up after a heavy pruning session is better than waiting until the tool crushes stems. For light work, cleaning and oiling may be enough between full sharpenings.
Storage makes a big difference. Put shears away dry, closed, and hung or sheathed so the edge is not knocked against shovels, concrete, or other steel tools. A thin oil film before winter storage can prevent the rust that turns a 10-minute tune-up into a full repair job.
Best Value

- Durable tungsten carbide blade: This tungsten carbide sharpener is widely used for quickly sharpening or repairing damaged blades. It is particularly common in gardening, where it can be employed to hone nearly all types of garden tools.
- Ensure you use the corner of the tungsten carbide tool against the cutting edge for sharpening. Do not use the flat surface
- Pure Ceramic blade: This ceramic blade component is designed primarily for fine honing tasks. It effectively removes residual burrs from blades previously honed with tungsten carbide tools. Additionally, it can be employed directly on delicate blades that require gentle handling to preserve their sharpness, making it ideal for kitchen knives and similar utensils.
- Patented Versatile: Restore and hone all sorts of pruners, knives, lawn mower blade, garden shears, axe, garden tools edge, etc.
- Portable design with pen clip: The innovative design, featuring a pen clip on the cap, ensures the product is securely held in place when stored in a pocket. Ergonomic and comfortable grip handle with lanyard hole.
A Practical Sharpness Test
Do not run your thumb along the edge. A garden shear does not need to shave hair to work well, and that test is not worth the risk.
Do these 3 things before closing this tab:
1Fix the driver behind crashes, sound loss and screen glitches2Repair Windows errors before they cause bigger problems3Scan for outdated or missing drivers - takes under a minuteFor bypass pruners, cut a small green twig about 1/8 to 1/4 inch thick. The cut should be clean, with little crushing. You can also cut a strip of paper near the tip and heel to check for dead spots. For hedge shears, trim a few soft hedge stems and watch whether the blades slice or fold the material. For grass shears, cut a small bunch of grass cleanly without yanking.
If the tool cuts well at the heel but not the tip, inspect the tip bevel and blade alignment. If it cuts only when you squeeze hard, check the pivot. If it leaves ragged cuts everywhere, return to the bevel and look for remaining marker, chips, or a burr that was not removed.
Bottom Line
Sharpening garden shears is a small maintenance job with a big payoff. Clean the tool first, clamp it securely, follow the original bevel, use light strokes, remove only the burr from the flat side, then disinfect, oil, and adjust the pivot. That process protects the tool and gives your plants cleaner cuts.
DIY sharpening makes sense for most dull pruners, grass shears, and lightly worn hedge shears. Hire a pro for expensive tools, deep nicks, long hedge shears with alignment issues, and powered hedge-trimmer blades. Replace the tool when the blade is bent, the handle is cracked, or the pivot cannot be serviced. A sharp edge helps, but only a straight, clean, properly adjusted tool will cut the way it should.
Frequently Asked Questions
What angle should garden shears be sharpened at?
Follow the original factory bevel rather than chasing a universal number. Many pruning shears fall roughly in the 20- to 30-degree range, but marking the bevel with a permanent marker is more reliable. When the marker disappears evenly, you are holding the correct angle.
Do you sharpen both sides of pruning shears?
Usually no. Most bypass pruning shears are single-bevel tools. Sharpen the outside beveled face only, then make one or two very light flat passes on the inside face to remove the burr. Do not grind a second bevel into the flat side.
Can I sharpen garden shears with a file?
Yes. A 6-inch smooth file, mill file, or diamond file works well for most garden shears. Clamp the blade securely, push the file away from your body, follow the existing bevel, and use light, even strokes from the hinge area toward the tip.
Should I clean or disinfect shears before sharpening?
Clean them first every time. Sap, dirt, and rust clog files and hide blade damage. If the shears touched diseased plants, disinfect with 70% isopropyl alcohol or ethanol before moving to healthy plants. A 10% bleach solution can work but needs at least a 3-minute soak, followed by rinsing and drying.
When should garden shears be replaced instead of sharpened?
Replace shears when the blades are bent, deeply chipped, cracked, or badly pitted, when the handle is cracked, or when a loose riveted pivot cannot be tightened. For quality tools with replaceable blades and springs, repair or professional sharpening is usually a better value.
How much does professional garden-tool sharpening cost in 2026?
Typical U.S. pricing in 2026 is about $8 to $20 for hand pruners, $12 to $25 for loppers, and $15 to $30 for manual hedge shears. Mobile, rush, mail-in, or heavily rusted tools can cost more.
Quick Recap
Product prices and availability are accurate as of the date/time indicated and are subject to change. Any price and availability information displayed on Amazon at the time of purchase will apply.

