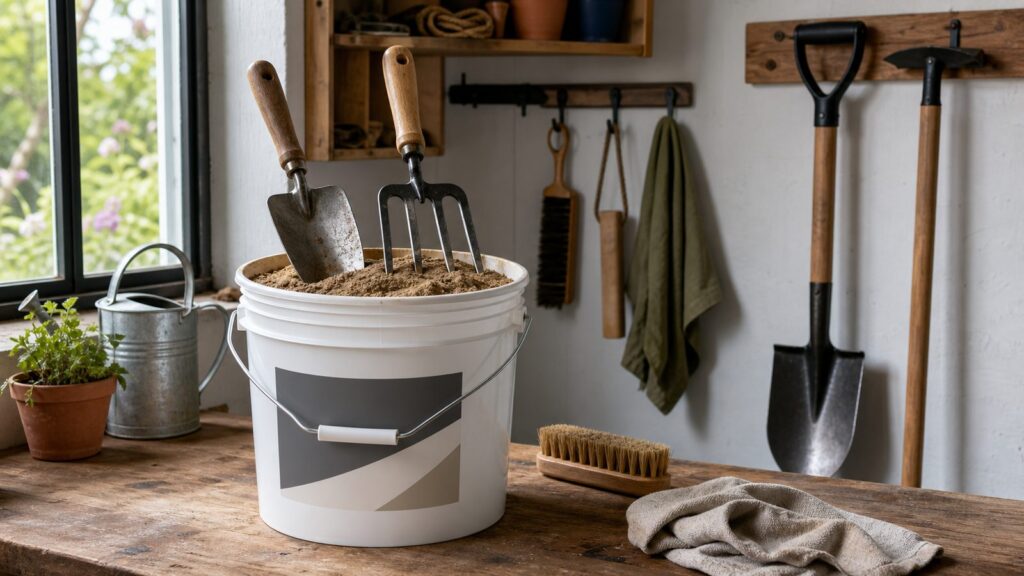
A bucket of sand and oil is one of the simplest ways to keep garden hand tools cleaner and less rusty between uses. The method is straightforward: fill a 5-gallon bucket most of the way with clean, dry sand, mix in enough oil to make the sand slightly damp, then push clean, dry metal tools into the bucket a few times before storage. The sand gives mild abrasion. The oil leaves a thin rust-inhibiting film.
Used correctly, this is a maintenance station, not a miracle cleaner. It does not disinfect pruning shears. It does not sharpen a hoe like a file. It does not fix pitted steel, loose handles, bent tines, or a shovel that was put away wet for three winters. What it does well is make routine tool care easy enough that you actually do it after a Saturday in the yard.
As an Amazon Associate I earn from qualifying purchases.
On our job sites, the same principle shows up everywhere: clean the tool, dry the tool, oil the tool, store the tool off wet ground. Garden tools are cheaper than construction tools, but neglect works the same way. Soil holds moisture against steel. Sap gums up pivots. Rust starts at scratches and worn edges. Ten seconds at a cleaning bucket can save a $20 trowel, a $45 shovel, or a set of pruning tools that should last for years.
Free tools Windows power users keep installed
One-click scans. No signup required.
What the Sand-and-Oil Method Actually Does
The sand-and-oil method combines two jobs in one bucket. First, the sand acts as a mild abrasive. When you plunge a trowel, weeder, hand cultivator, hoe, or shovel into the sand, the grains scrape off loose soil, light rust, and surface oxidation. Second, the oil coats exposed metal with a thin film that slows moisture from reaching the steel.
#1 Best Overall
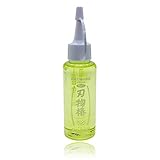
- Prevents rust on various carbon steel products such as knives, scissors, sewing machines, gardening tools, etc.
- Clean the cutlery and dry it completely. Then, take an appropriate amount and apply it on a cloth.
- It can also be used as a lubricant for machinery and tool products.
- Contents: 100ml
- Made in JAPAN
The key phrase is thin film. Your tools should not come out dripping. If the sand looks wet, clumps heavily, or leaves oil running down the blade, there is too much oil in the mix. The right texture is closer to damp beach sand than mud. You should be able to push a tool into it smoothly, pull the tool out, and wipe off a light dusty-oily residue with a rag.
This method is best for garden tools with simple metal surfaces: trowels, transplanters, hori-hori style digging knives, weeders, bulb planters, hand cultivators, hoes, shovels, spades, and garden forks. It is less useful for tools with precision edges or moving joints, such as bypass pruners, loppers, hedge shears, saws, and harvest knives. Those tools need separate cleaning, disinfecting, sharpening, and careful oiling.
Materials and 2026 Cost Breakdown
Most homeowners can build a useful sand-and-oil station for about $12 to $35 in 2026. If you add a tight lid, wire brush, disinfectant, sharpening file, and premium oil, the setup can run closer to $45 to $90. That is still less than replacing several neglected hand tools.
What’s actually slowing this PC down?
Pick the symptom - the matching free tool is one click away.
A standard setup uses a 5-gallon plastic bucket filled roughly 4/5 full with clean sand, plus about 1 quart of oil mixed through the sand. A full 5-gallon bucket is awkward and unnecessarily heavy, so leave several inches at the top. That extra headroom lets you plunge tools without throwing sand onto the floor.
| Item | Typical 2026 Cost | What to Buy |
|---|---|---|
| 5-gallon bucket | $3.98 to $9 | Standard plastic bucket; add a lid if storing outside or in a damp shed |
| Bucket lid | $2 to $5 | Snap-on lid to keep rain, insects, leaves, and dirt out |
| 50-lb bag of sand | $4 to $8 | Washed play sand or all-purpose sand; avoid mixes with cement or additives |
| Boiled linseed oil, 1 qt | About $15.48 | Good for metal coating and wood handles; handle oily rags carefully |
| Food-grade mineral oil | $9 to $20 for 12-16 oz | Clean choice for vegetable garden tools and harvest-contact surfaces |
| 70% isopropyl alcohol | About $2.98 to $10+ | For disinfecting pruning blades, not for mixing into the sand |
| Wire brush or steel wool | $3 to $12 | For heavy soil and rust before tools go into the bucket |
| Mill file or sharpening stone | $8 to $25 | For real edge maintenance on hoes, shovels, and cutting tools |
If you already have a spare bucket, a bag of sand, and suitable oil, the out-of-pocket cost may be under $10. If you are setting up a tidy maintenance corner from scratch, budget around $25 to $50 for the bucket, lid, sand, oil, brush, rag, and alcohol.
Choosing the Right Sand
Use clean, dry, washed sand. For shovels, hoes, spades, and garden forks, coarse all-purpose sand works well because it has enough bite to remove light soil and oxidation. For small hand tools, washed play sand is gentler and easier to plunge into. One 50-lb bag is enough for a 5-gallon bucket filled most of the way.
Avoid masonry mixes, concrete mixes, paver setting mixes with binders, or any product that contains cement, lime, polymers, or unknown additives. Those materials are made for building assemblies, not for tool maintenance. Cement residue plus moisture can create a gritty, alkaline mess that is hard on steel, handles, and your hands.
Dryness matters more than many homeowners realize. Wet sand defeats the purpose of the whole system. If rain gets into the bucket, or if you pour damp sand straight from a torn bag into the bucket, you are storing your tools in an abrasive moisture trap. That can accelerate rust instead of preventing it. If the sand is damp, spread it in a shallow tray in the sun or let it dry under cover before mixing in oil.
Choosing the Right Oil
The best oil depends on how you use your garden tools. For a general homeowner setup, food-grade mineral oil is a clean, low-odor choice, especially around vegetable beds and tools that may contact edible crops. It does not cure like a drying oil, so it may need more frequent reapplication, but it is easy to work with and does not leave the same kind of sticky buildup when used lightly.
Boiled linseed oil is a traditional option and works well on wood handles. A quart costs about $15.48 in current big-box listings, while gallon containers are commonly around $36.98. Linseed oil can help condition wooden handles and leave a more durable film than mineral oil, but it comes with a serious safety rule: rags wet with linseed oil can heat up and spontaneously combust if balled up or thrown into a trash can. Lay oily rags flat outdoors to dry, hang them over a noncombustible edge, or store them in a sealed metal container according to the product label and local disposal guidance.
Tung oil, camellia oil, and dedicated tool oils can also work. Premium oils cost more, but they make sense if you maintain high-quality tools or want a cleaner product around food-producing gardens. For most homeowners, mineral oil or linseed oil is the practical choice.
PC Slower Than It Used to Be?
A free scan shows the junk files, broken settings and background clutter dragging Windows down - then fixes them in one click.Free scan · Windows 10 & 11Crashes, No Sound, or Screen Glitches?
Random freezes, missing sound and display glitches usually trace back to one bad driver. Find and replace yours safely.Free scan · under a minuteDo Not Use Used Motor Oil
Older advice often mentions motor oil. We do not recommend used motor oil in a garden tool bucket. Used oil can contain contaminants from engines, and it does not belong near vegetable beds, compost areas, or harvest-contact surfaces. If you have used motor oil, recycle it through an appropriate collection program. Do not pour it into sand, soil, drains, trash, or a backyard maintenance bucket.
How to Build the Bucket
Start with a clean 5-gallon bucket. Pour in clean, dry sand until the bucket is about 4/5 full. That usually means leaving 3 to 5 inches of open space at the top. Add oil gradually, mixing as you go with a scrap piece of wood, a small shovel, or a garden stake. A common starting point is about 1 quart of oil for a nearly full 5-gallon bucket of sand, but the exact amount depends on the sand grain size and how dry the sand is.
Rank #2

- [Smooth Lubrication for Precision Cutting] The 30mL gardening tool oil prevents rust and keeps blades sharp. Apply a drop to pivot points and blades to reduce friction, enhance performance, and extend the lifespan of pruners, loppers, and shears
- [Deep Clean & Restore Garden Tools] Our powerful garden tool cleaner spray quickly dissolves stubborn resin, sap, dirt, and grime from pruning shears, blades, and hand tools. Simply spray, wait 30-60 seconds, then scrape it off with a scraper. For more stubborn tree sap, you can repeat the process as needed. like new tool surfaces
- [Gentle Yet Effective, Safe for All Tools] Both formulas are non irritating, free from harsh chemicals, and designed for frequent use. Ideal for gardeners, arborists, and DIY enthusiasts who value tool care without damaging metal or coated surfaces
- [Convenient 2 Step Maintenance System] First, remove sticky residues with the resin remover spray; Then protect and lubricate with the long lasting oil. This routine ensures tools stay clean, sharp, and rust free season after season
- [Versatile Use on Multiple Tools] Works excellently on pruning shears, hedge trimmers, saws, shovels, and other metal garden tools. Essential for maintaining fruit trees, vines, shrubs, and plants where sap buildup is common
Add less oil than you think at first. Mix thoroughly, then test the bucket with a trowel. If the tool comes out with a faint coating and the sand slides off easily, you are close. If the sand still feels bone dry and does not leave any oil film, add more oil in 4-ounce increments. If oil pools at the bottom, add dry sand or remove excess oil. The finished mix should be damp, not wet.
Label the bucket with the oil used and the date mixed. That sounds fussy until six months later, when you are trying to remember whether the bucket has mineral oil, linseed oil, or something else in it. A strip of painter’s tape and a marker is enough: “Play sand + mineral oil, mixed Aug. 2026.”
The Tool Desk
Outbyte Driver Updater FREEFix the driver behind crashes, sound loss and screen glitchesFind Drivers →Outbyte PC Repair FREERepair Windows errors before they cause bigger problemsFix Now →Keep the bucket where tools are actually put away. A perfect cleaning station in the far corner of the garage will not get used. The best location is near the shed door, garage garden wall, potting bench, or hose bib. Add a small stiff brush and a rag on a hook nearby. The brush handles dried soil. The rag removes grit and excess oil after plunging.
How to Use It After Gardening
The sequence matters. Do not put muddy tools straight into the bucket. Heavy soil turns the sand into an abrasive mud slurry, and that slurry holds moisture against metal. Knock off clods first. If the tool is wet or packed with clay, rinse it with a hose, scrub it with a brush, and dry it fully with a rag before using the sand bucket.
For a trowel, weeder, or hand cultivator, plunge the metal end into the sand 3 to 6 times. Change the angle slightly with each push so the sand contacts both faces and edges. Pull the tool out, tap it lightly against the inside wall of the bucket, then wipe off remaining grit and excess oil with a rag.
For a shovel, spade, hoe, or garden fork, use the same idea but be realistic about the size of the tool. Push the working end into the bucket several times, rotating the angle to reach the face, back, and shoulders. A 5-gallon bucket is deep enough for most hand tools and the lower portion of larger tools, but it will not clean an entire long-handled tool. Wipe the socket, collar, and handle separately.
After oiling, hang tools off the floor if possible. A wall rack, pegboard hooks, or a simple strip with tool clamps keeps metal away from damp concrete and makes cracks, loose heads, and rust easier to see. If tools must sit in a corner, store them with metal ends up and away from wet floors.
What About Pruners, Loppers, and Cutting Tools?
Use caution with precision cutting tools. Sand can get into pruner pivots, saw teeth, springs, and bypass blade gaps. If grit stays there, it increases wear. For these tools, we prefer a separate kit: clean rag, small brush, 70% isopropyl alcohol, light oil, and the correct sharpening tool.
For pruners used on healthy plants, wipe off soil and sap after use. If needed, use a little alcohol on a rag to clean sticky residue. Dry the tool, then oil the blade and pivot lightly. Open and close the pruners a few times, then wipe away excess oil.
For pruners used on diseased plants, clean off visible debris first. Then disinfect with 70% isopropyl alcohol by wiping, dipping, or spraying the blade surfaces. Practical guidance varies on contact time; many garden references treat alcohol as faster and less corrosive than bleach, while some recommend at least 30 seconds of wet contact. After disinfecting, let the tool dry, then oil the blade and pivot lightly.
Recommended Free Tools
Bleach can disinfect, but it is corrosive. If you use a 10% bleach solution, rinse the tool afterward, dry it completely, and oil the metal. Do not mix bleach with other chemicals. Do not pour disinfectants into the sand bucket.
Does Sand and Oil Sharpen Tools?
No, not in the way homeowners usually mean. Sand may polish a surface, knock off loose rust, and remove tiny burrs. It does not restore the bevel on a dull hoe, sharpen a pruning blade, or repair a rolled shovel edge. Any article or neighbor who says the bucket “sharpens” tools is overstating the method.
For real sharpening, use the right abrasive at the right angle. A garden hoe often needs a mill file. A shovel or spade can benefit from a file on the working edge, especially if you cut roots or compacted soil. Pruners need a small sharpening stone or tool designed for the blade shape. Mower blades should be sharpened and balanced properly; many homeowners are better off having that done by a shop unless they already understand blade removal, torque, and balancing.
Rank #3

- All ingredients are registered organic
- Cleans off tree sap and crud
- Bleach- Alcohol free with plant-based formula
- Lubricates and prevents rust
- Makes pruning tools cut better & last longer
A good seasonal routine is simple: clean deeply, remove rust with steel wool or a wire brush, sharpen cutting edges, tighten hardware, oil metal, treat wood handles, and hang tools under cover. The sand bucket handles the quick maintenance between those deeper tune-ups.
How Often to Refresh the Sand and Oil
Refresh the bucket when the sand is dirty, wet, clumpy, foul-smelling, or full of plant debris. For an average homeowner using the bucket during spring and summer weekends, that may mean once or twice per growing season. For heavy use, clay soil, or shared tools, inspect it monthly.
Do not keep adding oil forever. Too much oil turns the bucket into a greasy trap that collects grit and coats every handle. If the sand is still clean but feels dry, add a small amount of oil and mix thoroughly. If the sand is contaminated with mud, diseased plant residue, or standing water, replace the mix.
Store the bucket under cover with a lid. A lid costs only a few dollars and prevents most bucket failures: rainwater, leaves, insects, spilled potting mix, and curious kids or pets. If the bucket lives in a shed, keep it away from direct flame, heaters, and electrical equipment. If you used linseed oil, be especially disciplined with rags and combustible materials.
Common Mistakes That Ruin the Setup
The first mistake is using the bucket as a substitute for washing. A sand-and-oil bucket is for clean or mostly clean tools. If a shovel has wet clay packed onto it, scrape and rinse it first. If you skip that step, the bucket becomes dirty fast and stops doing its job.
Quick wins for a faster PC:
Fix the driver behind crashes, sound loss and screen glitchesFind Drivers →Clear out junk files and repair common Windows errorsFree Scan →The second mistake is leaving the bucket open outdoors. Rain turns the mix into wet abrasive storage. Wet sand plus steel equals rust. Keep the bucket covered and out of weather.
The third mistake is using the same bucket for every tool. Grit and pruner pivots are a poor combination. Make two stations if you care about your cutting tools: one sand-and-oil bucket for digging tools, and one clean rag, alcohol, oil, and sharpener kit for pruners, loppers, knives, and shears.
The fourth mistake is over-oiling. If tools come out greasy, the bucket has too much oil. Add dry sand, mix again, and wipe tools before storage. Oil belongs on the metal, not on every handle, shelf, glove, and garage floor.
The fifth mistake is ignoring safety disposal. Oil-contaminated sand and oily rags are not ordinary clean waste in every situation. Follow the oil product label and local household hazardous waste guidance. Used motor oil should be recycled through proper channels, never mixed into the bucket.
Do these 3 things before closing this tab:
1Fix the driver behind crashes, sound loss and screen glitches2Clear out junk files and repair common Windows errors3Scan for outdated or missing drivers - takes under a minuteWhen to DIY and When to Hire a Pro
This is an easy DIY project for routine garden maintenance. If your tools are structurally sound and only have normal soil, light rust, and seasonal wear, build the bucket yourself. The materials are inexpensive, the setup takes about 10 to 20 minutes, and the daily use takes less than a minute per tool.
Hire or visit a sharpening and repair professional when the tool is expensive, damaged, or safety-critical. Quality pruners, loppers, hedge shears, axes, chainsaw chains, and mower blades deserve better than guesswork. A bad sharpening job can change blade geometry, make a tool cut poorly, or create a dangerous imbalance in powered equipment. Professional sharpening costs more than a DIY sand bucket, but it is often cheaper than replacing premium tools.
For long-handled tools, consider repair instead of replacement when the steel head is good but the handle is cracked. A new handle may cost less than a new professional-grade shovel, fork, or hoe. Replace the tool when the socket is split, the blade is deeply pitted, the fork tines are badly bent, or the handle connection cannot be made tight and safe.
Rank #4

- Bleach-Alcohol free
- All ingredients are registered organic
- Cleans off tree sap and crud
- Lubricates and prevents rust
- Makes pruning tools cut better & last longer
Safety, Storage, and Disposal Notes
There are no building permits involved in making a garden tool cleaning bucket, but there are real safety considerations. Wear gloves when handling rusty edges, splintered handles, and oily materials. Wear eye protection when using a wire brush or file. Keep the bucket out of reach of children and pets, especially if you use anything other than food-grade mineral oil.
Oil-soaked rags deserve special attention. Rags wet with linseed oil, tung oil, or other drying oils can generate heat as they cure. If they are crumpled together, that heat can build until the rag ignites. Lay rags flat outdoors to dry completely, hang them over a noncombustible surface, or place them in a sealed metal container according to the oil label and local fire-safety guidance. Do not toss a balled-up oily rag into a plastic trash can.
For disposal, treat used motor oil as recyclable household hazardous waste. For oil-contaminated sand, check local waste rules, especially if the sand contains petroleum oil, solvent, pesticide residue, or diseased plant material. Small amounts of mineral-oil sand from normal garden tool use may be handled differently than solvent-contaminated waste, but local rules control.
Our Recommended Homeowner Setup
For most homeowners, we recommend a 5-gallon bucket with lid, one 50-lb bag of washed play sand or all-purpose sand, and mineral oil if the tools are used around vegetables. Use boiled linseed oil if you also want to condition wood handles, but handle rags with fire safety in mind. Mix the sand so it is slightly damp, label the bucket, and keep a brush and rag next to it.
Use the bucket for digging and cultivating tools after each garden session. Keep pruners and other cutting tools on a separate cleaning routine with 70% isopropyl alcohol, light oil, and proper sharpening. Once or twice a year, do a deeper inspection: remove rust, sharpen edges, tighten fasteners, sand rough wood handles, oil the metal, and replace anything cracked or unsafe.
That is the whole value of the sand-and-oil method. It makes the right habit easy. Clean tools cut better, dig better, last longer, and are safer to use. The bucket is not fancy, but it is the kind of small maintenance station that pays for itself every time a tool goes back on the wall dry, clean, and ready for the next job.
Frequently Asked Questions
What kind of sand should I use to clean garden tools?
Use clean, dry, washed sand. Coarse all-purpose sand works well for shovels, hoes, and garden forks. Washed play sand is better for small hand tools. Avoid masonry, concrete, or paver mixes with cement or additives.
What oil is best for a garden tool sand bucket?
Food-grade mineral oil is a clean choice for vegetable garden tools. Boiled linseed oil also works and is useful on wood handles, but oily rags must be handled carefully because they can spontaneously combust if balled up.
Can I use motor oil in a sand-and-oil garden tool bucket?
Do not use used motor oil. It can contain contaminants and should be recycled properly, not placed near garden beds or harvest-contact tools. Mineral oil, linseed oil, tung oil, camellia oil, or dedicated tool oil are better choices.
Does sand and oil sharpen garden tools?
No. Sand can remove light soil, polish metal, and knock off minor surface rust, but it does not restore a proper cutting bevel. Use a file, sharpening stone, or professional sharpening service for dull edges.
Do I still need to disinfect pruning shears?
Yes. A sand-and-oil bucket does not reliably kill plant pathogens. Clean pruning shears first, disinfect the blades with 70% isopropyl alcohol when disease is a concern, let them dry, then oil the blade and pivot lightly.
How often should I replace the sand and oil mixture?
Replace it when the sand becomes wet, muddy, clumpy, dirty, or contaminated with plant debris. For typical homeowner use, inspect it monthly during the growing season and refresh it once or twice a year.
Quick Recap
Product prices and availability are accurate as of the date/time indicated and are subject to change. Any price and availability information displayed on Amazon at the time of purchase will apply.
Quick wins for a faster PC:
Scan for outdated or missing drivers - takes under a minuteDriver Scan →Clear out junk files and repair common Windows errorsFree Scan →Fix the driver behind crashes, sound loss and screen glitchesFind Drivers →
