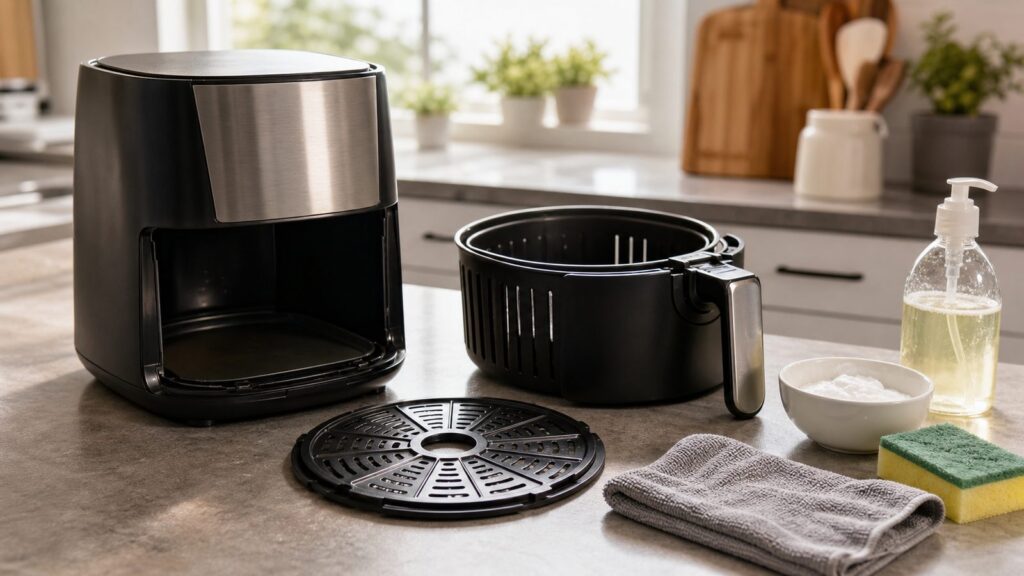
An air fryer should be cleaned after every greasy, saucy, or crumb-heavy cook. The short version is simple: unplug it, let it cool, remove the basket and tray, soak removable parts in hot water and dish soap for 10 to 15 minutes, scrub with a non-scratch sponge, rinse, dry, and wipe the inside of the unit with a damp cloth. Do not submerge the main body, do not run it with soapy water inside, and do not attack the basket with steel wool or oven cleaner.
That basic routine handles most messes. The reason many homeowners still end up with smoke, burnt odors, peeling coatings, or nuisance breaker trips is that an air fryer is not just a dirty pan. It is a high-watt countertop convection appliance with a fan, heating element, vents, nonstick parts, and a cord that may be drawing 1,200 to 1,800 watts on a kitchen circuit. Cleaning matters, but so do grease control, airflow, outlet condition, countertop heat protection, and knowing when a part or the entire unit is no longer worth saving.
On our job sites, we treat small appliances the same way we treat bigger kitchen decisions: keep heat away from finished surfaces, keep cords and outlets in good condition, and do not let grease accumulate where you cannot see it. Here is the practical way to clean an air fryer safely and keep it from turning into a smoky countertop problem.
As an Amazon Associate I earn from qualifying purchases.
What You Need Before You Start
You do not need a specialty kit to clean an air fryer. A routine clean usually costs less than $1 if you already have dish soap, hot water, a soft sponge, and a microfiber cloth at home. For a more complete cleaning setup, expect roughly $10 to $35 for dish soap or degreasing dish spray, baking soda, white vinegar, microfiber cloths, non-scratch sponges, and a soft toothbrush or detail brush.
Use mild tools first. Air fryer baskets and crisper plates are often coated with nonstick or ceramic-style surfaces, and the wrong scrubber can shorten the appliance’s life faster than the food grease will.
Supplies That Are Safe for Most Air Fryers
- Dish soap or degreasing dish spray
- Hot tap water
- Non-scratch sponge or soft dish brush
- Microfiber cloths
- Soft toothbrush or nylon detail brush
- Baking soda for paste on stubborn grease
- White vinegar for removable parts only, when appropriate
- Clean towel for drying parts and protecting the counter
What Not to Use
- Steel wool, metal scouring pads, knives, or metal utensils
- Oven cleaner, bleach, ammonia, or harsh industrial degreasers
- Abrasive powdered cleaners on nonstick surfaces
- Excess water around the main unit, vents, controls, fan, or heating element housing
- A dishwasher cycle for the main body of the appliance
The main rule is this: removable food-contact parts can usually be washed; the electrical body gets wiped. The basket, pan, tray, or crisper plate may be dishwasher-safe on many models, but hand-washing is often better for preserving the coating and hardware.
#1 Best Overall

- Air Fryer Cleaning Solution: Still looking for a cleaning tool that can deeply clean an air fryer? Come and try our airfryer cleaning brush kit. The long-handled nylon brush is used to clean stubborn stains on the heating element,double-sided sponge brush can be used to clean oil stains and food residues on the air fryer basket or crisper plate,nylon toothbrush can clean stains in hard-to-reach areas,making the air fryer as a whole cleaner and more comfortable to use.
- Efficient and Time Saving: With this air fryer cleaning brush sets, you no longer need to search for or buy various sizes of cleaning tools. With one purchase, you get a complete airfryer cleaner brush kits, which not only greatly improves your cleaning efficiency, but also saves you a lot of valuable time. With this cleaning brush kits, you will enjoy a smoother and more efficient cleaning experience, making air fryer maintenance easier and faster.
- Comprehensive Deep Cleaning without Dead Ends:Our air fryer cleaning brush kit offers a complete set of professional cleaning tools. The crevice cleaning brush can reach into tiny crevices for cleaning, while the cleaning cloth is used to wipe all surfaces (such as inner walls, control panels, bottoms, etc.). Cleaning brushes of different sizes are suitable for different areas, ensuring that every corner of the air fryer is thoroughly cleaned and giving your air fryer a brand new look.
- Extend the Life of Your Air Fryer: We understand the importance of health, so regular cleaning of your air fryer is essential. Our cleaning brush kit is made of high quality material, durable and can effectively remove the dirt inside the air fryer, so that yourair fryer is always in the best condition. Regular cleaning of your air fryer also delays the life of your air fryer and reduces maintenance costs.
- Easy to Operate: Each cleaning brush in the air fryer cleaning brush kit is carefully designed to be easy to operate and hold. Whether it is the air fryer basket, crisper plate, heating element, or tiny crevices, it can handle them all with ease, making the cleaning of the air fryer simple and easy. It effectively removes oil stains and food residues, providing a healthier and safer cooking environment for the family.
The Routine Cleaning Method After Normal Use
For most weeknight cooking, routine cleaning should take 10 to 20 minutes, with most of that time spent soaking parts while you clean something else. The goal is to remove grease before it hardens and carbonizes. Once oil residue turns into a brown, baked-on film, cleaning takes longer and the chance of damaging the coating goes up.
Free tools Windows power users keep installed
One-click scans. No signup required.
Step 1: Unplug and Cool the Unit
Unplug the air fryer first. Let it cool until the basket and interior can be touched comfortably. That usually takes 20 to 30 minutes after a hot cook, depending on the model and how long it ran. Cleaning while it is hot raises the chance of burns and can bake soap or cleaner residue onto the interior.
Unplugging also matters when the air fryer is not in use. Countertop cooking appliances should not stay powered indefinitely, especially if the cord is stressed, the outlet is loose, or the appliance sits near water.
Step 2: Remove the Basket, Tray, and Crisper Plate
Pull out all removable cooking parts. Most basket-style units have a drawer, basket, and crisper plate. Oven-style models may have racks, trays, a drip pan, and a door. Knock loose crumbs into the trash before soaking so you are not turning the sink into a grease trap.
If the basket has a removable rubber bumper or silicone feet on the crisper plate, check the manual before removing them. Those small parts keep metal from scraping the basket coating, and losing one can lead to scratches.
Step 3: Soak Removable Parts for 10 to 15 Minutes
Fill the sink or the basket itself with hot water and a few drops of dish soap. Let the basket, pan, and tray soak for 10 to 15 minutes. This is the step homeowners skip, and it is usually the difference between an easy clean and a scratched basket.
Let the soap and heat loosen the grease. Do not run the air fryer with water and soap inside as a shortcut. That so-called steam-clean method can push moisture where it does not belong and create an electrical or fire hazard.
Step 4: Scrub With a Soft Sponge
Use a non-scratch sponge or soft brush to clean the basket, pan, and crisper plate. Pay attention to the holes in the crisper plate and the corners of the drawer where sticky residue collects. A soft toothbrush works well around perforations and handle hardware.
If food is stuck, soak longer rather than scraping harder. A $20 to $60 replacement basket or tray is not unusual for many consumer models, and parts for larger, dual-basket, oven-style, or discontinued units can cost more or be unavailable.
Outdated Drivers Are Slowing You Down
One free scan finds every outdated or missing driver and matches the right update for your exact hardware.Free scan · exact hardware matchPC Slower Than It Used to Be?
A free scan shows the junk files, broken settings and background clutter dragging Windows down - then fixes them in one click.Free scan · Windows 10 & 11Step 5: Wipe the Interior
Use a damp microfiber cloth to wipe the inside walls and lower interior of the air fryer body. The cloth should be damp, not dripping. Keep water out of vents, fan openings, controls, and electrical cavities.
Grease on the interior walls can smoke during the next cook, especially at 375 to 400 degrees F. If the air fryer smells burnt even when the basket is clean, the upper interior or heating element area may need attention.
Step 6: Dry Everything Completely
Dry removable parts with a towel and let them air-dry for another 15 to 30 minutes if water is trapped around seams, screws, or handle hardware. Reassemble only when everything is dry. Moisture left in crevices can cause odors, spotting, or corrosion on exposed metal parts.
Rank #2
- RECOMMENDED FOR ALL GRILL TYPES - Whether you have an Air Fryer rack, gas grill, charcoal, smoker, porcelain, infrared grill rack or other types like Weber grill or Foreman grill, your barbecue will be looking brand new in no time by using our bbq brush grill tool.
- HIGH QUALITY STAINLESS STEEL - Made of 100% Premium 304 stainless steel brush bristles with wood handle, you can easily remove food, grease, and debris from your grill rack without scratching or damaging the surface.
- LONG LASTING SOLID CONSTRUCTION - 60% more rigid tool than a conventional brush. Will not bend or become flimsy. The latest innovation in grill accessories.
- THE IDEAL HANDLE LENGTH - 8" is the perfect length for ease of use on small to medium size grill racks. Allows the use of both hands with minimal effort. Longer brushes are too cumbersome and not portable.
How to Deep-Clean Baked-On Grease
Baked-on grease needs patience, not force. If the basket has a sticky amber film, black specks, or an oily smell after washing, use a controlled deep clean. Plan on 30 to 45 minutes total, including soak time.
Do these 3 things before closing this tab:
1Repair Windows errors before they cause bigger problems2Scan for outdated or missing drivers - takes under a minute3Clear out junk files and repair common Windows errorsUse a Baking Soda Paste on Removable Parts
Mix baking soda with a small amount of water until it forms a spreadable paste. Apply it to greasy areas on the basket, tray, or crisper plate and let it sit for 10 minutes. Scrub gently with a soft sponge or nylon brush, then rinse thoroughly with warm water.
Baking soda is mildly abrasive, so do not grind it into a nonstick surface like polishing compound. Use light pressure. If the coating is already flaking, stop cleaning and replace the part or the appliance.
Use Vinegar Carefully
White vinegar can help with odors and light mineral residue on removable parts, but it is not a magic degreaser. Use it in the sink or on parts you can rinse fully. Avoid pouring vinegar, baking soda mixtures, or foaming solutions into the appliance body. Foaming liquid can travel into seams, vents, and electrical areas where it should not be.
A practical odor rinse is 1 part white vinegar to 3 parts warm water for removable parts, followed by a normal dish-soap wash and a full rinse. Do not leave acidic solutions sitting on coated parts for hours.
The Tool Desk
Outbyte Driver Updater FREEFix the driver behind crashes, sound loss and screen glitchesFind Drivers →Outbyte PC Repair FREEClear out junk files and repair common Windows errorsFree Scan →When Degreasing Dish Spray Makes Sense
For stubborn fat, a dish-safe degreasing spray can help if the label allows use on cookware and nonstick surfaces. Spray the removable part, wait the label’s recommended dwell time, then scrub gently and rinse thoroughly. Avoid harsh commercial degreasers meant for grills, ovens, engines, or shop floors.
Cleaning the Heating Element and Upper Interior
The heating element area is where many smoky air fryers hide the real problem. Aerosolized oil rises during cooking and can collect on the upper interior, fan guard, and element area. Later, that residue heats again and smells burnt even when the basket looks clean.
Only clean this area when the air fryer is unplugged and fully cool. Put a towel on the counter. If your manufacturer allows it, turn the unit upside down carefully so you can see the upper interior. Some models make this easy; others do not. If the manual warns against inversion or gives a different procedure, follow the manual.
Use a damp cloth or soft toothbrush to loosen grease around the upper interior. Do not bend the heating element. Do not spray cleaner upward into the appliance. Do not use dripping water. If crumbs fall out, wipe them away from the towel and counter before turning the unit upright again.
What’s actually slowing this PC down?
Pick the symptom - the matching free tool is one click away.
If there is heavy black buildup around the element, melted plastic, a damaged fan guard, electrical odor, or scorch marks, stop. At that point, the issue may be beyond cleaning.
Air Fryer Cleaning Costs and Replacement Choices
Most air fryer cleaning is cheap. The expensive part is waiting too long, damaging the nonstick surface, or chasing a smoke problem that is actually electrical or mechanical. Use the table below as a practical 2026 cost guide for US homeowners.
| Item or Service | Typical 2026 Cost | When It Makes Sense |
|---|---|---|
| Routine DIY clean | Usually under $1 per cleaning | After normal cooking, especially greasy or saucy foods |
| DIY deep-clean supplies | About $10-$35 total | For baked-on grease, odor control, and better tools |
| Disposable parchment liners | About $8-$15 per 100-150 count | For sticky foods, used only with food weighing them down |
| Reusable silicone liners | About $8-$20 for a 1-2 pack | For easier cleanup, as long as airflow is not blocked |
| Replacement basket, tray, or crisper plate | Commonly $20-$60 | When coating is scratched, flaking, warped, or impossible to clean |
| Replacement air fryer | Roughly $60-$200 mainstream; $200-$350+ premium | When parts are unavailable, the unit smokes after cleaning, or electrical damage appears |
| Professional cleaning time | Often $25-$75 per cleaner-hour | When included in a kitchen clean or requested as a detailed add-on |
| Electrician evaluation | Highly local service-call pricing | For repeated GFCI trips, hot cords, scorched outlets, or breaker issues |
A professional house cleaner may wipe down small appliances during a kitchen cleaning, but detailed air fryer degreasing is usually a time-based add-on. Standard home cleanings often run about $100 to $300, while deep cleans are commonly $200 to $400 or more. Whether the air fryer interior is included depends on the cleaner’s checklist, the grease level, and minimum trip charges.
How Often Should You Clean an Air Fryer?
Clean the basket, tray, and crisper plate after every greasy or saucy cook. That includes chicken wings, bacon, burgers, marinated meat, fish, breaded foods, and anything with cheese or sugar-based sauce. Dry foods like toast, reheated pizza, or frozen fries may only leave crumbs, but the basket should still be checked after each use.
Recommended Free Tools
Rank #3

- Ideal for cleaning air fryers, electric indoor grills, stove top griddles and waffle makers
- Soft, flexible bristles are safe for non-stick cookware
- Soft, comfortable handle is non-slip, even when wet
- The heat resistant silicone wiper blade removes food and grease without damaging delicate surfaces
- Not for use on outdoor grills.
Wipe the interior every 3 to 5 uses for light cooking, or sooner if you see splatter. Check the upper interior and heating element area every 2 to 4 weeks if the air fryer is used several times a week. If you use it daily, make that a weekly inspection.
For oven-style air fryers, clean the drip tray after every cook. Leaving grease in a bottom tray is one of the fastest ways to create smoke during the next preheat.
Safe Counter Placement, Vents, and Kitchen Circuits
Cleaning solves grease. Placement solves heat and airflow. An air fryer needs open space around its vents so the fan can move hot air without cooking the wall, backsplash, cabinet side, or cord behind it.
As a practical homeowner rule, leave at least 4 to 5 inches of clearance at the rear and side vents unless the manual requires more. Keep the appliance on a flat, heat-resistant surface. Do not run it under low cabinets, inside a closed appliance garage, on a stove burner, or tight against a painted wall or plastic backsplash trim.
Quick wins for a faster PC:
Scan for outdated or missing drivers - takes under a minuteDriver Scan →Clear out junk files and repair common Windows errorsFree Scan →Fix the driver behind crashes, sound loss and screen glitchesFind Drivers →Kitchen countertop outlets in modern US homes are typically GFCI-protected, and small-appliance branch circuits are commonly 20-amp circuits under residential electrical code practice. That context matters because many air fryers draw serious power. A 1,500-watt air fryer at 120 volts uses about 12.5 amps. Add a toaster, microwave, coffee maker, or electric kettle on the same circuit and you can trip a breaker.
A single nuisance trip during a high-load cooking moment may be a circuit-load issue. Repeated GFCI trips, a warm plug, a buzzing outlet, scorch marks, melted plastic smell, or a cord that heats up are not cleaning problems. Stop using the appliance on that outlet and have a licensed electrician evaluate it.
Using Liners Without Creating a New Problem
Parchment and silicone liners can reduce cleanup, but they do not eliminate it. Grease still migrates under reusable silicone liners and around the edges of disposable liners. If you use liners, clean under them every time.
Use the correct size and shape for the basket. Do not block all the holes in the crisper plate unless the liner is designed for that model and still allows airflow. Air fryers cook by moving hot air quickly; block the flow and you get uneven cooking, longer cook times, and more residue.
Never preheat with an empty paper liner. Loose parchment can lift into the heating element and burn. Food needs to weigh the liner down. If the paper curls, trim it or use a better-fitting liner.
Disposable parchment liners commonly cost about $8 to $15 for 100 to 150 liners. Reusable silicone liners often cost about $8 to $20 for a 1- or 2-pack. Silicone can save money over time, but it adds one more part that must be washed well.
Smoke, Odors, and Warning Signs You Should Not Ignore
Smoke after cooking fatty food is often caused by grease splatter, crumbs, or residue near the heating element. Clean the basket, tray, drawer, interior walls, and upper area before assuming the appliance is failing. Also check that the temperature is reasonable. Bacon or fatty chicken at 400 degrees F will throw more grease than the same food at a lower setting.
Rank #4

- Comprehensive 9-Piece Cleaning Kit: This 9-piece air fryer cleaning kit includes 2 scouring pads, 1 microfiber cleaning cloths, 1 long-handled brush, 1 crevice brush,1 brush, 2 nylon toothbrushes, and 1 hook brush tool, providing you with all the tools needed for a thorough clean of your air fryer, oven, and other kitchen appliances
- Efficient & Thorough Cleaning: The long-handled brush and crevice brush are designed to reach tough spots inside your air fryer and oven, cleaning away grease, food particles, and residue. The nylon toothbrushes help clean tight spaces, ensuring no area is left untouched and your appliances stay spotless
- Durable & High-Quality Materials: Built to last, the tools in this cleaning kit are made from durable materials. The scouring pads remove stubborn stains without damaging surfaces, and the microfiber cleaning cloths absorb moisture quickly, leaving surfaces dry and streak-free
- Easy to Use & Comfortable to Handle: Each cleaning tool is designed for ease of use with ergonomic handles, making it comfortable to clean hard-to-reach areas. Whether it’s cleaning the air fryer basket, crisper plate, or the oven’s interior, these tools ensure a simple and effective cleaning process
- Versatile & Multipurpose: This kit is not only perfect for air fryers and ovens, but also for cleaning a wide range of kitchen appliances, including microwaves, coffee makers, and toasters. It's a must-have for every kitchen, saving time and ensuring efficient appliance maintenance
White smoke is commonly vaporized grease. Dark smoke, electrical odor, melting plastic smell, sparks, popping, or visible damage is different. Unplug the air fryer if it is safe to do so and stop using it.
Older, secondhand, or suspect units deserve a recall check. A major 2023 recall involved about 2 million US Cosori air fryers because of an overheating wire connection. Reported issues included units catching fire, burning, melting, overheating, or smoking, along with minor burn injuries and property-damage reports. That was a product defect, not a cleaning failure, but it is a useful reminder: not every smoke problem is grease.
Check the model number and manufacturer recall page if the unit overheats, smells electrical, trips breakers, has cord damage, or came from a resale shop, rental, estate sale, or online marketplace.
Independent reader supportYour contribution helps us test, update, and keep practical guides available for everyone.When to DIY vs. When to Hire a Pro
Most air fryer cleaning is a DIY job. If the problem is grease, crumbs, odor, or normal stuck-on food, handle it with soap, hot water, soak time, soft tools, and careful wiping. You should not need a contractor, cleaner, or electrician for routine maintenance.
DIY Is the Right Call When
- The basket coating is intact and not flaking
- The appliance works normally after cleaning
- Smoke is clearly from food residue or grease
- The cord, plug, outlet, and controls look normal
- You can access the removable parts and clean them safely
Hire a Cleaner When
Hire a cleaner only if you already need a broader kitchen clean or the appliance is part of a move-out, rental turnover, or deep-clean checklist. Ask directly whether small-appliance interiors are included. Many cleaners will wipe exteriors as part of a standard clean but charge extra for detailed degreasing. At $25 to $75 per cleaner-hour, a badly neglected air fryer can cost more in labor than a replacement basket.
The Tool Desk
Outbyte Driver Updater FREEFix the driver behind crashes, sound loss and screen glitchesFind Drivers →Outbyte PC Repair FREEClear out junk files and repair common Windows errorsFree Scan →Call an Electrician When
Call a licensed electrician if the air fryer repeatedly trips a GFCI or breaker, the outlet is scorched, the plug gets hot, the cord is damaged, or you smell electrical burning. Do not keep moving the air fryer from outlet to outlet hoping one circuit will tolerate it. The appliance may be defective, the outlet may be worn, or the circuit may be overloaded.
Replace Parts or the Whole Unit When
Replace the basket or tray if the coating is flaking, deeply scratched, rusted, or peeling. Replace the whole air fryer if parts are unavailable, the fan sounds damaged, the door or drawer no longer closes correctly, the unit smokes after a proper cleaning, or there are any signs of melting, overheating, or electrical failure. For a mainstream $60 to $200 air fryer, repair rarely makes sense unless the fix is a simple OEM basket or crisper plate.
Air Fryer Cleaning Mistakes That Damage Homes and Appliances
The biggest mistakes are shortcuts. Running the air fryer with soapy water in the basket is not a safe cleaning method. Submerging the main body can damage electrical components. Spraying cleaner into vents or the heating element area can leave residue where hot air and electricity are concentrated.
Another common mistake is treating the air fryer like a cast-iron pan or grill grate. Scraping with a knife, using steel wool, or applying oven cleaner may remove grease, but it can also remove the coating that keeps food from sticking. Once the basket coating is compromised, every future cleaning gets harder.
Storage mistakes matter too. Do not shove a warm air fryer into a cabinet. Let it cool fully, clean the grease, and store it with the cord loosely coiled. Avoid pinching the cord behind the appliance or bending it sharply at the plug. If you use an appliance garage in a remodeled kitchen, make sure the air fryer is pulled out into open air before operation. Closed cabinet spaces trap heat and grease vapor.
A Builder’s Checklist for a Cleaner, Safer Air Fryer Station
If you are planning a kitchen remodel, pantry wall, appliance garage, or coffee-and-small-appliance zone, design for how people actually cook. Air fryers are not tiny decor pieces. They are hot, high-watt appliances that need landing space, airflow, and a reachable outlet.
Best Value

- Durable nylon bristles: Safely scrub away baked-on food, grease and tough messes while protecting non-stick cookware from scratches for long-lasting kitchen performance
- Flared brush head: Angled bristles reach into corners of pots, pans, jars and bottles, ensuring every surface is cleaned thoroughly for fresher results with less effort
- Built-in scraper: Quickly lifts stubborn, stuck-on food from cookware and bakeware, reducing soaking time and making cleanup faster and easier after every meal
- Non-slip handle: Soft, comfortable grip stays secure even when wet, giving you full control and confidence while cleaning greasy pans, messy dishes and tough cookware
- Dishwasher safe: Conveniently clean and sanitize the brush in the dishwasher, saving time and keeping your essential kitchen tool fresh, hygienic and ready to use
Allow enough countertop depth so the air fryer can sit away from the backsplash while still leaving usable prep space in front. A standard 24-inch-deep counter can work, but larger oven-style air fryers may feel crowded. Heat-resistant counters such as quartz, granite, porcelain, stainless steel, or tile handle appliance zones better than heat-sensitive laminates or surfaces with vulnerable seams, but every surface still needs protection from trapped heat.
Place outlets where cords do not cross sinks, burners, or walk paths. GFCI protection is expected at kitchen countertops, and 20-amp small-appliance circuits help handle real kitchen loads. If a client tells us they use an air fryer, microwave, espresso machine, toaster oven, and kettle in the same zone, that affects outlet layout and circuit planning.
Recommended Free Tools
For backsplashes, choose materials that clean easily behind appliance zones. Gloss tile, porcelain slab, stainless panels, and quality grout sealing make grease cleanup easier. Painted drywall directly behind a high-use air fryer will show splatter and heat wear sooner.
The Bottom Line
Clean the removable parts after greasy cooks, deep-clean before residue carbonizes, and keep water out of the appliance body. Use soft tools, short soak times, and mild cleaners. Check the upper interior and heating element area when odors or smoke continue after the basket is clean.
Just as important, give the air fryer room to breathe. Keep 4 to 5 inches of clearance around vents unless the manual calls for more, unplug it when it is not in use, and treat repeated breaker trips, hot cords, scorch marks, or electrical smells as safety issues instead of cleaning chores. A clean air fryer should cook evenly, smell neutral, and sit in a kitchen setup that can handle the heat and electrical load.
Frequently Asked Questions
How often should you clean an air fryer?
Clean the basket, tray, and crisper plate after every greasy, saucy, or crumb-heavy cook. Wipe the interior every 3 to 5 light uses, and inspect the upper interior or heating element area every 1 to 4 weeks depending on how often you use it.
Do these 3 things before closing this tab:
1Clear out junk files and repair common Windows errors2Scan for outdated or missing drivers - takes under a minute3Repair Windows errors before they cause bigger problemsCan you put an air fryer basket in the dishwasher?
Many air fryer baskets and trays are dishwasher-safe, but check the manual first. Hand-washing with hot water, dish soap, and a soft sponge is usually better for preserving nonstick coatings and handle hardware.
How do you clean baked-on grease from an air fryer?
Soak removable parts in hot soapy water for 10 to 15 minutes, then scrub with a non-scratch sponge. For stubborn grease, apply a baking soda paste for about 10 minutes, scrub gently, rinse thoroughly, and dry completely.
How do you clean the air fryer heating element safely?
Unplug the air fryer and let it cool fully. If the manual allows it, turn the unit upside down on a towel and gently wipe the upper interior and element area with a damp cloth or soft toothbrush. Do not spray cleaner or let water drip into electrical parts.
Why is my air fryer smoking after I cleaned it?
Smoke after cleaning usually means grease remains on the interior walls, crisper plate, drawer corners, or upper heating element area. If the smoke smells electrical, the plug gets hot, the outlet is scorched, or the unit trips a breaker, stop using it and check for recalls or call an electrician.
Quick wins for a faster PC:
Repair Windows errors before they cause bigger problemsFix Now →Scan for outdated or missing drivers - takes under a minuteDriver Scan →When should you replace an air fryer instead of cleaning it again?
Replace the basket if the coating is flaking, rusted, or deeply scratched. Replace the whole unit if it smokes after a thorough cleaning, has melted plastic, cord damage, fan problems, unavailable parts, repeated overheating, or any electrical odor.
Quick Recap
Product prices and availability are accurate as of the date/time indicated and are subject to change. Any price and availability information displayed on Amazon at the time of purchase will apply.

