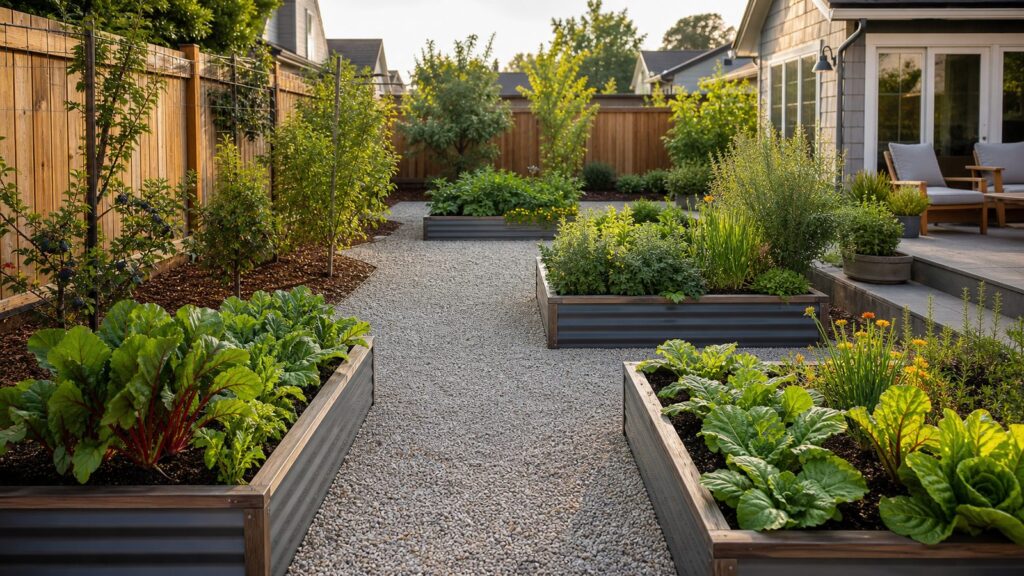
Replacing a lawn with an edible landscape can be one of the most useful upgrades you make to a yard, but it works best when it is planned like a small construction project. The goal is not simply to remove turf and plant vegetables. The goal is to create a durable, attractive outdoor system that produces food, drains properly, is easy to walk through after rain, has reliable water, and does not create code, HOA, or soil safety problems.
For most homeowners, the right first phase is a 100 to 200 square foot kitchen garden in the sunniest practical location, close enough to water and the house that it will actually be used. From there, you can add herbs near the kitchen, berries along edges, dwarf fruit trees, pollinator beds, and ornamental edible plantings in visible front-yard areas.
As an Amazon Associate I earn from qualifying purchases.
In 2026, costs vary widely. A simple DIY edible garden can start in the hundreds of dollars. A well-built raised-bed garden with paths, imported soil, drip irrigation, fencing, and professional installation can easily reach $10,000 to $25,000 or more. Larger edible yard conversions with hardscape, drainage, terracing, lighting, and front-yard design can move into the same range as other major landscape projects: $15,000 to $50,000, with complex renovations going higher.
Crashes, No Sound, or Screen Glitches?
Random freezes, missing sound and display glitches usually trace back to one bad driver. Find and replace yours safely.Free scan · under a minuteWindows Errors? Fix Them Before They Spread
Repair common Windows errors and clear accumulated junk for a smoother, more stable PC - no reinstall needed.Free scan · no reinstallOn our job sites, the projects that age well have one thing in common: the unglamorous work happens first. Utilities are marked. Soil is tested. Drainage is handled before beds go in. Irrigation sleeves are installed before paths are finished. Beds are built level, fastened properly, and filled with clean soil. That sequencing saves money because you are not tearing apart finished work six months later.
#1 Best Overall

- Quick, at home results for Soil pH, Nitrogen, Phosphorous and Potash Innovative and inexpensive soil test kit features an easy-to-use capsule system and patented color comparators
- Contains all components needed for 20 tests. 5 for each of pH, N, P and K
- Contains all components needed to test all variables in several spots in the yard or garden
- Simple, detailed instructions included. Great for beginners and experienced gardeners alike.
- Soil pH preference list for over 450 plants included
Start With the Site, Not the Plants
The plant list is the fun part, but the site decides what will succeed. Before buying lumber, soil, trees, or seed packets, walk the yard with a tape measure, a notebook, and a realistic eye.
Map the sun first. Tomatoes, peppers, eggplants, cucumbers, squash, melons, and most fruiting crops need about 6 to 8 hours of direct sun per day. If the best area only gets 3 to 5 hours, you can still grow food, but the crop list changes. Lettuce, baby kale, scallions, radishes, beet greens, herbs, and microgreens are better choices for partial shade.
Next, look at water. A garden that needs 150 feet of hose dragging across the driveway will not get watered consistently in July. Productive beds should be within easy hose reach or served by a dedicated drip irrigation zone. If you are installing hardscape paths, sleeves for future irrigation lines should go under those paths before stone, pavers, or concrete are placed.
Then look at drainage. Turf hides a lot of yard problems. Once you remove grass and add beds, paths, mulch, and compacted walking areas, water can start moving differently. Low spots, roof downspouts, driveway runoff, and clay soil all matter. If water stands for more than 24 hours after a normal rain, solve that before building beds.
A practical first assessment should include:
- Sun exposure by zone: full sun, partial sun, shade.
- Water source location and hose reach.
- Downspouts, low spots, and runoff paths.
- Utility markings before digging posts, irrigation trenches, or tree holes.
- Existing slopes that may need terracing or retaining walls.
- Access for wheelbarrows, soil delivery, mulch, compost, and maintenance.
- HOA, municipal, and front-yard visibility rules.
Do not skip access. A beautiful edible yard with narrow muddy paths becomes frustrating fast. We prefer 30 to 36 inch paths for normal garden access, wider where a wheelbarrow or mobility needs are part of the plan. Beds should usually be 3 to 4 feet wide so you can reach the center without stepping into the growing soil.
Test Soil Before You Grow Food
Soil safety is one of the biggest differences between a decorative landscape and an edible one. If you are growing food, especially in older neighborhoods or near streets, driveways, garages, or old painted structures, you need to know what is in the soil.
At minimum, test for pH, organic matter, phosphorus, potassium, and basic nutrients. For urban and older suburban lots, also consider lead and heavy metal screening. Lead risk is higher near older building drip lines, roads, and driveways. A good rule is to keep food crops at least 10 feet away from older buildings, roads, and driveways where lead levels are more likely to be elevated.
If the soil history is unknown, raised beds with clean imported soil are usually the safest and most controllable choice. For higher-risk sites, we use a physical separation approach: avoid disturbing suspect soil, install a barrier where appropriate, bring in tested clean soil, and mulch exposed ground to reduce dust and soil splash.
Soil testing also prevents expensive overcorrection. Many yards already have high phosphorus, and manure-based compost can add more. Adding fertilizer blindly can create runoff problems and weak plant performance. For established edible gardens, soil testing every few years is a good rhythm.
Raised Beds vs In-Ground Beds
Raised beds cost more upfront, but they solve several common problems at once. They improve drainage, reduce soil compaction, warm faster in spring, create defined paths, and make it easier to garden over poor or contaminated native soil. They are also easier to maintain when built at a comfortable height.
The tradeoff is water. Raised beds dry out faster than in-ground beds, especially in hot climates and windy sites. That is why drip irrigation and mulch are not luxuries in a serious edible landscape. They are part of the system.
Recommended Free Tools
For most homes, a good raised bed is 12 to 24 inches tall. Twelve inches is workable for leafy greens and many annual vegetables. Eighteen to 24 inches gives better root volume, easier access, and more separation from native soil. Keep width to about 48 inches if reachable from both sides, or 24 to 30 inches if the bed is against a fence or wall.
Build the Edible Yard in the Right Order
The biggest avoidable cost in edible landscape projects is poor sequencing. Homeowners often build beds first, then discover they need drainage, irrigation, fencing, or a better path. That means moving soil, lifting beds, cutting through finished areas, and paying twice for labor.
A better order is:
- Confirm local rules, HOA limits, and front-yard requirements.
- Call for utility marking before digging.
- Map sun, water, access, and drainage.
- Test soil for nutrients and contaminants.
- Correct grading and drainage problems.
- Install irrigation sleeves, mainlines, and hose bib upgrades.
- Build paths, edging, steps, walls, or terraces.
- Set raised beds, trellises, fencing, and gates.
- Bring in clean soil and compost.
- Install drip irrigation, mulch, and plantings.
This order is the same mindset we use on construction sites: underground and structural work before finish work. A gravel path, stone walkway, or paver route should not be cut open later because a drip line was forgotten. A retaining wall should not be built without proper drainage stone behind it. A trellis for grapes, tomatoes, or espalier fruit should be anchored for wind, not just pushed into loose soil.
Plan the Garden Zones
A productive edible yard needs zones, not scattered plants. Each zone should have a job.
Rank #2

- Comprehensive Soil Analysis: Liquid soil test kits offer a comprehensive analysis of essential soil parameters, including pH, ammonia, nitrogen, phosphorus, and potassium. Having all these measurements in one kit provides a holistic understanding of the soil's fertility and health.
- Customized Fertilizer Recommendations: With data on pH and nutrient levels, liquid soil test kits help users apply the right type and amount of fertilizers, optimizing plant growth, and preventing over-fertilization, which could harm both plants and the environment. Whether its for lawns, garden, grass, plants, vegetables, turf, flowers, compost trees vines ornamental landscape house plants or hydroponics you will be able to get the results you want.
- Time and Cost-Effective: Liquid soil test kits are relatively quick and easy to use, saving time for gardeners and agricultural professionals. Compared to sending samples to a laboratory, these kits provide rapid results, allowing for prompt action. Additionally, they are cost-effective for routine testing, making it feasible to monitor soil health regularly.
- Optimal Plant Health and Yield: By knowing the soil's pH and nutrient levels, gardeners and farmers can fine-tune their agricultural practices to create an environment conducive to optimal plant growth. Adequate levels of ammonia, nitrogen, phosphorus, and potassium are essential for healthy plant development and higher crop yields.
- Accurate and Precise Results: Liquid test kits are designed to provide accurate and precise measurements when used correctly. They are calibrated to detect specific nutrient levels, ensuring reliable data for informed decision-making in plant nutrition and soil management. You get a total of about 140 test. which is 40 test for each parameter and about 20 or so for nitrogen
The Kitchen Garden
This is the high-use area for annual vegetables and herbs. A strong starter size is 100 to 200 square feet. That might be four 4 by 8 foot raised beds with 3 foot paths, or a compact arrangement of metal trough-style beds with drip irrigation. Put this area where you have full sun, easy water, and convenient daily access.
Expect this zone to be the most intensive. It needs spring planting, summer harvesting, weeding, pruning, pest checks, and fall cleanup. If you cannot maintain a 150 square foot garden consistently, you are not ready for a 600 square foot one.
Perennial Edges
Berries, herbs, rhubarb, asparagus, grapes, and dwarf fruit trees give the yard structure. They also make the landscape look intentional outside peak vegetable season. Blueberries, rosemary, sage, thyme, strawberries, and espalier fruit can be attractive enough for front or side yards when planted in clean lines with mulch and edging.
Visible Ornamental Edibles
For front yards, curb appeal matters. Use edible plants that look deliberate: blueberries, artichokes, rainbow chard, kale, rosemary, lavender, sage, thyme, strawberries, edible flowers, and compact fruit trees. Keep beds edged, paths clean, and plantings layered. A front-yard edible landscape should read as designed, not abandoned.
What’s actually slowing this PC down?
Pick the symptom - the matching free tool is one click away.
Support Areas
Compost, tools, mulch staging, seed trays, and harvest bins need a place. Hide the utilitarian items from primary views, but keep them close enough to use. A small tool cabinet, potting bench, or screened compost area can make the whole system easier to maintain.
What It Costs in 2026
Edible landscape pricing depends on size, site conditions, materials, and how much work you do yourself. A few containers on a patio are not the same project as a terraced edible backyard with irrigation and stone paths.
For context, 2026 national landscaping data puts smaller general landscape projects around $1,047 to $2,465, while common landscape projects often fall around $2,600 to $13,700, with an average near $8,150. Major backyard renovations commonly land around $15,000 to $50,000, and large hardscape-heavy projects can run from $3,000 to well over $80,000.
Raised-bed kitchen gardens have their own cost pattern. DIY wood raised beds commonly run about $25 to $50 per square foot of garden space. Professionally built and installed wood beds should be budgeted at least $100 per square foot, with stone, brick, and steel costing more. Irrigation can add roughly $1,700 to $6,500 per property depending on zones, valves, timers, trenching, and backflow requirements. Retaining walls often run about $3,250 to $9,000, and sloped edible yards may need drainage stone, geogrid, engineered design, or permits.
Free tools Windows power users keep installed
One-click scans. No signup required.
| Project Type | Typical Scope | 2026 Budget Range | Best Fit |
|---|---|---|---|
| DIY starter garden | Containers or 1-2 simple beds, bagged soil, hose watering | $300-$1,500 | Testing interest before a larger conversion |
| DIY raised-bed kitchen garden | 100-200 sq ft, wood beds, mulch paths, basic drip kit | $2,500-$10,000 | Handy homeowners with time and level ground |
| Hybrid install | Pro grading, irrigation, paths, homeowner planting | $7,500-$18,000 | Good balance of durability and budget control |
| Professional edible landscape | Design, raised beds, clean soil, drip irrigation, fencing, paths | $15,000-$35,000+ | Finished, visible, long-term edible yard |
| Full yard conversion | Hardscape, drainage, walls, lighting, trees, irrigation, front-yard design | $35,000-$80,000+ | Major landscape replacement or renovation |
There is also a lawn-care comparison to consider. Basic mowing and trimming averages around $55 per visit, with common pricing around $30 to $80 per visit or $1,000 to $2,400 per year for seasonal service. A food garden will not automatically pay for itself in groceries, but it can replace part of that lawn expense while adding fresh produce, habitat, and a more useful yard.
The average U.S. garden is about 600 square feet and can produce roughly $600 worth of food, but do not treat that as guaranteed savings. Production depends on sun, soil, climate, crop choices, pest pressure, water, and how consistently the garden is maintained. Tomatoes are popular for a reason: they appear in a large majority of food gardens and can produce heavily in a small footprint. But a neglected tomato bed is still just an expensive tangle.
Materials That Hold Up
Edible landscapes are wet, dirty, and heavily used. Materials need to handle moisture, soil pressure, tools, hoses, and foot traffic.
For raised beds, cedar and other rot-resistant woods are common, but wood still has a service life. Use exterior-rated fasteners, brace long runs, and set beds level. Metal beds can last longer and look clean in modern landscapes, but they may cost more and need careful placement in hot climates. Stone and brick are durable and attractive, but labor and base preparation drive the price up.
Paths should be designed before beds. Compacted gravel, decomposed granite, pavers, brick, and stepping stones can all work, but the path must drain. We usually want a stable base, defined edging, and enough width to carry tools and harvest bins. Mulch paths are cheaper and softer underfoot, but they need topping up and can migrate into beds.
Trellises and arbors deserve real construction attention. Tomatoes, cucumbers, grapes, kiwis, and espalier fruit can put meaningful load on supports, especially in wind and rain. Use anchored posts, exterior fasteners, and materials sized for the mature plant, not the seedling.
Irrigation, Drainage, and Water Rules
Drip irrigation is usually the best system for edible beds. It puts water at the root zone, reduces wet leaves, cuts waste, and works well under mulch. A proper setup may include a timer, filter, pressure regulator, shutoff valves, drip tubing, emitters, and separate zones for annual beds, berries, trees, and containers.
Rank #3

- KNOW BEFORE YOU GROW | Grow the healthiest, sustainable lawn and garden with the most accurate and easy to use professional soil test kit on the market
- FAST & ACCURATE | Unlike at-home pH meters and test strips, our mail-in professional lab analysis accurately measures 13 plant-available nutrient levels, including Nitrogen and pH. Results in 6-8 days
- FOR ANY GROWING SCENARIO | Tests any soil type and growing condition - lawn & turf, vegetable gardening, flowers, compost, trees, vines, ornamental landscape, house plants, soil-less media or hydroponics
- SAVE TIME & MONEY | Stop applying products you don’t need. Learn exactly what products and amounts you need to grow the healthiest plants possible
- CUSTOM RECOMMENDATIONS | What to apply, how much to apply, and when to apply it. Provides both organic and non-organic fertilizer recommendations to effectively amend your soil
Backflow prevention matters. Many municipalities require approved backflow devices, permits, or inspections for irrigation systems. Rules vary by city, but the principle is the same: irrigation water should not be able to siphon back into the potable water supply. If a contractor is tying into a domestic water line, ask how backflow compliance will be handled.
The Tool Desk
Outbyte PC Repair FREERepair Windows errors before they cause bigger problemsFix Now →Outbyte Driver Updater FREEFix the driver behind crashes, sound loss and screen glitchesFind Drivers →Drainage is just as important as irrigation. Removing turf changes runoff behavior. Adding compacted paths changes it again. On slopes, edible gardens may need terracing, swales, drains, or retaining walls. A small decorative wall is one thing; a retaining wall holding back a slope is structural work. Depending on height and local code, walls may need permits, engineering, setbacks, guardrails, or inspections.
Never assume water will simply disappear because plants are present. Vegetable beds need moisture, but roots also need air. Standing water leads to rot, unstable paths, mosquitoes, and frost heave in colder regions.
Permits, HOA Rules, and Neighbor Visibility
Edible landscaping is more accepted than it used to be, but rules still matter. Before building, check city code, HOA covenants, and setback requirements. Front-yard gardens may be allowed, restricted, or subject to nuisance standards. Fences, walls, irrigation, grading, tree removal, drainage changes, and work in easements can all trigger review.
A practical permit and approval checklist includes:
Do these 3 things before closing this tab:
1Clear out junk files and repair common Windows errors2Scan for outdated or missing drivers - takes under a minute3Repair Windows errors before they cause bigger problems- Utility marking before digging beds, posts, trees, or irrigation trenches.
- HOA approval for front-yard beds, fencing, arbors, structures, or visible changes.
- Irrigation permit, inspection, and backflow prevention requirements.
- Fence height, location, gate, and corner visibility rules.
- Retaining wall height thresholds and engineering requirements.
- Stormwater rules if grading, drains, or runoff patterns change.
- Easements for utilities, drainage, sidewalks, and access.
The more visible the garden, the more design discipline matters. Straight edges, durable paths, repeated materials, evergreen herbs, perennial structure, and tidy fencing go a long way toward avoiding complaints. A front yard full of random containers and temporary netting may produce food, but it can create problems with neighbors or HOAs.
Wildlife, Pests, and Crop Protection
If you build an edible oasis, local wildlife will notice. Deer, rabbits, squirrels, birds, voles, insects, and neighborhood pets can all affect production.
For deer pressure, low decorative edging is not enough. You may need a tall fence, double-fence strategy, or selected planting of less attractive herbs and perennials in exposed areas. For rabbits, tight lower fencing and buried or pinned edges matter. For birds, use netting on berries, but install it so animals cannot get tangled and so you can still harvest.
Good construction helps pest control. Raised beds with clean edges are easier to inspect. Gravel or paver paths reduce hiding places. Drip irrigation reduces leaf disease. Proper spacing improves airflow. Compost should be managed so it does not attract rodents.
Quick wins for a faster PC:
Repair Windows errors before they cause bigger problemsFix Now →Scan for outdated or missing drivers - takes under a minuteDriver Scan →Plan crop protection before planting. Retrofitting hoops, cages, gates, and netting after crops are mature is awkward and usually looks temporary. Simple removable hoops over 4 foot beds can support insect netting, frost cloth, or shade cloth as the season changes.
Independent reader supportYour contribution helps us test, update, and keep practical guides available for everyone.When to DIY and When to Hire a Pro
DIY makes sense when the site is level, the garden is small, soil contamination risk is low, and you are comfortable with measuring, cutting, hauling soil, and assembling beds. A 4 by 8 foot raised bed, a few containers, or a small herb garden near the kitchen are reasonable homeowner projects.
Hire a pro when the project involves grading, drainage corrections, irrigation tied into the home water supply, retaining walls, fencing, significant hardscape, front-yard design, accessibility needs, or suspected contaminated soil. Those are the pieces where mistakes get expensive.
A hybrid approach works well for many homeowners. Have a contractor handle layout, grading, path base, irrigation sleeves, fencing, and bed construction. Then plant the vegetables, herbs, and seasonal crops yourself. That keeps the structure durable while preserving the hands-on part of gardening.
For a professional consultation, bring measurements, photos, sun notes, known drainage issues, and a rough budget. Be clear about how much maintenance you realistically want. A 600 square foot edible garden sounds impressive, but it is a commitment. A well-built 150 square foot garden that gets used every week is a better investment than a large installation that becomes overwhelming.
A Practical First-Year Plan
The first year should prove the system. Start with crops that reward the effort and teach you the site: tomatoes, peppers, basil, parsley, lettuce, kale, cucumbers, bush beans, radishes, strawberries, and a few perennial herbs. Add berries and dwarf fruit after irrigation and maintenance routines are working.
Rank #4
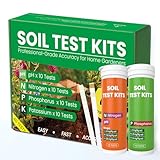
- Complete 4-in-1 Soil Test Kit (pH, N, P, K) – This garden soil test kit measures soil pH, Nitrogen, Phosphorus, and Potassium, giving you a full picture of your soil condition to improve fertilization and plant growth.
- 40 Accurate Tests for Long-Term Use – Includes 10 tests for each element (40 total tests), making this soil testing kit ideal for repeated use across multiple areas of your lawn, vegetable garden, or flower beds.
- Fast & Easy Soil Testing at Home – No calibration or complex tools needed. Simply mix soil with water, add the reagent, and compare the color chart for instant results. Perfect for beginners and experienced gardeners.
- All Tools Included for Convenience – This soil testing kit comes with test tubes, reagents, droppers, and a color comparison chart. Everything you need is included to perform reliable soil tests right at home.
- Improve Plant Growth & Save Fertilizer – By using this soil test kit for lawns and gardens, you can accurately balance soil nutrients, reduce waste, and grow healthier vegetables, flowers, and grass.
A good first-year build might look like this:
- Four 4 by 8 foot raised beds, giving 128 square feet of growing area.
- Thirty to 36 inch paths between beds.
- Drip irrigation with a timer, filter, pressure regulator, and shutoff.
- Clean imported soil blended for vegetable production.
- Mulch on beds and paths to reduce weeds and splash.
- One trellis bed for tomatoes, cucumbers, or pole beans.
- Perennial herbs near the kitchen or patio.
- Pollinator plants along the edge to support production.
That footprint is large enough to be productive and small enough to manage. If it performs well, expand in year two with berries, fruit trees, additional beds, or ornamental edible front-yard plantings.
Seasonal Maintenance Calendar
An edible landscape is not maintenance-free. It is a different kind of maintenance than mowing turf.
Recommended Free Tools
Spring: Test or refresh soil as needed, top beds with compost, check irrigation, plant cool-season crops, install supports, and mulch early. This is also the time to repair winter path movement or bed shifting.
Summer: Water consistently, harvest often, prune tomatoes and vines, monitor pests, replace failed plants, and keep paths clear. In hot regions, shade cloth may protect greens and young starts.
Fall: Remove diseased plant material, plant cover crops where appropriate, add mulch, divide or prune perennials, protect young trees, and clean up irrigation lines before freezing weather.
Winter: Prune fruit trees and berries at the right time for your climate, plan crop rotation, repair trellises, order seeds, and review what actually produced well. Shut down or winterize irrigation where freezing is a risk.
The Tool Desk
Outbyte PC Repair FREERepair Windows errors before they cause bigger problemsFix Now →Outbyte Driver Updater FREEFix the driver behind crashes, sound loss and screen glitchesFind Drivers →Maintenance planning should be part of the design. Leave room for compost, tool storage, mulch bags, harvest bins, and a place to wash produce. Small conveniences determine whether the garden stays enjoyable.
The Bottom Line
A good edible landscape is part garden, part construction project, and part maintenance system. The best results come from doing the permanent work first: soil testing, drainage, irrigation, paths, beds, fencing, and access. Once that structure is right, the planting becomes easier and more rewarding.
Start smaller than your ambition, build better than the average weekend project, and expand only after the first phase proves itself. A 100 to 200 square foot edible garden with clean soil, drip irrigation, solid paths, and reliable sun can produce more value than a much larger yard conversion that was built out of order.
For homeowners who want the yard to look finished, function year-round, and avoid costly rework, the construction details are not extras. They are the difference between a few raised beds in the lawn and a true edible oasis.
Free tools Windows power users keep installed
One-click scans. No signup required.
Frequently Asked Questions
How much does it cost to replace a lawn with an edible garden?
A small DIY setup can start around $300 to $1,500. A durable raised-bed kitchen garden often runs $2,500 to $10,000 DIY or $15,000 to $35,000+ professionally installed with irrigation, paths, fencing, and clean soil.
Are raised beds better than planting directly in the ground?
Raised beds are usually better when soil is compacted, poorly drained, contaminated, or unknown. They cost more and dry out faster, but they offer cleaner soil control, better access, and easier maintenance.
How much sun does an edible landscape need?
Most fruiting vegetables need 6 to 8 hours of direct sun daily. If your yard has partial shade, focus on lettuce, baby kale, scallions, radishes, beet greens, herbs, and other shade-tolerant crops.
Do I need permits for an edible yard?
Possibly. Permits or approvals may be needed for irrigation connections, backflow prevention, retaining walls, fences, grading, drainage changes, or HOA-visible front-yard work. Always check local rules before digging or building.
Quick wins for a faster PC:
Fix the driver behind crashes, sound loss and screen glitchesFind Drivers →Clear out junk files and repair common Windows errorsFree Scan →What is the best size for a first edible garden?
A 100 to 200 square foot kitchen garden is a strong first phase. It is large enough for meaningful production but small enough to water, weed, harvest, and learn from before expanding.
Quick Recap
Product prices and availability are accurate as of the date/time indicated and are subject to change. Any price and availability information displayed on Amazon at the time of purchase will apply.

