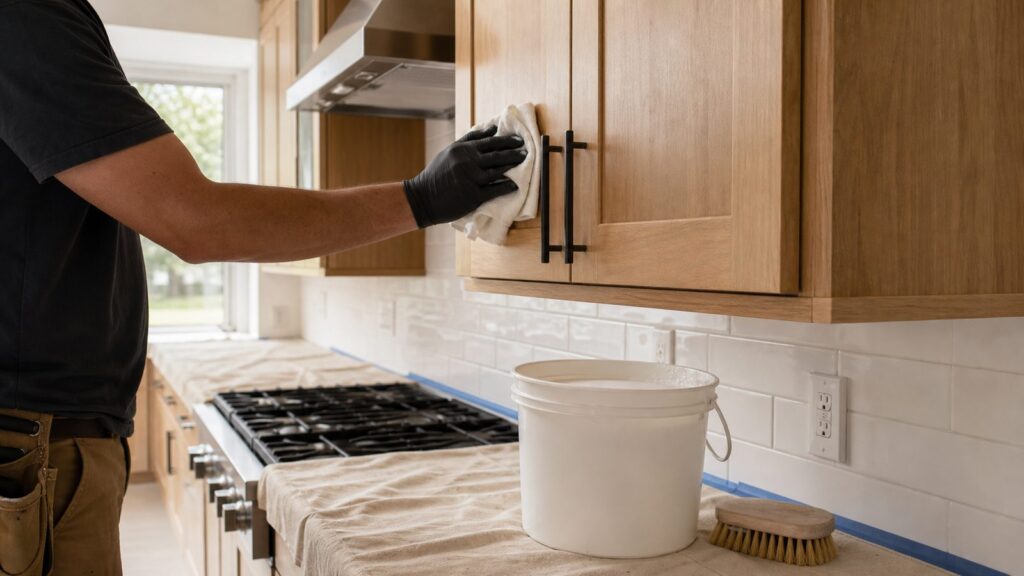
Sticky grease on wood kitchen cabinets is usually a mix of cooking oil, dust, smoke residue, moisture, and leftover cleaner residue. The safest fix is not a harsh degreaser or a scrubbing pad. It is a controlled cleaning process that starts mild, uses very little water, and protects the cabinet finish.
For most finished wood cabinets, start with mild dish soap in warm water on a microfiber cloth. Do not spray cleaner directly onto the doors. Work in small sections, rinse with a second barely damp cloth, and dry immediately. If that does not cut the grease, move up gradually to a wood-compatible degreaser after testing it in a hidden spot.
On our job sites, the cabinets that get damaged are rarely the ones cleaned too gently. The damage usually comes from soaking seams, using abrasive pads, attacking old lacquer with the wrong chemical, or sanding before the grease is removed. This guide gives you the same decision process we use before cleaning, repainting, refinishing, or recommending replacement.
What Makes Kitchen Cabinet Grease So Sticky?
Cabinet grease is not just oil. Cooking sends tiny droplets of oil into the air. Those droplets land on cabinet doors, crown molding, upper cabinet undersides, range-adjacent panels, and the area around knobs and pulls. Over time, dust and smoke residue bond to that film. If past cleaners were not rinsed off, surfactant residue can make the surface feel gummy even after it looks clean.
Quick wins for a faster PC:
Clear out junk files and repair common Windows errorsFree Scan →Fix the driver behind crashes, sound loss and screen glitchesFind Drivers →Repair Windows errors before they cause bigger problemsFix Now →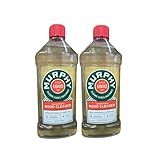
As an Amazon Associate I earn from qualifying purchases.
The worst areas are usually within 24 to 36 inches of the range, directly above the cooktop, beside the range hood, on cabinet rails near handles, and on decorative profiles where a flat cloth does not reach. If the range hood filter is loaded with grease, or if the fan is rarely used, the same cabinet faces will get sticky again within weeks.
There is one important distinction: sticky cabinets do not always mean dirty cabinets. If the finish itself has softened from heat, age, UV exposure, cooking oil, or incompatible cleaners, it may stay tacky after gentle cleaning. Scrubbing harder can pull color, flatten the sheen, or expose raw wood. That is when the job changes from cleaning to finish repair or refinishing.
Before You Clean: Identify the Cabinet Surface
Cleaning advice changes depending on what the cabinet is made from. A solid stained maple door with a factory conversion varnish can tolerate more careful cleaning than a thin wood veneer edge over particleboard. A painted MDF door may clean well on the face but swell at an exposed seam if water sits on it. Thermofoil can loosen at edges if heat and moisture get behind the film.
Recommended Free Tools
Start by inspecting one door, one drawer front, and one range-adjacent panel. Look at edges, inside corners, and the underside of upper cabinets. If you see peeling veneer, bubbling thermofoil, open seams, flaking paint, white haze, or dark swollen edges, keep moisture to an absolute minimum and consider a professional evaluation before deep cleaning.
#1 Best Overall

- Three 32 fl oz bottles of Murphy Oil Soap wood cleaner, Concentrated Formula, Citronella Oil Scent
- Murphy's Oil Soap safely cleans wood to a natural shine
- For household cleaning, this hardwood floor cleaner removes dirt, grease, and grime across surfaces in your home
- This Murphy floor cleaner is made with 99% natural ingredients (1), is dye free, and has 0% phosphates
- Murphys Oil Soap wood cleaner is for use on finished wood surfaces such as wood floors, cabinets, tables & chairs, wood paneling, laminate floors, bookcases
For painted cabinets in older homes, be careful before sanding or aggressive scraping. Homes built before 1978 may have lead-based paint somewhere in the coating history. Lead-safe work practices can apply when painted surfaces are disturbed during renovation or refinishing. Cleaning with cloths is one thing; sanding cabinet doors and frames is a different risk category.
The Hidden-Area Test That Prevents Expensive Damage
Before cleaning a visible cabinet face, test the method inside a door, on the back of a drawer front, or on a low inside rail. Use a white microfiber cloth so you can see whether color or finish transfers. Test with the same pressure and cleaner you plan to use on the visible surfaces.
After the test area dries, check for five warning signs: color on the cloth, a dull patch, whitening or haze, raised grain or swelling at seams, and a tacky feel that remains after 15 to 30 minutes. If any of those show up, stop. The coating may be failing, or the cleaner may be too aggressive for that finish.
This step takes 10 minutes and can save thousands. A full kitchen cabinet refinish in 2026 commonly runs about $1,500 to $5,000, with typical whole-kitchen averages around $3,100. Cabinet refacing is larger still, often around $4,000 to $9,500 or $100 to $250 per linear foot. A hidden-area test is cheap insurance.
Tools and Supplies for Safe Cabinet Degreasing
For a normal kitchen, plan on $15 to $60 in supplies if you already own a step stool and bucket. You need microfiber cloths, mild dish soap, warm water, a wood-safe cleaner or degreaser if needed, a soft toothbrush or detail brush, gloves, drop cloths, and a spray bottle used only to dampen the cloth. Do not spray cabinet surfaces directly.
Use microfiber, not steel wool, abrasive pads, or melamine foam. Those products can scratch or burnish the finish, especially on painted cabinets and satin clear coats. Avoid undiluted vinegar, ammonia, bleach, and generic heavy-duty degreasers unless a coating manufacturer specifically allows them. Those products can dull, soften, or strip cabinet coatings.
If the hardware is greasy, remove knobs and pulls where practical. Put screws in labeled bags or painter’s tape them to the matching door. Soak metal hardware separately only if the hardware finish can handle it. This keeps water and cleaner from pooling around screw holes, which is a common source of swelling and finish failure.
What’s actually slowing this PC down?
Pick the symptom - the matching free tool is one click away.
Step-by-Step: How to Remove Sticky Grease From Wood Kitchen Cabinets
1. Dry Dust First
Start with a dry microfiber cloth or a vacuum brush attachment. Remove loose dust from door faces, rails, crown, light rail, and cabinet tops. If you skip this step, you turn dust into muddy residue and drag grit across the finish.
Rank #2

- Product Type:Grocery
- Item Package Dimension:8.4 " L X3.33 " W X1.9 " H
- Item Package Weight:1.13 lbs
- Country Of Origin: United States
2. Mix a Mild Soap Solution
Use a few drops of mild dish soap in a quart of warm water. The water should feel warm, not hot. Hot water can soften some older finishes and can push moisture into seams faster. Dip a microfiber cloth, wring it until it is damp rather than wet, and fold it into quarters so you can rotate to a clean face.
3. Clean Small Sections
Work one door or one 2-square-foot area at a time. Wipe with the grain on stained wood. Around pulls and profiles, use a soft toothbrush or detail brush with light pressure. Do not flood corners, panel grooves, veneer edges, or the bottom edge of doors.
4. Rinse Lightly
Use a second microfiber cloth dampened with plain water. Rinse the cleaned section to remove soap and suspended grease. Change rinse water often. Dirty rinse water redeposits residue and leaves the surface sticky again.
Free tools Windows power users keep installed
One-click scans. No signup required.
5. Dry Immediately
Dry each section with a clean towel before moving on. Pay special attention to lower edges, inside corners, molding profiles, and seams. Water sitting on a cabinet for even a few minutes can cause problems on veneer, MDF, and older finishes.
6. Escalate Only Where Needed
If mild soap leaves sticky residue, use a wood-compatible degreaser according to the label. Apply it to the cloth, not directly to the cabinet. Give it a short dwell time on the cloth or surface, usually 30 to 90 seconds unless the product says otherwise, then gently agitate and rinse. Longer dwell time is not automatically safer.
Cleaner Comparison: What to Use and What to Avoid
| Cleaner or Tool | Best Use | Risk Level | Contractor Guidance |
|---|---|---|---|
| Mild dish soap and warm water | First-pass grease removal on finished wood | Low | Use on a damp microfiber cloth, rinse lightly, and dry immediately. |
| Wood-compatible degreaser | Stubborn range-area grease | Medium | Test first, keep dwell time short, and avoid soaking seams. |
| Soft toothbrush or detail brush | Profiles, corners, around pulls | Low | Use light pressure. Let the cleaner do the work. |
| Undiluted vinegar | Often suggested for grease | Medium to high | Can dull or affect finishes. Do not use as a default cabinet cleaner. |
| Ammonia, bleach, heavy-duty degreasers | Industrial or non-wood cleaning tasks | High | Can soften, discolor, or strip cabinet coatings. |
| Abrasive pads, steel wool, melamine foam | None for finished cabinet faces | High | Can scratch, flatten sheen, or remove paint and clear coat. |
How to Handle Grease Around Pulls, Hinges, and Cabinet Details
The area around knobs and pulls usually has the heaviest buildup because hands add skin oils to cooking residue. If the hardware is removable, take it off before deep cleaning. This lets you clean the full door face without forcing water around screw holes.
For hinges, avoid soaking. Clean exposed hinge leaves with a barely damp cloth and dry them right away. If grease is packed into hinge barrels, use a cotton swab or soft detail brush. Do not spray cleaner into hinges; it can run into the cabinet box and may affect lubrication.
The Tool Desk
Outbyte PC Repair FREERepair Windows errors before they cause bigger problemsFix Now →Outbyte Driver Updater FREEScan for outdated or missing drivers - takes under a minuteDriver Scan →Raised-panel doors, shaker inside corners, crown molding, and light rail need patience. Work the profile with a soft brush, wipe immediately with microfiber, then dry. If you see dark lines at joints after cleaning, that may be open grain, failed finish, or moisture staining rather than removable grease.
When Sticky Grease Is Actually Finish Failure
A cabinet finish is supposed to be the protective layer. If that layer has softened, cleaning cannot restore it. Common signs include permanent tackiness, color transfer onto a white cloth, uneven sheen, yellowing near the range, cloudy patches, peeling paint, or a surface that feels gummy even after mild soap cleaning and drying.
Heat and oil are hard on cabinet coatings. Upper cabinets beside a range can see repeated warm grease exposure for years. Older lacquer, low-grade paint, and poorly prepped repaints are more likely to soften or yellow. Once oil has plasticized the coating, stronger cleaning may only smear the finish.
Rank #3
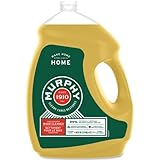
- VERSATILE CLEANING POWER: Murphy's Oil Soap cleans a variety of surfaces, including wood, ceramic tile, vinyl, and more, making it a versatile and essential cleaning solution for your entire home
- LARGE SIZE VALUE: The 145 oz Murphy Wood Cleaner bottle offers great value and ensures a long-lasting supply, reducing the need for frequent repurchases and providing an economical cleaning solution. With this size, you'll be able to make over 70 gallons of cleaning solution, ensuring you always have enough on hand for all your cleaning needs
- NATURAL INGREDIENTS: Made with 98% naturally derived ingredients, Murphy Wood Floor Cleaner is free from harsh chemicals, making it a safer choice for households with children and pets
- GENTLE ON WOOD: Specially formulated to clean wood surfaces without stripping away their natural oils, Murphy Floor Soap helps maintain the beauty and longevity of wood furniture and floors
- PLEASANT SCENT: Leaves behind a mild, pleasant scent that freshens your home while cleaning, without any overpowering chemical odors
If repainting is the next step, degrease before sanding. Sanding greasy cabinets can drive contaminants into scratches and cause primer or paint adhesion failure. A professional repaint normally includes degreasing, rinsing, scuff sanding, dust removal, bonding primer, and cabinet-grade finish coats. Cleaner, primer, and topcoat should be compatible with the coating manufacturer’s instructions.
PC Slower Than It Used to Be?
A free scan shows the junk files, broken settings and background clutter dragging Windows down - then fixes them in one click.Free scan · Windows 10 & 11Crashes, No Sound, or Screen Glitches?
Random freezes, missing sound and display glitches usually trace back to one bad driver. Find and replace yours safely.Free scan · under a minuteCost Guide: DIY Cleaning, Pro Cleaning, Refinishing, and Refacing
Most homeowners can attempt a careful DIY cleaning for $15 to $60 in materials. A typical 10-by-12-foot kitchen with 20 to 30 doors and drawers may take 3 to 6 hours for a detailed first cleaning, especially if you remove hardware and clean profiles.
Professional cleaning costs depend on whether this is a general kitchen clean or a true cabinet degreasing job. In 2026, a basic professional kitchen cleaning starts around $117 to $144 per kitchen. Whole-home standard cleaning commonly runs about $100 to $300 nationally, with one-time visit averages around $174 to $256 on large service marketplaces and about $180 on subscription-style cleaning platforms. Deep cleaning or move-out cleaning commonly runs $250 to $700 or more.
Cabinet-front detailing may be bundled or priced as an add-on. Some cleaning price guides list cabinet fronts and baseboards around $20 to $75 per session, but heavy baked-on kitchen grease can cost more because it takes labor, controlled dwell time, hardware removal, and multiple rinse passes.
| Scope | Typical 2026 Cost | Best For |
|---|---|---|
| DIY cabinet degreasing supplies | $15 to $60 | Light to moderate grease with intact finish |
| Basic professional kitchen cleaning | $117 to $144 starting range | General kitchen cleanup, light cabinet fronts |
| Whole-home standard cleaning | $100 to $300 typical national range | Routine cleaning with cabinet touch-up |
| Deep cleaning or move-out cleaning | $250 to $700+ | Heavy kitchen buildup, occupied-to-sale prep |
| Heavy degreasing before painting | $200 to $400 add-on in some markets | Baked-on grease before cabinet repainting |
| Cabinet refinishing | About $1,500 to $5,000 for many kitchens | Finish failure, worn stain, dull or damaged coating |
| Cabinet refacing | About $4,000 to $9,500 or $100 to $250 per linear foot | Bad doors, delamination, outdated style with sound boxes |
When to DIY vs. When to Hire a Pro
DIY is reasonable when the cabinet finish is intact, the grease is light to moderate, there is no swelling or peeling, and the hidden-area test shows no color transfer or gloss change. Plan for a half day in a normal kitchen and more time if you have detailed trim or glass doors.
Hire a professional cleaner when the kitchen has years of buildup, the cabinets are tall or difficult to access, the home is being prepared for sale, or you want the work bundled with a deep clean. Ask whether cabinet fronts, cabinet tops, range-hood exterior, and hardware detailing are included. Many standard cleanings do not include heavy degreasing unless specified.
Bring in a cabinet painter, refinisher, or construction professional when the surface stays tacky after gentle cleaning, the finish transfers to the cloth, paint is peeling, veneer is lifting, MDF is swollen, or grease damage is concentrated near heat. At that point, paying for more cleaning may not solve the problem. The better decision may be spot repair, refinishing, refacing, or replacing selected components.
Rank #4

- Country of origin is China
- The package dimension of the product is 11"L x 8.2"W x 2.6"H
- The package weight of the product is 3.2 pounds
Preventing Grease From Coming Back
The best cleaning job will not last if the ventilation problem remains. Clean or replace the range-hood filter according to the manufacturer’s instructions. Washable metal filters can hold a surprising amount of grease. If they are clogged, the fan cannot capture cooking aerosols effectively.
Use the hood fan before the pan starts smoking, not after the kitchen is already hazy. For high-grease cooking, run the fan during cooking and for 10 to 15 minutes afterward. Wipe the cabinets closest to the range every 1 to 2 weeks with a barely damp microfiber cloth and mild soap solution. That maintenance pass takes 10 minutes and prevents the thick film that takes hours to remove later.
Do these 3 things before closing this tab:
1Repair Windows errors before they cause bigger problems2Scan for outdated or missing drivers - takes under a minute3Clear out junk files and repair common Windows errorsKeep steam away from cabinet undersides where possible. Repeated moisture exposure can dull finishes and swell vulnerable seams. If your layout has cabinets very close to a high-output range, inspect the finish every few months for yellowing, tackiness, and edge swelling.
Safety Notes for Cabinet Cleaning and Refinishing
Wear gloves when using any degreaser, and ventilate the kitchen. Keep cleaners away from food-prep surfaces unless the label allows that use and you rinse properly. If you use oily rags with flammable or combustible liquids during refinishing, handle them as a fire hazard. Lay them flat to dry outdoors where allowed, or store and dispose of them according to the product label and local rules. Do not wad oily rags into a pile.
If the project escalates into sanding, stripping, or repainting, protect floors, counters, appliances, and HVAC returns. Control dust. In pre-1978 homes, painted cabinet work may require lead-safe procedures if old coatings are disturbed. Local rules can also affect coating choices, especially VOC limits for paints, primers, and clear coats.
Cleaning cabinets typically does not require a permit. Replacing kitchen cabinets sometimes does, depending on the city and whether plumbing, electrical, structural work, or layout changes are involved. Before a cabinet replacement project, check local permitting requirements. A like-for-like door cleaning job is maintenance; a kitchen alteration can become construction.
Clean, Deep Clean, Refinish, Reface, or Replace?
Use this decision path. If the hidden-area test passes and the finish is intact, clean with mild soap and escalate carefully only where needed. If the finish is intact but buildup is heavy, schedule a deep clean or dedicated cabinet degreasing. If the surface remains tacky, dull, or transfers color, stop cleaning and evaluate refinishing.
Best Value
If the doors are structurally sound but the coating is worn, repainting or refinishing may be the right scope. Repainting can be less expensive than full restaining, with some 2026 estimates around $400 to $1,500 for smaller repainting scopes and $1,500 to $5,000 for restaining or full refinishing. Premium glaze or specialty finish work can land around $1,200 to $3,500 depending on the system and kitchen size.
If doors are delaminating, veneer is lifting, thermofoil is peeling, or the style is outdated but the cabinet boxes are sound, refacing may make sense. If boxes are damaged, layout is poor, or water and grease damage are widespread, replacement becomes the cleaner long-term construction answer.
The main rule is simple: clean the coating, do not fight it. If the coating is still doing its job, careful degreasing will bring the cabinets back. If the coating has failed, stop before a cleaning job turns into avoidable damage.
Frequently Asked Questions
What is the safest way to remove sticky grease from wood kitchen cabinets?
Use mild dish soap in warm water on a damp microfiber cloth. Clean one small section at a time, rinse with a second barely damp cloth, and dry immediately. Test first in a hidden area.
Can I use vinegar on greasy wood cabinets?
Do not use undiluted vinegar as a default cleaner. It can dull or affect some cabinet finishes. A mild soap solution is safer for the first pass.
Why are my cabinets still sticky after cleaning?
The finish may be failing, or cleaner residue may still be on the surface. If the cabinet stays tacky after rinsing and drying, or a white cloth pulls color, stop scrubbing and evaluate refinishing.
How much does professional cabinet grease cleaning cost?
A basic professional kitchen cleaning in 2026 starts around $117 to $144, while deep cleaning commonly runs $250 to $700 or more. Heavy cabinet-front degreasing may be an add-on.
What’s actually slowing this PC down?
Pick the symptom - the matching free tool is one click away.
Should I degrease cabinets before painting?
Yes. Degrease before sanding. Sanding greasy cabinets can push contaminants into scratches and cause primer or paint adhesion problems.
When should greasy cabinets be refinished instead of cleaned?
Consider refinishing if the finish is tacky, yellowed, peeling, dull after testing, or transferring color to a white cloth. Those are signs the coating may be damaged rather than dirty.
Quick Recap
Product prices and availability are accurate as of the date/time indicated and are subject to change. Any price and availability information displayed on Amazon at the time of purchase will apply.

