Windows Errors? Fix Them Before They Spread
Repair common Windows errors and clear accumulated junk for a smoother, more stable PC - no reinstall needed.Free scan · no reinstallCrashes, No Sound, or Screen Glitches?
Random freezes, missing sound and display glitches usually trace back to one bad driver. Find and replace yours safely.Free scan · under a minuteGreasy kitchen cabinets do not need a harsh cleaner first. They need the right cleaner for the cabinet finish, short dwell time, clean microfiber, a rinse wipe, and immediate drying. On job sites, we treat cabinet grease as a finish-safety problem before we treat it as a cleaning problem, because the fastest way to make cabinets look worse is to scrub through a softened clear coat or dull a painted door.
The safe escalation is simple: start with warm water and a few drops of grease-cutting dish soap, step up to a cabinet-safe degreaser for sticky buildup, use baking soda paste only on small problem spots, and stop for a refinishing assessment if the surface stays tacky, yellowed, swollen, or dull after cleaning. For most kitchens, the first two steps handle the job in 30 to 90 minutes. Heavy grease over a range can take longer because the oil has mixed with dust and heat-cured into a sticky film.
Before you start, identify what you are cleaning. Painted cabinets, stained wood with a clear coat, laminate, thermofoil, unfinished wood, and older painted cabinets all react differently. A product that is fine on laminate can soften paint, lift veneer edges, or creep into a thermofoil seam. Work damp, not wet. Use warm water, not boiling water. Dry every section as you go.
As an Amazon Associate I earn from qualifying purchases.
Do these 3 things before closing this tab:
1Fix the driver behind crashes, sound loss and screen glitches2Repair Windows errors before they cause bigger problems3Scan for outdated or missing drivers - takes under a minuteStart With a 5-Minute Finish Test
A quick test prevents most cabinet-cleaning mistakes. Pick an inconspicuous place such as the inside edge of a door, the bottom rail near a hinge, or the underside of an upper cabinet. Clean a 2-inch by 2-inch area with your planned solution, wait until it dries, then inspect it from two angles under good light.
Look for four things: color transfer on the cloth, dulling, soft or tacky finish, and swelling at seams or veneer edges. If the cloth picks up paint or stain color, stop. If a glossy surface turns cloudy or flat, stop. If the door feels tacky after drying, cleaning harder will not solve the problem; the coating may already be failing or contaminated with old oil.
#1 Best Overall
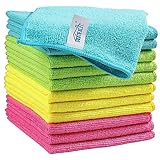
- Effective Streak-Free Cleaning: Clean kitchen countertops, windows, mirrors, bathroom surfaces, stainless steel, car interiors, glass, and other delicate surfaces with just water or your favorite cleaner—these microfiber cloths deliver streak-free, neat results with minimal effort, making daily cleanup fast and simple
- Lint-Free & Scratch-Safe: Soft to the touch and completely lint-free, these cloths won't scratch or damage delicate finishes like glass, ceramic, coated metals, car paint, or polished surfaces—clean with confidence on everything from household appliances to auto trim and electronics screens
- Ultra-Absorbent for Spills, Polishing & Drying: Designed to quickly soak up liquids, grease, and grime, making them ideal for drying dishes, wiping spills, polishing stainless steel, buffing car surfaces, and tackling everyday messes around the house, garage, or workshop—efficient cleaning without extra effort
- Reusable, Washable & Long-lasting: Machine washable and reusable hundreds of times with reinforced edges that hold up wash after wash—a durable replacement for disposable paper towels that cuts down on waste and repeat purchases for families, pet owners, detailers, and busy households
- Versatile Across Home, Auto & Beyond: Equally suited for general household cleaning, interior car detailing, exterior buffing, polishing wheels, wiping down tools, workshop surfaces, electronics, eyeglasses, screens, and more—simply rinse after use or toss in the washing machine; a practical all-around choice for homes, garages, shops, and small businesses
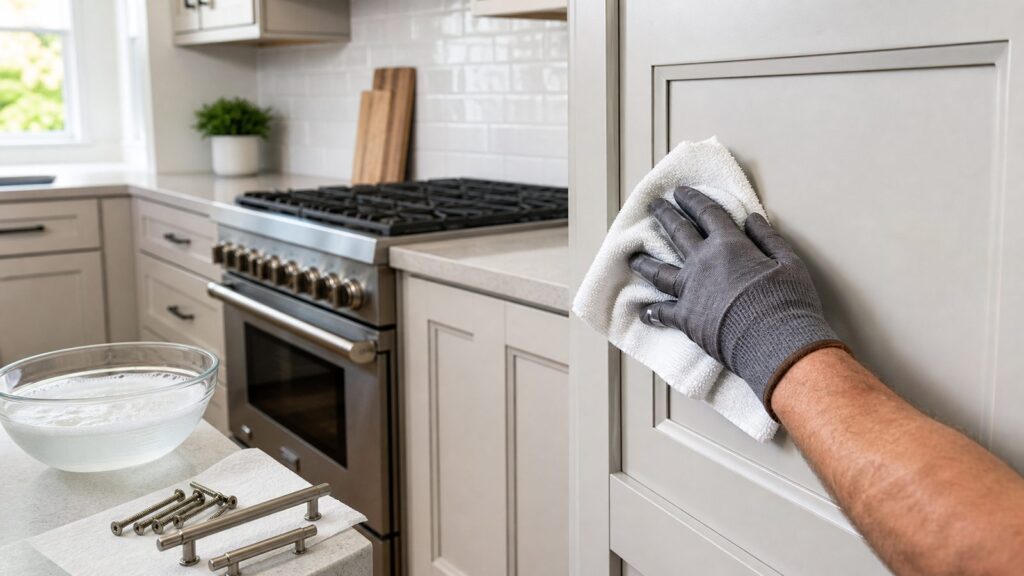
Remove knobs and pulls before you clean if you have time. Hardware shadows make cabinet faces look dirty even after the flat panel is clean, and grease packs into the ring around handles. Most pulls come off with a Phillips screwdriver from the back of the door or drawer. Put screws and hardware in a bowl so nothing rolls under the range.
Set up with two bowls or buckets, not one. Use one for cleaning solution and one for clean rinse water. Fold microfiber cloths into quarters and rotate sides often. Once a cloth is loaded with grease, it smears more than it cleans. For an average 10-by-12-foot kitchen, plan on 4 to 8 microfiber cloths, a non-scratch sponge, dish soap, and a dry towel.
Method 1: Dish Soap and Warm Water for Fresh Grease Film
The safest first pass for most finished kitchen cabinets is a few drops of grease-cutting dish soap in warm water. This works well on fresh cooking film, light fingerprints, and the thin haze that builds on doors near the stove. It is also the least likely method to damage painted, stained, clear-coated, laminate, or thermofoil cabinets when used correctly.
Mix 2 to 4 drops of dish soap into 1 quart of warm water. The water should feel comfortably warm to your hand, roughly the temperature you would use for hand-washing dishes. Do not use boiling water. Excessive heat can soften some finishes and adhesives, especially along thermofoil edges and older veneer seams.
How to do it fast
Work from top cabinets down, and from the least greasy areas toward the most greasy areas near the range. Dip a microfiber cloth in the solution, wring it until damp rather than dripping, and wipe a small section about 2 feet wide. Use straight passes with light pressure. If the grease does not release immediately, re-wet the surface and let it sit for 30 to 60 seconds before wiping again.
Follow each cleaned section with a second cloth dampened with plain water. This rinse step matters because soap residue can leave cabinets feeling sticky and can attract new dust and cooking oil. Dry immediately with a clean towel, especially at raised panels, lower rails, inside corners, seams, hinge areas, and veneer edges.
For cabinet tops, use the same solution but expect more dwell time. The tops of upper cabinets collect airborne oil, dust, and lint. Keep the surface damp for 1 to 2 minutes, agitate with microfiber or a non-scratch sponge, then rinse and dry. Do not flood the top of the cabinet box. Water can find unfinished particleboard or plywood edges and cause swelling.
Where dish soap works best
Dish soap is the right first tool for painted cabinets in good condition, stained wood with an intact clear coat, laminate cabinet fronts, and most thermofoil doors. It is also a good maintenance cleaner after a deeper degreasing. If you cook daily, a 10-minute wipe of the doors closest to the range once a week prevents the sticky film that later requires stronger chemicals.
White cabinets need a realistic eye. Yellowing near a stove is not always removable grease. Heat, UV exposure, smoke, finish aging, and oil migrating into an old coating can change the color below the cleanable surface. If a white painted door remains yellow after a proper wash, rinse, and dry, you may be looking at finish discoloration rather than dirt.
Method 2: Use a Cabinet-Safe Degreaser for Sticky Buildup
If soap leaves a tacky film, step up to a cabinet-safe degreaser. This is the right move for cabinets above the stove, doors next to a fryer or griddle, and rental or move-in kitchens where grease has sat for months. The goal is controlled chemistry, not more pressure.
Quick wins for a faster PC:
Repair Windows errors before they cause bigger problemsFix Now →Scan for outdated or missing drivers - takes under a minuteDriver Scan →Clear out junk files and repair common Windows errorsFree Scan →Rank #2

- 10x GRIP-ROOT WEAVE - TRAP MORE, WORK LESS: Ultra-absorbent microfiber towels for car Grip Root weave works like PLANT ROOT FOLLICLES, sucking up & LOCKING AWAY 8x to 10x its weight in liquid, particulates, moisture, grime and dirt in far LESS TIME than traditional ‘Heavy Duty’ Cleaning Rags. Each towel features a 2.5mm thick design, providing enhanced durability and better grip during use.
- WON’T LINT, SCRATCH, PILL, SWIRL, SHED, or BLEED like thin, cheaply made microfiber towels for cars. RAPID DRY release layers make these the ideal microfiber towels for cars, creating that spectacular, SWIRL-FREE MIRROR SHINE with our cleaning rags. With a solid 2.5mm thickness, these towels are built to prevent damage while ensuring optimal performance.
- LASTS 1200+ WASHES - That’s 3.27 YEARS worth of use in this 12-pack of COMMERCIAL GRADE 300 GSM Reuseable Cleaning Cloth. The 2.5mm thickness and OVERLOCK BRAIDED STITCHING makes the ideal SUSTAINABLE SOLUTION for cleaning every SURFACE, crack, and CREVICE in your home, garage, or office.
- SOAK IT UP FASTER - 4X’s MORE ABSORBENT than COTTON cloths, these are the microfiber cleaning cloth for cars to get if you want an ALL PURPOSE cleaning towel, crafted with 2.5mm thickness to scoop up your messes, oils, and liquids FASTER than a SPONGE
- UNRIVALED POWER - TEST THIS GRIP-ROOT technology risk-free for 30 full days. With a 2.5mm thick design, it LOCKS AWAY dirt, dust, grime, spills, and messes better than any other high-performance cleaning rags you’ve tried.
Choose a cleaner labeled for painted surfaces, finished wood, laminate, or cabinets, depending on what you have. EPA Safer Choice labeled products are useful when selecting household cleaners because the label identifies products designed to perform while using ingredients that are safer for people and the environment. EPA also maintains a searchable product list, and the Safer Choice standard was strengthened in 2024 with updated criteria including packaging criteria that avoid intentionally added PFAS or other chemicals of concern. The label does not mean every product belongs on every cabinet finish, so still read the surface directions.
Retail cabinet-safe or low-odor degreasers commonly run about $5 to $20 per bottle or concentrate in 2026. Concentrates cost more upfront but less per use if you clean often. For a typical kitchen, one bottle is usually enough unless the cabinet tops and interiors are included.
The right way to use dwell time
Spray the cleaner onto a cloth or sponge rather than directly into door seams, hinge cups, or drawer gaps. Keep the surface damp but not wet. Let the cleaner dwell according to the label, often 30 seconds to a few minutes, then wipe with microfiber or a non-scratch sponge. The dwell time lets the cleaner loosen the oil so you do not have to abrade the finish.
After the grease releases, rinse with a clean damp cloth and dry right away. Do not leave degreaser residue behind. Surfactant residue can feel sticky, collect dust, and make the cabinet look dirty again within days. On dark stained cabinets, residue also shows as streaking when light hits the door at an angle.
Recommended Free Tools
For hardware, clean separately in a small bowl of warm soapy water unless the finish is unlacquered brass, specialty black, antique, or fragile. Many modern knobs and pulls have thin decorative coatings. Soaking them in a strong degreaser can discolor the finish. A soft toothbrush is useful around screw posts and handle bases, but avoid wire brushes.
What to avoid when grease is stubborn
Do not use oven cleaner on cabinet doors. Many oven cleaners are caustic enough to burn skin and can strip coatings, discolor metal hardware, and leave permanent marks. Avoid steel wool, abrasive scouring pads, and aggressive melamine foam on painted or glossy cabinets because they can leave dull spots and visible scratch patterns. Also avoid bleach and ammonia mixtures. That combination can create hazardous fumes and has no place in cabinet cleaning.
Undiluted vinegar is not a universal cabinet degreaser. Acids can dull some finishes, affect metal hardware, and may not break down polymerized cooking film well. If a cabinet manufacturer specifically permits a diluted vinegar solution, test first and rinse. If you do not know the finish, choose soap or a labeled cabinet-safe degreaser instead.
Method 3: Baking Soda Paste for Small Sticky Spots Only
Baking soda can help with isolated sticky spots, but it should not be treated like a whole-kitchen scrub. It is mildly abrasive. That is useful on a small patch of hardened grease around a handle, but risky across a glossy painted door or a clear-coated wood panel.
The Tool Desk
Outbyte Driver Updater FREEScan for outdated or missing drivers - takes under a minuteDriver Scan →Outbyte PC Repair FREEClear out junk files and repair common Windows errorsFree Scan →Mix baking soda with a small amount of water to make a soft paste. A practical starting point is 2 tablespoons of baking soda with 1 teaspoon of water, adding drops as needed until it spreads without running. Apply it to the sticky spot with your fingertip or a soft cloth. Let it sit for 1 to 2 minutes, then wipe gently with the grain or panel direction. Do not bear down.
Rinse thoroughly with a clean damp cloth, then dry. Any leftover powder can lodge in painted profiles, shaker inside corners, and open wood grain. On dark cabinets, dried residue shows as a pale haze.
Rank #3

- Strong Absorbent & Streak-Free: Crafted with premium microfiber, these cleaning rags quickly absorb water and wipe away spills, dust, grease, and dirt without leaving streaks. Ideal for drying dishes, cleaning countertops, or polishing surfaces in the kitchen, car, or around the home.
- Soft & Lint-Free on Delicate Surfaces: Made from a non-abrasive blend of 85% polyester and 15% nylon, our microfiber cloths are gentle yet effective. They won’t scratch paint, glass, or delicate surfaces, and leave no lint behind—perfect for cleaning mirrors, electronics, stainless steel, and other smooth surfaces.
- Durable Construction for Long-Term Use: Designed with reinforced stitching, these cleaning cloths are not only reusable but also resist wear and tear even after frequent washing. A reliable alternative to disposable paper towels for everyday cleaning.
- Multi-Color Convenience for Any Task: Available in 4 assorted colors—Pink, Green, Blue, and Purple—for easy color-coding. Use different cleaning towels for the kitchen, bathroom, car, or electronics. Stay organized and keep your cleaning tasks clearly separated.
- Machine Washable & Quick-Drying: Each microfiber cloth measures 11.8" x 11.8", making them compact and easy to store. They can be washed by hand or machine. Quick-drying and always ready for your next cleaning job.
Best uses for baking soda
Use this method on small grease dots, handle grime, and the lower edge of upper cabinet doors where fingers repeatedly touch the same place. It is not ideal for unfinished wood, failing paint, high-gloss lacquer, or thermofoil seams. If the spot needs repeated scrubbing, switch back to a compatible degreaser and dwell time rather than increasing pressure.
For raised-panel doors, keep paste out of joints and decorative grooves. Grease often hides in those areas, but so does old finish damage. Use a damp microfiber corner or a soft toothbrush with soap solution instead of forcing paste into profiles.
Free tools Windows power users keep installed
One-click scans. No signup required.
Method 4: Stop Cleaning and Assess the Finish
Sometimes cabinet grease has crossed the line from cleaning into repair. If the cabinet remains sticky after soap, a compatible degreaser, rinsing, and drying, the finish may have softened or failed. If the door is swollen, delaminating, yellowed through the coating, or peeling at an edge, more cleaning will not restore it.
We see this often in kitchens with poor ventilation, frequent frying, or a range hood that is undersized, unused, or packed with grease. Heat and oil can soften coatings over time. Once oil contaminates paint or clear coat, a surface wipe may improve the feel but not fix the appearance. That is when a refinishing or refacing conversation is more honest than another cleaning trick.
Signs cleaning will not solve it
Look for finish that feels rubbery after it dries, paint color on the cloth, swollen MDF or particleboard at door edges, peeling thermofoil, cloudy clear coat, blackened seams, or yellowing that does not change after cleaning. On stained wood, dark halos around knobs may mean hand oils have penetrated through worn finish. On painted cabinets, shiny or dull patches after cleaning may show where the coating has been polished, softened, or abraded.
Older painted cabinets need extra caution. If the home or cabinet paint may predate 1978, sanding, scraping, or disturbing paint can trigger lead-safe requirements. EPA’s Lead Renovation, Repair and Painting Program applies to many renovation activities in pre-1978 homes and child-occupied facilities when painted surfaces are disturbed. Cleaning cabinet faces is maintenance. Sanding, stripping, repainting prep, and certain repairs are a different category.
What’s actually slowing this PC down?
Pick the symptom - the matching free tool is one click away.
Mineral spirits and refinishing solvents also belong in this stop-and-assess category for most homeowners. They can soften finishes, create ventilation concerns, and require proper handling of solvent-soaked rags because oily or solvent-contaminated materials can be a fire hazard. If a project needs solvents, sanding, spray finishing, or coating removal, treat it like a refinishing job rather than routine cleaning.
Cost Comparison: DIY Cleaning, Deep Cleaning, Refinishing, or Refacing
The cost depends on whether you are removing surface grease or correcting finish damage. In 2026, a basic DIY cabinet grease cleanup usually runs about $10 to $45 if you need microfiber cloths, dish soap, a non-scratch sponge, baking soda, and a cabinet-safe degreaser. If you already own the basics, the cost may be only the cleaner.
Rank #4

- 【Microfiber Towels Bulk】One pack of 50 microfiber towels for cars and home, measuring 12x12 inches, Made of 87% polyester and 13% polyamide, 210gsm microfiber cloth, is vacuum-packed to reduce greenhouse gas emissions. Please allow a few minutes for the towels to expand fully after unpacking to achieve optimal fluffiness and absorbency.
- 【Super Absorbent】 TEAWOO microfiber cleaning cloths quickly soak up moisture and dry rapidly, making them ideal for both automotive and household cleaning tasks. They efficiently remove dirt, grime, and liquids with ease.
- 【Soft and Lint-Free】TEAWOO microfiber towels bulk supply of ultra-soft, non-abrasive microfiber towels ensure a scratch-free cleaning experience on surfaces, paint, glass, and coatings. Perfect for cleaning tough grease and dirt from your car, kitchen, and windows, leaving no traces behind.
- 【Reusable and Washable】These reusable and washable microfiber towels cleaning for cars can be used hundreds of times without shrinking, shedding, or losing their cleaning effectiveness. They are a cost-effective alternative to disposable towels, ideal for car and household cleaning.
- 【Easy Maintenance and Use 】Our bulk microfiber towels come in 5 colors and are crafted with high-quality fabric and sewn edges, providing a soft and scratch-free feel. They are easy to maintain and perfect for keeping both your car and home spotless.
Professional cleaning costs more because grease removal is labor-heavy. National 2026 figures commonly put a standard house-cleaning visit that includes kitchen detail work around $100 to $300, with an average near $180. Hourly cleaning rates commonly land around $40 to $55 per hour in marketplace data. Deep cleans often run about $200 to $400 or more, and heavy buildup, move-in, or move-out cleaning can reach roughly $250 to $700 or more depending on cabinet count, home size, region, and whether interiors are included.
| Option | Typical 2026 Cost | Best For | Typical Time |
|---|---|---|---|
| DIY soap and microfiber cleanup | $10-$25 | Fresh grease film, weekly maintenance, light fingerprints | 30-60 minutes |
| DIY cabinet-safe degreaser | $15-$45 | Sticky doors near the range, cabinet tops, rental turnover touch-ups | 1-3 hours |
| Professional kitchen detail cleaning | $100-$300 standard visit; $200-$400+ deep clean | Heavy grease, limited time, move-in or move-out kitchens | 2-6 labor hours depending on scope |
| Cabinet refinishing | About $307-$1,359 for smaller jobs; $1,500-$5,000 typical full kitchen | Failed paint or clear coat, yellowed finish, worn areas around pulls | Several days to 1+ week |
| Cabinet refacing | About $3,000-$13,500; often around $100-$250 per linear foot | Damaged or dated doors and veneers with usable cabinet boxes | 3-7+ days |
Refinishing and refacing are not cleaning upgrades; they solve different problems. Refinishing keeps the existing doors and drawer fronts but sands, repairs, primes, paints, stains, or clears them. Refacing typically keeps the cabinet boxes while replacing doors, drawer fronts, and visible veneers. Material choice, door style, hardware, kitchen size, prep condition, and local labor drive the final price.
When to DIY and When to Hire a Pro
DIY is the right call when the finish is intact, the cabinet faces are not swollen, and the grease is mostly on the surface. A homeowner with a free afternoon can clean a normal kitchen with soap, a compatible degreaser, microfiber, and patience. Keep the work small: one wall of cabinets at a time, top to bottom, rinse and dry each section before moving on.
Hire a cleaner when the kitchen has heavy buildup but the finish still appears sound. This is common before listing a home, after a long rental, or after months of frequent frying. Ask whether the quote includes cabinet exteriors, cabinet tops, interiors, range hood exterior, backsplash, and hardware. Interior cabinet cleaning can add time because shelves need to be emptied, wiped, dried, and reloaded.
Bring in a cabinet refinisher or construction professional when cleaning exposes damage. That includes peeling thermofoil, swollen substrate, delaminating veneer, failed clear coat, or paint that transfers to the cloth. On our projects, we photograph cabinet condition before aggressive cleaning or prep work so the homeowner can see what is grease, what is wear, and what is finish failure.
Permits are not usually required for wiping down cabinets. Simple repainting without electrical, plumbing, structural, or mechanical changes is often treated as maintenance, but local rules vary. If the work expands to moving cabinets, altering electrical outlets, changing ductwork, adding a new range hood, or modifying mechanical systems, permits and code requirements may apply.
Ventilation upgrades deserve special attention. Grease returns faster when the range hood filter is dirty or the kitchen lacks effective exhaust. Many IRC-based codes require makeup air for domestic kitchen exhaust hoods over 400 CFM, with makeup air delivered at a rate roughly equal to exhaust and equipped with a means of closure. A high-CFM hood can be the right solution for serious cooking, but it can add mechanical, electrical, ducting, and makeup-air costs beyond a cleaning project.
Best Value

- Microfiber 16 x 12-inch cleaning cloth (24-pack); ideal for cleaning cars, trucks, boats, and more
- Ultra-soft and non-abrasive car drying towels; will not scratch paints, vinyl, glass, finishes, or other surfaces
- Effectively cleans either dry or with liquid cleaners for streak-free results and a lint-free shine
- Durable and absorbent; soak up 8 times their own weight
- Can be reused hundreds of times
Keep Grease From Coming Back So Fast
The clean cabinet is only half the job. The other half is reducing airborne grease. Run the range hood during high-grease cooking, especially frying, searing, and wok cooking. Turn it on before the pan smokes and leave it running for 5 to 10 minutes after cooking to clear residual vapor.
Clean the hood filter monthly if you cook often, and more frequently if you fry several times a week. Metal mesh filters can often be washed with hot water and degreasing dish soap, but follow the hood manufacturer’s directions. Charcoal filters in recirculating hoods are typically replaced rather than washed. A clogged filter pushes greasy air back into the room, where it lands on cabinet faces, crown molding, light fixtures, and walls.
Wipe the range-adjacent cabinet doors weekly. It takes about 5 minutes if the grease is fresh and 1 to 2 hours if it becomes sticky. Pay special attention to the underside of upper cabinets, the lower rail of doors above the stove, and the first 12 to 24 inches of cabinets on each side of the range.
Use lids and splatter screens when practical. They do not replace ventilation, but they reduce the amount of oil that aerosolizes. If you have white or light painted cabinets, keep smoke controlled as well as grease. Smoke staining and heat yellowing can look like grease but may not clean off.
Safe Cabinet Grease Removal Checklist
Start with the least aggressive method that can work. Test in a hidden spot. Remove hardware if grease rings are visible. Use warm water, not boiling water. Keep cloths damp, not dripping. Let compatible cleaners dwell briefly instead of scrubbing harder. Rinse every cleaned section. Dry immediately. Stop if color transfers, the finish dulls, or the cabinet feels tacky after drying.
Avoid oven cleaner, steel wool, abrasive pads, harsh melamine scrubbing on glossy or painted finishes, bleach-ammonia mixtures, undiluted vinegar unless the finish allows it, and soaking wood doors. These shortcuts may remove grease quickly, but they can also dull, scratch, discolor, swell, or strip the finish.
The fastest safe answer is not one miracle recipe. It is the right sequence. Soap handles fresh grease. A cabinet-safe degreaser handles sticky buildup. Baking soda paste is for small spots. Damaged finishes need refinishing judgment. That approach keeps the cabinets clean without turning a Saturday maintenance job into a full cabinet repair.
Frequently Asked Questions
What is the fastest safe way to clean grease off kitchen cabinets?
Use a few drops of grease-cutting dish soap in 1 quart of warm water, wipe with microfiber, rinse with a clean damp cloth, and dry immediately. For sticky buildup, step up to a cabinet-safe degreaser and let it dwell briefly per the label before wiping.
Can I use Dawn dish soap on wood kitchen cabinets?
Yes, on most finished wood cabinets, a small amount of dish soap in warm water is a safe first pass. Keep the cloth damp rather than wet, rinse the surface, and dry seams, rails, and veneer edges right away.
Is vinegar safe for painted or wood cabinets?
Not always. Undiluted vinegar can dull some finishes and affect metal hardware, and it is not the best degreaser for heavy cooked-on oil. If the cabinet manufacturer allows diluted vinegar, test it first in a hidden spot and rinse afterward.
What should I avoid using on greasy kitchen cabinets?
Avoid oven cleaner, steel wool, abrasive scouring pads, aggressive melamine foam on glossy or painted finishes, bleach mixed with ammonia, soaking wood doors, and strong solvents unless a pro has confirmed the finish can tolerate them.
When is cabinet grease a sign the finish is damaged?
If the cabinet remains tacky after cleaning and drying, transfers paint or stain to the cloth, looks cloudy, has swollen edges, or shows peeling thermofoil or veneer, the problem is likely finish damage rather than surface grease.
Do lead-paint rules apply when sanding old painted cabinets?
They can. In pre-1978 homes, sanding, scraping, or disturbing painted cabinet surfaces may fall under EPA lead-safe renovation rules. Basic cleaning is maintenance, but refinishing prep should be handled with lead-safe requirements in mind.
Quick Recap
Product prices and availability are accurate as of the date/time indicated and are subject to change. Any price and availability information displayed on Amazon at the time of purchase will apply.

