What’s actually slowing this PC down?
Pick the symptom - the matching free tool is one click away.
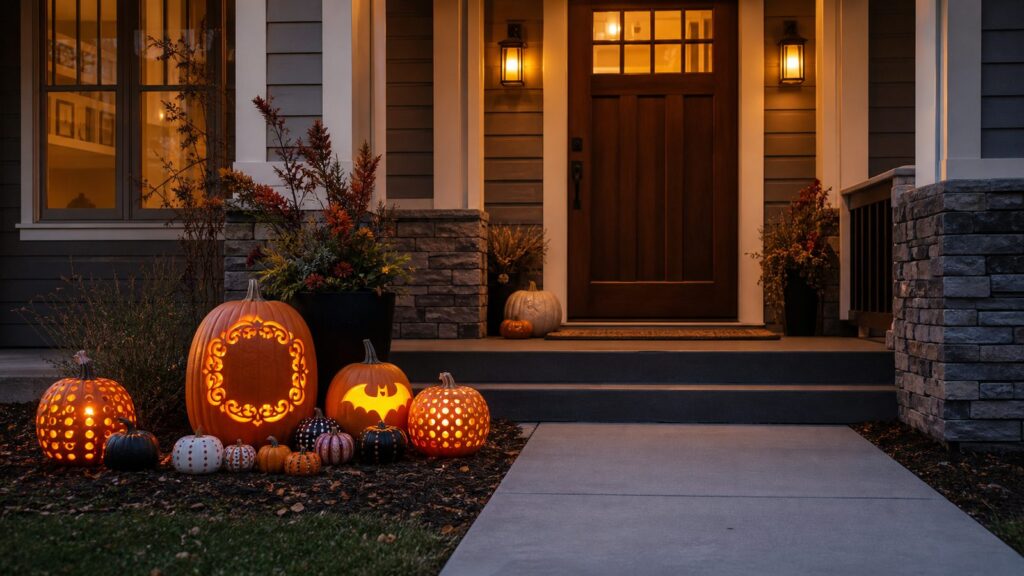
A good pumpkin display has to do more than look clever in a photo. It needs to read from the sidewalk, hold up for several nights, stay out of the walking line, avoid fire hazards, and fit the style of the house. The best pumpkin stencil is the one that matches your porch, your tools, your time, and the distance people will view it from.
For most homeowners, the right plan is simple: use bold carved shapes for pumpkins seen from the street, save detailed etched designs for close-up porch viewing, use low-heat LEDs instead of candles, and keep every pumpkin clear of stairs, handrails, door swings, and narrow walkways. A standard carved pumpkin may cost $4 to $12 at a grocery or big-box store in 2026, while larger farm-stand pumpkins can run $10 to $25 or more. A basic carving kit is usually $5 to $10, and a better reusable detail kit often lands between $25 and $60.
As an Amazon Associate I earn from qualifying purchases.
On our job sites, we treat seasonal porch displays the same way we treat permanent exterior details: sightlines, clearance, drainage, lighting, and surface protection matter. A beautiful pumpkin placed on the front edge of a step is still a trip hazard. A candle next to dry corn stalks is still a fire risk. The ideas below are organized so you can pick a design that looks finished without making your entry less safe or harder to use.
Free tools Windows power users keep installed
One-click scans. No signup required.
Start With the Pumpkin, Not the Pattern
Before choosing a stencil, look at the pumpkin like a material. The shape, wall thickness, stem, surface texture, and where it will sit all affect the final result.
#1 Best Overall

- Complete Kit: This pumpkin carving kit includes 2 Scoopers, Detailer, Large Carver, 2 Medium Carver, Small Carver, 2 Pokers, Tracer, Stencil Book for creative jack-o'-lantern designs.
- Two options: 10Pcs and 5Pcs are selectable.
- Safe and Durable: Tools have thick plastic handles for a secure grip and easy maneuvering.
- Versatile Designs: Stencils offer a range of spooky, funny, and intricate patterns for all skill levels.
- Fun for the Whole Family: Pumpkin carving is a beloved Halloween tradition that brings families and friends together for a creative and memorable experience.
For clean stencil work, choose a pumpkin with one broad, fairly flat face at least 8 to 10 inches wide. A medium pumpkin around 10 to 14 inches tall is usually easier to carve than an oversized one because it is stable on a table and still large enough for readable detail. Mini pumpkins are better for paint, drilled dots, table clusters, and path markers; they are usually too small for detailed cutting.
For detailed carving, thin the wall from the inside to about 1 inch behind the design zone. That lets light pass through and reduces the force needed on the saw. For etched designs, a smooth orange or pale pumpkin works better than a deeply ribbed one. For house numbers, monograms, and reusable displays, faux pumpkins make more sense because they can be stored and used again.
Cost Guide for Pumpkin Stencils and Porch Displays
A recent national benchmark put a large carving pumpkin at about $6.21 in October 2024. In 2026, homeowners should expect pricing to vary by region, crop conditions, size, variety, and where they buy. Grocery stores and big-box stores are often cheaper; farm patches cost more but usually offer larger pumpkins and specialty varieties.
| Item | Typical 2026 Cost | Best Use |
|---|---|---|
| Standard real carving pumpkin | $4-$12 | Classic faces, bats, ghosts, moon shapes, simple stencils |
| Large or specialty pumpkin | $10-$25+ | Porch focal points, large silhouettes, stacked displays |
| Mini pumpkin | $2-$5 | Path markers, clusters, painted accents, place settings |
| Basic carving kit | $5-$10 | Beginner jack-o’-lanterns and simple cutouts |
| Reusable detail kit | $25-$60+ | Etching, shaded carving, portraits, cleaner repeat use |
| LED tea lights or glow sticks | A few dollars per multipack | Safer lighting for most jack-o’-lanterns |
| Outdoor-rated cords, timers, clips, or GFCI adapters | $10-$40+ | Powered porch lighting or larger displays |
| No-carve craft materials | $10-$25 in add-ons | Painted, decoupage, vinyl, foliage, or kid-safe designs |
Beginner Pumpkin Stencil Ideas
These are the best choices if you have one evening, a basic kit, and want the pumpkin to look good from 20 to 40 feet away. Plan on 20 to 45 minutes per pumpkin after cleaning it out.
1. Classic Jack-o’-Lantern Face
Use triangle eyes, a bold nose, and a wide mouth with large teeth. Keep bridges of pumpkin at least 1/2 inch wide so the face does not collapse after a day outside. This is still the best first carve for kids to help design while an adult handles the cutting.
2. Friendly Ghost
A ghost stencil works well because the shape can be simple and high contrast. Use two oval eyes and one rounded body shape. It reads clearly from the curb and does not need precision cuts.
3. Bat Silhouette
Cut one large bat across the widest face of the pumpkin or repeat three smaller bats. Keep wing tips thick enough to survive handling. This design pairs well with warm-white LEDs.
4. Crescent Moon and Stars
A crescent moon is forgiving because slight unevenness looks natural. Drill or cut small stars around it. This design works on orange, white, or blue-gray pumpkins.
5. Witch Hat
A witch hat stencil gives you a strong triangular shape that reads well from the sidewalk. Add a buckle with etching instead of cutting if the band is narrow.
6. Black Cat
Use a sitting cat silhouette with pointed ears and a curled tail. Avoid thin whisker cutouts; paint whiskers or etch them lightly so they do not break.
7. Simple Skull
Use large eye sockets, a triangle nose, and a row of square teeth. Keep the jaw area thick. A skull takes about 30 to 60 minutes depending on tooth detail.
8. Spider Web
For beginners, carve the web as bold triangular openings instead of thin lines. You can also drill anchor points and lightly etch the web lines for a cleaner result.
9. Owl Face
Two large round eyes, a beak, and feather cuts make an owl instantly readable. This is a good choice for a squat pumpkin because the face can fill the full width.
10. Fall Leaf
A maple or oak leaf stencil bridges Halloween and Thanksgiving. Use one oversized leaf on a medium pumpkin, not several tiny leaves, unless you have detail tools.
Intermediate Designs With Better Curb Appeal
These designs need more patience and cleaner stencil transfer. Expect 45 to 90 minutes per pumpkin. Tape the stencil in small pleats around the pumpkin curve, poke guide holes close together, remove the paper, and cut the smallest details before the large openings.
Recommended Free Tools
11. Haunted House Silhouette
A haunted house with crooked windows looks best on a large pumpkin at least 12 inches wide. Cut window openings first, then the roofline. Use a brighter LED puck light so the window shapes glow strongly.
12. House Number Pumpkin
Carve or etch your house number into one large pumpkin near the walkway or door. Use numerals at least 4 inches tall for visibility. For delivery drivers and guests, high contrast matters more than decoration. Faux pumpkins are best if you want to reuse the address marker each year.
13. Monogram Pumpkin
A single large initial looks polished on traditional porches. Use a serif letter for a classic house and a clean block letter for a modern exterior. Etching is often better than full cutouts because it keeps the pumpkin stronger.
14. Welcome Message
Use short wording only: “Boo,” “Welcome,” or “Trick or Treat.” Keep letters at least 2 inches tall, with thick strokes. Long phrases get hard to read and weaken the pumpkin face.
15. Chevron or Geometric Pattern
Geometric stencils suit newer homes, painted brick, metal railings, and clean-lined porches. Use painter’s tape to lay out stripes, diamonds, or chevrons before cutting or painting.
16. Drilled-Dot Lantern
Use a 1/4-inch to 1/2-inch drill bit to make dot patterns, spirals, or bands. Clamp the pumpkin gently or brace it against towels. Drilled pumpkins are fast, durable, modern, and attractive with LEDs.
17. Constellation Pumpkin
Pick a real constellation or make a simple star map. Drill the larger stars and use shallow etched lines between them. A dark-painted faux pumpkin with warm lights can look especially sharp.
18. Lace or Mesh Stencil
Wrap lace, mesh, or a reusable stencil around the pumpkin and dab paint through it. This is better as a no-carve or etched design because thin lace cuts are fragile.
The Tool Desk
Outbyte Driver Updater FREEScan for outdated or missing drivers - takes under a minuteDriver Scan →Outbyte PC Repair FREEClear out junk files and repair common Windows errorsFree Scan →19. Fall Florals
Carve or etch large flowers, vines, or sunflowers. Florals look better close to the door than down at the curb, so place them on a porch table, bench, or wide landing.
20. Acorns and Oak Leaves
This is a good late-season design because it does not look out of place after Halloween. Use etched caps and carved leaf shapes for depth.
21. Minimalist Line Art
Use shallow carving for a face outline, abstract hand, leaf stem, or simple landscape. This works best on smooth faux pumpkins or firm real pumpkins with thin walls.
22. Pumpkin Village
Carve small windows and doors into several pumpkins of different sizes. Cluster them on a wide landing or porch corner, not across the stair path. Use one LED per pumpkin for even glow.
Quick wins for a faster PC:
Clear out junk files and repair common Windows errorsFree Scan →Fix the driver behind crashes, sound loss and screen glitchesFind Drivers →Repair Windows errors before they cause bigger problemsFix Now →Advanced Pumpkin Stencil Ideas
Advanced designs depend on controlled depth, not just cutting holes. These can take 2 to 4 hours each, and they are where better tools matter. A stainless detail kit, linoleum cutter, sculpting loop, and small saw give cleaner results than a basic disposable kit.
23. 3D Layered Face
Instead of cutting all the way through, carve different depths for brows, cheeks, teeth, and wrinkles. Thin the wall to about 1 inch first, then work slowly. Side lighting from inside creates stronger shadows.
24. Etched Woodland Animal
Foxes, deer, rabbits, and owls look refined when etched rather than fully carved. Use shallow scraping for fur texture and cut only the eye highlights or background moon.
25. Pet Portrait Stencil
Convert a clear front-facing pet photo into a high-contrast stencil. Keep the design large, simplify fur, and rely on etching for midtones. This is a good reason to use a faux pumpkin if you want the work to last.
Do these 3 things before closing this tab:
1Repair Windows errors before they cause bigger problems2Fix the driver behind crashes, sound loss and screen glitches3Clear out junk files and repair common Windows errors26. Movie or Pop-Culture Silhouette
Use a recognizable outline rather than a detailed scene. Avoid tiny facial details unless the pumpkin will be seen up close. Silhouettes read better on porches with low ambient light.
27. Sports or Team Logo
Logos require clean edges and correct proportions. Use transfer paper, poke guide holes closely, and cut interior details first. For a reusable tailgate or porch piece, use a faux pumpkin.
28. Shaded Portrait
This is one of the hardest pumpkin styles because it depends on multiple carving depths. Use a large pumpkin with a smooth face, work from a grayscale reference, and plan on several hours.
Rank #3

- (2) Carving Tools, (1) Marker, (1) Pumpkin Scooper
- (10) Carving Patterns.
29. Detailed Spider and Web
Use etching for the web and cut the spider body only. Full cutout webs fail quickly because the thin pumpkin strands dry and curl.
Outdated Drivers Are Slowing You Down
One free scan finds every outdated or missing driver and matches the right update for your exact hardware.Free scan · exact hardware matchWindows Errors? Fix Them Before They Spread
Repair common Windows errors and clear accumulated junk for a smoother, more stable PC - no reinstall needed.Free scan · no reinstall30. Architectural Facade
For a construction-minded display, carve a row house, barn, cabin, or your own front elevation. Use windows as cutouts and siding, shingles, or brick lines as shallow etching.
No-Carve Pumpkin Design Ideas
No-carve pumpkins are safer for kids, last longer, and work better on finished porches where you do not want pumpkin pulp staining stone, wood, or concrete. They are also the right choice when you need the display to last 2 to 4 weeks instead of a few nights.
31. Painted Pumpkin
Use acrylic paint or exterior craft paint. Wipe the pumpkin clean and dry first. For clean stripes or blocks, use painter’s tape and remove it before the paint fully cures.
32. Metallic Finish
Gold, copper, bronze, or matte black paint works well for formal entries. Keep the finish simple; metallic pumpkins look better in groups of three than covered in extra craft pieces.
33. Decoupage Pumpkin
Use paper leaves, fabric, maps, or patterned napkins with decoupage medium. This is a good indoor porch or covered-entry project because rain can soften the finish.
34. Kid-Handprint Pumpkin
Paint handprints around the pumpkin and add dates or initials on the bottom. This is safer than carving and makes sense for families with small children.
35. Adhesive Vinyl Face
Cut eyes, mouths, stars, bats, or house numbers from adhesive vinyl. Vinyl is crisp, fast, and clean. Use it on faux pumpkins for repeat seasonal use.
36. Faux Foliage Pumpkin
Attach faux leaves, small branches, or dried-looking stems around the top. Keep additions clear of any lights and avoid blocking the stem area if the pumpkin will be moved.
PC Slower Than It Used to Be?
A free scan shows the junk files, broken settings and background clutter dragging Windows down - then fixes them in one click.Free scan · Windows 10 & 11Crashes, No Sound, or Screen Glitches?
Random freezes, missing sound and display glitches usually trace back to one bad driver. Find and replace yours safely.Free scan · under a minute37. Pumpkin Planter
Use a hollowed real pumpkin as a short-term planter or place a nursery pot inside a faux pumpkin. Keep soil contained in a plastic liner so moisture does not sit on porch flooring.
Porch and Walkway Display Ideas
Placement matters as much as carving. A 36-inch-wide walkway should stay clear enough for two feet and a bag of candy, groceries, or a child’s costume. Keep pumpkins outside the normal walking line, off the nosing of steps, and away from handrail grip zones.
38. Symmetrical Step Cluster
Place matching pumpkins on both sides of wide steps, set back from the stair edge by at least 6 inches. This works only when the stairs are broad enough to keep the walking path clear.
39. One-Sided Door Display
For narrow porches, put the full display on the latch side or hinge side of the door, whichever does not interfere with the swing. Preserve handrail access from the bottom step to the door.
40. Mini-Pumpkin Path Markers
Use mini pumpkins along a walkway, but keep them outside the walking surface. Space them 24 to 36 inches apart for rhythm. Use glow sticks or small LEDs, not cords crossing the path.
41. Weatherproof Faux Display
Use faux pumpkins for address markers, drilled lanterns, and displays exposed to rain or sun. They cost more upfront but are better when you want a professional-looking entry for the whole season.
Lighting and Fire Safety
Battery candles, glow sticks, and low-heat LEDs are the safer default for jack-o’-lanterns. Fire safety agencies consistently warn that Halloween decorations become dangerous when they sit too close to heat sources, and candles are a major ignition source. Dry corn stalks, paper decorations, fabric, leaves, and porch mats should never sit near an open flame.
For most pumpkins, one warm-white LED tea light is enough. For etched designs, use a brighter puck light because etching needs more internal light to show through. Color-changing LEDs are useful when you want a cooler, theatrical look, but warm white or amber usually looks better with brick, wood doors, and traditional porch lights.
Rank #4
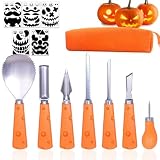
- 【7 PCS Pumpkin Carving Kits】 It comes with 1* Pumpkin Drills, 1* Scraper, 1* Fine-toothed Saw, 1* Double-sided Coarse tooth saw, 1* Pumpkin Scooper, 1* Etching tool, 1* V-shaped carving tool, 12 Engraving Templates. Meet all your pumpkin carving needs. After use, tools can be neatly organized and stored in a sturdy zippered high-quality nylon storage bag.
- 【Sturdy And Durable Material】 It features heavy duty thickened stainless steel and non-slip ABS handles, not easy to break and slip during use. No rust, stains or pitting. Rest assured that our pumpkin carving kits are durable and can be used year after year.
- 【Family fun】 A must-have accessory for Halloween parties. Everyone can work on their own pumpkins and express their creativity, create unique and cool art. Both your friends and love ones can enjoy the fun of carving, and it's a fun way to enjoy a wonderful Halloween time with family and friends.
- 【Warning】 It is important to note that kids must use the tool under adult supervision. Store tools away from kids when not in use.
- 【5 Sheets of 12 Pumpkin Carving Stencils】 No more staring into your pumpkin with no idea of what you want to create. Use our stencils as a base to create the funniest, scariest and most unique pumpkin on your block!
If you use plug-in lighting, use outdoor-rated cords and products only. Keep connections off wet ground, avoid pinch points at doors and windows, and never run cords across a walkway where guests can trip. A weather-rated timer can add $10 to $40 or more depending on cord length, gauge, and features, but it is a better setup than manually plugging in decorations every night.
Independent reader supportYour contribution helps us test, update, and keep practical guides available for everyone.Carving Safety and Tool Setup
Pumpkin carving causes a surprising number of seasonal injuries. Recent federal safety reporting found that 55% of Halloween-related injuries were tied to pumpkin carving, while falls accounted for 25%. That lines up with what we see in homes: sharp tools and cluttered entries are the two problems to control.
Set up on a stable table with good lighting. Use a towel under the pumpkin to stop it from rolling. Adults should handle cutting; kids can scoop pulp, tape stencils, mark dots, paint, or place stickers. Cut away from your hand, use small controlled strokes, and do not force a dull blade through thick pumpkin walls.
For detailed patterns, the order matters. Cut small interior details first, then larger outer sections. If you remove the large support areas too early, the face flexes and the fine pieces snap. Keep bridges at least 1/4 inch for small pumpkins and closer to 1/2 inch for larger outdoor pumpkins.
Weather, Durability, and Surface Protection
Real carved pumpkins usually look best for only a few days outdoors, especially in warm, humid, sunny, or rainy weather. If you need the display to look good for a party, carve 1 to 2 days before the event. Painted or uncut pumpkins can last much longer, and faux pumpkins can be reused for years.
Do not place wet pumpkins directly on finished wood, porous stone, painted thresholds, or unsealed concrete for long periods. Pumpkin pulp and moisture can stain. Use a saucer, plastic tray, scrap paver, or plant stand under the pumpkin. On masonry steps, avoid adhesive hooks or tapes that can leave residue or pull at painted finishes.
After setting the display, photograph it at dusk from the sidewalk and from the walking path to the door. If the design is unreadable from the curb, move detailed pumpkins closer to the entry and put simpler shapes near the street. If any pumpkin narrows a step, blocks a handrail, or sits where a guest naturally walks, move it before Halloween night.
When to DIY and When to Hire a Pro
DIY makes sense for classic jack-o’-lanterns, house numbers, painted pumpkins, drilled lanterns, and most porch clusters. A homeowner can usually produce a polished display for $30 to $150 depending on the number of pumpkins, lights, and tools.
Do these 3 things before closing this tab:
1Scan for outdated or missing drivers - takes under a minute2Repair Windows errors before they cause bigger problems3Fix the driver behind crashes, sound loss and screen glitchesHiring a professional or local artist makes sense for event entrances, commercial storefronts, logo pumpkins, shaded portraits, large multi-pumpkin installations, or displays that need to be ready on a specific deadline. Labor dominates the cost. Custom carving can cost far more than the pumpkin itself because a detailed portrait or logo may take several hours, specialized tools, and careful staging.
If the display includes temporary structures, large props, powered lighting, or anything near public sidewalks, check local rules and homeowner association guidelines. A normal porch pumpkin display does not usually require a permit, but large installations, public events, electrical work, blocked egress, or commercial displays may trigger local requirements.
Best Practical Picks by Situation
For a fast family pumpkin, choose a classic face, ghost, bat, or crescent moon. For curb appeal, choose house numbers, a haunted house silhouette, drilled dots, or bold geometric bands. For a covered front porch, use florals, lace, monograms, or etched woodland designs. For kids, use paint, handprints, vinyl stickers, or decoupage. For a display that needs to last, use faux pumpkins with LED lighting.
The strongest entries usually mix three scales: one large focal pumpkin, two or three medium carved or painted pumpkins, and several small accents. Keep the tallest piece near the door or planter, not in the walking line. Use odd-numbered clusters, leave the steps functional, and let lighting do the work after dusk.
Quick wins for a faster PC:
Fix the driver behind crashes, sound loss and screen glitchesFind Drivers →Clear out junk files and repair common Windows errorsFree Scan →Scan for outdated or missing drivers - takes under a minuteDriver Scan →Frequently Asked Questions
What are the easiest pumpkin stencil designs for beginners?
The easiest designs are classic jack-o’-lantern faces, ghosts, bats, crescent moons, stars, simple skulls, and large leaf shapes. Use bold openings, avoid thin bridges, and plan on 20 to 45 minutes per pumpkin.
How much does it cost to carve or decorate pumpkins in 2026?
A practical DIY range is $4-$12 for a standard carving pumpkin, $5-$10 for a basic carving kit, and a few dollars for LED tea lights. Larger farm-stand pumpkins can cost $10-$25 or more, and better reusable carving kits often run $25-$60+.
Are candles safe inside jack-o’-lanterns?
Battery candles, glow sticks, and low-heat LEDs are the safer choice. If a real candle is used, keep it far from dry leaves, corn stalks, fabric, paper decorations, porch mats, siding, and railings, and never leave it unattended.
How long do carved pumpkins last outside?
Real carved pumpkins usually look best for only a few days outdoors. Warm, humid, sunny, or rainy weather shortens that window. For an event, carve 1 to 2 days ahead; for a longer display, use painted or faux pumpkins.
Do I need a permit for a large Halloween pumpkin display?
A normal residential porch display usually does not require a permit. Check local rules if the display blocks sidewalks or exits, uses large temporary structures, includes significant electrical work, or is part of a commercial or public event.
What pumpkin stencil looks best from the street?
Large, high-contrast designs read best from the street: house numbers, bold faces, bats, ghosts, haunted houses, moons, stars, and drilled-dot lanterns. Detailed etched portraits and lace patterns are better near the front door where guests see them up close.
Quick Recap
Product prices and availability are accurate as of the date/time indicated and are subject to change. Any price and availability information displayed on Amazon at the time of purchase will apply.

