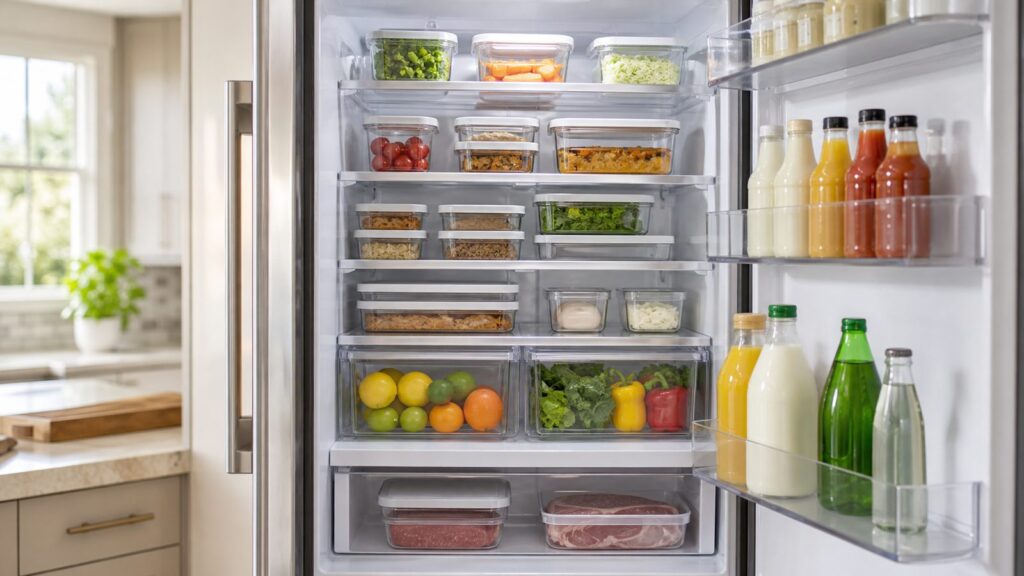
A professionally organized refrigerator starts with temperature, airflow, and food safety before it ever gets to bins and labels. The goal is simple: keep the refrigerator at 40 degrees F or below, make food easy to see, prevent cross-contamination, and avoid crowding the appliance so badly that cold air cannot move.
On our kitchen projects, we see the same pattern again and again. A homeowner thinks the refrigerator is too small, but the real issue is usually a mix of poor zoning, duplicate groceries, blocked vents, weak door seals, and no landing space near the appliance. Sometimes the refrigerator is genuinely undersized or badly placed. More often, a one-afternoon reset fixes 80 percent of the daily frustration.
As an Amazon Associate I earn from qualifying purchases.
This guide gives you the practical method: set the right temperature, empty and clean the refrigerator, assign food to the right cold zones, use organizers only where they help, label leftovers by date, and know when refrigerator clutter is pointing to a bigger appliance, electrical, plumbing, or kitchen-layout problem.
What’s actually slowing this PC down?
Pick the symptom - the matching free tool is one click away.
Start With Temperature, Not Containers
Before buying a single bin, confirm that the refrigerator is actually holding safe temperatures. FDA and USDA guidance is consistent: refrigerated food should be held at 40 degrees F or below. FDA also recommends freezers at 0 degrees F. ENERGY STAR recommends setting the refrigerator between 35 and 38 degrees F, which gives you a practical buffer below the 40-degree safety line without overcooling the compartment.
#1 Best Overall

- Convenient and practical: Our refrigerator thermometer is suitable for traditional refrigerators, freezers, insulated boxes, etc. It has a large dial with clear blue and red area indication on the surface of the fridge thermometer, making it easier for you to read the temperature.
- Temperature range: Refrigerator thermometer measures refrigerator temperature -20~80 °F/ -30~30 °C, meeting different requirements and requirements. Clear reading scale helps you measure food stored at the right temperature to ensure safety.
- Exquisite design: The refrigerator thermometer uses a hook type panel design, can be hung or placed in different positions, reading instant with the mechanical design, no need for battery power with our freezer thermometer.
- Durable material: Refrigerator thermometer is made of stainless steel material, not easy to break, long life, durable, easy to clean structure and glass protective lens, very suitable for use in the refrigerator and freezer.
- What you get: 2 x PECULA Refrigerator Thermometer and our 7*24 friendly customer service for peace of mind.
Do not rely only on the digital setting on the door. That number is a target, not always the real temperature at the shelf. Put a $5 to $15 refrigerator thermometer near the center of the middle shelf, leave it there for at least 8 hours, and check it after the door has stayed closed for a while. If the reading is consistently above 40 degrees F, adjust the controls and check again. If it still runs warm, organization is not the first problem.
Good working targets are:
- Refrigerator setting: 35 to 38 degrees F.
- Food-safety maximum: 40 degrees F or below.
- Freezer setting: 0 degrees F.
- Power outage rule: a closed refrigerator can keep food safe for up to 4 hours.
If you have repeated condensation, frost, soft ice cream, warm milk, or produce freezing in the wrong drawer, check the basics before reorganizing. Clean the door gasket, confirm the door closes fully, leave space around interior vents, and make sure the refrigerator has rear air circulation. An appliance shoved tight into a hot alcove beside a range will work harder and may struggle to hold temperature.
Empty, Clean, Measure, and Audit
A refrigerator reset works best when you treat it like a small construction layout task. Empty one section at a time into a cooler or onto a clean counter. Discard unsafe food, wipe the surfaces, measure the usable openings, then put food back according to a plan.
PC Slower Than It Used to Be?
A free scan shows the junk files, broken settings and background clutter dragging Windows down - then fixes them in one click.Free scan · Windows 10 & 11Crashes, No Sound, or Screen Glitches?
Random freezes, missing sound and display glitches usually trace back to one bad driver. Find and replace yours safely.Free scan · under a minuteFor cleaning, use warm water and mild dish soap for shelves, drawers, and bins. Avoid harsh odors from cleaners that can transfer to food. If a spill has reached the gasket folds or drawer tracks, clean those areas carefully because sticky residue can stop drawers and doors from closing correctly.
Measure before buying organizers. The numbers that matter are shelf depth, shelf width, clear height between shelves, drawer interior dimensions, and door-bin clearance when the door closes. A common mistake is buying a 14-inch-deep bin for a shelf that technically measures 15 inches, then finding the door bin hits it. Leave practical clearance, especially on French-door models where both doors need to swing past center hardware.
The audit is where most waste reduction happens. USDA estimates U.S. food waste at 30 percent to 40 percent of the food supply. ReFED estimated that in 2024, 29 percent of the U.S. food supply went unsold or uneaten, with 60 million tons becoming waste destinations. At the household level, that often looks like three open jars of salsa, two half-used bags of greens, and leftovers with no date.
As you empty the refrigerator, sort food into four groups: keep, eat first, freeze, and discard. The eat-first group should get a dedicated shallow bin at eye level. That one bin saves more money than a drawer full of specialty containers because it changes behavior every time someone opens the door.
Free tools Windows power users keep installed
One-click scans. No signup required.
Build Refrigerator Zones That Match Real Use
The best refrigerator layout is not decorative. It is built around temperature, safety, and retrieval. Food that is ready to eat should not sit under raw meat. Items used every morning should not be buried behind party trays. Children’s snacks should be reachable without leaving the door open for 90 seconds.
Upper Shelves: Ready-to-Eat Foods
Upper shelves are good for leftovers, prepared meals, yogurt, cheeses, deli items, and foods that do not need cooking before eating. Keep these items visible and grouped. A shallow leftover bin works well here because it supports first-in, first-out rotation: oldest safe food in front, newer food behind it.
Label leftovers with the cooked or opened date, not just the food name. Cooked meat, poultry, pizza, and many prepared foods are commonly treated as 3-to-4-day refrigerator items when stored at 40 degrees F or below. A Friday date label is more useful than a mystery container everyone avoids until trash day.
Rank #2
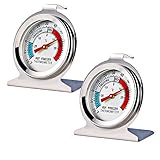
- Measuring range:-20~80℉
- Material type:Stainless steel
- Installation mode:Wide base and integrated hook allow it to be placed anywhere in the refrigerator
- Easy to read
- Please give the thermometer enough reaction time
Middle Shelves: Daily Staples
Use the middle shelves for high-turnover items: milk, eggs, lunch components, breakfast foods, and opened beverages that need steady cold. Milk and eggs are better here than in the door because the door sees more temperature fluctuation. If your family uses milk constantly, place it near the front but not directly in the door.
For lunches, use one rectangular bin for sandwich supplies and one for grab-and-go snacks. For families, zones by function work better than zones by person. A “lunch” zone is easier to maintain than four individual territories that slowly collect duplicates.
Lower Shelves or Meat Drawer: Raw Protein
Raw meat, poultry, seafood, and thawing foods belong low in the refrigerator, ideally in a dedicated meat drawer or a leakproof container on the lowest practical shelf. The reason is simple: if packaging leaks, it should not drip onto ready-to-eat food.
Use a rimmed, washable container that is large enough for the package to sit flat. If you thaw frozen meat in the refrigerator, set it in that container before it starts releasing liquid. Do not stack raw chicken over salad greens, fruit, cheese, or cooked leftovers.
Crisper Drawers: Produce With Humidity Control
Crisper drawers are not junk drawers. They are controlled storage zones. Use higher humidity for leafy greens and items that wilt. Use lower humidity for many fruits and produce that releases more ethylene gas. If your drawers have sliders, label them so the setting is obvious after grocery day.
Recommended Free Tools
Remove wet, damaged, or spoiled pieces before storing produce. Excess moisture speeds breakdown, especially in sealed plastic bags. For greens, a breathable produce container or a towel-lined container can help manage moisture. For apples, citrus, and sturdier fruit, avoid burying them where they disappear for two weeks.
Door Bins: Condiments and Less-Perishable Items
The door is convenient but warmer and less stable. Store condiments, dressings, jams, pickles, water, and less-sensitive items there. Avoid using the door for milk, eggs, raw meat, or highly perishable foods unless the manufacturer specifically designed a cold compartment for that purpose.
Freezer: Group by Meal Type and Date
Freezer organization follows the same principle: visibility beats symmetry. Group by category: proteins, vegetables, prepared meals, bread, breakfast, and desserts. Date freezer bags and containers clearly. If you use a secondary freezer, keep a simple inventory sheet or whiteboard nearby because overflow appliances are where bulk purchases often disappear.
Use Bins, Labels, and Turntables the Right Way
Organizer products are tools, not the system. A basic DIY refrigerator refresh in 2026 usually costs about $25 to $75 for a thermometer, a few clear bins, Shelf liners, labels, and cleaning supplies. A more complete setup often lands between $75 and $200. Premium setups with modular bins, glass containers, produce keepers, vacuum-seal systems, and matching freezer and pantry labels can run $200 to $500 or more.
Clear, washable rectangular bins are usually the best use of money because they preserve shelf space and make categories easy to pull forward. Round turntables are useful for deep corners, short jars, and condiments, but they waste space when used for boxy cartons or large containers.
Do not decant everything. Original packaging often includes expiration dates, allergen information, cooking instructions, lot numbers, and storage guidance. Decant only when it improves visibility, prevents spills, or fits the space better. For example, transferring berries into a vented produce keeper can help. Moving every sauce into identical unlabeled bottles usually makes the kitchen less functional.
| Item | Typical 2026 Cost | Best Use |
|---|---|---|
| Refrigerator thermometer | $5 to $15 | Confirming safe temperature before and after organizing |
| Clear bin set | $20 to $60 | Lunch supplies, snacks, leftovers, small jars |
| Lazy Susan | $8 to $25 each | Condiments, jars, deep corners |
| Can dispenser | $10 to $30 | Beverages where shelf height is limited |
| Shelf liners | $10 to $25 | Spill control, if they do not block drainage or airflow |
| Label maker | $25 to $80 | Dates, zones, freezer inventory, allergy notes |
| Glass storage set | $25 to $100+ | Leftovers and meal prep with better visibility |
Keep labels simple: “Eat First,” “Lunch,” “Raw Meat,” “Snacks,” “Condiments,” and dates. Over-labeling creates a system people stop following. The best label is one that makes the return location obvious in less than two seconds.
Protect Airflow and Appliance Performance
A refrigerator needs open air paths to cool evenly. One of the most common mistakes we see is a clean, attractive refrigerator packed so tightly that cold air cannot circulate. Tall containers pushed against rear vents, shelf liners covering drainage paths, and bins filled edge-to-edge can create warm pockets, frozen produce, or constant compressor run time.
Rank #3

- Measuring range:-20~80℉
- Material type:Stainless steel
- Installation mode:Wide base and integrated hook allow it to be placed anywhere in the refrigerator
- Easy to read
- Great quality
Leave visible gaps around vents. Avoid lining every shelf from edge to edge unless the liner is designed for that appliance and does not interfere with drainage or circulation. Do not store bags of greens, pizza boxes, or beverage cases directly against the back wall if that blocks airflow.
The outside of the refrigerator matters too. ENERGY STAR recommends locating refrigerators away from heat sources and maintaining rear air circulation. In construction terms, that means the alcove cannot be treated as a sealed box. Freestanding refrigerators need the manufacturer’s specified side, top, and rear clearances. Built-in and panel-ready units have different ventilation requirements and should be planned from the installation manual, not guessed in the field.
If your refrigerator runs constantly, sweats around the doors, frosts up, or struggles after a grocery run, check the gasket, condenser coil area, alcove clearance, and temperature setting. Appliance repair in 2026 commonly ranges from about $100 to $700, with many service calls landing near the mid-$200s. Sealed-system repairs, built-in units, older premium brands, and hard-to-source parts can cost more.
Make Refrigerator Organization Part of Kitchen Planning
Sometimes the refrigerator is organized correctly and the kitchen is still fighting you. We see this during remodel planning, especially in older kitchens where a modern French-door refrigerator has been squeezed into a space designed for a smaller top-freezer unit.
Quick wins for a faster PC:
Scan for outdated or missing drivers - takes under a minuteDriver Scan →Clear out junk files and repair common Windows errorsFree Scan →Fix the driver behind crashes, sound loss and screen glitchesFind Drivers →A functional refrigerator area needs three things: clear door swing, nearby landing space, and safe utility connections. Landing space is the counter area where groceries, ingredients, and containers go while you load or unload. Without it, refrigerator clutter migrates to the nearest chair, island corner, or cooktop.
As a practical planning target, give yourself a nearby counter landing zone at least 15 inches wide, and more if the kitchen handles family meal prep. Confirm that refrigerator doors can open far enough to remove drawers. Many homeowners discover too late that a wall, pantry cabinet, or island blocks a drawer from sliding out for cleaning.
Water and ice makers add another layer. A refrigerator water line should have an accessible shutoff valve, not a mystery saddle valve hidden behind finished cabinetry. Use proper tubing and fittings for the appliance and local code. Protect flooring during installation because a slow leak can damage hardwood, laminate, subflooring, and base cabinets long before it is obvious from the front.
Electrical planning matters as well. Moving or adding a refrigerator outlet is not just a handyman convenience item. Kitchens have specific electrical requirements, and newer code cycles have expanded GFCI protection in many locations. Local adoption varies, so the authority having jurisdiction and a licensed electrician should guide final decisions. If you are adding an outlet, moving a circuit, changing cabinetry around a built-in appliance, or altering water lines, treat it as trade work, not just organization.
Rank #4

- Temperature range: -40°to 80°F or -40°to 27°C
- Thermometer material:Plastics + Stainless Steel
- Good quality
- Easy to install
- Cheap
Maintenance Schedule That Keeps the System Working
A refrigerator organization system fails when it depends on one big annual cleanout. Use a small maintenance rhythm instead.
Weekly, do a 10-minute open-fridge audit before grocery shopping. Check the eat-first bin, review leftovers, move older safe food to the front, and build the shopping list from what is actually inside the refrigerator. This prevents duplicate buying and catches food before it becomes waste.
Monthly, remove bins and drawers that need cleaning, wipe shelf edges, clean sticky door bins, and review condiments. Check that vents are open and that no container has migrated into an airflow path.
Quarterly, check door gaskets, vacuum or clean accessible coil areas according to the manufacturer’s instructions, confirm alcove clearance, and verify temperature with a thermometer. If the refrigerator has been moved, serviced, overloaded for a party, or affected by a power outage, check temperature again.
Do these 3 things before closing this tab:
1Repair Windows errors before they cause bigger problems2Scan for outdated or missing drivers - takes under a minute3Clear out junk files and repair common Windows errorsAfter a power outage, keep the door closed as much as possible. FoodSafety.gov guidance says a closed refrigerator keeps food safe for up to 4 hours. After that, many perishables may need to be discarded. A thermometer gives you better information than guesswork.
Independent reader supportYour contribution helps us test, update, and keep practical guides available for everyone.When to DIY vs. When to Hire a Pro
Most refrigerator organization is a straightforward DIY job. If the appliance holds temperature, the door seals properly, the shelves and drawers are intact, and you are not moving utilities, you can reset the system in 2 to 4 hours with $25 to $200 in supplies.
Hire a professional organizer if the refrigerator is part of a larger kitchen, pantry, and grocery-management problem. Professional organizing rates vary by metro and scope, but many U.S. projects effectively land around $75 to $150 per hour. A refrigerator-only session is usually a small add-on. A full kitchen, pantry, refrigerator, and freezer reset can take several hours.
Call an appliance technician if the refrigerator cannot maintain 40 degrees F or below, cycles constantly, leaks internally, forms repeated frost, has a failed ice maker, or shows error codes. Organization will not fix a weak compressor, bad fan, blocked drain, failed thermostat, or damaged gasket.
The Tool Desk
Outbyte PC Repair FREEClear out junk files and repair common Windows errorsFree Scan →Outbyte Driver Updater FREEScan for outdated or missing drivers - takes under a minuteDriver Scan →Bring in a licensed electrician, plumber, carpenter, or remodeling contractor when the solution involves moving the refrigerator, modifying cabinetry, changing an outlet, adding a water line, replacing flooring under the appliance, or converting from freestanding to built-in. Straightforward professional refrigerator installation in 2026 is commonly quoted around $130 to $250, but costs rise with built-in panels, tight alcoves, water and ice hookups, flooring protection, door removal, haul-away, cabinet modifications, or electrical work.
Best Value
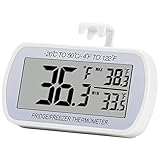
- Large Screen, Small Size: LCD display, big digits. You can visually observe the temperature, and also won't take too much places.(Tips: Please remove the protective film on the screen surface before use)
- Wide Measuring Range & Accurate: Temperature range is -4°F to 122°F with high accuracy 2°F up/down. Max/Min temperature value display on screen, you can easily monitor the temp change of your fridge.
- Hook, Magnet, Stand: Temperature sensing point is on the back. Hanging inside the refrigerator, the measuring temperature is more accurate.
- New Design Upgrade: Waterproof structure level IPX3, ABS environmentally friendly material. Worked with CR2032 battery(included), batteries can be replaced.
- Multiple uses: Digital refrigerator thermometers can be used in household fridge, restaurants, bars, cafes, large supermarkets and convenience store freezers, pharmacy medicine chests, rooms, wineries, etc.
A new appliance is the larger decision. HomeAdvisor’s 2026 appliance pricing guide reports broad new-appliance pricing from $190 to $10,600, with an average around $2,175, and refrigerators are often among the higher-cost categories. Before replacing the unit, confirm the problem is not temperature setting, clearance, gasket condition, loading habits, or a repairable part.
A Pro-Level Refrigerator Setup in One Afternoon
Here is the practical sequence we would use in a client’s kitchen if the appliance itself was working correctly.
- Put a thermometer in the refrigerator and confirm performance at 40 degrees F or below.
- Empty the refrigerator by section, keeping perishables cold while you work.
- Discard unsafe food and sort remaining items into keep, eat first, freeze, and replace.
- Wash shelves, drawers, bins, gasket folds, and door compartments.
- Measure shelves, drawers, and door clearances before buying or placing organizers.
- Assign zones: ready-to-eat foods high, daily staples middle, raw proteins low, produce in crispers, condiments in the door.
- Add only the bins that improve retrieval and visibility.
- Label leftovers with dates and create one eye-level eat-first bin.
- Check vents, drawer movement, door closure, and gasket contact.
- Repeat a 10-minute audit before each grocery trip.
The finished refrigerator should not look packed. It should have open sightlines, visible dates, reachable categories, and enough air space for the appliance to do its job. That is the difference between a refrigerator that looks organized for a photo and one that works on a Tuesday night when everyone is hungry.
Frequently Asked Questions
What temperature should a refrigerator be for safe food storage?
Keep the refrigerator at 40 degrees F or below. A practical set point is 35 to 38 degrees F because it gives a safety buffer. Use a refrigerator thermometer to confirm the real shelf temperature.
Where should raw meat go in the refrigerator?
Store raw meat, poultry, and seafood in a leakproof container on the lowest practical shelf or in a dedicated meat drawer. This helps prevent juices from dripping onto ready-to-eat food.
Should milk and eggs be stored in the refrigerator door?
Milk and eggs are better on an interior shelf where temperatures are more stable. The door is best for condiments, dressings, jams, pickles, and less-perishable items.
How long are leftovers safe in the fridge?
Many cooked leftovers, including cooked meat, poultry, pizza, and prepared foods, are commonly kept for 3 to 4 days in a refrigerator at 40 degrees F or below. Label containers with the cooked or opened date.
Do these 3 things before closing this tab:
1Repair Windows errors before they cause bigger problems2Scan for outdated or missing drivers - takes under a minute3Clear out junk files and repair common Windows errorsDo refrigerator organizer bins block airflow?
They can if they are too tall, overfilled, or pushed against vents. Use clear bins where they improve visibility, but leave open gaps around vents and avoid packing shelves edge to edge.
Do I need a permit to move or add a refrigerator outlet?
Often, electrical changes in a kitchen must meet local code and may require a permit or licensed electrician. Requirements vary by jurisdiction, especially around GFCI protection, so verify locally before moving or adding an outlet.
Quick Recap
Product prices and availability are accurate as of the date/time indicated and are subject to change. Any price and availability information displayed on Amazon at the time of purchase will apply.

