Free tools Windows power users keep installed
One-click scans. No signup required.
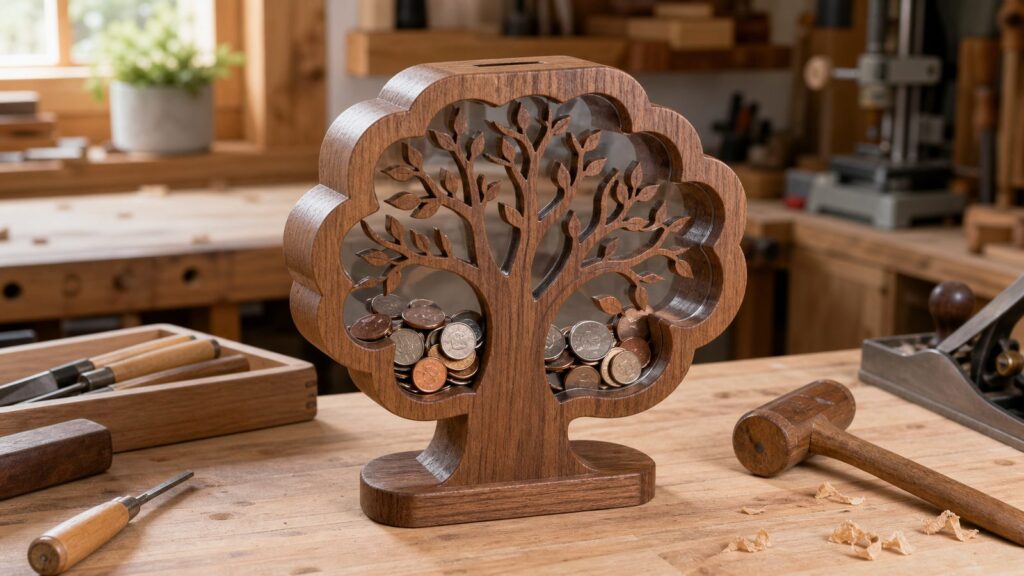
A Money Tree coin bank is a small woodworking project with a lot of good shop lessons packed into it: pattern transfer, scroll-saw control, lamination, acrylic fitting, sanding, finishing, and child-safe edge work. The finished bank is about 16 inches high, 11 inches wide, and 2.5 inches deep, so it sits more like a desktop or shelf display than a piece of furniture.
The original free plan is a four-page scroll-saw pattern first published in 2013. This guide focuses on how to build it cleanly in a modern home shop, what materials make sense in 2026, what the project should cost, and where builders usually run into trouble. Treat it as a decorative indoor coin bank, not a lawn or garden structure. If you scale the idea into a fixed outdoor sign, play feature, wired display, or permanent yard installation, the rules change.
Project Snapshot
This is a beginner-to-intermediate scroll-saw project. A careful beginner can build it, but the branch shapes, coin slot, clear window, and layered body demand patience. The work is not heavy construction, but the same habits our crews use on job sites apply here: lay out accurately, dry-fit before glue, control squeeze-out, break sharp edges, and never assume two parts match until they have been tested together.
- Finished size: approximately 16 in. high x 11 in. wide x 2.5 in. deep.
- Best use: decorative indoor coin bank, gift, shelf piece, or woodworking skill-builder.
- Skill level: beginner to intermediate, depending on scroll-saw experience.
- Build time: 4 to 8 shop hours, plus finish drying or curing time.
- Estimated 2026 material cost: about $25 to $75 if you already own the tools.
- Main tools: scroll saw, drill or drill press, clamps, sanding block, square, and basic layout tools.
The project is small enough to use offcuts, which is where the best value is. A shop with scrap hardwood plywood, a partial sheet of clear acrylic, and glue on hand may spend less than $25. If you buy cabinet-grade plywood, a fresh clear sheet, blades, stain, topcoat, screws, and felt feet, $60 to $75 is a realistic budget.
#1 Best Overall
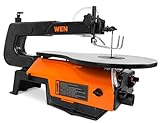
- Unique side panel flips open for easy-access blade changes
- Variable speed goes from 550 to 1600 strokes per minute
- Spacious 16-by-10-inch table bevels up to 45 degrees for angled cuts
- Cuts wood up to 2 inches thick with a 16-inch throat depth
- Features a thumb screw blade adapter for tool-free blade changes, a cast iron base, an air pump, a dust port, a foot lock clamp, and three 5-inch blades
Materials and 2026 Cost Estimate
For a bank with fine branch detail, do not use construction sheathing unless you are only practicing. Cheap plywood often has voids, soft inner plies, and face veneer that splinters when you turn a tight scroll-saw radius. Baltic birch, quality hardwood plywood, or stable hardwood stock will give you cleaner curves and stronger thin parts.
The clear window can be acrylic or polycarbonate. Acrylic is easy to find, relatively inexpensive, and clear enough for this use. Polycarbonate is tougher and more impact resistant, but it costs more and scratches more easily unless handled carefully. For a coin bank that will live on a dresser or bookshelf, a 0.093-inch acrylic sheet is usually sufficient.
| Item | Typical spec | 2026 cost range | Builder notes |
|---|---|---|---|
| Wood body and layers | 1/4 in. or 1/2 in. plywood, project panel, or hardwood stock | $0-$35 | Offcuts may cover the whole project. Cabinet-grade birch or hardwood plywood costs more but cuts cleaner. |
| Clear window | 0.093 in. acrylic or similar clear sheet | $13-$25 for a small sheet | One listed 11 in. x 14 in. OPTIX acrylic sheet was $13.31. Polycarbonate may cost more. |
| Wood glue | 8 oz. bottle | $3.69-$7.49 | Titebond Original was listed at $3.69, Titebond II at $5.49, and Titebond III at $7.49. |
| Scroll-saw blades | Fine-tooth blades for plywood | $4.97-$9.99 | Examples include 4-piece and 12-piece packs. Keep spares ready; dull blades wander. |
| Finish | Paint, stain, shellac, wipe-on poly, or water-based clear coat | $8-$25 | Choose low-odor, fully cured finishes if children will handle the bank. |
| Hardware and extras | Small screws, felt feet, plug, removable back plate | $3-$12 | Worth adding if you want a clean coin-removal method. |
National lumber numbers are useful background, but they do not translate directly to the small project-panel rack at your local store. As of July 24, 2026, NAHB reported framing-lumber prices up 1.4 percent week to week, 3.1 percent higher than one month earlier, and 0.3 percent lower than one year earlier. Trading Economics showed lumber at $613.50 per 1,000 board feet on July 31, 2026, down 11.79 percent year over year. Those wholesale signals affect retail sheet goods indirectly, with lag time, regional markups, species differences, and store inventory all playing a role.
Tools That Make the Job Easier
A scroll saw is the right tool for this plan because the tree shape has tight curves and internal cuts. Use fine-tooth blades for thin plywood and detailed branch work. A blade in the 15 to 20 TPI range is a reasonable starting point, but the exact choice depends on your material thickness and how tight the pattern is. Finer blades leave cleaner edges and reduce tear-out, but they cut slower and can deflect if you push too hard.
Outdated Drivers Are Slowing You Down
One free scan finds every outdated or missing driver and matches the right update for your exact hardware.Free scan · exact hardware matchWindows Errors? Fix Them Before They Spread
Repair common Windows errors and clear accumulated junk for a smoother, more stable PC - no reinstall needed.Free scan · no reinstallA drill press is helpful for starter holes because it keeps the holes perpendicular to the face. If you use a handheld drill, clamp the work and slow down. Starter holes should be just large enough for the blade to pass through without scraping the finished face. Slightly oversized holes are better than fighting the blade and marring an inside corner.
- Primary tools: scroll saw, drill or drill press, clamps, sanding block, detail sander, square, pencil, utility knife, and files.
- Safety gear: eye protection and respiratory protection, especially during sanding.
- Useful extras: painter’s tape, spray adhesive, small brad-point bits, a coping saw, and scrap blocks for clamping.
You can cut the outer profile with a jigsaw if needed, but a jigsaw is not precise enough for delicate internal branch details unless you simplify the pattern. A coping saw can work, but it will be slow. A laser cutter can produce accurate parts if the plan is converted properly, but you must account for kerf, char, and glue surface quality.
Best Wood for the Money Tree Bank
Use stable, flat material. For layered coin banks, flatness matters because every small bow becomes a gap at the glue line or clear window. Our crews reject bowed trim and twisted stock on finish work for the same reason: little defects get louder after assembly.
For most builders, 1/4-inch Baltic birch plywood is the best choice for detailed tree layers. It has uniform plies, holds narrow shapes better than utility plywood, and sands cleanly. If the plan calls for thicker base pieces or body spacers, 1/2-inch plywood or hardwood stock can be used where the extra depth is needed.
The Tool Desk
Outbyte PC Repair FREEClear out junk files and repair common Windows errorsFree Scan →Outbyte Driver Updater FREEScan for outdated or missing drivers - takes under a minuteDriver Scan →Plywood vs. Solid Wood
Plywood is more dimensionally stable and less likely to move with seasonal humidity. That helps keep the acrylic window from binding and the coin cavity from twisting. Solid hardwood can look better, especially for the base and outside frame, but it moves across the grain. If you use solid wood, pay attention to grain direction and avoid trapping the clear window so tightly that seasonal movement cracks it or bows the bank.
Acrylic vs. Polycarbonate
Acrylic is clear, affordable, and easy to polish. It can chip if forced, so cut and drill it gently. Polycarbonate is tougher and better where impact is a concern, but it is easier to scratch. For an indoor shelf bank, acrylic is usually the better cost-to-performance choice. For a bank used in a classroom, public room, or high-handling environment, polycarbonate deserves consideration.
Rank #2

- INTEGRATED LED WORKLIGHT—Allows greater visibility at a variety of angles
- INTEGRATED DUST REMOVAL SYSTEM—Keeps cut line free of debris for accurate cuts
- ELECTRONIC VARIABLE SPEED CONTROL—Provides greater cutting control with a variety of materials
- TILTING 16 IN. X 10 IN. WORK TABLE—Tilts 0–45 degrees for precise cuts
- ON-TOOL BLADE STORAGE—Easily access additional blades
Step-by-Step Build Sequence
The plan itself gives you the shapes. The difference between a rough craft project and a clean finished piece is sequence. Do not rush into glue-up. The internal coin chamber, clear window, and cleanout access all need to be proven before anything becomes permanent.
1. Print and Prepare the Pattern
Print the pattern at full size and confirm the scale before cutting wood. Measure a known dimension on the printout with a ruler. If the plan says the finished bank is 16 inches high, your pattern should support that finished height.
Recommended Free Tools
Apply painter’s tape to the wood first, then attach the pattern with spray adhesive. The tape makes pattern removal cleaner and can reduce surface fuzzing. Keep the paper flat with no wrinkles near branch curves or the coin slot.
2. Cut Blanks Oversize
Cut your plywood or hardwood blanks slightly larger than each pattern piece. Leave enough margin to clamp safely and support the work on the saw table. If the bank uses stacked layers, label every layer before cutting. A pencil mark on the back face can save a lot of confusion later.
3. Drill Starter Holes
Drill starter holes for internal cuts before going to the scroll saw. Keep the holes square to the face. For a fine scroll-saw blade, the hole does not need to be large, but it should be large enough that threading the blade does not scar the edge. Drill into a backer board to reduce blowout on the underside.
4. Scroll-Saw the Tree and Body Pieces
Let the blade do the work. If you push too hard, the blade heats up, wanders, and leaves angled cuts. That becomes a problem when stacked layers need to align. For tight branch turns, slow down before the corner, rotate the piece steadily, and keep both hands flat on the table.
Expect to change blades. A dull blade burns edges, pulls off the line, and increases tear-out. A $5 to $10 blade pack is cheap compared with remaking a delicate tree layer.
5. Fit the Coin Slot and Chamber
Before sanding everything smooth, test the slot and chamber with real coins: pennies, nickels, dimes, and quarters. A U.S. quarter is about 0.955 inch in diameter, so the slot and any turns in the chamber need enough clearance for the largest coin you expect to use. Do not rely on sight alone. Drop coins through the path and shake the bank gently to find snags.
6. Fit the Clear Window
Cut the acrylic or polycarbonate after the wood frame is close to final size. Sneak up on the fit. The window should sit flat without force. If you have to bend it into place, it is too tight. Leave a small amount of clearance so finish buildup and seasonal movement do not create pressure.
Ease the acrylic edges with fine sandpaper. Sharp plastic edges feel unfinished and can scratch hands. Keep solvent-based finishes and aggressive adhesives away from acrylic unless you know they are compatible.
Quick wins for a faster PC:
Fix the driver behind crashes, sound loss and screen glitchesFind Drivers →Clear out junk files and repair common Windows errorsFree Scan →Scan for outdated or missing drivers - takes under a minuteDriver Scan →Rank #3

- Dust port adapter keeps line-of-sight clear and work space clean
- Auto tensioning quick-change mechanism for easy accessory change and optimal blade tensioning
- Detachable coping function for handheld use to take the tool to the work piece
- Variable-speed control for optimal cutting in a variety of materials
- Fast-clamp base attaches to various tables, benches and surfaces
7. Decide How Coins Come Out
A coin bank without a cleanout method eventually becomes a frustration. Add one before final assembly. The three practical options are a screw-fastened back, a sliding bottom, or a hidden plug.
A screw-fastened back is the most reliable. Use small screws, predrill the holes, and avoid placing screws where they can split narrow branch or root details. A sliding bottom looks cleaner but must be cut accurately so it does not bind. A hidden plug works if the opening is large enough for quarters and fingers, but it is easier to lose.
8. Sand and Prefinish Internal Areas
Sand internal surfaces before glue-up. Once the bank is assembled, the inside of the coin chamber is hard to reach. Work through 120, 150, 180, and 220 grit. Do not over-sand delicate branches. A small file or folded sandpaper strip gives better control than a power sander near thin details.
If you prefinish internal faces, mask glue areas or scuff them lightly before assembly. Glue needs wood-to-wood contact. A slick finished surface can weaken the bond.
What’s actually slowing this PC down?
Pick the symptom - the matching free tool is one click away.
9. Glue and Clamp
Use a thin, even film of glue. More glue does not make the joint stronger; it makes squeeze-out worse. Glue beads inside the coin chamber can trap coins and look sloppy behind the clear window.
Clamp with moderate pressure and use cauls or scrap blocks to spread the load. Overclamping thin plywood can bow the bank or squeeze too much glue out of the joint. After clamping, check the piece from the side to make sure it is still flat.
10. Final Sanding and Finish
After the glue cures, round over all touch edges by hand. Pay special attention to the coin slot, base corners, back panel, and any areas a child may grab. The goal is a soft touch edge, not a rounded-over blob. Keep branch details crisp.
For finish, water-based clear coat, shellac, or wipe-on polyurethane all work. Paint is also fine if you want a bright gift piece. For a bank handled by children, choose a low-odor finish and allow it to cure fully before use. Dry to the touch is not the same as cured. Depending on product and conditions, that can mean 24 hours for light handling and several days before regular use.
Common Mistakes to Avoid
The biggest mistake is skipping the full dry fit. Assemble the layers without glue, place the window, test the coin slot, and confirm the cleanout method. If something binds dry, it will be worse with glue and finish added.
- Using rough construction plywood: voids can break narrow branches and leave ragged edges.
- Ignoring blade kerf: the cut removes material, which can make mating parts loose or tight depending on how the line is followed.
- Overclamping: too much pressure can bow thin layers and push glue into the chamber.
- Forgetting coin retrieval: a sealed bank may look clean, but it is poor design unless breaking it open is the goal.
- Leaving sharp edges: acrylic, plywood corners, and coin slots all need attention.
- Rushing finish cure: high-odor or oil-based coatings should not go into a child’s room before they are fully cured.
- Making the base too narrow: a 16-inch-tall bank needs enough footprint to resist tipping on a dresser or shelf.
Safety Notes for Kids and Indoor Air
This project is often built as a gift for a child, but it should not be treated as a toy for toddlers. Coins and small removable parts are choking hazards. For children under 3, use strict adult control and keep loose coins away. If the bank has a removable plug or small screws, make sure they cannot be removed casually by a young child.
Rank #4
- 20 in. Variable-Speed Scroll Saw
Tip-over stability matters because the finished bank is tall compared with its depth. At roughly 16 inches high and 2.5 inches deep, the base should be wide enough and heavy enough to sit securely. Felt feet can protect furniture, but do not let them reduce stability.
Wood dust is another real issue. Sawing and sanding produce fine particles, and some hardwood dust can be irritating. Wear eye protection and a properly fitted dust mask or respirator when cutting and sanding. Use dust collection if available, and clean the bench before bringing finish into the area.
Finish selection also matters indoors. Many coatings release volatile organic compounds while drying and curing. Use ventilation, follow the label, and do not place the bank in a bedroom or nursery until odor has cleared and the finish has cured according to the manufacturer’s instructions.
Independent reader supportYour contribution helps us test, update, and keep practical guides available for everyone.Do You Need a Permit?
For the standard 16 in. x 11 in. x 2.5 in. indoor Money Tree coin bank, no building permit is normally relevant. It is a portable craft object, not a structure, not electrical work, and not an alteration to a building.
The permit conversation starts only if you expand the idea into something else. A large fixed outdoor garden feature, freestanding yard sign, play structure, illuminated display, or weatherproof installation can trigger zoning, building, sign, or electrical rules. Many jurisdictions exempt small detached accessory structures below certain sizes, but those exemptions vary. Some places reference thresholds around 120 square feet for accessory structures, while others use different rules, setbacks, height limits, easements, or use restrictions.
If you scale this from a coin bank into a yard installation, check your local building department before you build. The cost of asking is small. Moving or rebuilding a noncompliant outdoor feature is not.
When to DIY vs. When to Hire a Pro
This project is a good DIY job if you already have basic shop habits and can work safely around a saw. The material cost is low, the pieces are small, and mistakes are usually recoverable. If you are making one bank as a gift, DIY makes sense.
Hire or ask for help if you do not have a safe way to cut the internal details, if the bank is part of a larger built-in display, or if you are adapting the design into a public, commercial, school, or outdoor installation. A cabinetmaker, finish carpenter, or experienced scroll-saw woodworker can build a cleaner version quickly, especially if you want hardwood, inlay, engraving, a custom nameplate, or multiple matching banks.
For a one-off custom bank, professional labor will cost far more than the materials. Even a small shop project can take 3 to 6 billable hours once layout, cutting, sanding, finishing, and hardware are included. At common shop rates, that can turn a $50 material project into a $250 to $600 custom piece. That is reasonable for a keepsake, fundraiser, or branded display, but unnecessary for most casual builds.
Practical Upgrades Worth Considering
A few small upgrades make the bank more useful without complicating the build. First, add a removable back panel with four small screws. Second, make the base slightly wider or heavier than the plan minimum if the bank will sit where children can reach it. Third, use felt feet so the base does not scratch furniture.
Do these 3 things before closing this tab:
1Scan for outdated or missing drivers - takes under a minute2Repair Windows errors before they cause bigger problems3Fix the driver behind crashes, sound loss and screen glitchesBest Value

- Stens replacement parts have become a favorite among lawn and landscape professionals thanks to exceptional performance.
You can also personalize the tree with a name, year, or short phrase burned, carved, painted, or engraved into the base. Keep decoration away from the coin slot and clear window. The bank should still work smoothly after it looks good.
If you want a cleaner finish, prefinish the visible inside faces before assembly, then do final sanding and topcoat after glue-up. Just keep glue surfaces bare. On our finish work, we think about the order of operations before opening the glue bottle. Small projects reward that discipline because there is no room to hide a bad sequence.
Bottom Line
The Money Tree coin bank is a compact woodworking project that teaches real carpentry fundamentals at a manageable scale. Build it from quality plywood, cut patiently, test the coin path before glue-up, and include a cleanout method. Expect to spend about $25 to $75 in 2026 if you already own the tools, with acrylic, finish, blade choice, and wood quality driving most of the cost.
Keep it indoors, round every touch edge, let the finish cure, and treat coins as choking hazards around young children. Built carefully, this is more than a decorative bank. It is a good lesson in precision, sequencing, and making a small object feel professionally finished.
Recommended Free Tools
Frequently Asked Questions
How big is the Money Tree coin bank when finished?
The finished bank is approximately 16 inches high, 11 inches wide, and 2.5 inches deep. It is sized for a shelf, dresser, desk, or gift display, not for outdoor use.
How much does it cost to build a wooden coin bank in 2026?
Plan on about $25 to $75 for materials if you already own the tools. Scrap wood can keep the cost low, while cabinet-grade plywood, acrylic, finish, hardware, and fresh scroll-saw blades push the total higher.
What wood should I use for a scroll-sawn coin bank?
Baltic birch plywood or quality hardwood plywood is the best practical choice because the uniform plies hold small branch details better than construction-grade plywood. Hardwood can work for the base or accents.
Can I build the coin bank without a scroll saw?
Yes, but with compromises. A jigsaw can cut larger outside profiles, and a coping saw can handle details slowly. For the original tight internal tree cuts, a scroll saw gives the cleanest and most controlled result.
Is a wooden coin bank safe for young children?
It can be safe for older children when edges are rounded and the finish is cured, but it is not suitable as a toddler toy. Coins and small removable parts are choking hazards for children under 3.
Do I need a permit for a Money Tree bank or garden version?
No permit is normally relevant for the standard indoor desktop coin bank. If you enlarge the idea into a fixed outdoor feature, sign, play structure, or wired garden display, check local zoning, building, and electrical rules first.
Quick Recap
Product prices and availability are accurate as of the date/time indicated and are subject to change. Any price and availability information displayed on Amazon at the time of purchase will apply.




