The Tool Desk
Outbyte PC Repair FREEClear out junk files and repair common Windows errorsFree Scan →Outbyte Driver Updater FREEScan for outdated or missing drivers - takes under a minuteDriver Scan →Matching color on plywood and solid wood is possible, but it is rarely automatic. The mistake is assuming that “birch is birch” or “red oak is red oak.” A plywood panel and a piece of solid trim may share a species name and still absorb stain, reflect light, and show grain in noticeably different ways.
On our job sites, we treat color matching as a finishing system, not a one-can stain choice. The reliable sequence is to select the right plywood and solid stock, make real samples from the actual materials, sand both substrates consistently, control absorption with conditioner or sealer where needed, adjust color with dye, stain, glaze, or toner, and approve the final look under the lighting where the work will live.
| # | Preview | Product | Price | |
|---|---|---|---|---|
| 1 |

|
Varathane Total Control Dark Walnut Gel Stain | $10.59 | Buy on Amazon |
| 2 |

|
Varathane Total Control Kona Gel Stain | $11.78 | Buy on Amazon |
| 3 |

|
Varathane Total Control American Walnut Gel Stain | $10.59 | Buy on Amazon |
| 4 |
|
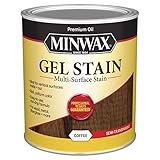
Minwax Gel Stain for Interior Wood Surfaces, Quart, Coffee | $19.99 | Buy on Amazon |
| 5 |

|
General Finishes Oil Base Gel Stain, 1 Quart, Java | $59.74 | Buy on Amazon |
If you are building cabinets, wall panels, bookcases, stair parts, or stain-grade trim, the goal is not to force two different materials to behave identically. The goal is to control enough variables that the finished installation reads as intentional, consistent, and professionally built.
Why Plywood and Solid Wood Do Not Stain the Same
Plywood and solid wood are built differently, and stain exposes those differences. Hardwood plywood has a thin face veneer over a core. Solid lumber is wood all the way through, with deeper grain, end grain, growth rings, and density variation. When stain hits those surfaces, it does not penetrate or sit the same way.
#1 Best Overall
- THICK, NO-DRIP FORMULA: Less mess than traditional wood stains and applies smoothly on horizontal and vertical surfaces including wood, metal, fiberglass and more
- LOW ODOR, WATER BASED GEL STAIN: Comfortably complete projects indoors including furniture, doors, trim and banisters
- FAST DRY TIME: Dries on wood in only 1 hour for quick project completion
- RICH, EVEN COLOR: Covers up to 250 square feet per quart
- INTERIOR AND EXTERIOR USE: Ideal for indoor and outdoor applications; not recommended for floors, decks or siding
That thin plywood face is the biggest practical issue. On cabinet-grade hardwood plywood, the face veneer may be thin enough that aggressive sanding can cut through it. Once that happens, no stain trick will make the panel look right. The core or glue line will telegraph through the finish, and the panel usually needs to be remade or hidden.
Solid wood also has end grain, edges, and profile details that drink finish faster than flat face grain. A solid maple stile, a red oak nosing, or a birch face frame can go darker than a plywood panel even when both were wiped with the same stain from the same can.
Species matching helps, but it is not enough. Rotary-cut birch plywood can look broad and busy compared with plain-sawn solid birch. Quarter-sawn oak veneer can look straighter and tighter than solid red oak trim. Maple plywood, maple face frames, and maple edge banding can all shift differently once water-based dye, oil-based stain, or clear finish is applied.
Start With the Right Material Specification
The best color match starts before sanding or staining. If the plywood and solid wood are visually far apart when raw, the finish schedule has to work harder and the result will be less predictable.
For stain-grade built-ins, cabinets, wall panels, and architectural millwork, we specify the plywood by species, veneer cut, grade, thickness, and core type. For solid lumber, we look for compatible species, grain pattern, color range, and moisture condition. We also try to buy from the same supplier batch when the project budget and schedule allow it, because plywood faces and solid lumber vary by mill, log source, region, and storage history.
Species and Cut Matter
A good specification does not stop at “oak plywood” or “birch plywood.” It should say what kind of oak, what face grade, and what veneer cut is expected. Rotary-cut veneer, plain-sliced veneer, rift-cut veneer, and quarter-sawn veneer all show different figure. That figure changes how stain collects in the grain and how the finished panel catches light.
For oak, open grain can create strong contrast. For birch and maple, tight grain can blotch, especially with penetrating stain. For walnut, cherry, and mahogany, natural color variation may be part of the design, but it still needs sample approval.
Use Stain-Grade Plywood, Not Utility Panels
Lower-cost plywood can be useful for sheathing, shop fixtures, paint-grade work, and temporary construction, but it is not the same as stain-grade cabinet plywood. In 2026, common retail listings for lower-cost utility or thin decorative 4 ft. by 8 ft. panels can fall around $17 to $35 per sheet. Cabinet-grade hardwood plywood is a different category.
Outdated Drivers Are Slowing You Down
One free scan finds every outdated or missing driver and matches the right update for your exact hardware.Free scan · exact hardware matchWindows Errors? Fix Them Before They Spread
Repair common Windows errors and clear accumulated junk for a smoother, more stable PC - no reinstall needed.Free scan · no reinstallFor 1/2 in. to 3/4 in. birch, maple, and red oak hardwood plywood, a realistic big-box retail range is about $60 to $90 per 4 ft. by 8 ft. sheet. Recent national listings include 1/2 in. birch around $59.98, 3/4 in. birch or maple around $74.98, and red oak around $79.98. Local pricing can move above or below that based on veneer grade, species, core, availability, and delivery.
On visible work, saving $30 on a sheet can cost far more if the face veneer stains unevenly or cannot be sanded cleanly. For a run of built-ins, one rejected panel can consume more labor than the plywood upgrade would have cost.
Check Compliance Labels
Hardwood plywood used indoors should be labeled compliant with EPA TSCA Title VI formaldehyde standards. Regulated composite wood products include hardwood plywood, MDF, and particleboard. For California projects or projects using California-compliant specifications, CARB-related labeling may also appear in the submittal package.
For commercial interiors, we also pay attention to product data sheets, VOC limits, fire and smoke requirements for interior finishes, and any project-specific low-emitting material requirements. ANSI/HPVA HP-1 is the key hardwood and decorative plywood standard; the 2024 edition superseded HP-1-2020 and covers items such as veneer grades, moisture content, tolerances, sanding, grade marking, and formaldehyde emissions.
Build a Real Sample Before Production
The most useful color-matching tool is not a stain chart. It is a control sample made from the actual plywood and actual solid wood that will be installed.
Rank #2
- THICK, NO-DRIP FORMULA: Less mess than traditional wood stains and applies smoothly on horizontal and vertical surfaces including wood, metal, fiberglass and more
- LOW ODOR, WATER BASED GEL STAIN: Comfortably complete projects indoors including furniture, doors, trim and banisters
- FAST DRY TIME: Dries on wood in only 1 hour for quick project completion
- RICH, EVEN COLOR: Covers up to 250 square feet per quart
- INTERIOR AND EXTERIOR USE: Ideal for indoor and outdoor applications; not recommended for floors, decks or siding
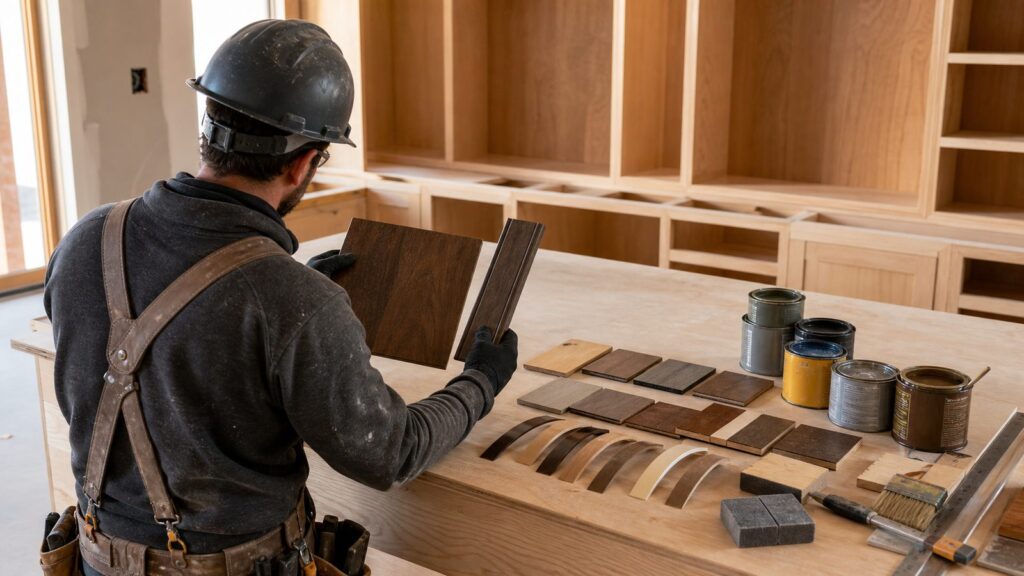
On our projects, a proper control sample includes one piece of the plywood face, one piece of the solid trim or face-frame material, any edge banding, the full sanding sequence, the complete stain or dye schedule, toner or glaze if used, the clear topcoat, and the final sheen. The sample is labeled and approved before production starts.
A sample should be large enough to tell the truth. A 2 in. offcut is not enough for plywood with active grain. For cabinetry or wall panels, we prefer sample boards in the 8 in. by 12 in. range or larger, especially when the panel face has strong cathedral grain or the trim has a routed profile.
Test the sample under actual lighting. Daylight, warm LEDs, cool LEDs, under-cabinet lighting, and recessed fixtures can all change how the color reads. Two pieces that match in a shop under 5000K lighting can look mismatched in a kitchen with warm 2700K LEDs.
Recommended Free Tools
Also look at the sample vertically if the finished work will be vertical. A sample lying flat on a workbench often looks different once it is mounted on a wall, cabinet side, stair skirt, or bookcase end panel.
The Professional Finishing Sequence
There are many ways to finish wood, but the sequence matters. The more visible the work, the more disciplined the process needs to be.
1. Sort and Lay Out the Material
Before sanding, lay out the plywood and solid pieces together. Reject or relocate panels that are much lighter, darker, greener, pinker, or more figured than the rest. On built-ins, we often reserve the best-matched sheets for doors, exposed ends, and eye-level panels, then use less critical pieces in backs, toe kicks, shelves, or concealed areas.
Do the same with solid lumber. A single dark face-frame rail can stand out against a lighter plywood cabinet side. If the mismatch is obvious while raw, it will usually remain obvious after stain.
Free tools Windows power users keep installed
One-click scans. No signup required.
2. Sand Both Materials Consistently
Different sanding grits change stain absorption. If the plywood is sanded to 220 grit and the solid trim is sanded to 120 grit, the same stain can land as two different colors. The rougher surface usually absorbs more pigment and reads darker.
For many interior stain-grade hardwoods, a practical sequence is 120, 150, then 180 grit. Some tight-grained woods or water-based systems may call for 180 to 220 grit, depending on the product. The key is consistency. Do not sand panels and trim with different final grits unless the sample proves that is needed.
Be cautious with plywood. Sand enough to remove handling marks and mill glaze, but do not chase every defect aggressively. The face veneer is thin, and sanding through it is permanent damage.
3. Raise the Grain When Using Water-Based Products
Water-based dye, stain, and topcoat can raise wood fibers. If that happens after color is applied, sanding the raised grain can remove color unevenly. For clean work, lightly dampen the sample and production pieces with water, let them dry, then sand lightly with the final grit or a fine abrasive pad before applying the finish schedule.
This step is especially useful on maple, birch, and other tight-grained woods where uneven fibers can catch color in small patches.
4. Control Blotching With Conditioner or Washcoat
Birch, maple, pine, cherry, and some plywood veneers can blotch because stain absorbs unevenly. A pre-stain conditioner or washcoat partially seals the surface so pigment does not dive into soft areas as aggressively.
Rank #3
- THICK, NO-DRIP FORMULA: Less mess than traditional wood stains and applies smoothly on horizontal and vertical surfaces including wood, metal, fiberglass and more
- LOW ODOR, WATER BASED GEL STAIN: Comfortably complete projects indoors including furniture, doors, trim and banisters
- FAST DRY TIME: Dries on wood in only 1 hour for quick project completion
- RICH, EVEN COLOR: Covers up to 250 square feet per quart
- INTERIOR AND EXTERIOR USE: Ideal for indoor and outdoor applications; not recommended for floors, decks or siding
A washcoat is a thin sealer layer, often made with a compatible clear finish reduced according to the manufacturer’s system. The exact ratio depends on the product, which is why the sample board matters. Too much sealer can make the stain too pale. Too little may not control blotching.
For a homeowner project, a manufacturer-matched conditioner is usually the simpler option. For higher-end shop work, finishers may use shellac, vinyl sealer, waterborne sealer, dye, glaze, and toner in a more controlled schedule.
Quick wins for a faster PC:
Scan for outdated or missing drivers - takes under a minuteDriver Scan →Repair Windows errors before they cause bigger problemsFix Now →5. Apply Dye, Stain, Glaze, or Toner Based on the Problem
Penetrating stain is not the only way to add color. In fact, relying only on penetrating stain is one reason plywood and solid wood fail to match.
Dye changes the color of the wood more transparently and can be useful when the plywood face needs a more even base tone. Pigmented stain lodges more in grain and pores, which can emphasize oak grain but may blotch birch or maple. Gel stain sits more on the surface and can help when absorption is uneven, but it still needs testing and proper dry time.
Glaze is useful after a sealed coat when the goal is to add depth, soften contrast, or accent profiles. Toner is color added to a clear finish and sprayed over the surface. On professional work, toner is often how we close the last 10 percent of the match because it shifts the overall color without depending on more absorption into mismatched substrates.
The rule is to start lighter than the target. It is much easier to darken with another dye pass, glaze, or toner than to rescue a panel that went too dark.
Do these 3 things before closing this tab:
1Fix the driver behind crashes, sound loss and screen glitches2Clear out junk files and repair common Windows errors3Scan for outdated or missing drivers - takes under a minute6. Match the Sheen, Not Just the Color
Sheen changes perceived color. Gloss can look deeper and darker because it reflects more sharply. Satin can read softer and slightly lighter. Matte can make color look flatter. Oil and solvent finishes often amber the wood, while many waterborne finishes preserve a cooler tone.
If the plywood sample has two coats of satin waterborne topcoat and the solid trim sample has one coat of oil-based polyurethane, those are not comparable samples. Match the full schedule: product, number of coats, dry time, sanding between coats, and sheen.
Cost to Match Stain on Plywood and Solid Wood in 2026
Color matching can be inexpensive on a small repair and costly on a full cabinet or millwork package. The main cost drivers are material grade, sample time, finish complexity, access, prep condition, dust control, ventilation, and whether the work is site-finished or shop-finished.
For a homeowner touching up a small plywood-and-trim mismatch, the cost may be a few sample boards, stain or dye quarts, brushes, rags, sandpaper, and several labor hours. For a full built-in, kitchen, stair wall, or commercial millwork package, a paid mockup allowance is a smart line item because remaking stained panels after installation is much more expensive than testing first.
| Item or Scope | Typical 2026 US Cost | What Affects the Price |
|---|---|---|
| Cabinet-grade hardwood plywood, 4 ft. x 8 ft. | About $60-$90 per sheet for common birch, maple, or red oak examples | Thickness, veneer species, face grade, core, local availability, delivery |
| Utility or thin decorative plywood, 4 ft. x 8 ft. | Roughly $17-$35 per sheet | Panel type, thickness, surface quality, whether it is suitable for stain-grade work |
| Professional staining and finishing of woodwork | About $4.60-$9.05 per linear foot | Prep, profiles, access, number of coats, masking, occupied-space protection |
| Professional cabinet staining | About $2.95-$5.87 per square foot | Door removal, sanding, color changes, finish system, shop vs site work |
| Kitchen cabinet staining/refinishing project | Commonly about $1,500-$5,000 total, or $4-$15 per square foot | Kitchen size, condition, stripping, finish type, labor market |
| Exterior deck staining | About $1-$5 per square foot | Cleaning, sanding, product type, access, weather, railing complexity |
Those numbers are planning ranges, not bids. A small built-in with four sheets of plywood, solid face frames, and a simple stain may finish quickly. A large wall of rift-cut white oak panels with custom toner, multiple approval samples, and low-VOC finish requirements can require much more finish labor.
The most expensive outcome is usually not the finish material. It is rework. If a 3/4 in. 4 ft. by 8 ft. hardwood plywood panel costs $75 but has already been cut, installed, scribed, and finished, replacing it can involve demolition, carpentry, finish labor, schedule delay, and touch-up across adjacent pieces.
Matching Common Plywood and Solid Wood Combinations
Birch Plywood With Solid Birch
Birch is common in built-ins and utility cabinetry, but it can blotch badly. Rotary-cut birch plywood can show broad figure that does not look like solid birch rails and stiles. For birch, we often prefer dye or toner over a sealed surface rather than a heavy penetrating stain.
Rank #4
- WOOD GEL STAIN – Minwax Gel Stain is specifically designed to give you full control over the staining process and help you achieve beautiful results. Recommended uses include woodwork, furniture, doors, molding, trim, cabinets, and accessories.
- UNIQUE NON-DRIP FORMULA – The non-drip formula of this gel stain for wood makes application easy, even for vertical surfaces. It’s thick-bodied, so it stays more towards the surface of the wood, allowing for greater color control during application.
- DELIVERS EVEN COLOR – Minwax interior wood stain delivers color evenly on wood and non-wood surfaces, such as metal, veneer, and fiberglass. Pre-treat bare wood with Minwax Pre-Stain Wood Conditioner to ensure you get the most uniform color.
- COFFEE WOOD STAIN – This beautiful natural wood stain provides a deep, dark-colored finish. It offers a rich color that looks great on a variety of projects.
- A BRAND YOU CAN TRUST – Minwax is America’s leading brand of wood finishing and wood care products. Since 1904, we have been inspiring consumers to Keep on Finishing. We offer consumers a complete line of products to meet every wood finishing need.
If the target color is light natural birch, use a clear finish sample first. If the target is medium brown, test conditioner, dye, and toner before committing to a pigmented wiping stain. Dark stain on birch can become patchy fast.
What’s actually slowing this PC down?
Pick the symptom - the matching free tool is one click away.
Maple Plywood With Solid Maple
Maple is dense and tight-grained. It is strong, clean-looking, and popular for cabinets, but it does not always accept stain evenly. A light dye followed by sealer and toner can be more predictable than trying to push a dark wiping stain into the wood.
For a modern natural maple look, waterborne clear finish may keep the tone lighter and cooler. Oil-based finishes can add amber, which may be desirable in some traditional rooms but too yellow in others.
Red Oak Plywood With Solid Red Oak
Oak is more forgiving because the open grain accepts stain readily. The challenge is grain contrast. Plywood veneer cut may show a different figure than solid trim. Red oak also has natural pink, tan, and brown variation.
If the goal is a smoother furniture-grade match, grain filler or glaze can be used intentionally. If the goal is a more traditional oak look, the open grain can be part of the appearance, but the plywood and solid samples still need to be approved together.
Plywood Panels With Solid Edge Banding
Edges are often where a match fails. Plywood edges expose layers and do not stain like the face. Most visible work needs solid wood edging or veneer edge banding. Even then, the edge material may absorb darker than the plywood face, especially at end-grain cuts and corners.
Finish edge samples separately. Sand edges with the same discipline as faces, ease sharp corners slightly, and seal end grain if it is going too dark. For shelves, doors, and exposed cabinet sides, the edge is in the line of sight and deserves its own test.
When an Exact Match Is Unrealistic
Some material combinations will not match exactly, and promising perfection creates problems. A realistic contractor should say that early.
An exact match may be unrealistic when the plywood veneer and solid wood are different species, when the veneer cut is dramatically different from the solid grain, when existing wood has aged for years, when the old finish has ambered, when UV exposure has changed exposed surfaces, or when the plywood face is too thin or already sanded through.
The Tool Desk
Outbyte Driver Updater FREEScan for outdated or missing drivers - takes under a minuteDriver Scan →Outbyte PC Repair FREEClear out junk files and repair common Windows errorsFree Scan →Exterior and humid locations add another layer. UV exposure, water, temperature swings, and maintenance cycles will change color over time. For exterior doors, soffits, porch ceilings, and decks, durability and product compatibility matter more than a perfect day-one match. A finish that looks perfect for two weeks but fails after one season is not a good finish.
For additions and remodels, we also set expectations around old wood. A 20-year-old oak stair rail and new red oak plywood paneling can be brought into the same family, but the old material has oxidation, wear, and finish history. Sometimes the better design decision is contrast: make the new work clearly intentional instead of nearly matched but slightly wrong.
Independent reader supportYour contribution helps us test, update, and keep practical guides available for everyone.DIY vs Hiring a Professional
A careful homeowner can handle basic stain matching on small projects. A shelf, a laundry room cabinet, a mudroom bench, or a single plywood panel with solid edging is a reasonable DIY scope if you have offcuts to test and time to work slowly.
DIY is reasonable when the project is small, the wood is new, the color target is light to medium, the finish is not in a wet or high-abuse area, and a slight variation will not ruin the room. Plan on at least one full weekend: a few hours for sanding and samples, overnight dry time for many stains, another day for topcoats, and additional cure time before heavy use.
Free tools Windows power users keep installed
One-click scans. No signup required.
Best Value
- This is the stain that has the most "finishing feel" of all General Finishes' products
- Woodworkers love the lustrous finish that shows up
- Heavy-bodied, and so does not penetrate as deeply into the wood as liquid oil-base stains do
- Can help you get a more even appearance on difficult woods such as aspen or pine
- Easy-to-use stains simply wipe on with a cloth or applied with a foam brush (no spills or splashes)
Hire a pro when the work is expensive, highly visible, dark-stained, already installed, or part of a larger cabinet or millwork package. Also bring in a professional finisher when matching new work to existing cabinets, when the project requires spray toner, when the finish must meet commercial submittal requirements, or when the space is occupied and dust, odor, and ventilation must be controlled.
Dark colors are especially unforgiving. A deep espresso, dark walnut, black-brown, or gray-brown finish can magnify sanding scratches, glue spots, blotching, and veneer differences. The cost of professional sampling is small compared with replacing a run of cabinet doors or plywood end panels.
Safety, VOC, and Permit Notes
Most interior staining and cabinet finishing does not require a building permit by itself in a typical residential setting. That changes if the work is part of a larger remodel involving walls, electrical, plumbing, structural changes, fire-rated assemblies, commercial occupancy, or regulated interior finish requirements. For commercial projects, interior finish rules in the building code and project specifications may matter, especially for flame spread, smoke development, and approved materials.
VOC rules also matter. Architectural coatings are regulated at the federal level, and states or air districts may have stricter requirements. California and South Coast Air Quality Management District rules are common examples of stricter coating environments. Always use products that are legal for sale and use in the project location, and follow the manufacturer’s label for ventilation, personal protective equipment, dry times, and disposal.
Do these 3 things before closing this tab:
1Repair Windows errors before they cause bigger problems2Scan for outdated or missing drivers - takes under a minute3Clear out junk files and repair common Windows errorsRags used with oil-based stains and finishes can create a fire risk if they are wadded up and left in a pile. Lay them flat outdoors to dry according to the product directions or place them in a listed oily-waste container. Keep solvents away from ignition sources, protect HVAC returns during sanding and spraying, and do not spray solvent finishes in an occupied home without proper containment and ventilation.
For indoor plywood, check TSCA Title VI compliance. For schools, healthcare spaces, multifamily common areas, offices, and public-facing commercial interiors, keep product data sheets and finish submittals organized before materials arrive on site.
Jobsite Checklist for a Reliable Match
Use this checklist before committing stain to the finished work:
- Confirm plywood species, veneer cut, face grade, thickness, core type, and compliance labeling.
- Confirm solid wood species, grain pattern, moisture condition, and compatibility with the plywood face.
- Buy from the same supplier batch when practical.
- Make sample boards from actual plywood, solid trim, and edge banding offcuts.
- Use the same sanding grit sequence on samples and production parts.
- Raise grain before water-based dye, stain, or finish if the system calls for it.
- Test conditioner or washcoat on blotch-prone woods.
- Start lighter than the target color.
- Use dye, stain, glaze, or toner based on the specific mismatch.
- Apply the same topcoat product, number of coats, and sheen used in production.
- Review samples under actual room lighting, both daytime and nighttime.
- Label the approved schedule with product names, batch numbers, dwell time, wipe method, dry time, and coat count.
That documentation may feel excessive for a small shelf. It is not excessive for a $15,000 built-in, a new kitchen, a reception desk, a paneled office, or a stair package. The finish schedule is part of the construction, and it should be controlled with the same seriousness as dimensions and hardware.
The Bottom Line
Plywood and solid wood can be matched closely, but the match comes from process, not luck. Choose compatible materials, avoid sanding through thin veneer, test the full finish schedule, and judge the result under real lighting. Use conditioner or washcoat when absorption is uneven, use dye or stain for base color, and use glaze or toner for final correction when the project justifies it.
For small projects, patient DIY sampling can get a good result. For high-visibility cabinetry, wall panels, trim packages, and commercial interiors, professional sampling and finishing are worth the cost. The cheapest time to solve a color mismatch is before the first production panel is stained.
Frequently Asked Questions
Why does plywood stain differently than solid wood?
Plywood has a thin face veneer over a core, while solid wood has deeper grain, end grain, and more variable density. The same stain can absorb differently and make the plywood face, solid trim, and edges read as different colors.
Can plywood and solid wood ever match exactly?
They can often be matched closely, but an exact match is not always realistic. Species, veneer cut, grain direction, age, lighting, sanding grit, stain type, and topcoat sheen all affect the final appearance.
Should I use pre-stain conditioner on plywood?
Use conditioner or a washcoat when testing shows blotching, especially on birch, maple, pine, cherry, and some plywood veneers. Always test it on offcuts first because too much sealing can keep the stain too light.
Is gel stain better for matching plywood to solid wood?
Gel stain can help because it sits more on the surface and depends less on deep absorption. It is useful for some mismatched substrates, but it still needs sample testing and proper dry time before topcoating.
What grit should I sand plywood before staining?
Many interior stain-grade projects use a sequence such as 120, 150, then 180 grit, with some systems going to 220. The exact grit depends on the wood and finish, but plywood and solid parts should be sanded consistently.
Do I need a permit to stain plywood cabinets or wall panels?
Staining alone usually does not require a residential permit. Permits or code review may apply when the work is part of a larger remodel, commercial interior, fire-rated assembly, or project with specific VOC or interior finish requirements.
Quick Recap
Product prices and availability are accurate as of the date/time indicated and are subject to change. Any price and availability information displayed on Amazon at the time of purchase will apply.