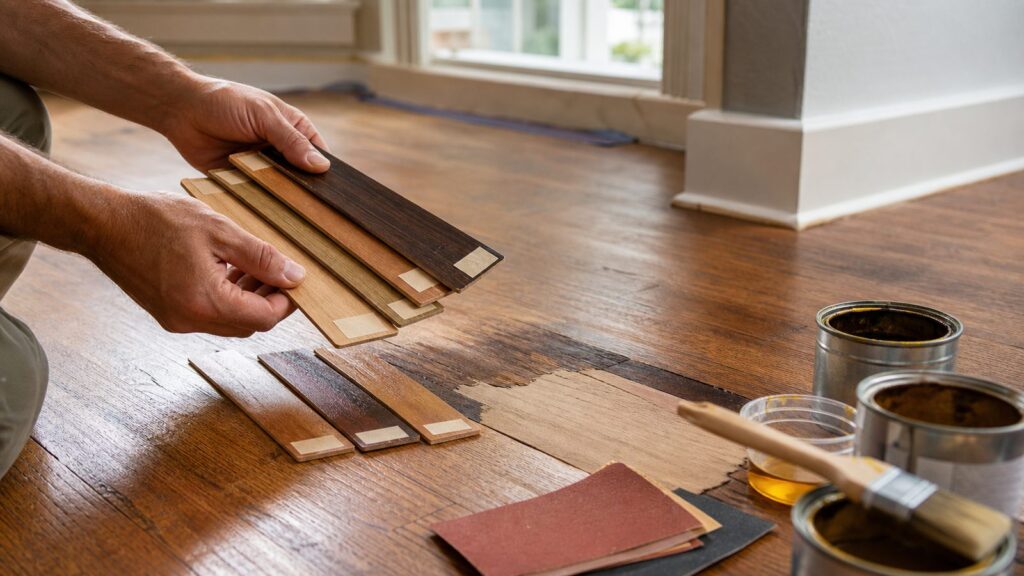
Matching new stain to old wood is possible, but the honest answer is this: the match comes from process, not from grabbing a can labeled “oak,” “walnut,” or “cedar” and hoping it disappears. New wood and old wood absorb stain differently. Old wood has been changed by UV light, oxidation, cleaning products, moisture, old finish, wax, dirt, and normal wear. The same stain can look warm brown on red oak, muddy on pine, pale on maple, and almost black on end grain.
On our job sites, we treat stain matching like a small finish system. We identify the species, clean the existing wood, sand the repair to the right grit, make sample boards, adjust undertone, and match the clear coat and sheen. The goal is not always a microscope-perfect match. The goal is a repair that looks natural under normal room light, from standing height, after the finish has dried and settled.
As an Amazon Associate I earn from qualifying purchases.
For a small DIY repair, expect roughly $30 to $150 in materials if you already own basic tools. For professional work, the cost is usually driven more by labor and testing than by the stain itself. Deck staining commonly lands around $2 to $6 per square foot in 2026. Hardwood floor refinishing with stain commonly runs about $3 to $8 per square foot, with stain-only line items lower when the surface is already properly prepared. Cabinets, stairs, furniture, and historic trim are usually priced by complexity because the hard part is blending color and sheen.
What’s actually slowing this PC down?
Pick the symptom - the matching free tool is one click away.
Why New Stain Rarely Matches Old Wood on the First Try
Wood is not a uniform material. A board is a bundle of pores, grain, resin, tannins, earlywood, latewood, end grain, and old finish history. When one board has lived in a house for 30 years and another came from the lumberyard last week, they are no longer the same color base, even if they started as the same species.
#1 Best Overall
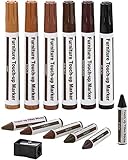
- PRODUCT DETAILS - This 13 piece kit includes 6 Repair Markers, 6 paper wrapped wax sticks and 1 wax stick sharpener packaged in a blister card.
- 6 UNIQUE COLORS - Maple, Oak, Cherry, Walnut, Mahogany and Black to match the color of your furniture. Now there's no need for you to call a professional to retouch your scuffed furniture. Become the pro yourself!
- PREMIUM QUALITY - Top quality markers and wax sticks that cover scratches, nicks, scuffs, and discoloration on furniture, cabinets, tables, beds and more. 100% effective and permanent.
- EASY TO USE - Simply draw over the scratch, allow it to quickly dry, and watch the scratches disappear right before your eyes! These are safe to use on all types of wooden furniture. Use the included sharpener to sharpen the wax sticks.
Older wood often darkens, ambers, grays, or reddens depending on the species and exposure. Sunlight can bleach some surfaces and deepen others. Moisture can raise grain and leave dark mineral or tannin stains. Floor wax, smoke residue, furniture polish, deck cleaners, mildew, and old polyurethane can all shift the apparent color. If you stain a new patch to match that dirty or aged surface without cleaning first, you may match the wrong target.
Sanding is another major variable. A board sanded with 80-grit paper usually accepts more pigment and looks darker than the same board sanded to 180 or 220 grit. Coarser sanding leaves the pores more open. Very fine sanding can burnish the surface and reduce penetration. That is why two pieces of the same oak can look different with the same stain if one was sanded by hand with 120 grit and the other came factory-sanded smooth.
End grain is even more aggressive. It drinks stain faster than face grain and often turns too dark. On stair treads, exposed trim ends, rails, shelves, and butcher-block-style repairs, we often sand end grain one or two grits finer or use conditioner to slow absorption. Ignoring end grain is one of the fastest ways to make a repair look patched.
The Tool Desk
Outbyte Driver Updater FREEFix the driver behind crashes, sound loss and screen glitchesFind Drivers →Outbyte PC Repair FREEClear out junk files and repair common Windows errorsFree Scan →Start With the Wood Species, Not the Stain Color
The first question is not “What stain color matches this?” It is “What wood am I staining?” Red oak, white oak, pine, maple, birch, cedar, walnut, fir, poplar, cherry, and pressure-treated lumber all take color differently. Even within the same species, plainsawn and quartersawn boards can read differently because the grain reflects light differently.
A red oak patch stained brown will still show red oak grain. A pine replacement board in an old fir floor may stain close in darkness but still look wrong because the grain, hardness, and blotching pattern do not match. Maple and birch are dense and can resist pigment in some areas while blotching in others. Cedar and pressure-treated lumber are especially unpredictable outdoors because oils, preservatives, moisture content, and weathering affect absorption.
For visible repairs, match these items before buying stain:
- Species: Use the same wood species whenever possible.
- Cut and grain: Match flat grain, vertical grain, cathedral grain, or tight straight grain where the repair is visible.
- Board width and layout: A 3 1/4-inch floor board replacement is easier to hide when it matches the existing floor width.
- Moisture and age: Let new exterior lumber dry before staining when required by the stain manufacturer and job conditions.
- Surface preparation: Sand the new and old work areas to a compatible grit schedule.
If you cannot match the species, plan to blend over a larger area. That may mean staining a full stair tread, a complete cabinet rail, a whole floor board, or a deck zone instead of stopping in the middle of a field.
Clean and Prepare the Old Wood Before You Judge Color
Old wood should be cleaned before it becomes the color target. Otherwise, you may be matching grime, wax, mildew, oxidized finish, or gray dead fibers instead of the actual wood and finish.
Interior trim, cabinets, and stairs should be degreased carefully. Around kitchens, handrails, and door casings, oils from hands and cooking can make the surface look darker and duller. A mild cleaner followed by a clean-water wipe is often enough for evaluation. Avoid soaking joints or veneers. If there is wax or polish, you may need mineral spirits or a finish-safe cleaner in a small test area.
Floors usually need more than a wipe. If the old finish is worn through in some areas and intact in others, stain will not absorb evenly unless the floor is sanded consistently. For a small board replacement, we still test the patch against the adjacent floor after cleaning and after applying the same type of finish sheen.
Exterior wood is its own challenge. Decks, fences, siding, porch rails, and outdoor stairs collect UV damage, mildew, tannin bleed, soil, and old coatings. Pressure washing alone can leave raised fibers or uneven striping if handled poorly. A proper exterior process often includes cleaning, brightening, drying, sanding rough areas, and then staining. Many exterior stains require the wood to be dry and within a specific temperature range, commonly around moderate weather rather than cold, damp, or direct hot sun conditions. Follow the product label for exact limits.
Recommended Free Tools
Rank #2
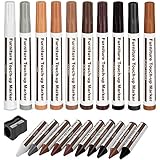
- WIDE RANGE OF USE - It has both markers and crayon type filler, very easy to fill the scratch, discoloration, hole or separation gaps, Ideal for any kind of wooden furniture.
- 10 UNIQUE COLORS - Maple, Oak, Cherry, Walnut, Mahogany, White, Grey, Chestnut, Burnt Sienna and Black to match the color of your furniture. Now there's no need for you to call a professional to retouch your scuffed furniture. Become the pro yourself!
- PREMIUM QUALITY - Top quality markers and wax sticks that cover scratches, nicks, scuffs, and discoloration on furniture, cabinets, tables, beds and more. 100% effective and permanent.
- EASY TO USE - Simply draw over the scratch, allow it to quickly dry, and watch the scratches disappear right before your eyes! These are safe to use on all types of wooden furniture. Use the included sharpener to sharpen the wax sticks.
- QUALITY WATTANTY: If the marker you receive is dry or leaking, there may be product problems caused by logistics, please feel free to contact us at any time.
Build a Sample Ladder Before Touching the Repair
The best stain match is made on samples, not on the installed repair. On our projects, we make a sample ladder whenever the repair is visible. It takes time, but it prevents the expensive mistake of making the actual workpiece too dark.
Use scrap from the same board or the same bundle whenever possible. A store sample stick is not good enough unless it is the same species, same sanding, and same finish system. For floor repairs, save offcuts from the replacement boards. For trim, test on the back side or a hidden return if scrap is unavailable.
A Practical Sample Ladder
Set up at least 4 to 8 test sections. Label every section in pencil or tape. A useful ladder might look like this:
- 120-grit sanding, conditioner, stain wiped after 2 minutes
- 120-grit sanding, conditioner, stain wiped after 5 minutes
- 150-grit sanding, conditioner, stain wiped after 5 minutes
- 150-grit sanding, no conditioner, stain wiped after 3 minutes
- 150-grit sanding, lighter stain plus second coat after drying
- Dye or toner adjustment over the closest raw stain sample
Always apply the actual clear coat over at least half of each sample. Raw stain color is not the finished color. Oil-based clear coats usually add amber and depth. Water-based finishes stay clearer and can make the same stain look cooler. Satin, semi-gloss, and gloss also change how dark or rich the wood appears. A satin finish scatters light differently than gloss; on floors and cabinets, that can be the difference between “close” and “wrong.”
Let samples dry fully before deciding. Wet stain usually looks darker and richer than the cured result. Many stains need overnight drying before topcoat, and some exterior products need longer depending on humidity, temperature, and wood density. Do not judge the final match 20 minutes after wiping the stain.
Choose the Right Stain Type for the Job
There is no single best stain for matching old wood. The right product depends on the species, surface, existing finish, and how much control you need.
| Product type | Best use | Color control | Common caution |
|---|---|---|---|
| Oil-based penetrating stain | Oak, ash, walnut, many interior trim and floor repairs | Good open-grain depth and warmth | Can amber; VOC rules and drying time matter |
| Water-based stain | Projects needing faster dry time, lower odor, or clearer color | Good for cooler, cleaner tones | Can raise grain; may look less warm without adjustment |
| gel stain | Blotch-prone wood, vertical surfaces, partial color shifts | High surface control | Can obscure grain if applied too heavily |
| Dye stain | Transparent undertone shifts and layered custom matching | Excellent for color tuning | Requires careful testing; can be unforgiving |
| Toner or tinted topcoat | When stain is close but needs age, amber, gray, red, or brown adjustment | Excellent final adjustment | Too much tint can make the finish look sprayed-on or muddy |
| Exterior semi-transparent stain | Decks, fences, siding where grain should show | Moderate | Weathering and old coating removal control the result |
| Exterior solid stain | Older decks or mismatched boards where uniformity matters more than grain | High hiding power | Looks more like paint; future prep may be heavier |
For oak, pigment stain often works well because the open grain accepts color. For pine, fir, maple, birch, cherry, and poplar, blotching is a real risk. Those woods often need a pre-stain conditioner, washcoat, gel stain, dye, toner, or a controlled sealing step before the final color. The goal is to slow down the thirsty areas so they do not turn dark and patchy.
For historic trim, cabinets, furniture, and stair parts, a close match may require layers: dye for undertone, pigment stain for grain, glaze for age in profiles, shellac or sealer for control, toner for final warmth, then clear coat for sheen. That sounds fussy, but on a 100-year-old stair rail or a visible cabinet end panel, one off-the-shelf stain rarely does the whole job.
Do these 3 things before closing this tab:
1Fix the driver behind crashes, sound loss and screen glitches2Repair Windows errors before they cause bigger problems3Scan for outdated or missing drivers - takes under a minuteMatch Darkness and Undertone Separately
Homeowners often say a repair is “too light” or “too dark,” but the real issue may be undertone. Old wood may have amber, red, brown, gray, black, or yellow notes. A stain can be the right darkness and still look wrong if the undertone is off.
Work from light to dark. It is much easier to add color than to pull back a repair that went too dark. Start with a lighter stain than you think you need, then build with controlled layers. If the old wood is warm and amber, the final clear coat may create much of that warmth. If the old wood has a gray weathered cast, a brown stain alone may look too orange. If old red oak has aged under oil polyurethane, a neutral brown can look flat without amber or red adjustment.
Look at the repair in the same light where it will live. Daylight, warm LED bulbs, cool LED bulbs, and under-cabinet lighting all shift color. We check samples vertically for cabinets and trim because light hits vertical surfaces differently than flat sample boards. Floors should be checked from standing height, not just with your face 12 inches from the patch.
Blend to Natural Break Lines
The worst place to stop stain is usually the middle of an open field. Even a good color match can show a hard edge. Pros look for natural break lines: a board seam, inside corner, door casing edge, cabinet stile-and-rail joint, stair nosing, threshold, panel edge, or full deck board.
Rank #3

- Product Details: 13 pieces furniture repair kit, 6 touch up markers and 6 wax sticks with 1 sharpener.It has both markers and crayon type filler, very easy to fill the scratch, discoloration, hole or separation gaps, Ideal for any kind of wooden furniture.
- Variety of Colors: Furniture touch up markers and wood putty filler sticks both come in 6 colors: maple, oak, cherry, walnut, mahogany, and black, offering a versatile color selection to match and repair a wide range of wood furniture and wood floors.
- Easy to Use: Simply draw over the scratch, allow it to quickly dry, and watch the scratches disappear right before your eyes! These are safe to use on all types of wooden furniture. Use the included sharpener to sharpen the wax sticks.
- Make it New Again: Our wood floor repair kit provides a simple and effective solution for rejuvenate wood floor restorer and wood floor scratch remover, helping you maintain their original charm while saving money on wood furniture repair or wood floor scratch repair.
- Premium Quality: Top quality markers and wax sticks that cover scratches, nicks, scuffs, and discoloration on furniture, cabinets, tables, beds and more. 100% effective and permanent. We promise provide you with 100% satisfactory service, if our products make you have any dissatisfaction, please feel free to contact us.
For hardwood floors, replacing one board in the middle of a sun-faded room is difficult to hide. If possible, replace boards in a line, near a wall, under a cabinet toe kick, or at a doorway where the eye expects a transition. For small repairs, feathering and board-by-board blending can help, but a full room sand and refinish may be the more honest answer if the finish is worn everywhere.
For decks, isolated new boards often stand out until they weather. If the deck is already uneven, a semi-transparent stain may still show the patch. A semi-solid or solid stain can create a more uniform look, but it changes the character of the deck because it hides more grain. On older decks with mixed new and old boards, we often discuss zones: stain a full platform, a set of steps, or a railing section rather than one board at a time.
For cabinets and trim, stop at construction joints. A single patched spot in the middle of a cabinet door panel is harder to hide than refinishing the full panel or full door. On stained baseboard, it is often cleaner to blend from inside corner to outside corner than to touch up a 6-inch section and leave two visible lap marks.
Typical 2026 Costs for Stain Matching and Refinishing
Material costs are modest compared with labor. The stain itself may be a small part of the bill. The time is in masking, cleaning, sanding, making samples, waiting for dry time, adjusting undertones, and matching the topcoat.
Outdated Drivers Are Slowing You Down
One free scan finds every outdated or missing driver and matches the right update for your exact hardware.Free scan · exact hardware matchPC Slower Than It Used to Be?
A free scan shows the junk files, broken settings and background clutter dragging Windows down - then fixes them in one click.Free scan · Windows 10 & 11| Project type | Typical 2026 cost | What affects price |
|---|---|---|
| Small DIY stain-match repair | $30-$150 in materials | Sample cans, sandpaper, rags, conditioner, stain, brushes, cleanup supplies, clear coat |
| Exterior stain, 1 gallon | About $10-$200 per gallon; many mainstream deck and fence stains are $40-$80 | Brand, opacity, oil vs water base, specialty formulas, 5-gallon pricing |
| Professional deck staining | Commonly $2-$6 per sq ft; many projects fall from several hundred dollars to over $1,500 | Deck size, railings, stripping, sanding, repairs, access, coating type, drying windows |
| Hardwood floor sand, stain, and finish | Commonly $3-$8 per sq ft | Dust control, repairs, stain color, number of finish coats, stairs, furniture moving |
| Stain-only floor line item after prep | Often around $1.16-$2.06 per sq ft | Only realistic when the floor is already properly sanded and ready |
| Cabinet, stair, trim, or furniture matching | Usually labor-based, not simple square footage | Custom samples, vertical work, masking, profiles, occupied-home protection, sheen matching |
A 200-square-foot deck at $2 to $6 per square foot might be roughly $400 to $1,200 before unusual stripping, repairs, or railing complexity. Add railings, lattice, heavy peeling coating, or sanding, and the number can move quickly. A 600-square-foot floor at $3 to $8 per square foot might run about $1,800 to $4,800 for full refinishing with stain and finish, depending on the home, dust control, and coating system.
For a visible cabinet or stair repair, do not be surprised if the sample-making takes longer than the staining. A pro may spend 2 to 4 hours just testing color on a high-visibility repair before applying finish to the actual piece.
When to DIY and When to Hire a Pro
DIY stain matching makes sense when the repair is small, the location is not the first thing people see, and you can test on matching scrap. A closet shelf, small trim return, basement stair tread, fence board, or utility-room patch is a good place to learn. Plan on buying more than one stain sample. Plan on sanding and re-testing. The first attempt is rarely the final formula.
Hire a pro when the repair is in the middle of a hardwood floor, on a front stairway, on built-in cabinets, on historic trim, or across a large exterior surface. Also hire out work when old finish has to be stripped, when the wood may contain lead-based coating, when the surface is veneer, or when a failed match would be expensive to correct.
Free tools Windows power users keep installed
One-click scans. No signup required.
A contractor should be able to explain the planned blend area, sanding grit, stain type, number of samples, topcoat, sheen, and expected limitations. Be cautious with anyone promising an invisible match without seeing the wood in person. Sometimes we can get extremely close. Sometimes the better professional recommendation is to refinish a larger section so the whole surface looks intentional.
Safety, VOC, and Lead-Paint Notes
Stains and finishes are chemical products. Read the label, follow ventilation requirements, and use the correct gloves, eye protection, and respirator when needed. Oil-based products and solvent-soaked rags can create a fire risk through spontaneous combustion. Lay oily rags flat to dry outdoors or store and dispose of them exactly as the product label and local rules require.
VOC rules vary by product type and state. Some oil-based exterior stains and specialty coatings are restricted or reformulated in certain states. If you are matching an older stain, the exact product may no longer be available in the same formula. That does not mean the match is impossible, but it may require testing a newer compliant product or layering dye, stain, and toner.
Rank #4
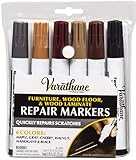
- Touch up markers repair scratches on nearly any stained wood or laminate surfaces
- Oil-based wood stain markers provide ultimate precision in hard to reach areas
- Easy to use stain pens dry to the touch in 5 minutes, fully dry in 15 minutes
- Use stain markers as a perfect complement to Varathane wood stains
- Stain marker set includes Maple, Gray, Cherry, Walnut, Mahogany and Black
For homes built before 1978, assume painted or coated surfaces may involve lead until proven otherwise. Sanding, scraping, or disturbing old coatings can trigger lead-safe work practices. Contractors working on pre-1978 homes often need to follow EPA Renovation, Repair and Painting rules when disturbing painted surfaces. Stained wood itself is not the same as lead paint, but old varnished trim can have adjacent painted layers, painted edges, or previous coatings that matter. When in doubt, test before sanding.
Permits are not usually required for simple staining, trim touch-up, cabinet refinishing, or deck staining. Permits may become relevant when the work includes structural deck repairs, stair reconstruction, guardrail replacement, exterior alterations under local rules, or work in a regulated historic district. HOA rules can also affect exterior stain color on decks, fences, doors, and siding.
Independent reader supportYour contribution helps us test, update, and keep practical guides available for everyone.A Contractor’s Step-by-Step Stain Matching Process
1. Identify the existing wood and finish
Confirm the species if possible. Look at grain, age, location, and nearby unfinished edges. Determine whether the existing finish is oil-based polyurethane, water-based finish, varnish, shellac, lacquer, penetrating oil, deck stain, or paint-like solid stain.
2. Clean the old surface
Remove dirt, wax, grease, mildew, or oxidized residue before judging color. For exterior wood, clean and brighten as needed, then allow the surface to dry according to the stain label.
3. Sand consistently
Choose a grit schedule and repeat it on samples and the actual repair. For many interior stain repairs, final sanding often falls around 120 to 180 grit, depending on species and finish system. Floors follow professional sanding sequences with equipment, edging, and screening. Do not sand the patch to 220 grit if the surrounding floor was finished at 120 grit and expect the same absorption.
Quick wins for a faster PC:
Clear out junk files and repair common Windows errorsFree Scan →Fix the driver behind crashes, sound loss and screen glitchesFind Drivers →4. Control blotching
Use conditioner, washcoat, gel stain, or sealer strategy on blotch-prone woods. Pine, fir, maple, birch, cherry, and poplar need extra care. Test conditioner on the actual species because it can make the stain lighter and may require a darker or second color step.
5. Make sample boards
Test stain color, dwell time, number of coats, dye adjustments, and topcoat. Label everything. Record sanding grit, conditioner, stain name, mix ratio, wipe time, dry time, topcoat, and sheen.
6. Apply color gradually
Start lighter than the target. Adjust darkness, then undertone. Add warmth, red, brown, gray, or amber only after you can see what the first stain layer actually did.
7. Match the clear coat
Apply the same type of finish and sheen whenever practical. If the old floor has ambered oil polyurethane, a clear water-based topcoat over the patch may look too pale or cool. If the old cabinets have a satin lacquer look, a glossy brushed polyurethane touch-up may stand out even if the color is close.
8. Blend into a logical stopping point
Do not create a rectangular touch-up in open view unless there is no alternative. Use board seams, corners, joints, thresholds, nosings, and full panels.
Common Mistakes That Make Repairs Obvious
The most common mistake is trusting the can label. Stain names are marketing shortcuts, not color guarantees. “Early American,” “provincial,” “walnut,” and “cedar” can look completely different depending on species and sanding.
The second mistake is testing on the wrong wood. A factory-sanded sample from the store will not behave like your old floor, your pine stair tread, or your weathered deck board. Test on the same material, prepared the same way.
Best Value
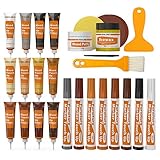
- KIT INCLUDES our most powerful wood repair compounds, so you can repair all levels of damage to wood furniture by yourself. Includes 12 touch up fillers, 8 touch up markers, 1 wood putty, 1 beewax, 2 brushes, 2 sandpaper, 1 sponge and 1 scraper
- RESTORE ALL KINDS OF DAMAGES such as scratches, chips, cracks, holes and discoloration on wooden floors, doors and furniture like desks, chairs, beds, wardrobes, bookcases, cabinets, wooden crafts and many more
- EASY TO USE: Apply the filler into the cracks, and then smooth the surface with scraper. The markers can be used to touch up the superficial scratches or to draw wood grain
- UNIQUE COLORS: The touch up fillers are available in 12 colors: White, Black, Light Gray, White Maple, Yellow Maple, Deep Pine, Earthy Yellow, Yellow Teak, Red Cherry, Cedar, Dalbergia, Walnut. The touch up markers come in 8 colors: White, Gray, Oak, Maple, Cherry, Walnut, Mahogany, Black
- Tips for mixing colors: You can mix the desired wood filler color according to the color chart. When mixing colors, first add the lighter repair filler, then gradually add the darker wood repair filler, observing the color changes until you achieve the desired shade
Another frequent miss is forgetting the clear coat. Many homeowners get the raw stain close, then apply a finish that changes everything. Oil-based finishes add amber. Water-based finishes stay clearer. Sheen changes depth. Old varnish may have yellowed for decades. Matching stain without matching finish is only half the job.
Heavy dark coats are also risky. One overloaded coat can muddy the grain, exaggerate blotching, and make the repair impossible to lighten without sanding back. Build color in controlled steps instead.
Finally, do not judge exterior color on dirty old wood. Mildew, gray fibers, tannin stains, and failed coatings can make the old deck look darker or duller than it really is. Clean first, then choose the target.
What a Good Match Really Looks Like
A successful stain match should pass the normal-use test. Stand where people actually stand. Look in morning and evening light. View the floor from standing height, the cabinet from across the kitchen, the stair from the bottom landing, and the deck from the yard. If the repair does not call attention to itself, the match is doing its job.
Perfect invisibility is difficult when old wood has years of UV exposure, wear, oxidized finish, and cleaning history. That is not a failure of craftsmanship; it is the nature of wood. The professional approach is to control every variable we can: species, grain, sanding, conditioner, stain chemistry, dry time, undertone, topcoat, sheen, and blend line. When those are handled carefully, new stained wood can sit comfortably beside old wood instead of looking like a patch.
Frequently Asked Questions
Can you stain new wood to match old wood exactly?
Sometimes you can get very close, but an exact match is difficult because old wood has changed through UV exposure, oxidation, wear, cleaning products, and old finish. The best results come from matching the wood species, sanding schedule, stain layers, clear coat, sheen, and blend area.
Why does the same stain look different on new and old wood?
New and old wood absorb stain differently. Species, grain, moisture, sanding grit, old finish, dirt, wax, and sun exposure all affect color. Coarse sanding usually makes stain darker, while very fine sanding can reduce penetration.
Should I use oil-based stain, water-based stain, gel stain, dye, or toner?
Use the product that gives the control your wood needs. Oil-based stain adds warmth and depth, water-based stain dries faster and stays clearer, gel stain helps control blotching, dye shifts undertone transparently, and toner or tinted topcoat is useful when the raw stain is close but still lacks age or warmth.
Do I need to sand all the old wood or only the new patch?
For small trim or cabinet repairs, you may only need to prepare and blend a controlled area. For floors, decks, and large visible surfaces, sanding or cleaning a larger zone often produces a better match. Stopping in the middle of an open field usually makes the repair more obvious.
How do I keep pine, maple, birch, or fir from turning blotchy?
These woods often need a pre-stain conditioner, washcoat, gel stain, dye-and-toner approach, or another sealing step before color. Always test first because conditioner can reduce stain absorption and make the final color lighter.
Do I need a lead-safe contractor to sand and restain old wood?
If the home was built before 1978 and the work may disturb old painted or coated surfaces, test for lead before sanding. Contractors working on pre-1978 homes may need to follow EPA lead-safe renovation rules when disturbing painted surfaces.
Quick Recap
Product prices and availability are accurate as of the date/time indicated and are subject to change. Any price and availability information displayed on Amazon at the time of purchase will apply.

