Quick wins for a faster PC:
Fix the driver behind crashes, sound loss and screen glitchesFind Drivers →Repair Windows errors before they cause bigger problemsFix Now →You can make a cheap silicone mold from 100% silicone caulk, but it is not the same thing as professional two-part RTV mold rubber and it is absolutely not a substitute for construction sealant in windows, tubs, expansion joints, firestopping, glazing, or building-envelope work. The useful version is simple: mix 100% silicone caulk with cornstarch until it becomes a workable dough, press it over the object you want to copy, keep the section thin enough to cure, and test a small puck before you commit to a real mold.
On our job sites and in the shop, the place for this trick is mockups, temporary forms, small texture stamps, decorative concrete experiments, and one-off replicas where failure is inconvenient but not dangerous. It can save money on a quick prototype. It can also waste a day if you use the wrong caulk, make the mold too thick, trap bubbles in the face, or expect hardware-store caulk to behave like engineered mold-making rubber.
For 2026 pricing in the U.S., a small DIY batch usually starts around $8 to $18 for one 10 to 10.1 oz tube of 100% silicone caulk, plus about $2 to $9 for a 16 oz box of cornstarch. A Home Depot listing for GE Advanced Silicone 2 kitchen and bath caulk showed $11.48 for a 10.1 oz tube, while a Walmart listing for Great Value 16 oz cornstarch showed $1.92. That makes the material cost attractive for a small shop test. The tradeoff is predictability.
What This DIY Silicone Is Good For
Caulk-and-cornstarch silicone works best when the mold is small, shallow, non-structural, and not expected to produce dozens of perfect castings. Think of it as a shop hack, not a specified construction material.
The Tool Desk
Outbyte PC Repair FREERepair Windows errors before they cause bigger problemsFix Now →Outbyte Driver Updater FREEScan for outdated or missing drivers - takes under a minuteDriver Scan →Good uses include small texture stamps for plaster or concrete samples, decorative trim replicas, prototype forms, quick impressions of nonvaluable objects, temporary jigs, and rough molds for low-detail casting. A 3 in. by 5 in. texture stamp with a 1/4 in. to 3/8 in. rubber face is a realistic project. A large, deep, high-detail production mold is not.
#1 Best Overall

- 100% Waterproof and Weatherproof: This 100% silicone formula offers protection from water damage, providing a reliable seal in areas exposed to harsh weather
- Excellent Flexibility and Strong Adhesion: Provides a flexible, durable seal for both exterior and interior projects
- Same-Day Rain-Ready: Ready for rain exposure in as little as 12 hours
- Compatible with Most Materials: Adheres to most metals and woods; glass, drywall, plaster, granite, cultured marble, ceramic and porcelain tile; natural stone, cement board, composites, and more
- Color : Clear
The key limitation is cure chemistry. Most DIY recipes use moisture-cure silicone caulk. The outside skins first. If the silicone mass is too thick, the skin slows moisture movement into the center, and the middle can stay soft or gummy. That is why a shallow stamp often works and a thick poured block often fails.
Use this method when the master is not irreplaceable, the mold can be made thin, and you can accept variation in hardness, tear strength, surface detail, and shrinkage. If you are casting resin parts for a client, copying fine architectural ornament, or making a mold that must survive repeat production, buy a two-part RTV silicone kit instead.
What Not to Use It For
Do not use homemade silicone caulk mixes for construction sealing. This includes exterior window joints, siding penetrations, expansion joints, tubs, showers, roofs, glazing, structural glass, firestopping, potable-water contact, food molds, medical or body-contact molds, and load-bearing applications.
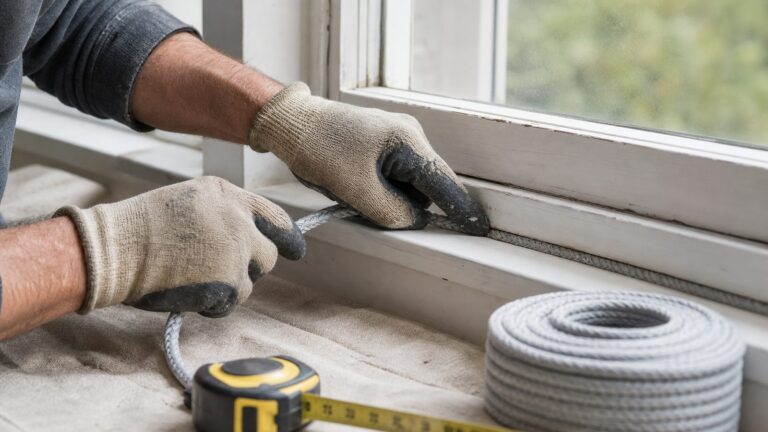
That line matters. Professional sealants are not just “rubber in a tube.” In construction, performance comes from the full system: joint width and depth, backing rod, bond-breaker tape, surface preparation, primer where required, tooling pressure, cure conditions, movement rating, substrate compatibility, and manufacturer instructions. ASTM C920 sealants are tested and classified for properties such as type, grade, class, and use. A homemade caulk-and-starch blend is not a code-recognized ASTM C920 sealant system.
Kitchen and bath silicone also often contains mildew-resistant additives. That may be useful around a sink when used as directed, but it is a reason not to assume the cured material is food-safe. Unless the full finished system is sold and documented for food-contact molding, do not use it for chocolate, ice, candy, baking, or anything that touches food.
Materials and Tools
Start with 100% silicone caulk. Do not use acrylic-latex caulk, siliconized acrylic, paintable caulk, construction adhesive, or hybrid adhesive sealant unless you are intentionally testing a different material. Those products do not behave like silicone mold rubber.
Many DIY mold recipes work best with acetoxy-cure silicone, the type that smells like vinegar while curing because it releases acetic acid. Neutral-cure silicones may behave differently, and some premium caulks include additives that change mixing, cure time, or final flexibility. When the tube says “paintable,” that is usually a sign you are not holding plain 100% silicone.
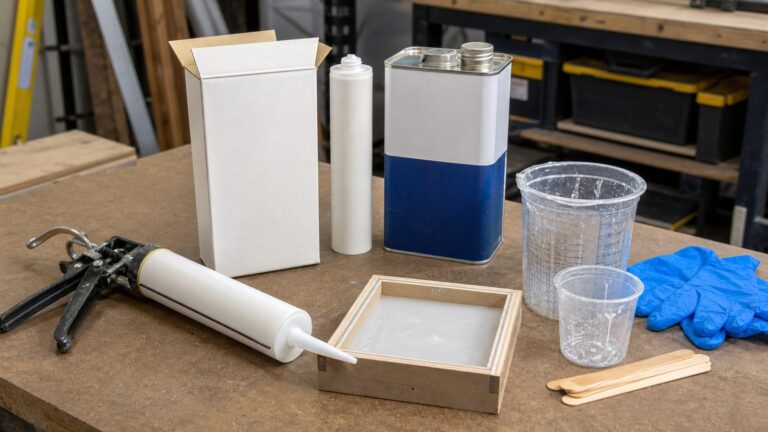
- 100% silicone caulk: one 10 to 10.1 oz tube for small molds or stamps.
- Cornstarch: one 16 oz box is plenty for several small batches.
- Caulk gun: basic models usually run $5 to $20.
- Nitrile gloves: expect $5 to $15 per box.
- Mixing surface: disposable plastic sheet, wax paper, or a scrap board covered in painter’s tape.
- Mixing stick or plastic putty knife: useful for the first rough fold before hand-kneading.
- Mold box: foam board, scrap plywood, melamine offcuts, plastic container, or taped cardboard for small work.
- Release agent: petroleum jelly, light mold release, or a compatible spray release, usually $3 to $12.
- Eye protection and ventilation: nonnegotiable when working with uncured silicone.
Do not work directly on finished counters, flooring, painted trim, or any surface that may need future paint or sealant adhesion. Uncured silicone smears badly. Cured residue can cause adhesion problems later, and it is stubborn to remove completely.
Cost Comparison: DIY Caulk Silicone vs Two-Part RTV
The DIY version is cheaper at the register. The commercial version is usually cheaper when the mold has to work the first time, hold detail, release resin cleanly, or survive repeated casts. That is the honest cost comparison.
| Option | Typical 2026 U.S. Cost | Best Use | Main Tradeoff |
|---|---|---|---|
| 100% silicone caulk plus cornstarch | About $10 to $27 for caulk and cornstarch before tools | Small one-off molds, texture stamps, shop prototypes | Variable cure, strength, shrinkage, and detail |
| DIY batch with basic tools | About $25 to $70 if buying caulk gun, gloves, cups, release agent, and supplies | First-time experiment or occasional shop use | Tool cost narrows the savings |
| Solvent-thinned caulk recipe | Often $20 to $50+ depending on thinner and PPE already owned | Experimental semi-pourable molds only | Higher odor, flammability, VOC exposure, shrinkage, and cure risk |
| Two-part RTV silicone kit | Commonly $30 to $70+ for small 1 to 2 lb kits | Detailed molds, resin casting, paid work, repeat use | Higher upfront cost but much more predictable |
For a rough 4 in. by 4 in. stamp, a partial tube of silicone and a few ounces of cornstarch may be enough. For a deep mold around a valuable master, failed DIY batches can quickly cost more than the right RTV kit. Labor counts too. If a carpenter, finisher, or project manager spends two hours fighting a bad mold, the cheap material stopped being cheap.
Rank #2

- 100% Silicone Caulk Protection: This silicone caulk clear provides ultimate waterproof protection, ensuring a reliable seal against water damage. Ideal for areas with consistent exposure, keeping your surfaces safeguarded and pristine under any weather condition.
- Strong and Flexible: Delivers a silicone sealant waterproof clear that remains permanently flexible, adapting to surface movements for a lasting, durable hold. Perfect for dynamic environments like bathrooms and kitchens where adaptability and resilience are paramount.
- Quick 30 Minute Water Ready Performance: Experience the convenience of a silicone caulk that becomes water resistant in just 30 minutes, making it perfect for time sensitive projects. No more waiting hours, dependable, quick sealing efficiency with clear silicone caulk.
- Shrink and Crack Proof: Experience superior durability with clear silicone caulk that withstands temperature fluctuations. Its flexibility guarantees your surfaces stay intact without shrinking or cracking, ensuring consistent protection and a flawless finish over time.
- Low Odor and Safe Indoors: Enjoy stress free application with this silicone sealant featuring a low odor, neutral cure formula. Great for indoor use without overwhelming fumes, enhancing comfort and safety while ensuring effective waterproof clear protection for your spaces.
The Basic Cornstarch Recipe
The common working ratio is roughly 1 part silicone caulk to 1 to 2 parts cornstarch by volume. Start closer to 1:1 for better flexibility and add starch only until the mix stops being stringy and becomes dough-like. More cornstarch speeds skinning and makes the material easier to handle, but too much can leave the cured rubber chalky, weak, and less elastic.
PC Slower Than It Used to Be?
A free scan shows the junk files, broken settings and background clutter dragging Windows down - then fixes them in one click.Free scan · Windows 10 & 11Crashes, No Sound, or Screen Glitches?
Random freezes, missing sound and display glitches usually trace back to one bad driver. Find and replace yours safely.Free scan · under a minuteFor a first test, do not use the whole tube. Make a 2 oz test puck. That is enough material to learn how fast your chosen caulk kicks, how stiff the cured rubber becomes, and whether the center cures in your shop conditions.
Test Batch Formula
- Silicone caulk: about 2 tablespoons.
- Cornstarch: start with 2 tablespoons, then add up to 4 tablespoons total as needed.
- Working time: often 3 to 10 minutes after starch is fully mixed, depending on caulk, humidity, and ratio.
- Initial set: commonly 30 minutes to 2 hours for small pieces.
- Full cure check: 24 to 48 hours before judging strength through the center.
Humidity changes the result. A dry winter shop and a humid summer garage will not behave the same. Temperature matters too. A 55 degree workspace can slow cure and make the caulk harder to mix. A warm, humid area can shorten working time enough that a beginner batch stiffens before it is placed.
Step-by-Step Method
1. Prepare the Master and Mold Area
Clean the object you are copying. Dust, oil, and loose particles will print into the mold. If the master is porous, seal it first and let the sealer cure. For wood, plaster, raw concrete, or 3D prints with layer texture, test your release agent on a hidden area before coating the whole piece.
Build a simple mold box if you need clean edges. Leave at least 1/2 in. of clearance around the master and plan for a silicone thickness of about 1/4 in. to 3/8 in. over the highest points. For a texture stamp, a 1/4 in. detailed face can work, with a thicker backing layer added after partial cure.
Free tools Windows power users keep installed
One-click scans. No signup required.
2. Put on PPE and Ventilate
Wear nitrile gloves and eye protection. Work where there is moving air. Acetoxy silicone can irritate eyes, skin, and airways while it is uncured, and the vinegar smell is a practical warning sign. Avoid breathing concentrated vapors, especially in a small bathroom, basement, or closed garage.
3. Measure a Small Batch
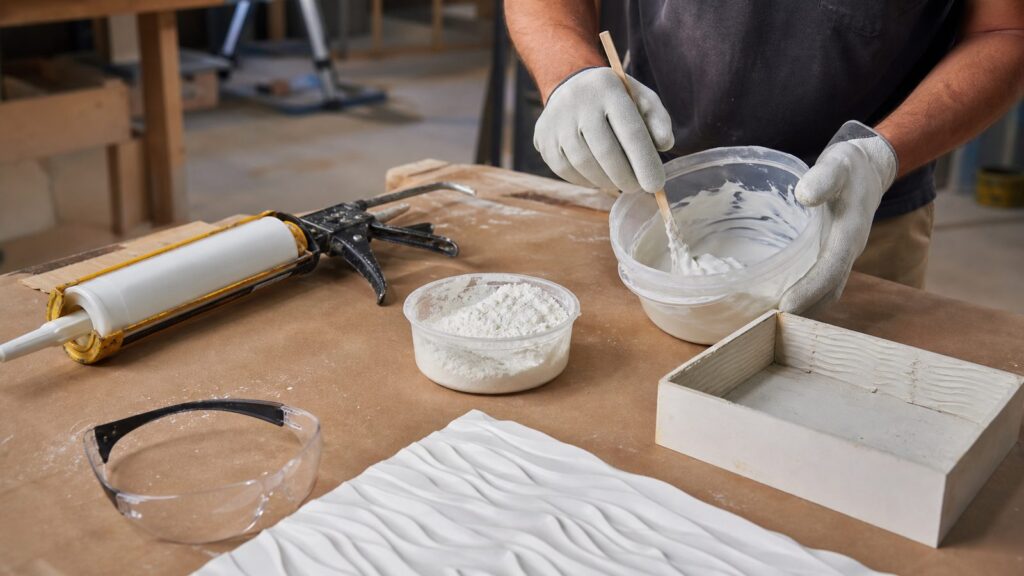
Dispense a small bead or pile of caulk onto your mixing surface. Add roughly the same volume of cornstarch beside it. Fold the cornstarch into the silicone with a stick or putty knife first. Once the surface is less sticky, knead with gloved hands.
If the mix strings heavily and sticks to the gloves, dust in more cornstarch a little at a time. If it crumbles, tears apart, or looks dry, you used too much starch. There is no perfect universal ratio because consumer caulks vary by filler, cure system, color, and additive package.
4. Press Detail First
The first contact layer determines the mold surface. Press a thin layer of silicone into the highest-detail areas first, using firm pressure. Do not just drop a lump on top and hope it flows. This material is not true pourable RTV; it needs to be worked into corners, grooves, and texture.
Do these 3 things before closing this tab:
1Repair Windows errors before they cause bigger problems2Scan for outdated or missing drivers - takes under a minute3Clear out junk files and repair common Windows errorsFor a decorative concrete texture stamp, apply a thin face coat first, usually 1/8 in. to 3/16 in. thick. Let it partially firm up, then add a thicker backing layer. That two-stage method reduces voids on the visible face and gives the back enough body to handle.
5. Build Thickness Without Making a Brick
A common mistake is making one thick mass. Keep the silicone section shallow when possible. For small molds, 1/4 in. to 1/2 in. thickness is more reliable than a 1 in. block. If the mold needs stiffness, build an outside support shell from plaster, wood, rigid foam, or another backing instead of relying on a thick silicone mass.
Rank #3

- 100% Silicone Caulk Protection: This silicone caulk white provides ultimate waterproof protection, ensuring a reliable seal against water damage. Ideal for areas with consistent exposure, keeping your surfaces safeguarded and pristine under any weather condition.
- Strong and Flexible: Delivers a silicone sealant waterproof white that remains permanently flexible, adapting to surface movements for a lasting, durable hold. Perfect for dynamic environments like bathrooms and kitchens where adaptability and resilience are paramount.
- Quick 30 Minute Water Ready Performance: Experience the convenience of a silicone caulk that becomes water resistant in just 30 minutes, making it perfect for time sensitive projects. No more waiting hours, dependable, quick sealing efficiency with white silicone caulk.
- Shrink and Crack Proof: Experience superior durability with white silicone caulk that withstands temperature fluctuations. Its flexibility guarantees your surfaces stay intact without shrinking or cracking, ensuring consistent protection and a flawless finish over time.
- Low Odor and Safe Indoors: Enjoy stress free application with this silicone sealant featuring a low odor, neutral cure formula. Great for indoor use without overwhelming fumes, enhancing comfort and safety while ensuring effective waterproof clear protection for your spaces.
6. Let It Cure Before Demolding
Small molds may feel firm in an hour, but that does not mean the center has cured. Leave the piece undisturbed for at least 24 hours. For thicker areas, wait 48 hours before judging. When you demold, bend the rubber gently and look for soft, wet, or pasty interior areas. If the center is uncured, the section was too thick, too dry, or the recipe was poorly balanced.
The Soap-and-Water Method
Another common method is to dispense silicone into water with dish soap, knead it underwater with gloved hands, then press it over the master. The soap reduces sticking, and the water helps moisture reach the caulk surface. This can work for quick impressions, but it is less controlled than a measured cornstarch batch.
The downside is trapped bubbles and inconsistent texture. Water and soap can interfere with how cleanly the material packs into fine detail. If you try this method, use it for rough work first. Keep the mold thin, press the first face carefully, and still give the piece 24 to 48 hours before real use.
For a small shop stamp, we prefer the cornstarch method because the body of the mix is easier to control. For a quick grip, pad, bumper, or rough negative impression, the soapy-water method may be acceptable.
About Solvent-Thinned “Pourable” Caulk
Some DIY recipes thin silicone caulk with mineral spirits, naphtha, xylene, or similar solvent to make it more pourable. That comes with real tradeoffs: flammability, stronger odor, VOC exposure, shrinkage, longer or unpredictable cure, and a higher chance of damaging the master or surrounding finishes.
From a contractor’s point of view, solvent-thinned caulk is usually a quality downgrade, not an upgrade. If you need a silicone that pours cleanly into fine detail, use a two-part RTV silicone formulated for mold making. It will have published mix ratios, working time, cure time, Shore hardness, tear strength, and compatibility guidance.
If you still experiment with solvents, do it outdoors or with serious ventilation, keep ignition sources away, wear appropriate gloves and eye protection, and test on scrap. Do not use solvent recipes around occupied interiors, finished flooring, painted surfaces, foam plastics, or valuable masters unless you already know the solvent will not attack them.
Curing, Strength, and Quality Checks
Before making the real mold, make a 2 oz test puck about 1/4 in. to 3/8 in. thick. Let it sit for 24 hours, then cut or tear it open. If the inside is glossy, wet, gummy, or smells sharply uncured, your mold section may not cure reliably at that thickness.
After 48 hours, bend the test piece in half. A usable caulk-and-cornstarch mix should flex without crumbling. It may tear more easily than commercial RTV, especially if overloaded with starch. If the rubber leaves powder on your hands or cracks at the bend, reduce the starch or switch caulk brands.
Expect some shrinkage and surface variation. Expect bubbles if the material was folded aggressively or pressed too lightly into detail. Expect different results from white, clear, kitchen/bath, and exterior caulks even when all are labeled 100% silicone. That variability is the reason professionals do not write this material into specifications.
What’s actually slowing this PC down?
Pick the symptom - the matching free tool is one click away.
Rank #4
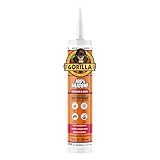
- Kitchen & Bath Ready – Premium white silicone caulk formulated for kitchens and bathrooms, delivering a durable, long-lasting seal in wet, humid environments
- 100% Waterproof Seal – Perfect for showers, tubs, sinks, tile, and backsplashes, keeping water out where it matters most
- 30-Minute Water-Ready – Can be exposed to water in as little as 30 minutes; full cure in 24 hours for reliable results
- Flexible and Durable – High-flex silicone caulk prevents shrinking, cracking, or breaking down; perfect for indoor and outdoor projects
- Long-Lasting Mold-Resistant – Formulated to resist mold and mildew after curing; easy to clean with soap and water
Casting Materials: Concrete, Plaster, Resin, and Soap
For plaster, gypsum, and small concrete samples, homemade silicone can work reasonably well if the mold is thick enough to resist tearing and backed properly. Use release agent when needed, especially with rough or cementitious mixes. Do not expect a thin DIY mold to hold shape under a heavy wet concrete pour unless it has a rigid support.
For resin, test first. Some casting resins generate heat as they cure, and some can bond, inhibit cure, stain, or attack a marginal mold surface. A commercial RTV silicone is the better choice for epoxy, polyurethane, or repeat resin work.
For soap, be cautious. “Soap mold” does not automatically mean “food safe,” and kitchen/bath caulk with mildew inhibitors is not a material we would choose for skin-contact products unless the finished mold system is documented for that use. For anything sold, gifted, or used on the body, buy the right mold material.
For food, the answer is no unless the silicone product and finished use are specifically documented as food-safe. Hardware-store caulk is sold as a sealant, not as food-contact mold rubber.
Troubleshooting Common Problems
The Silicone Stays Sticky
You may have used too little cornstarch, the wrong caulk, a very thick section, or a low-moisture cure environment. Make a thinner test and verify the tube says 100% silicone. If the caulk is old or has partially cured in the tube, start over with fresh material.
The Mold Tears Easily
Too much cornstarch is the usual cause. Reduce the starch ratio and make the mold thicker at stress points. Also avoid sharp undercuts unless the rubber is flexible enough to release without ripping.
The Surface Has Voids
You probably placed a lump instead of a face coat. Press a thin layer into detail first, then build the back. For fine patterns, use a small brush, gloved fingertip, or plastic spreader to work the material into grooves before adding bulk.
The Mold Warps
The silicone layer may be too thin or unsupported. Add a rigid mother mold, backer board, or framed support. For stamps, embed a flat backing plate after the face layer has firmed enough not to distort.
Recommended Free Tools
The Mold Smells Strong After Curing
Give it more time in a ventilated area. If the odor remains sharp after 48 hours or the inside is soft, the section likely did not cure properly. Do not use it for enclosed interior work, food, skin contact, or anything sensitive.
Safety and Cleanup
Plan the work so uncured silicone never touches finished building surfaces. Cover the bench. Keep a trash bag open. Wear gloves from start to finish. Do not wash uncured silicone down a sink. Wipe tools with disposable towels before the material cures, and follow the caulk and solvent label instructions for disposal.
Best Value

- 100% Waterproof and Weatherproof: 100% silicone formula offers protection against water damage, providing a reliable seal in areas prone to harsh weather
- 10-Year Product Protection: Cured sealant is resistant to stain causing mold and mildew growth
- Permanently Flexible with Strong Adhesion: Sealant offers 40% more flexibility than Class 25 sealants and 5X stronger adhesion than our Silicone 1 sealant
- Durable: Rain-ready in as little as 30 minutes, and resistant to shrinking and cracking due to temperature fluctuations
- Compatible with Most Materials: Adheres to most metals and woods; aluminum, composites, brick, stone, stucco, masonry, cement board, glass, drywall, ceramic and porcelain tile, and more
If using acetoxy-cure silicone, expect a vinegar odor during cure. That odor comes from acetic acid release. It can irritate eyes, skin, and respiratory passages, so ventilation matters. If using solvent-thinned recipes, the hazard level rises. Solvents can be flammable, can produce strong vapors, and can damage finishes.
Keep these batches away from children, pets, open flame, pilot lights, heaters, and food-prep surfaces. Label experimental molds so they do not get mistaken for food-safe silicone later.
When to DIY vs When to Hire a Pro
DIY is reasonable when the work is small, non-critical, and reversible. A homeowner making a one-off plaster ornament, a concrete texture sample, or a small shop jig can justify a $15 experiment. Keep it shallow, test first, and accept that the mold may be a one-use item.
Use commercial RTV silicone when the master is valuable, the mold needs crisp detail, the casting material is resin, the part will be repeated, or the labor matters. A $30 to $70 kit is often cheaper than a failed afternoon, especially when you need predictable working time and tear strength.
Hire a pro when the work touches the building envelope, water management, structural movement, fire rating, code compliance, or a paid finish that has to last. Exterior sealant joints, window perimeters, expansion joints, wet-area waterproofing, and glazing all need approved materials and proper joint design. On our jobs, those decisions are made from manufacturer data, substrate conditions, movement requirements, and applicable standards, not from a homemade blend.
Bottom Line
Cheap castable silicone from caulk is useful when you treat it as an experiment with boundaries. Use 100% silicone, make small batches, start around 1 part silicone to 1 part cornstarch, adjust carefully, press the detail face first, keep sections thin, and allow 24 to 48 hours before judging the cure.
Quick wins for a faster PC:
Clear out junk files and repair common Windows errorsFree Scan →Scan for outdated or missing drivers - takes under a minuteDriver Scan →Repair Windows errors before they cause bigger problemsFix Now →The method is economical for rough, one-off molds and texture stamps. It is not a professional sealant, not an ASTM C920 construction joint system, not food-safe by default, and not a substitute for two-part RTV when quality matters. The smartest move is to run the small puck test first. If that test fails, the real mold was going to fail too.
Frequently Asked Questions
Can you make castable silicone from regular caulk?
You can make a rough mold material from 100% silicone caulk, usually by mixing it with cornstarch or kneading it in soapy water. It works for small non-critical molds and stamps, but it is not the same as commercial two-part RTV silicone.
What kind of caulk works for DIY silicone molds?
Use 100% silicone caulk. Avoid acrylic-latex, siliconized acrylic, paintable caulk, construction adhesive, and hybrid sealants. Acetoxy-cure silicone, which smells like vinegar, is commonly used in DIY recipes.
What is the best silicone caulk to cornstarch ratio?
Start around 1 part silicone caulk to 1 part cornstarch by volume, then add more cornstarch only until the mix becomes dough-like. Many batches land between 1:1 and 1:2. Too much starch makes the cured rubber weaker and less elastic.
Free tools Windows power users keep installed
One-click scans. No signup required.
How long does homemade silicone from caulk take to cure?
Small thin pieces may firm up in 30 minutes to 2 hours, but you should allow 24 to 48 hours before demolding or judging the cure. Thick sections may stay uncured in the center because moisture-cure silicone skins over first.
Can homemade silicone caulk molds be used for food?
No, not unless the specific finished mold system is documented as food-safe. Kitchen and bath caulks may contain mildew-resistant additives and are sold as sealants, not food-contact mold rubber.
Can I use homemade silicone instead of sealant around windows or tubs?
No. Homemade caulk-and-starch silicone is not a code-recognized construction sealant system. Windows, tubs, exterior joints, glazing, firestopping, and expansion joints require approved materials, correct joint design, surface prep, and manufacturer instructions.
Quick Recap
Product prices and availability are accurate as of the date/time indicated and are subject to change. Any price and availability information displayed on Amazon at the time of purchase will apply.