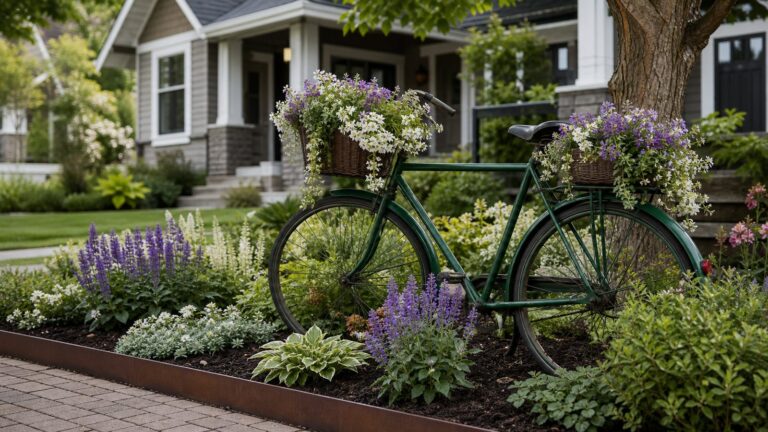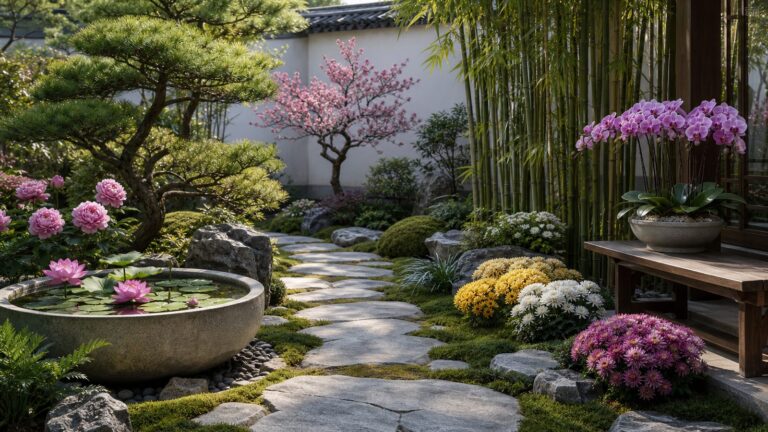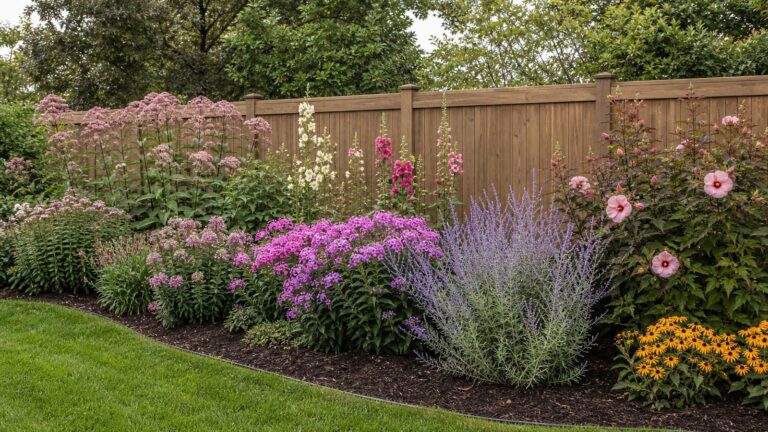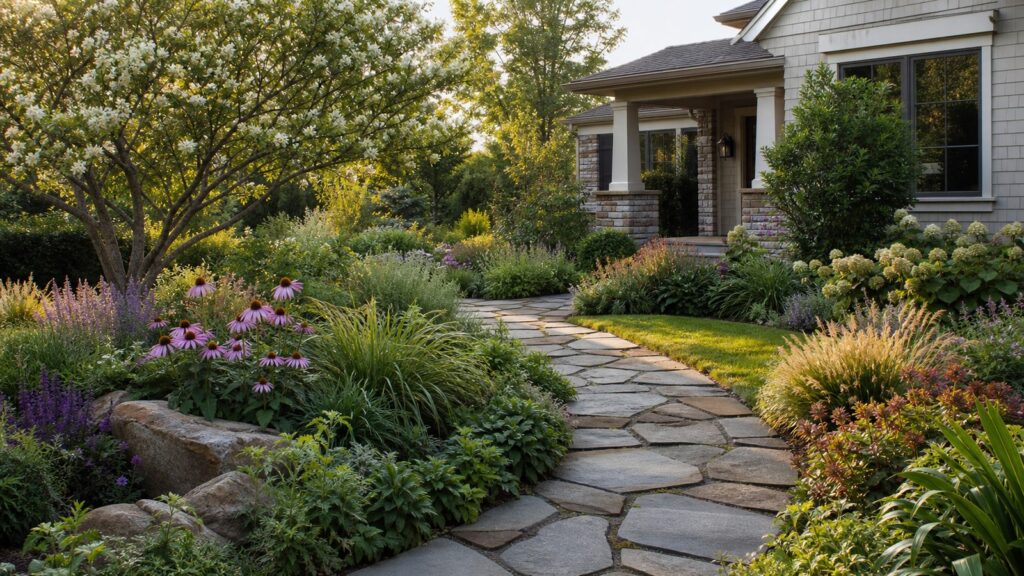
A lived-in garden is not an abandoned yard. It is a designed landscape that looks relaxed, established, and personal: layered plants, softened edges, weathered stone, self-seeding flowers, winding paths, and seasonal change. The goal is natural charm, not a perfect showroom installation.
From a construction standpoint, the difference between charming and messy usually comes down to the parts you do not notice first: grading, drainage, soil preparation, path base, edging, irrigation, plant spacing, and maintenance access. On our job sites, we treat the loose, natural look as the finish layer. The structure underneath still has to perform.
If you want a garden that feels like it has been there for years, start with a clear framework, choose plants for your actual site conditions, and leave room for the landscape to mature. A new garden can start looking settled in 12 to 24 months, but a truly established naturalistic garden usually takes 3 to 5 growing seasons.
What Makes a Garden Feel Lived In?
A lived-in garden overlaps with cottage gardens, meadow planting, pollinator gardens, native landscaping, and rewilded yards. The common thread is softness. Plants lean, spill, reseed, and overlap. Materials weather. Paths curve. Beds are dense rather than dotted with isolated plants.
What’s actually slowing this PC down?
Pick the symptom - the matching free tool is one click away.
#1 Best Overall

- 𝐅𝐥𝐞𝐱𝐢𝐛𝐥𝐞 & 𝐄𝐚𝐬𝐲 𝐭𝐨 𝐈𝐧𝐬𝐭𝐚𝐥𝐥: Each panel measures 40" (L) × 5" (H), including 3" underground stakes for strong anchoring, leaving 2" visible above ground for a clean, low-profile border. The hammer-in design makes installation fast and effortless—perfect for creating neat, professional-looking edges without digging.
- 𝐃𝐮𝐫𝐚𝐛𝐥𝐞 𝐆𝐚𝐥𝐯𝐚𝐧𝐢𝐳𝐞𝐝 𝐒𝐭𝐞𝐞𝐥 𝐂𝐨𝐧𝐬𝐭𝐫𝐮𝐜𝐭𝐢𝐨𝐧: Made from high-quality galvanized steel, this 33ft landscape edging (10-pack) is built to withstand outdoor conditions, providing long-lasting durability and rust resistance for your garden, yard, or flower beds.
- 𝐒𝐞𝐜𝐮𝐫𝐞 & 𝐒𝐭𝐚𝐛𝐥𝐞 𝐃𝐞𝐬𝐢𝐠𝐧: Comes with 11 stakes, ensuring strong anchoring in soil and stability against shifting over time. Ideal for maintaining defined garden edges and pathways.
- 𝐒𝐥𝐞𝐞𝐤 𝐁𝐥𝐚𝐜𝐤 𝐅𝐢𝐧𝐢𝐬𝐡 𝐟𝐨𝐫 𝐌𝐨𝐝𝐞𝐫𝐧 𝐀𝐩𝐩𝐞𝐚𝐥: The powder-coated black steel adds a stylish, modern touch to your outdoor landscaping while blending seamlessly with various garden styles.
- 𝐕𝐞𝐫𝐬𝐚𝐭𝐢𝐥𝐞 𝐆𝐚𝐫𝐝𝐞𝐧 𝐁𝐨𝐫𝐝𝐞𝐫 𝐒𝐨𝐥𝐮𝐭𝐢𝐨𝐧: Perfect for creating crisp, clean separations between lawns, flower beds, pathways, and patios. Easily cut or bend to fit curves, corners, and custom garden designs.
But the best examples still have discipline. We usually recommend keeping at least one or two clean structural lines in the design. That may be a mown lawn edge, a gravel path, a low hedge, a defined entry walk, a stone border, or a simple fence line. That contrast tells the eye the garden is intentional.
A useful rule is this: make the hardscape dependable and the planting expressive. A path can meander, but it still needs a stable base. A border can look casual, but it still needs enough spacing from siding, vents, utilities, and drainage outlets. A bed can support pollinators, but it should not block sightlines at a driveway or bury an HVAC unit.
Start With Site Conditions, Not Inspiration Photos
Before buying plants, spend a full week observing the yard. Track sun, shade, wind, standing water, foot traffic, deer pressure, and where hoses or downspouts already discharge. A romantic planting scheme copied from another region can fail quickly if the soil, rainfall, or winter temperatures do not match your property.
For plant selection, confirm your USDA hardiness zone and then narrow the list by sun exposure and moisture. Full sun generally means 6 or more hours of direct sun per day. Part sun is usually 3 to 6 hours. Shade planting becomes more challenging under large trees because roots compete for water, so do not assume shade equals moist soil.
Free tools Windows power users keep installed
One-click scans. No signup required.
Soil matters just as much. Compacted clay near new construction, sandy soil that drains too fast, and low areas that hold water all require different plant choices. A basic soil test is inexpensive in many regions and can prevent hundreds or thousands of dollars in plant losses. If you are renovating after construction work, expect to loosen compacted soil, add compost where appropriate, and correct drainage before installing dense planting.
Native and climate-adapted plants are often the backbone of a lived-in garden because they can reduce water, fertilizer, and chemical needs once established. That does not mean they are maintenance-free in year one. Most new perennials, shrubs, and trees need consistent watering through the first growing season, and many need supplemental water into the second season during hot or dry periods.
Build the Garden in Layers
Layering is what makes a garden feel mature. Instead of installing one row of shrubs and a few flowers in front, think in vertical and seasonal layers.
Use These Planting Layers
Canopy and small trees: Serviceberry, redbud, dogwood, crabapple, magnolia, or regionally appropriate shade trees can give the garden height and age. Keep mature canopy size in mind. A small ornamental tree may still need 10 to 20 feet of spread.
Shrubs: Shrubs provide winter structure and reduce the amount of open mulch. Many lived-in gardens rely on mixed shrubs instead of large annual beds. Common installed shrub costs can run from about $35 to $150 or more each, depending on size and species.
Tall perennials and grasses: These create movement and seasonal texture. Use them where they will not flop into walkways or block windows. Leave enough room for mature width, not just the nursery pot size.
Mid-height flowers: This is where bloom succession matters. Plan for spring, summer, and fall interest so the garden does not peak for three weeks and fade for the rest of the year.
Groundcovers and bulbs: Groundcovers help shade soil and reduce weeds once established. Bulbs add early-season color before perennials fill out.
Quick wins for a faster PC:
Repair Windows errors before they cause bigger problemsFix Now →Fix the driver behind crashes, sound loss and screen glitchesFind Drivers →Clear out junk files and repair common Windows errorsFree Scan →A common mistake is buying one of everything. Repetition works better. Choose 3 to 7 main plant varieties and repeat them across the yard in drifts or clusters. You can still have variety, but repetition gives the garden rhythm.
Rank #2

- 【Durable & Flexible Plastic Material】Made of high-quality, weather-resistant rubber, the MIXC garden edging border is designed to bend and shape easily to your landscaping needs. Whether you’re installing in straight lines, curves, or circular beds, the soft yet sturdy material can be trimmed as needed to match your garden layout. Great for long-term outdoor use in all seasons.
- 【Complete 100FT Landscape Edging Kit with 150 Stakes】The edging border kit includes one roll of 100FT black garden border (2" height) and 150 spiral anchoring stakes (6 inch each). The dense stake count allows secure installation in soft or uneven ground, keeping your lawn edging firmly in place—ideal for flower beds, tree rings, stone paths, and yard borders.
- 【Tool-Free Installation for DIY Landscaping Projects】No digging or professional help required! Simply uncoil the edging, let it warm under the sun to increase flexibility, shape it to your desired design, and hammer in the 6-inch stakes using a rubber mallet. If the stakes are difficult to insert into the ground, water the soil first and wait until it softens before installing—this will help secure the spikes firmly. Enjoy a clean and defined edge in minutes with this simple, mess-free setup.
- 【Secure and Weather-Resistant Design】Each 6-inch stake is made of durable plastic that resists rust and breakage. The edging withstands tough weather, including rain, snow, and direct sunlight. Once installed, it holds its form and position even against lawn mowers, wind, and small animals.
- 【Wide Applications for Outdoor Landscaping】Perfect for DIY home landscaping projects. Use this garden edging border to neatly separate flower beds, rock gardens, mulched areas, pavement edges, walkways, and lawn perimeters. Suitable for both flat and uneven terrain—just follow proper spacing with stakes for best results.
Give the Wild Look a Strong Framework
A lived-in garden needs a visible structure, especially near the house. Without it, the yard can look unfinished from the street and become difficult to maintain.
We often use one of these organizing elements:
- A 36- to 48-inch-wide main path from the driveway or patio
- A mown strip between lawn and meadow-style planting
- Steel, stone, brick, or aluminum edging at high-traffic beds
- A low hedge or clipped shrub line near the entry
- A simple gravel court, stepping-stone path, or sitting area
- A clear 12- to 18-inch maintenance strip near siding, fences, or utilities
Paths are especially important. A narrow stepping path can be 24 inches wide for occasional use, but a primary garden path should usually be closer to 36 inches. If two people need to pass comfortably, 48 inches is better. Keep surfaces firm, stable, and well-drained. Rustic should not mean wobbly.
For gravel or decomposed granite paths, installed costs commonly run about $8 to $20 or more per square foot, depending on excavation depth, edging, base stone, compaction, geotextile fabric, site access, and drainage. Natural stone or flagstone paths often run about $20 to $50 or more per square foot installed. The surface can look informal, but the base still needs to be built correctly.
Plan Drainage Before Planting
Drainage is where many natural gardens fail. Dense planting and rustic hardscape should never trap water against the house, patio, fence posts, or retaining walls.
On our job sites, we check slope before we talk about final planting. The ground around a house should generally move water away from the foundation. Low pockets next to foundations, patios pitched toward the house, clogged downspout outlets, and mulch piled against siding can all create moisture problems.
If you are adding beds near the house, keep mulch and soil below siding and trim. Do not build raised soil directly against wood framing, stucco weep screeds, vents, or basement windows. Organic mulch is typically installed 2 to 3 inches deep, but it should be pulled back from trunks, stems, siding, and foundation openings. Mulch volcanoes around trees are not just unattractive; they can hold moisture against bark and contribute to decay.
Drainage corrections may include regrading, downspout extensions, French drains, dry creek beds, catch basins, permeable paths, or rain gardens. The right answer depends on soil type, slope, roof drainage, and where water can legally discharge. Solve this before installing expensive plants.
Recommended Free Tools
Use Weathered Materials the Right Way
Reclaimed brick, fieldstone, old granite, weathered planters, and salvaged pavers can make a garden feel established immediately. The caution is that old materials still need modern installation standards.
A stone path, for example, usually needs excavation, compacted base stone, bedding material, edge restraint where appropriate, and drainage planning. If the stones are simply dropped onto soil, they often rock, sink, collect water, or become a tripping hazard after a freeze-thaw cycle.
Be selective with salvaged materials. Avoid old railroad ties in vegetable or children’s areas, unstable stacked stone, lead-painted architectural pieces, splintering wood, and any material with unknown chemical treatment. If you are building retaining walls, steps, decks, or permanent structures, the aged look should never override structural requirements.
Realistic 2026 Cost Ranges
A lived-in garden can be phased, which makes it easier to control budget. Spend first on grading, drainage, soil correction, paths, and irrigation rough-ins. Plants can be added in stages, and smaller nursery stock often catches up well within a few seasons.
| Project Item | Typical 2026 US Cost Range | What Drives the Price |
|---|---|---|
| Professional landscape design | $50-$150+ per hour or $500-$5,000+ for a plan | Site size, detail level, region, planting plan, construction drawings |
| Moderate full-yard landscaping | $5,000-$25,000+ | Planting, soil prep, edging, mulch, basic paths, labor |
| Complex whole-yard transformation | $50,000+ | Grading, walls, patios, lighting, irrigation, drainage, mature plants |
| Garden bed installation | $1,000-$5,000+ | Bed size, amendments, edging, plant size, irrigation, labor |
| Perennial plants | $8-$30+ each | Container size, species, local availability |
| Shrubs | $35-$150+ each | Size, maturity, species, installation labor |
| Bulk mulch | $30-$90 per cubic yard before delivery and spreading | Material type, local supply, delivery distance, labor |
| Gravel or decomposed-granite path | $8-$20+ per square foot installed | Excavation, base depth, edging, fabric, compaction, access |
| Flagstone or natural-stone path | $20-$50+ per square foot installed | Stone type, slab thickness, pattern, base prep, labor |
| Drip irrigation for beds | $1-$4 per square foot | Zones, controller, backflow, trenching, water source |
| Low-voltage landscape lighting | $2,000-$6,000+ for a modest system | Fixture quality, transformer, trenching, controls, number of lights |
For a small front-yard refresh, a homeowner might spend $1,500 to $6,000 on bed expansion, small plants, mulch, and a short gravel path. A more complete front-and-back lived-in garden with drainage corrections, irrigation, stone paths, lighting, and layered planting can easily move into the $20,000 to $50,000 range.
Professionally installed landscaping can also add value when it is well designed and maintained. Industry estimates often place the potential home value impact around 15% to 20%, but that depends heavily on the local market, design quality, and whether the garden looks cared for rather than overgrown.
Rank #3

- Pound‑In Lawn Edging – Create clean, defined garden borders without hiring a professional; installs with minimal ground preparation.
- Simple DIY Installation – Score the soil and gently pound edging into place with a rubber mallet for a secure, long‑lasting border.
- Durable & Flexible Plastic – Made from sturdy recycled plastic that installs in straight lines or tight curves around plants and trees.
- Low‑Maintenance Landscape Border – Designed to withstand string trimmers, temperature changes, and seasonal ground movement.
- Bonus Stake Kit Included – Includes (1) 20‑ft coil of edging and 6 anchoring stakes—triple the stakes of standard kits for added stability.
Watering, Mulch, and Establishment
Outdoor water use can represent a large share of household demand, and inefficient irrigation wastes both water and money. A natural garden should be planned to need less water over time, but not at installation.
For the first growing season, new plants need regular monitoring. In hot weather, small perennials may need water several times per week until roots expand. New shrubs and trees need deeper, less frequent watering that reaches the root ball and surrounding soil. The exact schedule depends on rainfall, soil type, temperature, slope, and mulch.
Drip irrigation is usually a better match for lived-in planting beds than overhead spray because it puts water closer to the root zone and reduces leaf wetness. Smart controllers, rain sensors, pressure regulation, and hydrozoning can improve performance. Hydrozoning means grouping plants with similar water needs in the same irrigation zone. Do not put drought-tolerant grasses, moisture-loving ferns, and newly planted shrubs on one schedule and expect all of them to thrive.
Mulch helps conserve moisture and suppress weeds, but more is not better. For most beds, 2 to 3 inches of organic mulch is enough. Keep it off trunks, crowns, siding, fence posts, and foundation vents.
Wildlife and Pollinator Value Without Losing Control
A lived-in garden can support pollinators, birds, and beneficial insects when it includes native host plants, reduced pesticide use, and bloom succession from spring through fall. Seed heads and standing stems can provide food and shelter through colder months.
The practical side is placement. Leave some stems and leaves for habitat, but keep combustible or moisture-holding material away from foundations, wood framing, vents, drains, and mechanical equipment. In wildfire-prone regions, follow defensible-space guidance and keep ignition zones clean. That may mean a leaner, more mineral-based zone close to the house and denser planting farther out.
Do these 3 things before closing this tab:
1Clear out junk files and repair common Windows errors2Fix the driver behind crashes, sound loss and screen glitches3Repair Windows errors before they cause bigger problemsAlso be careful with aggressive plants. Some self-seeders are charming in one region and invasive in another. Before planting vines, grasses, groundcovers, or meadow mixes, check local invasive species lists, extension resources, and native plant societies. A plant that fills space quickly can become a maintenance problem within two seasons.
Permits, Utilities, and Safety Notes
For ordinary planting, permits are usually not required. The moment you add walls, electrical work, irrigation connections, major grading, drainage changes, patios, decks, or structures, the rules can change. Local codes vary, so verify requirements before work begins.
Call 811 before digging, even for landscape projects. Planting trees, trenching irrigation, setting fence posts, installing lighting, or excavating path bases can all hit buried utilities. Make the call before crews or equipment arrive.
Retaining walls are a common permit trigger. Many jurisdictions require permits or engineered plans once a wall reaches a certain height, often around 3 to 4 feet, especially if it supports a surcharge such as a driveway, slope, patio, or structure. Steps, guards, handrails, electrical circuits, GFCI protection, low-voltage transformers, water features, and backflow prevention for irrigation may also fall under local building or plumbing requirements.
The Tool Desk
Outbyte PC Repair FREEClear out junk files and repair common Windows errorsFree Scan →Outbyte Driver Updater FREEFix the driver behind crashes, sound loss and screen glitchesFind Drivers →Paths should be safe in wet weather and after freeze-thaw cycles. Avoid loose round stone on slopes, unstable stepping stones, and abrupt height changes. For main routes, think about stroller, trash-bin, and wheelbarrow movement. A garden path that looks good but cannot be used comfortably will eventually be ignored.
Independent reader supportYour contribution helps us test, update, and keep practical guides available for everyone.When to DIY vs. When to Hire a Pro
A lived-in garden is a good candidate for partial DIY because planting can be phased. The key is knowing which pieces carry construction risk.
Good DIY Tasks
- Planting small perennials and bulbs
- Adding 2 to 3 inches of mulch to prepared beds
- Editing seedlings and documenting plant locations
- Installing small decorative containers
- Expanding soft garden edges with hand tools
- Replacing small annual pockets with climate-adapted perennials
Hire a Pro For
- Drainage corrections near foundations, patios, or retaining walls
- Major grading or soil import
- Retaining walls, steps, and structural masonry
- Primary paths that require excavation, base, compaction, and edging
- Irrigation tied to domestic water or requiring backflow protection
- Low-voltage lighting systems with transformers, trenching, and controls
- Planting large trees or specimen shrubs
- Work near utilities, easements, septic systems, or property lines
A practical hybrid approach is to hire professionals for the base work and install smaller plants yourself over time. That gives the garden a durable foundation while allowing the planted character to evolve.
Rank #4

- No Digging: These landscape edgings are simple to install. Just hammer these spikes into the ground to reinforce the shape to prevent warping. It's easy to create a beautiful garden by yourself without hiring a professional.
- Flexible and Durable: This plastic landscape edging border made of polyethylene (PE) is very strong and flexible. It bends easily into curves without breaking. Each bundle is tied with straps for easy transportation and portability.
- Easy to Trim & Long Life: This plastic lawn edging is easier to trim to any length to separate garden flower bed areas than metal garden edging! It won't rust and will keep the garden looking good for a long time.
- Suitable for: This garden edging border is suitable for loose ground and provides a good separation between grass and garden. It can be used to improve the appearance of landscape edges and create clean gardens and pathways. Ideal for landscape edging, patio gardens and lawns.
- More Spikes: Ours kit includes 2 pack 33 ft edging for landscape and 100 pcs landscape stakes (We provide 5 stakes per 1 meter and others provide 3 stakes per meter). You can buy as many as you need depending on the size of your garden.
How to Keep It From Looking Messy
The maintenance goal is editing, not constant grooming. A natural garden should have seasonal texture, but it still needs clear paths, visible entries, healthy plants, and controlled edges.
Windows Errors? Fix Them Before They Spread
Repair common Windows errors and clear accumulated junk for a smoother, more stable PC - no reinstall needed.Free scan · no reinstallOutdated Drivers Are Slowing You Down
One free scan finds every outdated or missing driver and matches the right update for your exact hardware.Free scan · exact hardware matchPlan on more maintenance in year one, not less. New beds need weeding, watering, gap-filling, and occasional plant replacement. By years two and three, dense planting should begin shading soil and reducing weed pressure, but you will still need selective cutbacks and division.
A simple annual rhythm works well. In spring, cut back damaged material, remove weeds, refresh mulch only where needed, and check irrigation. In summer, edge paths, deadhead selectively, water during drought, and remove aggressive seedlings. In fall, leave some seed heads and stems for habitat, but clear paths, drains, vents, and foundation edges. Every 3 to 5 years, divide crowded perennials and reassess shrubs before they block windows or walkways.
Documentation helps. Keep a simple garden map or photo file so future maintenance crews know which seedlings are intentional and which are weeds. This is especially useful with self-seeding flowers, grasses, and native meadow areas.
A Practical Sequence for Building One
For most homeowners, the best sequence is not to plant everything first. Start with the site work that is hardest to change later.
Free tools Windows power users keep installed
One-click scans. No signup required.
- Map the property: Mark utilities, doors, windows, downspouts, slopes, wet areas, service access, and main views.
- Fix drainage and grading: Move water away from structures and solve standing water before planting.
- Define circulation: Decide where paths, service routes, gates, bins, hoses, and seating need to go.
- Install hardscape: Build paths, edging, walls, steps, and patios with proper base and drainage.
- Rough in irrigation and lighting: Trenching is easier before beds are full.
- Prepare soil: Test, loosen compaction, amend where appropriate, and avoid overworking wet soil.
- Plant structure first: Trees and shrubs establish the framework.
- Add perennials and groundcovers: Use repeated groups instead of scattered singles.
- Mulch correctly: Apply 2 to 3 inches, keeping it away from trunks and structures.
- Edit for the first 24 months: Weed, water, replace losses, and adjust spacing as the garden fills in.
The lived-in look is earned through time, but it can be planned from day one. Build the bones correctly, choose plants that belong on the site, and allow enough controlled looseness for the garden to age gracefully.
Frequently Asked Questions
What is a lived-in garden?
A lived-in garden is an intentionally relaxed landscape that looks established rather than newly installed. It uses layered planting, repeated plant groups, softened edges, weathered materials, meandering paths, and seasonal texture while still keeping clear structure and maintenance access.
How do you make a new garden look established?
Use larger structural plants where the budget allows, repeat key perennials and shrubs, install durable paths or edging, mulch correctly, and plant densely enough to reduce open gaps. Most gardens begin to look settled in 12 to 24 months and feel genuinely established after 3 to 5 growing seasons.
Is a natural garden low-maintenance?
Not at first. New naturalistic planting usually needs regular watering, weeding, and gap-filling during the first growing season or two. Once established, climate-adapted and native plants can reduce water and chemical inputs, but the garden still needs seasonal editing.
How much does it cost to create a lived-in garden in 2026?
Small bed projects may run $1,000 to $5,000 or more, while moderate residential landscaping often falls around $5,000 to $25,000+. Complex whole-yard projects with grading, irrigation, stone paths, lighting, walls, and mature plants can exceed $50,000.
Do I need a permit for garden paths, retaining walls, or irrigation?
Planting usually does not require a permit, but retaining walls, major grading, drainage changes, electrical work, irrigation backflow connections, patios, steps, and structures may. Many areas require permits or engineering for retaining walls around 3 to 4 feet high, especially when supporting slopes or nearby loads.
How do you keep a wild-looking garden from looking neglected?
Keep paths clear, maintain defined edges, repeat plant groups, remove invasive weeds, prune for windows and sightlines, and keep mulch, leaves, and stems away from foundations, vents, drains, and wood framing. The planting can be loose, but the structure should stay readable.
Quick Recap
Product prices and availability are accurate as of the date/time indicated and are subject to change. Any price and availability information displayed on Amazon at the time of purchase will apply.