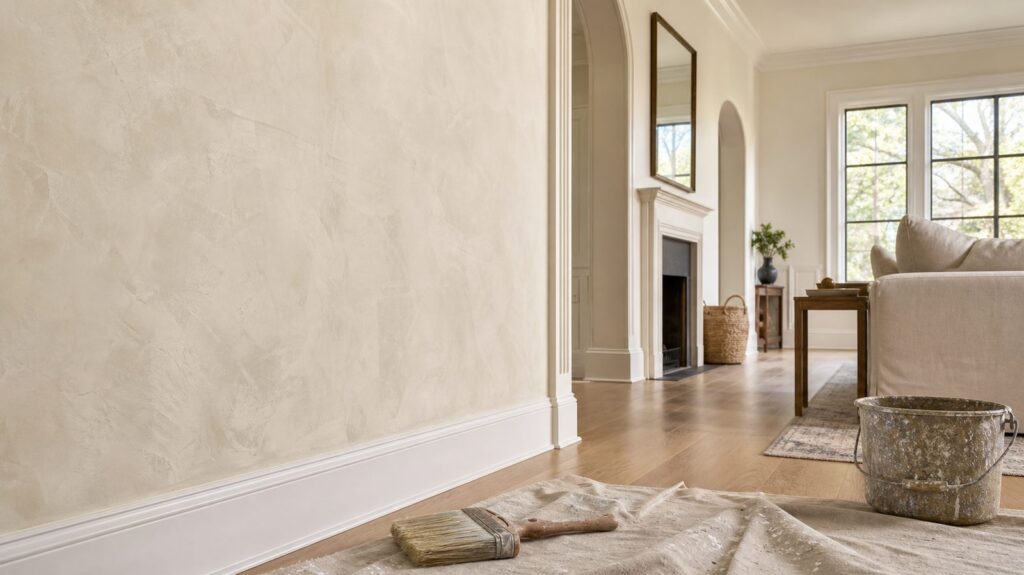
limewash paint is a mineral-based coating made from slaked lime, water, and mineral pigments. It does not behave like standard latex paint. Instead of forming a plastic-like film over the wall, limewash cures through carbonation and bonds best to porous mineral surfaces such as brick, stone, stucco, lime plaster, cement render, and properly primed drywall.
Homeowners usually ask about limewash for one reason: the look. It creates a soft, matte, cloudy finish that feels closer to old plaster than a modern painted wall. But on our job sites, the finish only turns out well when the substrate, primer, moisture conditions, and expectations are right. Limewash is beautiful, breathable, and forgiving visually, but it is not the best coating for every room or every exterior.
If you are considering limewash paint for your home, the short answer is this: use it on vertical surfaces where you want depth and mineral character, sample it before committing, budget more than a standard repaint, and treat surface prep as the most important part of the job.
As an Amazon Associate I earn from qualifying purchases.
PC Slower Than It Used to Be?
A free scan shows the junk files, broken settings and background clutter dragging Windows down - then fixes them in one click.Free scan · Windows 10 & 11Crashes, No Sound, or Screen Glitches?
Random freezes, missing sound and display glitches usually trace back to one bad driver. Find and replace yours safely.Free scan · under a minuteWhat Is Limewash Paint?
Limewash paint is a traditional mineral coating made primarily from slaked lime, water, and pigment. The slaked lime is created by processing limestone, then mixing it into a coating that can be brushed onto porous surfaces. As it dries and cures, it reacts with carbon dioxide in the air and turns back toward limestone through a process called carbonation.
That curing process is one reason limewash looks and performs differently from acrylic or latex wall paint. A typical latex paint sits on the surface as a film. Limewash penetrates into a porous surface and becomes part of the mineral layer. The result is a very matte finish with movement, tonal variation, and a chalky softness that changes with light.
#1 Best Overall

- Meoded Lime Wash is a unique slaked limestone mineral coating that creates a beautiful weathered plaster-like finish on almost any interior and exterior surface.
- Formulated to easily achieve a matte, durable mottled finish with a soft touch using a two-coat brush application.
- Pre-tinted, pre-mixed, and easy to apply. Can be applied using a Meoded Lime Wash brush in a X Hatch pattern as seen in tutorial video. Easily repaired or recoated if damaged.
- Coverage: Gallon covers 250 - 300 sq ft ( per 2 coat) | Quart covers 62 - 75 (per 2 coat)
- For optimal durability and maximal aesthetic appeal, apply a layer of Meoded Lime Wash Base Coat before Lime Wash application and 1-2 layers of Meoded Stain Shield Sealer over the Lime Wash for protection.
Traditional limewash was used for centuries on masonry, plaster, farm buildings, and historic homes. Modern interior limewash products are more refined, with controlled pigments and manufacturer systems designed for drywall, previously painted walls, and decorative interiors. Still, the basic rule remains the same: limewash needs the right surface to grip.
Where Limewash Works Best
The best candidates for limewash are vertical, porous, mineral-based surfaces. That includes unsealed brick, natural stone, stucco, lime plaster, cementitious render, concrete masonry units, and some fireplace surrounds. These surfaces allow the coating to soak in and cure instead of simply sitting on top.
The Tool Desk
Outbyte Driver Updater FREEFix the driver behind crashes, sound loss and screen glitchesFind Drivers →Outbyte PC Repair FREERepair Windows errors before they cause bigger problemsFix Now →Inside the home, limewash can also be used on drywall or previously painted walls, but usually only with a compatible mineral primer or specialty primer. That primer is not a minor add-on. It creates an even, absorbent surface so the limewash can move and cure consistently across patched areas, old paint, joint compound, and texture changes.
Good interior locations include bedrooms, dining rooms, living rooms, fireplaces, accent walls, powder rooms, and ceilings where the homeowner wants a soft, architectural finish. We are more cautious in mudrooms, stairwells, kids’ hallways, laundry rooms, and tight entries because unsealed limewash is not as scrub-resistant as a satin or semi-gloss latex paint.
Best surfaces for limewash
- Unsealed brick
- Natural stone
- Stucco
- Lime plaster
- Cement render
- CMU block
- Fireplace masonry
- Drywall with the correct mineral primer
- Previously painted walls with an approved primer system
Poor candidates for limewash
- Glossy latex or acrylic paint without primer
- Sealed brick or sealed stone
- Nonporous tile
- Floors, steps, decks, porches, and counters
- Shower interiors or surfaces exposed to constant water
- High-abrasion walls unless a compatible sealer is used
Horizontal surfaces are a common mistake. Limewash is meant for vertical walls and masonry, not walking surfaces. Exterior steps, porch floors, decks, and high-wear ledges receive abrasion and standing moisture. Those conditions shorten the life of the finish and can create chalking, staining, or uneven wear.
Limewash vs. Regular Paint
Limewash and regular paint can both change the color of a room, but they solve different problems. Standard interior paint is usually the practical choice when you need washability, predictable color, fast production, and a wide range of sheens. Limewash is the better choice when you want a matte mineral surface with depth, softness, and natural variation.
What’s actually slowing this PC down?
Pick the symptom - the matching free tool is one click away.
| Category | Limewash Paint | Standard Interior Paint |
|---|---|---|
| Finish | Matte, cloudy, plaster-like, tonal movement | Uniform color; available in flat, eggshell, satin, semi-gloss, and gloss |
| Best surfaces | Porous mineral surfaces and properly primed drywall | Drywall, trim, ceilings, doors, and many primed surfaces |
| Application | Usually brush-applied in 2 thin coats | Brush, roller, or spray; often 1 primer coat plus 2 paint coats |
| Breathability | Highly vapor-permeable on masonry | Varies; many acrylic paints form a less breathable film |
| Washability | Lower when unsealed; gentle cleaning only | Better, especially satin and semi-gloss products |
| Typical 2026 installed cost | About $1.50-$6.00 per sq. ft.; specialty markets may reach $4-$10 per sq. ft. | Often about $1.50-$4.80 per sq. ft. for standard interior repainting |
The biggest practical difference is control. Standard paint is designed to hide variation. Limewash is designed to reveal controlled variation. If a homeowner wants a perfectly flat, uniform wall, we usually steer them away from limewash. If they want a wall that looks hand-finished, layered, and responsive to daylight, limewash can be the right finish.
How Much Limewash Paint Costs in 2026
For interior limewash, national installed pricing in 2026 commonly falls around $1.50 to $6.00 per square foot. In high-cost metro areas or with boutique decorative-finish contractors, quotes can run closer to $4 to $10 per square foot. Standard interior repainting is often cheaper, typically around $1.50 to $4.80 per square foot depending on the market, wall condition, paint quality, ceiling height, and project complexity.
The premium is real. Limewash commonly costs 15% to 40% more than a standard repaint because it is slower, brush-applied, sensitive to prep, and often requires test patches or mockups before the full job starts.
| Line Item | Typical 2026 Cost | What Affects Price |
|---|---|---|
| DIY limewash paint | About $80-$150 per gallon | Brand, pigment, concentrate vs. ready-mixed product, number of coats |
| DIY primer and supplies | Often $75-$250 per room | Mineral primer, brushes, tape, masking paper, patching supplies, trays |
| Professional interior limewash | About $1.50-$6.00 per sq. ft. | Wall height, repairs, primer, color depth, protection, local labor |
| Boutique decorative finish | About $4-$10 per sq. ft. | High-cost markets, mockups, custom color, complex movement, sealing |
| Feature wall | Often starts around $1,800 in expensive markets | Size, prep, access, repairs, primer, sealer, contractor minimums |
| Exterior masonry limewash | Highly variable by project | Cleaning, porosity, sealed brick, repairs, stories, lifts, weather windows |
| Compatible sealer | Added material and labor cost | Bathrooms, kitchens, high-touch walls, desired wipeability |
For a simple 12-by-14-foot bedroom with 8-foot ceilings, the wall area before openings is roughly 416 square feet. At $1.50 to $6.00 per square foot, professional limewash would land around $624 to $2,496 before major repairs, unusually high ceilings, or premium sealer requirements. A single accent wall may have a higher effective square-foot price because contractors still need to mobilize, protect the room, prep the wall, and apply multiple coats.
Rank #2

- Double Brush Head for Efficient Limewash Application This limewash paint brush double design covers more surface with every stroke—perfect for fast and even mineral finish coating.
- U Shaped Design for Better Grip and Balance The limewash paint brush u shaped handle allows stable two-hand control, ideal for extended use on large lime-painted walls and brick surfaces.
- Natural Bristle for Lime-Based Paints Made with durable natural bristles, this limewash paint brush natural bristle type ensures smooth application of traditional lime and mineral paints.
- Wide Paint Brush for Limewash Walls Measuring 200mm total (100mm x 2), this wide paint brush for limewash is excellent for rustic texture effects on walls, ceilings, or fireplaces.
- Heavy-Duty Stainless Steel Ferrule Firmly holds the bristles in place, reducing shedding while brushing across rough plaster and masonry finishes.
For exterior brick or stucco, square-foot pricing is harder to generalize because the prep can be bigger than the painting. A two-story home may require ladders, scaffold, or a lift. Old brick may need gentle cleaning, mortar repairs, efflorescence treatment, or water-intrusion fixes before coating. If water beads on the surface, the masonry may be sealed, and limewash will not bond like it does on raw brick.
How Limewash Looks After It Dries
Limewash dries lighter than it looks in the bucket and often lighter than it appears when first brushed on the wall. The final color depends on the wall’s porosity, dilution, primer, number of coats, brush direction, and lighting. A north-facing room can make the same color read cooler and grayer. A sunny dining room may make it feel warmer and more textured.
That is why we treat sampling as part of the work, not a decorative extra. A 12-by-12-inch sample is better than nothing, but a 2-by-2-foot test patch gives a more honest read. For exterior masonry, we prefer a test area on the actual brick or stucco because absorption can vary from one elevation to another.
Expect movement. A good limewash wall will not look like a roller-applied flat paint. It may have cloudy areas, soft brush variation, and slight depth changes where the surface absorbs differently. Over time, especially outside, limewash can patina. That is part of its appeal, but homeowners should understand it before the first coat goes on.
How to Use Limewash Paint on Interior Walls
Interior limewash is a manageable DIY project for a patient homeowner, but it rewards prep and punishes shortcuts. The process is not technically difficult, but the finish is visible. Every patched area, dry edge, and inconsistent brush pattern can show if the surface was not prepared correctly.
1. Choose a compatible system
Start with the manufacturer, not the color chip. Use a limewash paint, primer, and sealer from the same brand or products that are explicitly approved to work together. Mixing a mineral limewash with a random bonding primer or acrylic sealer can change adhesion, color, sheen, breathability, and touch-up behavior.
2. Repair and clean the wall
Fill nail holes, repair dents, sand rough patches, and remove dust. If the wall has grease, soot, hand oils, or bathroom residue, clean it before priming. Limewash will not hide poor wall prep. In fact, the movement in the finish can draw attention to bad patches if the primer does not equalize absorption.
3. Prime drywall and painted walls
For drywall, primer is the make-or-break step. The goal is not only stain blocking. The goal is even absorption and a mineral-friendly surface. New drywall, old latex paint, and repaired joint compound all absorb differently. A compatible mineral primer helps the limewash read as one finish instead of a map of patches.
Do these 3 things before closing this tab:
1Fix the driver behind crashes, sound loss and screen glitches2Clear out junk files and repair common Windows errors3Scan for outdated or missing drivers - takes under a minute4. Apply two thin coats
Most interior limewash systems use two thin coats. Use a large block brush and work in random, multidirectional strokes. X-strokes are common, but do not stamp the same X pattern across the whole room. Vary your motion enough to avoid obvious stripes or repetitive marks.
Maintain a wet edge, especially on large walls. Work from corner to corner where possible. Do not stop in the middle of a broad wall unless there is a natural break. The first coat may look thin, uneven, or alarming. That is normal. The second coat usually brings the finish together.
Rank #3

- Premium-quality, water-based, 100% acrylic primer formulated to be used as a base coat for Meoded Lime Wash
- Serves as a base coat for both interior and exterior Lime Wash applications.
- New Surface: Surface should be smooth, clean and dust free. Prime the substrate with the recommended water based primer as required; such as PVA primer for drywall, multi-purpose primer for wood. orglossy surfaces, and let it dry fully. Next, apply two coats of Meoded Lime Wash Base Coat allowing it at least 5-8 hours to dry.
- Existing Surface: Any surface with sheen should be sanded, dust free, and then primed with a multi-purpose primer letting it dry fully. Next, apply two coats of Meoded Lime Wash Base Coat allowing it at least 5-8 hours to dry. Preparation of flat surfaces requires only the application of Meoded Lime Wash Base Coat.
- Application - The Base Coat can be brushed, rolled, or spray applied. Apply only when the surface and air temperatures are between 50°F and 95°F. Do not apply under high humidity or if rain is expected within 24 hours. Use a water-based universal primer first when going over oil-based paint.
5. Decide whether to seal
Unsealed limewash is matte and mineral-looking, but it is less washable than standard paint. In bedrooms and dining rooms, that may be acceptable. In powder rooms, kitchens, high-touch hallways, or behind a vanity, a compatible sealer may be worth it.
Sealer is a tradeoff. It can improve wipeability, but it may also shift the color, add sheen, reduce vapor permeability, or flatten some of the natural mineral character. Always test the sealer over a sample of the actual limewash color before using it across a full wall.
How to Limewash Exterior Brick, Stone, or Stucco
Exterior limewash requires more judgment than interior limewash because the coating has to deal with weather, moisture movement, heat, wind, and substrate condition. The upside is significant: on older masonry, breathable limewash can let trapped moisture escape better than many film-forming acrylic coatings. The risk is that coating problem masonry can trap you in a cycle of chalking, flaking, staining, and repairs if the underlying water issue is not fixed.
Check for sealers first
Before limewashing brick, perform a simple water-absorption test. Spray or splash clean water on the brick. If the water darkens the surface and absorbs, the masonry may be a good candidate. If water beads and sits on the surface, the brick is likely sealed or coated, and limewash will not bond like it does on raw masonry.
Clean, repair, and solve moisture problems
Exterior masonry should be clean and sound. That may mean low-pressure washing, removing biological growth, addressing efflorescence, and repairing failed mortar. Do not limewash over active water intrusion, bad flashing, failed gutters, poor drainage, or deteriorated mortar and expect the finish to solve the problem.
Dampen the surface
Brick, stone, and stucco should usually be dampened before application. The wall should be wet but not dripping. If it is bone dry, especially in sun or wind, the limewash can flash-dry on the surface instead of absorbing properly. If it is soaked, the material can run, streak, or dilute unpredictably.
Recommended Free Tools
Work in the right weather
Schedule exterior limewash for mild temperatures, shade, and dry weather. Avoid hot sun, high wind, freezing conditions, and rain in the near forecast. On larger elevations, a two-person crew is often better: one person applies while the other controls dampening and keeps edges workable.
Work one elevation at a time. Keep the surface damp, maintain consistent dilution, and plan natural stopping points at corners, trim breaks, or downspouts. For a distressed brick look, some systems allow wash-off or softening after partial set, but timing matters. Test first so the final result looks intentional, not patchy.
Common Limewash Mistakes We See
The most expensive limewash mistakes usually happen before the brush touches the wall. Homeowners focus on the stroke pattern and color, while the real success factors are surface compatibility, moisture control, primer, and expectations.
Rank #4

- Brush Specs: 5” wide x 1” thick, soft synthetic filament blended with natural bristle. Hold more stain/sealer and paint smoothly, making your home improvement job a breeze.
- Selected Premium Large Stain Brush: for all paints and stain/ sealant. No loss of bristle. This stain brush can also be used for dusting, waterproofing, masonry and heavy-duty painting projects. A soft Utility Attachable Paint Brush.
- Wide and Thick Deck Brush: easily apply stain/ sealer in between planks, cracks, railings and back-brushing, simplify your painting tasks, either on rough or on smooth surface, for exterior or indoor, thick or thin coat.
- Brush with a Threaded Grip: The hollow handle can add a universal screwed broom/mop handle or a painter’s extension pole when staining decks, floors, logs, porch, shed and fence, etc., no painful knees or backache.
- Easy to Clean in proper way. Resistant to all solvent.
- Skipping primer on drywall: drywall and old paint need a compatible primer so absorption is even.
- Applying over sealed masonry: if water beads on brick, limewash may not bond properly.
- Using limewash on floors or steps: abrasion and standing water make horizontal surfaces poor candidates.
- Working in full sun: fast drying can create chalky, uneven exterior results.
- Overworking the finish: limewash should have controlled movement, not perfect uniformity.
- Skipping samples: color can shift dramatically after drying and across different lighting conditions.
- Sealing automatically: sealer can help durability, but it may change color, sheen, and breathability.
- Ignoring masonry repairs: failed mortar, efflorescence, and water intrusion must be handled first.
Does Limewash Need Maintenance?
Interior limewash is low-maintenance in the right room but not maintenance-free. Unsealed walls should be cleaned gently with a soft, dry or barely damp cloth. Scrubbing with a sponge, using aggressive cleaners, or treating it like a washable satin paint can burnish or remove the finish.
Quick wins for a faster PC:
Scan for outdated or missing drivers - takes under a minuteDriver Scan →Clear out junk files and repair common Windows errorsFree Scan →Touch-ups are usually easier than with glossy paint because the finish already has variation. Still, touch-up success depends on whether the original wall was sealed, how many coats were used, and whether the same batch or color formula is available. Keep the product name, color, dilution notes, coat count, primer, and sealer information with your project records.
Exterior limewash can weather, soften, and patina over time. Some homeowners like that aged look. Others want a more consistent finish and should plan for periodic touch-ups. Exposure matters: a shaded porch wall may age differently than a south- or west-facing elevation that gets direct sun, wind, and rain.
Permits, HOAs, and Historic District Rules
Before changing exterior masonry color, check local rules. Many exterior limewash jobs do not require a standard building permit, but historic districts, landmark properties, HOA communities, and local design-review boards may have separate approval requirements. The issue is not only safety; it is the visual change to the exterior and the treatment of historic masonry.
If your home is in a historic district, talk with the local preservation office before work begins. Some cities require approval for exterior painting, masonry coating, color changes, or work visible from the street. Others may restrict surface preparation methods, especially aggressive blasting or treatments that damage brick faces and historic mortar.
For older masonry, we recommend using a preservation-minded contractor. Breathable limewash can be appropriate, but the wall assembly matters. Soft historic brick, lime mortar, prior coatings, water movement, and cleaning methods should be evaluated before coating the building.
When to DIY vs. When to Hire a Pro
Limewash can be a good DIY project when the scope is small, the surface is straightforward, and the homeowner is comfortable with variation. A bedroom accent wall, dining room, powder room, or fireplace surround is a reasonable place to start. Plan for one day of prep and priming, one day for the first coat, and another day for the second coat and cleanup. Dry times vary by product and conditions, but rushing coats is a reliable way to get uneven results.
DIY makes the most sense when the wall is under 300 square feet, access is easy, repairs are minor, and you are using a complete manufacturer system. Expect to spend roughly $80 to $150 per gallon for limewash paint, plus primer, brushes, tape, floor protection, patching supplies, and possibly sealer. A realistic DIY supply budget for one room often lands between $200 and $600 depending on size and product system.
Hire a pro when the finish needs to be consistent across multiple rooms, when ceilings are high, when walls need skim coating, when the color is dark or saturated, or when the substrate is exterior masonry. Exterior limewash also deserves professional help when the home is two stories or taller, the brick may be sealed, mortar needs repair, or access requires scaffold or lift equipment.
Free tools Windows power users keep installed
One-click scans. No signup required.
Best Value

- Meoded Lime Wash is a unique slaked limestone mineral coating that creates a beautiful weathered plaster-like finish on almost any interior and exterior surface.
- Formulated to easily achieve a matte, durable mottled finish with a soft touch using a two-coat brush application.
- Pre-tinted, pre-mixed, and easy to apply. Can be applied using a Meoded Lime Wash brush in a X Hatch pattern as seen in tutorial video. Easily repaired or recoated if damaged.
- Coverage: Gallon covers 250 - 300 sq ft ( per 2 coat) | Quart covers 62 - 75 (per 2 coat)
- For optimal durability and maximal aesthetic appeal, apply a layer of Meoded Lime Wash Base Coat before Lime Wash application and 1-2 layers of Meoded Stain Shield Sealer over the Lime Wash for protection.
A good contractor should talk about substrate testing, primer compatibility, mockups, weather windows, masking, and curing conditions. If the conversation is only about color and price per gallon, keep asking questions.
Our Practical Recommendation
Use limewash when the finish itself is the reason for the project. It is not simply a trend color or a cheaper way to repaint. It is a material choice with real strengths: depth, softness, breathability, and a finish that feels built into the wall instead of sprayed over it.
For interiors, we like limewash most in rooms where the wall can be appreciated without constant abuse: bedrooms, dining rooms, studies, fireplaces, accent walls, and powder rooms with the right sealer strategy. For exteriors, we like it on sound, unsealed masonry where breathability matters and the homeowner understands that the finish may age and patina.
The best limewash jobs start with three decisions: confirm the surface can accept it, build a sample in the real lighting, and choose a complete product system. Get those right, and the brush technique becomes manageable. Get them wrong, and even a skilled applicator will be fighting the wall.
Quick wins for a faster PC:
Repair Windows errors before they cause bigger problemsFix Now →Scan for outdated or missing drivers - takes under a minuteDriver Scan →Frequently Asked Questions
What is limewash paint made of?
Limewash paint is made from slaked lime, water, and mineral pigments. It cures through carbonation and bonds best to porous mineral surfaces such as brick, stone, stucco, plaster, and properly primed drywall.
Can you use limewash paint on drywall?
Yes, but drywall usually needs a compatible mineral or specialty primer first. The primer creates even absorption, which is critical because limewash can reveal patched areas, old paint, and uneven wall texture.
How much does limewash paint cost in 2026?
Professional interior limewash commonly costs about $1.50 to $6.00 per square foot in 2026. Specialty decorative contractors and high-cost metro areas may quote about $4 to $10 per square foot. DIY limewash paint often costs about $80 to $150 per gallon before primer and supplies.
Does limewash need to be sealed?
Not always. Sealer can improve wipeability in bathrooms, kitchens, and high-touch areas, but it may change the color, sheen, vapor permeability, and natural mineral look. Test the sealer before applying it to the full wall.
Can limewash be used on exterior brick?
Yes, if the brick is clean, sound, porous, and not sealed. Do a water-absorption test first. If water beads on the brick, limewash will not bond the same way it does on raw masonry.
Do I need a permit to limewash my home’s exterior?
Many exterior limewash projects do not need a standard building permit, but historic districts, landmark properties, HOAs, and local design-review boards may require approval before changing masonry color.
Quick Recap
Product prices and availability are accurate as of the date/time indicated and are subject to change. Any price and availability information displayed on Amazon at the time of purchase will apply.

