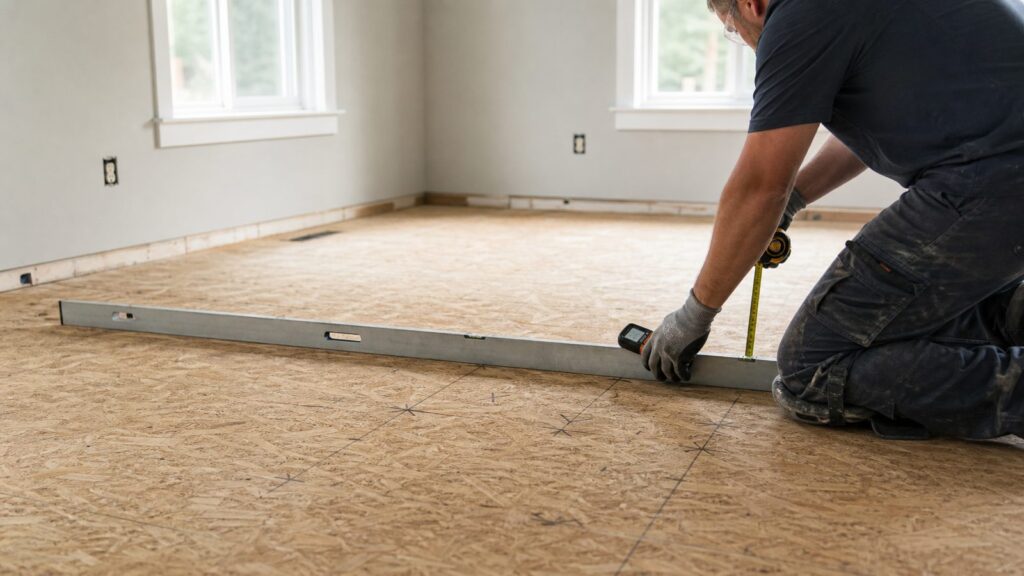
If you are installing laminate over an uneven OSB subfloor, the target is usually flat, not perfectly level. A floor can slope slightly across the room and still accept laminate if it is clean, dry, structurally sound, and within the flooring manufacturer’s flatness tolerance. A floor that has ridges, dips, loose panels, swollen seams, bounce, or moisture damage needs correction before the laminate goes down.
On our job sites, we do not start with self-leveling compound. We start with a straightedge, a moisture meter, and a floor map. Most laminate manufacturers require the subfloor to be flat within about 3/16 inch over 10 feet or 1/8 inch over 6 feet. Some products are tighter, including instructions in the range of 1/16 inch over 40 inches. The installation sheet for your exact laminate controls, because that is what the warranty will be measured against.
As an Amazon Associate I earn from qualifying purchases.
The right fix depends on what is causing the unevenness. High OSB seams are usually sanded or planed. Small low spots are patched. Loose panels are screwed down. Water-swollen or delaminated OSB gets replaced. A broad wavy floor may need a properly specified self-leveling underlayment. A sagging, bouncing, or rotted floor is a framing problem first and a flooring problem second.
Free tools Windows power users keep installed
One-click scans. No signup required.
Flat Versus Level: The Distinction That Saves Money
Laminate is a floating floor. The click-lock joints need continuous support so the planks do not rock, flex, separate, squeak, or break at the edges. That support comes from flatness.
#1 Best Overall

- Use to fill and level surfaces prior to the installation of carpeting, vinyl floor tile, floor sheeting and more
- Crack resistant formula can be sanded to a feathered edge
- Latex-based filler sets in 6 hours
- Crack filler remains flexible and allows for joint movement making it ideal for plywood subfloors and concrete
- Apply up to 1/4 inch and let dry, for thickness greater than 1/4 inch, apply in multiple coats allowing each coat to fully dry between applications
Level means the floor is horizontal. Flat means the surface has no unacceptable humps or dips. A bedroom floor that slopes 3/8 inch from one wall to the other may still perform if it is flat across that slope. A kitchen floor that is technically level overall but has a 1/4-inch hump at an OSB seam can destroy laminate joints.
This matters because chasing perfect level can create unnecessary work. Pouring compound across a whole room to remove a harmless slope can add hundreds of pounds of material, raise transitions, interfere with doors, trap appliances, and create problems at stairs or cabinets. For laminate, the better question is: does a 6-foot or 10-foot straightedge show gaps or humps outside the flooring manufacturer’s limit?
Write the laminate tolerance on the floor plan before prep starts. If the instructions say 3/16 inch in 10 feet, use a 10-foot straightedge or level and verify to that standard. If the instructions say 1/8 inch in 6 feet, use that. If they are stricter, follow the stricter number.
Inspect the OSB Before Choosing a Repair
OSB can look acceptable from standing height and still be out of tolerance. Before buying patch, primer, lath, or self-leveler, inspect the floor in a grid.
Tools we use for diagnosis
For a typical room, gather a 6-foot level or straightedge, a 10-foot straightedge if the room allows it, painter’s tape or marker, a tape measure, a flashlight, a moisture meter for wood, a screw gun, and a notepad. A laser level is useful for understanding slope, but it does not replace a straightedge for laminate flatness.
Lay the straightedge in multiple directions: parallel to the joists, perpendicular to the joists, diagonally across the OSB seams, and through doorways. Mark high spots with one color and low spots with another. Write the measured gap directly on the OSB: 1/8 inch, 3/16 inch, 1/4 inch, and so on. This gives you a repair map instead of a guess.
Check moisture and movement
Wood-subfloor moisture matters. Pergo-style guidance commonly calls for wood subfloor moisture at or below 12%, with crawl-space conditions meeting the flooring instructions. If the OSB is over the limit, do not trap that moisture under laminate. Find the source first: crawl-space humidity, plumbing leaks, exterior doors, dishwasher leaks, refrigerator lines, toilets, pet damage, or wet mopping history.
Quick wins for a faster PC:
Repair Windows errors before they cause bigger problemsFix Now →Fix the driver behind crashes, sound loss and screen glitchesFind Drivers →Walk the room slowly. If the OSB moves under your foot, squeaks badly, deflects, or feels soft, surface patching is premature. Drive loose panels tight to the joists with appropriate screws. If the movement remains, check joist spacing, blocking, damaged panels, rot, or framing deflection. Laminate underlayment and leveling compound will not correct a moving structure.
Common OSB Problems and the Right Fix
Uneven OSB subfloors usually fall into a few categories. Matching the fix to the cause is the difference between a durable laminate installation and a floor that fails after the room is furnished.
High OSB seams
Raised seams are one of the most common problems under laminate. OSB edges can swell from moisture, tight panel joints, or normal construction exposure. Tongue-and-groove edges and butt joints are especially suspect.
If the seam is structurally sound and only slightly high, sand or plane it down. Use dust control, eye protection, and a respirator rated for fine dust. Vacuum thoroughly afterward. Do not leave a ridge and try to hide it with foam underlayment. A 1/8-inch ridge concentrated at one seam can create plank rocking even if the rest of the room looks good.
PC Slower Than It Used to Be?
A free scan shows the junk files, broken settings and background clutter dragging Windows down - then fixes them in one click.Free scan · Windows 10 & 11Outdated Drivers Are Slowing You Down
One free scan finds every outdated or missing driver and matches the right update for your exact hardware.Free scan · exact hardware matchIf the seam is swollen from water and the panel edge is crumbly, delaminated, or permanently expanded, replacement is usually the better repair. Sanding rotten or moisture-damaged OSB only removes the symptom at the surface.
Localized low spots
Small depressions are usually handled with a compatible floor patch or leveling compound approved for wood subfloors and laminate preparation. Feather-patching is often cleaner than a full-room pour when the low area is isolated.
Before filling, correct nearby high seams first. If you fill the low area without knocking down the high point, you may create a wider hump. Vacuum the OSB, prime if the patch manufacturer requires it, and apply in lifts within the product’s thickness limits. After it cures, recheck the area with the same straightedge used during diagnosis.
Loose panels and squeaks
Loose OSB should be fastened before any surface work. We typically locate joists, add screws where the panel has lifted, and check whether the original fasteners missed framing or backed out. Use screws long enough to bite into the framing without overdriving and crushing the OSB face.
What’s actually slowing this PC down?
Pick the symptom - the matching free tool is one click away.
If the panel still moves after fastening, look below if access is available. You may need blocking, sistering, or panel replacement. Floating laminate is unforgiving over movement because the click-lock joint becomes the flex point.
Damaged or swollen OSB
OSB around dishwashers, refrigerators, toilets, exterior doors, laundry areas, and pet zones deserves close inspection. Dark staining is not automatically failure, but swelling, softness, flaking strands, musty odor, or fasteners that no longer hold are red flags.
Replace damaged OSB rather than burying it. Patch and self-leveler are not structural repairs. If a panel has lost stiffness or thickness from water damage, it can continue to move under the laminate and telegraph through the finished floor.
Room-wide waves or sagging
Broad waves can come from framing variation, joist crown differences, settlement, old remodel layers, or subfloor installation issues. If the floor is flat enough for the laminate tolerance, it may not need correction even if it slopes. If it has connected low areas across the room, self-leveling underlayment may be appropriate. If it sags between joists or bounces, address the structure first.
Do these 3 things before closing this tab:
1Fix the driver behind crashes, sound loss and screen glitches2Clear out junk files and repair common Windows errors3Scan for outdated or missing drivers - takes under a minuteRepair Options Compared
The best repair is the least invasive method that brings the OSB within the laminate manufacturer’s flatness tolerance while preserving structural performance.
| Condition | Typical Fix | Best For | Watchouts |
|---|---|---|---|
| Raised OSB seam | Sand or plane high edge | Localized ridges at panel joints | Use dust control; do not sand rotten OSB and call it fixed |
| Small low spot | Feather patch approved for wood | Isolated dips under 1/8 to 1/4 inch, depending on product | Prime if required; recheck with straightedge after cure |
| Loose OSB panel | Screw panel to joists; add blocking if needed | Squeaks, panel lift, minor movement | Movement must stop before patching or laminate |
| Water-swollen or soft OSB | Cut out and replace affected panel area | Leaks, delamination, edge swelling, rot | Find and correct the moisture source first |
| Broad connected lows | Self-leveling underlayment system rated for OSB | Large rooms with waves or multiple dips | Requires primer, gap sealing, dams, sometimes lath, and minimum thickness |
| Sagging or bouncing floor | Framing repair before surface prep | Joist deflection, rot, settlement, crawl-space issues | May need contractor or structural evaluation |
How to Flatten an OSB Subfloor Step by Step
This is the practical order we use before laminate. The details change by product, but the sequence holds up.
1. Remove everything that hides the real subfloor
Pull the old floor covering, pad, staples, tack strips, loose adhesive, and debris. Remove base shoe or baseboards if needed for expansion gaps and edge work. Vacuum the OSB thoroughly. Dust is the enemy of patch bond and primer performance.
Rank #2

- EASY FLOOR LEVELING: Achieve a smooth, even surface with this self leveling floor compound. Ideal for preparing floors before tile or other coverings. Simple application saves time and effort.
- WATER RESISTANT FORMULA: Designed for areas exposed to moisture, this liquid compound offers reliable water resistance. Perfect for bathrooms, kitchens, and other wet environments.
- MULTI-SURFACE COMPATIBILITY: Suitable for use on tile, brick, and concrete floors. Works as a floor leveling compound and mortar repair solution for a variety of wall and floor surfaces.
- PREMIXED CONVENIENCE: Ready-to-use liquid form eliminates the need for mixing. This premixed grout and mortar mix ensures consistent results and reduces preparation time.
- CRACK AND GAP FILLER: Effectively fills cracks and gaps in concrete and tile. Acts as a concrete crack filler and tile mortar, providing a durable, long-lasting repair for damaged surfaces.
2. Check the laminate instructions
Find the flatness requirement for the actual laminate being installed. Common requirements are 3/16 inch in 10 feet or 1/8 inch in 6 feet, but some instructions are tighter. Also confirm moisture limits, underlayment requirements, vapor retarder requirements, and whether the manufacturer allows installation over the existing subfloor assembly.
Recommended Free Tools
3. Map the floor
Use the required straightedge length, mark highs and lows, and measure the deepest gaps. Work in a grid, including doorways and transitions. If the floor slopes, mark the slope separately from the humps and dips. Slope alone may not matter. Surface variation does.
4. Secure the OSB
Drive loose panels tight to framing. Address squeaks and movement now. If fasteners spin without holding, the OSB or framing may be compromised. Do not apply compound over a moving panel.
5. Sand high spots first
Start with raised seams and obvious humps. Sand only enough to bring the surface into tolerance. Aggressive sanding can weaken the panel face, especially on thinner subfloor or already damaged OSB. Vacuum after sanding and recheck.
6. Fill low spots
Use a patch or leveling compound compatible with wood subfloors and the laminate system. Apply primer if the product requires it. Feather edges smoothly so you do not create a new ridge. Let the patch cure as directed before checking or installing laminate.
The Tool Desk
Outbyte PC Repair FREERepair Windows errors before they cause bigger problemsFix Now →Outbyte Driver Updater FREEScan for outdated or missing drivers - takes under a minuteDriver Scan →7. Recheck the full room
After sanding and patching, repeat the straightedge check. This is where many DIY jobs go wrong. The floor looked better, but nobody confirmed it met the written tolerance. Take photos of the straightedge measurements and moisture readings if the job needs documentation for a homeowner, buyer, builder, or flooring warranty.
Can You Pour Self-Leveling Compound Over OSB?
Yes, but only with the right product and preparation. Cementitious self-leveling underlayment over OSB is not a casual skim coat. OSB moves with moisture and load, and cement-based materials need bond, thickness, and reinforcement conditions that match the manufacturer’s data sheet.
Some systems allow OSB or wood subfloors only when the wood is APA-rated Exterior or Exposure 1, properly fastened, structurally sound, primed, and installed with metal lath at a specified minimum depth. One USG Durock Multi-Use type system, for example, allows OSB under a wood-subfloor tile assembly only with metal lath and a minimum 1/2-inch depth under the referenced wood method. Other self-leveling systems allow no-lath wood pours only at thicker minimums, such as 3/4 inch. The point is not that every laminate job needs those tile details; the point is that wood-subfloor pours have real system requirements.
Read the self-leveler data sheet before buying bags. Confirm it is approved for OSB or wood, check minimum and maximum thickness, primer type, lath requirement, working time, cure time, finished floor compatibility, and whether the OSB grade and framing meet the product limits.
Self-leveler prep over OSB
Seal gaps and penetrations so the mix cannot run into the crawl space, basement, wall cavities, heat registers, or plumbing openings. Install perimeter foam or dams at walls, doorways, stairs, cabinets, and floor vents. Prime exactly as directed. Many primers have an open window; if the primer sits too long before the pour, it may need reapplication.
Stage all bags, measured water, buckets, mixing paddles, gauge rake, smoothing tool, spiked shoes if used, and helpers before mixing. Many self-leveling products have a working time around 15 to 20 minutes at 70 degrees F. That is not the time to search for another bucket or read the bag.
Pouring over OSB also adds weight and height. A 1/2-inch pour across a 200-square-foot room is a significant amount of material, and it can affect transitions, doors, appliances, stair risers, and cabinet clearances. For a small isolated dip, patching is often smarter.
Why Laminate Underlayment Is Not a Leveling Product
Laminate underlayment improves sound control, walking feel, minor surface texture, and sometimes vapor management. It is not designed to bridge out-of-tolerance dips, ridges, panel movement, or framing problems.
Using thicker foam to hide uneven OSB can make the floor worse. Too much cushion lets the laminate flex more at the locking joints. The symptoms usually show up as clicking, hollow spots, separated seams, cracked edges, squeaks, or a floor that feels spongy under furniture and foot traffic.
Use the underlayment required by the laminate manufacturer. If the planks have an attached pad, do not automatically add another layer underneath unless the instructions allow it. More pad is not always better.
Independent reader supportYour contribution helps us test, update, and keep practical guides available for everyone.2026 Cost to Level or Repair an OSB Subfloor
Costs vary heavily by room size, depth of correction, access, region, and whether the issue is cosmetic flatness or structural damage. For planning in 2026, professional floor leveling commonly falls around $3 to $9 per square foot for many residential and light commercial interiors, including compound, primer, and mixing labor. Thicker pours, fiber-reinforced products, lath, complicated prep, or tight scheduling can push costs to $7 to $12 or more per square foot.
A broad 2026 floor-leveling project range is about $1,000 to $8,000, with a national average around $2,800. That range is wide because a 10-by-12 bedroom with one dip is not the same job as a 900-square-foot first floor with old adhesive, appliances, doorways, and structural sag.
| Work Item | Typical 2026 Cost | What Drives the Price |
|---|---|---|
| Professional floor leveling | $3-$9 per sq. ft.; complex jobs $7-$12+ per sq. ft. | Depth, prep, lath, primer, room layout, labor rates |
| Self-leveling overlay at about 1/4 inch | $3.50-$6.50 per sq. ft. in many pro contexts | Bag count, minimum thickness, crew size, access |
| Subfloor installation | $4.13-$6.33 per sq. ft. | Panel type, fastening, layout, removal needs |
| Subfloor repair | $26.13-$44.95 per sq. ft. | Localized damage, cutting, replacement, finish protection |
| Floor-structure repair | $65.54-$93.18 per sq. ft. | Joists, blocking, rot, crawl-space access, engineering concerns |
| Laminate flooring project | Often around $3.80-$4.80 per sq. ft. before extra prep | Laminate selection, underlayment, installation labor, prep exclusions |
DIY materials for a small room can be much lower, but the shopping list is longer than a few bags of leveler. Over OSB, you may need manufacturer-approved primer, gap sealant, perimeter foam, doorway dams, metal lath, screws, patch, sanding discs, mixing buckets, a high-output drill mixer, gauge rake, smoothing tool, and cleanup supplies. Bag count rises fast as pour depth increases.
Rank #3
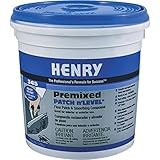
- ITEM WEIGHT: Weighs 12.5 lb for easy handling and transport. Ideal for use as a concrete patching compound or floor patch leveler in home improvement projects.
- ORIGIN AND QUALITY: Made in the United States with high standards for durability. Suitable for concrete patch repair and cement patch applications on various surfaces.
- BRAND RELIABILITY: Manufactured by Henry, W.W. Co. for trusted performance. Designed for strong adhesion and long-lasting results in flooring and wall-surface repair.
- DIMENSIONS AND SIZE: Measures 7.6 in L x 7.6 in W x 7.8 in H. Each set includes three 1 gal containers, perfect for large flooring or linoleum floor repair kit needs.
- FEATURES AND USES: High viscosity, water-resistant paste form for easy application. Great for self leveling floor filler, concrete crack filler, and washed stone flooring premixed repairs.
The expensive part is usually not the laminate. It is discovering that the OSB is water-damaged, the joists are sagging, the crawl space is wet, or the floor must be brought flat enough to satisfy a strict warranty tolerance.
When to DIY and When to Hire a Pro
A capable homeowner can handle some OSB flattening before laminate. Sanding a high seam, driving loose screws, and feather-patching a small low area are reasonable DIY tasks when the subfloor is dry, stiff, and not damaged.
DIY makes sense when the room is small, the deepest correction is minor, the floor is structurally sound, and you can meet the laminate flatness tolerance with sanding and patching. Plan for one day of prep and a second visit after cure if patching is involved. Do not install laminate over uncured patch or questionable moisture readings just to keep the schedule moving.
PC Slower Than It Used to Be?
A free scan shows the junk files, broken settings and background clutter dragging Windows down - then fixes them in one click.Free scan · Windows 10 & 11Crashes, No Sound, or Screen Glitches?
Random freezes, missing sound and display glitches usually trace back to one bad driver. Find and replace yours safely.Free scan · under a minuteHire a pro when the floor has broad connected lows, requires a self-leveling pour over OSB, has moisture damage, includes several rooms and doorways, or shows bounce and sag. Self-leveler rewards preparation and punishes hesitation. Once the mix is in the bucket, the working time is short, and mistakes can harden into a new problem.
Bring in a contractor or qualified carpenter if you see soft OSB, rot, joist cracks, cut or notched framing, termite damage, long-term leaks, or movement that does not stop after fastening the panels. If the floor structure is the issue, surface leveling is the wrong first trade.
Safety, Permits, and Code Notes
For ordinary laminate installation and minor surface prep, many jurisdictions do not require a permit. But permits and inspections may apply when you repair or replace structural subflooring, alter joists, change floor framing, modify stairs, or work in multifamily or commercial spaces. Local rules control, so verify before opening a structural floor assembly.
The building code concern is not whether the laminate looks good. It is whether the floor system can safely carry loads and meet structural requirements. If joists are undersized, over-notched, rotted, or excessively deflecting, that is beyond cosmetic floor prep.
The Tool Desk
Outbyte PC Repair FREERepair Windows errors before they cause bigger problemsFix Now →Outbyte Driver Updater FREEFix the driver behind crashes, sound loss and screen glitchesFind Drivers →Use basic job-site protection. Wear eye protection and a respirator when sanding OSB. Control dust at HVAC returns and occupied areas. Cementitious levelers are alkaline, so use gloves and avoid skin contact. Keep wet compound out of floor registers, wall cavities, plumbing penetrations, and electrical openings. If the home was built before 1978 and old flooring or adhesive is being disturbed, lead-safe and asbestos-aware practices may be needed before demolition or sanding.
Final Checklist Before Laminate Installation
Before the first plank goes down, the OSB should be clean, dry, flat, and quiet underfoot. Confirm the moisture reading is within the flooring manufacturer’s limit, commonly at or below 12% for wood subfloors in Pergo-style guidance. Confirm the surface meets the exact flatness tolerance for the laminate, such as 3/16 inch in 10 feet, 1/8 inch in 6 feet, or the stricter value listed for that product.
Check that high seams are sanded, low spots are cured and feathered, loose fasteners are corrected, damaged OSB has been replaced, and all dust is vacuumed. Make sure doors, appliances, cabinets, stairs, and transitions still work with any added height. Use only the underlayment configuration approved by the laminate manufacturer.
The best laminate floors are won before the flooring box is opened. If the OSB is flat, stable, and dry, the installation is straightforward. If it is wavy, loose, wet, or structurally weak, fix that first. Laminate is a finish surface, not a repair system.
Frequently Asked Questions
Does laminate flooring need the OSB subfloor to be level or just flat?
Laminate usually needs the subfloor to be flat, not perfectly level. A slight overall slope can be acceptable if the OSB is dry, stable, and within the manufacturer’s flatness tolerance. Humps, dips, swollen seams, and bounce are the real problems.
How flat does an OSB subfloor need to be before laminate?
Many laminate instructions require no more than 3/16 inch variation over 10 feet or 1/8 inch over 6 feet. Some products are stricter, so use the installation sheet for your exact laminate.
Can self-leveling compound be poured over OSB?
Yes, but only if the product is approved for OSB or wood subfloors and installed exactly as specified. That may include primer, gap sealing, perimeter dams, metal lath, and a minimum pour thickness such as 1/2 inch or 3/4 inch depending on the system.
Can laminate underlayment hide uneven OSB?
No. Laminate underlayment can help with sound, feel, vapor control, and minor surface texture, but it is not a substitute for correcting out-of-tolerance dips, ridges, loose panels, or structural movement.
When should uneven OSB be replaced instead of leveled?
Replace OSB that is soft, swollen from water, delaminated, rotten, or unable to hold fasteners. Sanding or patching damaged OSB may make it look better temporarily, but it does not restore structural stiffness.
How much does it cost in 2026 to level a subfloor before laminate?
Professional floor leveling commonly runs about $3 to $9 per square foot, with complex jobs reaching $7 to $12 or more per square foot. Subfloor repair can cost much more, often $26.13 to $44.95 per square foot, while floor-structure repair may run $65.54 to $93.18 per square foot.
Quick Recap
Product prices and availability are accurate as of the date/time indicated and are subject to change. Any price and availability information displayed on Amazon at the time of purchase will apply.

