If a Laars Mini-Therm boiler is not firing, first identify its exact model and generation, then use the matching Laars manual. Mini-Therm JX and legacy Mini-Therm boilers have different controls and ignition systems, so a light, terminal, or troubleshooting step for one may not apply to another. For a JX, indicator lights can help distinguish a missing heat call from a low-water or temperature condition; a hot boiler with cold radiators may point to a circulation problem.
Start by identifying your Laars Mini-Therm model
“Mini-Therm” refers to more than one boiler generation. Find the model information on the boiler’s rating plate and match it to the documentation in Laars’s document library. The library lists the Mini-Therm JX installation manual separately from discontinued Mini-Therm/JVH documents. Do not use JX indicator labels, terminals, or flow-chart instructions on a legacy boiler unless its own manual confirms they apply.

Laars describes the Mini-Therm JX as a residential gas-fired boiler. If you need service, Laars’s contractor finder can help locate a contractor.
Laars Mini Therm boiler troubleshooting: safe first checks
For a JX, check the control-panel indicators and follow the troubleshooting sequence in the JX manual. The indicators describe operating conditions; they do not, by themselves, prove that a component has failed. Before investigating further, make sure the thermostat is set to call for heat. The manual states, “The burner will not fire unless there is a call from the thermostat or an external zone.”
Quick wins for a faster PC:
Clear out junk files and repair common Windows errorsFree Scan →Fix the driver behind crashes, sound loss and screen glitchesFind Drivers →Repair Windows errors before they cause bigger problemsFix Now →#1 Best Overall

- Laars A2000400 Temperature/Pressure Gauge
| JX indicator or condition | What it can mean | Safe next step |
|---|---|---|
| No green Temp Active light | The manual’s flow chart identifies this as a control-power issue. | Have a qualified person check control input power and board supply. These are electrical diagnostics, not routine homeowner checks. |
| Red Low Water light | The low-water condition prevents the burner from firing. | Let the boiler cool fully before adding water. The manual also directs checking whether the system is filled and whether the sensor is properly inserted and contacting a clean copper well. Do not work on a hot, pressurized system. |
| Yellow Hi Temp light | The burner is waiting for water temperature to fall below the high-limit differential. The JX chart gives a high-temperature setting range of 180°F–220°F. | Allow the boiler to respond to its controls. If it stays hot while heat is not reaching the emitters, investigate circulation with a technician; the manual names a malfunctioning pump or air-bound system as possibilities. |
| Yellow Target light | With Economy active, the control can set a target below the high limit and hold the burner off until water cools to the calculated target differential. | Consult the JX manual for the control’s operation. Do not treat this indication alone as proof of a fault. |
| No thermostat or external-zone call | The burner will not fire without a call for heat. | Check the thermostat’s setting and ordinary operating schedule. If it is calling but the boiler remains off, use the manual’s model-specific flow chart or call a technician. |
Laars boiler hot but radiators cold
If the boiler is hot but radiators or other emitters remain cold, Laars’s JX troubleshooting chart points to a possible lack of flow. It directs checking whether the boiler pump is running and whether water is flowing. A malfunctioning boiler or zone pump, or an air-bound system, may prevent heat from reaching the emitters.
Do not open or alter a hot, pressurized heating system to investigate. If the pump does not appear to run, flow is absent, or the boiler stays hot while the system remains cold, have a qualified boiler technician diagnose the circulation problem.
Rank #2

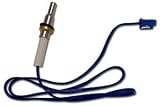
- Boiler Water Heater Ignitor Part Number DS018K.
- Gasket Included. 5" Wire Leads with Molex Plug. Porcelain Wire Nuts Included.
- Ensure its reliability safety and long service life with performance exceeding industry standards, using high-performance materials
- Installing this accessory can effectively solve various core problems and restore your home appliances to their optimal operating state
- After-sale guarantee: what we have been pursuing is customer satisfaction. If you are not satisfied with the product, please contact us! We will show you our sincere attitude and satisfactory solution
Mini-Therm pilot won’t light: keep model generations separate
Ignition troubleshooting depends on the boiler’s exact generation and installed ignition system. The JX manual sequences checks through control indicators and safety interlocks, then spark and pilot operation. Its chart includes rollout and blocked-vent switches, field interlocks, vent-damper/end-switch conditions, and whether spark reaches the pilot. It also includes electrical-voltage and gas-pressure checks; those measurements belong with a qualified technician.
For a legacy Mini-Therm II equipped with a Honeywell S8600 intermittent-pilot system, Laars’s separate manual covers checks involving line and low-voltage supply, ignition spark and cable/ground, pilot gas supply and orifice, flame rod, and module/gas-valve operation. These checks are specific to that system, not universal instructions for every Mini-Therm or for the JX.
Free tools Windows power users keep installed
One-click scans. No signup required.
A pilot that does not light does not establish that the gas valve, pilot assembly, or control needs replacement. Avoid replacing parts based on symptoms alone; the correct diagnosis depends on model, controls, interlocks, and ignition system.
Quick Recap
Best Value

- ♨The Thermopile is a Replacement of Fireplace Pilot Burner Assemnly Parts with Internal resistance (25°C) around 4000 mΩ and heating voltage above 750mV. Specifications: Length 24"(609mm) Glass Fiber Wire. Connecting type: spiral type and two-pole plug-in type. normally installed on plilot assembly used for fireplaces, frying, heating appliance
- ♨Replace Parts Number: 60125501, R1054, 7533113, 1950-001, 071515. Normal working temperature 700-750°C. Replacement of Heatilator Heat n Glo 24" Lead Thermopile, Fits Empire DV210, DV215, GWT25, GWT35, and GWT50 Models Replacement of PITCO 60125501 Model
- ♨It will needs about 60 seconds (2 minutes ) to heat up to the 750mV and the flame should be heat the middle of the head sensor, So you may need time to waiting the valve start work.
- ♨The Repalcement of heatilator thermopile 100% Tested, Quality Assured. Suitable For American Deep Fryer Thermostat Control Valve Pilots Light
- ♨(2 Pack in the Package) 750 Millivolt Replacement Thermopile Generators have long been used in self-powered heaters and hot water equipment.
When to stop troubleshooting and call a technician
- Stop and seek qualified service if you smell gas or suspect a combustion, venting, or blocked-vent problem.
- Call a technician for repeated safety-switch trips, persistent ignition failure, or any diagnosis requiring live electrical or gas-pressure measurements.
- If the burner fires when there is no call for heat, the JX manual says: “TURN OFF POWER TO BURNER IMMEDIATELY!” Then contact a qualified boiler technician.
- If a low-water condition requires adding water, allow the boiler to cool fully first, as the JX manual instructs.
Product prices and availability are accurate as of the date/time indicated and are subject to change. Any price and availability information displayed on Amazon at the time of purchase will apply.




