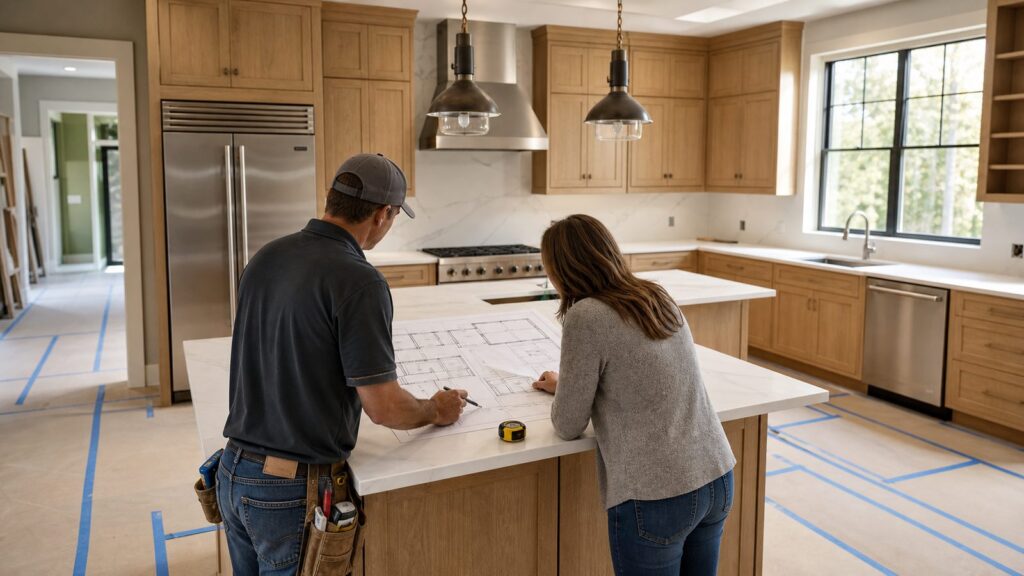
Good kitchen spacing is not about memorizing random numbers. It is about building a room where cabinet doors open, appliance doors do not fight each other, two people can cook without shoulder-checking, and the finished kitchen passes inspection where code applies. The fastest practical answer is this: plan 42 inches of work aisle for one cook, 48 inches for two cooks, 36 inches for basic walkways, 32 to 44 inches behind seating depending on traffic, and keep the sink, refrigerator, and cooking surface within a workable triangle of 4 to 9 feet per leg and 26 feet total.
Those numbers are mostly planning guidelines, not universal law. Actual requirements come from adopted local code, appliance installation manuals, electrical rules, ventilation rules, and permit conditions. On our job sites, the kitchens that feel right are the ones where we review the cabinet plan, appliance spec sheets, outlet layout, ventilation path, and door swings before anything is ordered. Fixing a tight aisle on paper costs little. Fixing it after cabinets, stone, wiring, and flooring are installed can turn into a multi-trade change order.
As an Amazon Associate I earn from qualifying purchases.
This guide gives you the clearances that matter most, explains which numbers are comfort recommendations versus code-related issues, and shows where spacing mistakes affect budget in a 2026 kitchen remodel.
Free tools Windows power users keep installed
One-click scans. No signup required.
Kitchen Spacing Rules At A Glance
Use these dimensions as the first pass when reviewing a kitchen layout. They come from widely used NKBA planning guidance, model code concepts, and common construction practice. Local rules and manufacturer instructions still control the final build.
#1 Best Overall

- Value Pack:GDMINLO offers a 3-pack of retractable, automatic button tape measures and a soft folding tape, each 60 inch/150 cm long, ensuring precision in inches and centimeters for various applications.
- Serviceable Material: Retractable Tape Measure is made of non-stretch fiberglass material, which is sturdy and wear resistant. With a portable handy plastic case outside, the inside flexible vinyl tape measure is 1.5M/60In in length, Soft Pink Tape Measure Tailor Vinyl tape measure won't stretch or deform, provides superior measurement consistence; Soft tape measure, a flexible and portable tape measure, made from soft plastic material
- Unique Design: The tape measure is retractable, One of the magical features of the tape is that you simply press a button in the middle of the plastic box to retract the long ruler.It goes back in automatically,Portable tape measure, easy to carry, quick and easy to measure with ease
- Wide Application: Cloth tape measure; body tape measure,sewing tape measure,measuring tape tailor. Good sewing tool, accurate tape measuring for sewing, tailoring, body, waist measurement or measuring any curved surface. can provide you accurate measurements, suitable for a seamstress, a crafter, a quilter or whoever just need a flexible measuring tapebutt-up against the item your measuring; The metal ends also can prevent fraying
- Warm Prompt: When using a retractable tape measure, if the tape measure extends a long length, you can press the button in the middle to make the tape measure retract quickly, or there will be loud noise.
| Kitchen area | Minimum or recommended distance | What goes wrong if ignored |
|---|---|---|
| Kitchen doorway | 32 inch clear opening minimum; 34 inches for better accessible planning | Appliances, walkers, and everyday traffic feel tight before you even enter the room |
| Work aisle | 42 inches for one cook; 48 inches for multiple cooks | Dishwasher, oven, and refrigerator doors block movement and create pinch points |
| Walkway | 36 inches minimum; 42 inches preferred where two walkways meet at a corner | People cut through the cooking zone or brush past stools and cabinet pulls |
| Work triangle | 4 to 9 feet per leg; 26 feet maximum total | The cook takes too many steps, or the main prep zone gets split by an obstacle |
| Sink landing | 24 inches on one side and 18 inches on the other | Wet dishes, prep bowls, and hot pans end up balanced on unsafe edges |
| Main prep zone | At least 36 inches wide by 24 inches deep near the sink | The kitchen has counters but no usable chopping, mixing, or plating space |
| Dishwasher | Nearest edge within 36 inches of the sink; 21 inches standing clearance when opening toward a perpendicular surface | Loading becomes awkward and the open door blocks a corner or adjacent cabinet |
| Cooking surface landing | 12 inches on one side and 15 inches on the other | Hot pans have nowhere safe to land |
| Refrigerator landing | 15 inches on handle side, either side of side-by-side, or within 48 inches across from front | Groceries and ingredients get staged on the floor or across the room |
| Seating clearance | 32 inches no traffic; 36 inches to edge past; 44 inches for walk-behind traffic | Stools become a permanent obstruction |
| Wheelchair turning goal | 60 inch turning diameter; 30 by 48 inch clear floor areas at appliances | The kitchen may look open but fail real accessible use |
If you remember one rule from the table, make it this: measure clearances with doors and drawers open, not only from cabinet face to cabinet face. A kitchen can look generous on a floor plan and still fail when the dishwasher, trash pullout, refrigerator door, pantry rollout, and island seating are all in use.
Code, Guidelines, And Appliance Specs Are Not The Same
Kitchen spacing gets confusing because people use the word rule for four different things. The first is design guidance, such as NKBA planning recommendations. These numbers are not usually enforced by an inspector, but they are based on decades of kitchen use and are worth respecting.
The second is building code. Model codes such as the IRC are adopted and amended by states, counties, and cities. A model code section is not automatically the rule in your municipality. Your local building department decides what version applies, what amendments are in force, and whether your kitchen remodel needs building, electrical, mechanical, plumbing, or over-the-counter permits.
The third is appliance manufacturer instructions. These matter more than many homeowners expect. A range, cooktop, wall oven, refrigerator, built-in microwave, hood insert, or panel-ready dishwasher may require side clearances, rear clearances, ventilation gaps, anti-tip hardware, cabinet cutout tolerances, or combustible-material clearances that are stricter than generic planning guidance.
The fourth is jobsite reality. Existing framing, drain slope, duct routing, electrical panel capacity, flooring thickness, slab seams, window heights, and door casing all affect what can be built cleanly. A 48 inch aisle on a plan does not help if the countertop overhang, refrigerator handle, or bowed wall takes away the usable space.
Our working sequence is simple: first make the layout comfortable, then verify code, then verify appliance specs, then check field dimensions before ordering cabinets. That order prevents the common mistake of designing a beautiful kitchen around appliances that cannot legally, safely, or comfortably fit.
How To Measure Kitchen Clearances
Most kitchen spacing errors start with measuring from the wrong points. Work aisles are measured between the fronts of counters, tall cabinets, and appliances, not between wall studs or cabinet boxes. If an island has a 1 inch to 1 1/2 inch countertop overhang, that overhang reduces the finished aisle. If a refrigerator projects 30 inches from the wall while the cabinet beside it is 24 inches deep, the refrigerator front becomes the measuring point.
Do these 3 things before closing this tab:
1Scan for outdated or missing drivers - takes under a minute2Repair Windows errors before they cause bigger problems3Fix the driver behind crashes, sound loss and screen glitchesFor seating, measure from the counter edge to the obstruction behind the seated person. That obstruction might be a wall, another counter, a pantry face, a cabinet pull, or the back of a sofa in an open-plan room. For a walkway behind stools, measure the space after the stool and seated person are accounted for, not just the empty floor behind the island.
For appliance conflicts, use the actual appliance door dimensions. A 24 inch dishwasher door can block most of a 36 inch aisle when open. A French-door refrigerator may need less swing width than a single-door refrigerator, but the freezer drawer still needs pullout space. A wall oven door, microwave drawer, trash pullout, and corner cabinet can all claim the same floor area if the plan is not tested.
Before we release a kitchen for cabinet order, we like to mark the main cabinet and island edges on the floor with tape. Then we test the big moves: stand at the sink, open the dishwasher, pull out the trash, turn to the cooking surface, open the oven, walk to the refrigerator, and imagine stools occupied. That 20 minute exercise catches problems a flat elevation will miss.
Work Aisles, Walkways, And Doorways
The most important kitchen clearance is the work aisle. NKBA guidance uses 42 inches as the minimum work aisle for one cook and 48 inches for multiple cooks. This is measured between the face of the counter, appliance, or cabinet on one side and the face of the counter, appliance, or cabinet on the other side.
The Tool Desk
Outbyte PC Repair FREERepair Windows errors before they cause bigger problemsFix Now →Outbyte Driver Updater FREEScan for outdated or missing drivers - takes under a minuteDriver Scan →A work aisle is different from a walkway. A work aisle is where cooking, prep, cleanup, and appliance use happen. A walkway is circulation through or around the kitchen. A walkway should be at least 36 inches wide, and where two walkways meet at a right angle, one should be at least 42 inches wide for easier access.
Doorways matter too. A kitchen doorway should have at least a 32 inch clear opening. For more accessible planning, use 34 inches or more. Clear opening is not the same as the rough framed width or the door slab size. Hinges, stops, casing, and door swing can reduce usable clearance.
Comfortable Versus Minimum Aisles
A 36 inch gap beside an island may technically allow a person to pass, but it is not a good main work aisle. If that side includes the range, sink, dishwasher, or refrigerator, treat 42 inches as the starting point. If two people cook, or if an oven or dishwasher opens into that aisle, 48 inches is the better target.
Rank #2

- 16-foot retractable measuring tape for personal or professional use
- Provides both SAE and metric measurements
- Wide 3/4-inch blade with easy readability
- Convenient belt clip and lanyard for easy access
- Molded, impact-resistant case with easy grip-ability
More is not always better. A 60 inch work aisle can make the cook take extra steps between the sink and cooking surface. Wide-open kitchens sometimes feel less efficient because the triangle stretches too far. The right aisle is wide enough to avoid collisions but tight enough that the kitchen still works like a kitchen.
Island And Peninsula Spacing
Kitchen islands cause more spacing problems than any other feature. The reason is simple: islands are often added after the homeowner has already fallen in love with a large slab, four stools, pendant lights, a prep sink, or a cooktop. The room then has to absorb the island whether or not the clearances work.
For the main working side of an island, use 42 inches for one cook and 48 inches where two cooks work or where appliance doors open. Use 36 inches only on a lower-use pass-through side with no major appliance conflict. Around seating, use 32 inches behind the seated diner if no one needs to pass, 36 inches if someone needs to edge past, and 44 inches where people regularly walk behind the stools.
A common mistake is counting the island cabinet size but forgetting countertop overhang. A 36 inch deep island cabinet with a 12 inch seating overhang becomes roughly 48 inches deep before stools are added. In a 12 foot wide room, that can erase the aisle very quickly.
Cooktops On Islands
An island cooktop needs more discipline than a simple prep island. Plan at least 12 inches of landing on one side of the cooking surface and 15 inches on the other. Where the cooking surface is in an island or peninsula and the counter is at the same height, include at least 9 inches behind the cooking surface. You also need a hood or downdraft strategy that actually moves air outdoors when required, not just a decorative fixture.
What’s actually slowing this PC down?
Pick the symptom - the matching free tool is one click away.
We are cautious with island cooktops in family kitchens because they put hot pans near seating, traffic, and conversations. They can work well, but only when the aisle, landing space, ventilation, and safety clearances are handled together.
Outlet Planning For Islands And Peninsulas
Island outlet rules changed in the newest model language. Under 2024 IRC and 2023 NEC concepts, receptacles may be optional for islands and peninsulas in many jurisdictions, but provisions for future receptacles are required if none are installed. Local adoption varies, and some municipalities still enforce older outlet rules. The practical move is to ask the local inspector early and decide where a future outlet could be added without cutting into finished stone later.
Appliance Spacing That Prevents Daily Headaches
Appliance spacing is where a kitchen either works smoothly or becomes annoying every day. The plan should be tested with the refrigerator open, oven door down, dishwasher open, trash pulled out, pantry doors open, and a person standing at the sink.
Refrigerator Clearance And Landing
Plan 15 inches of landing area on the handle side of a single-door refrigerator. For a side-by-side refrigerator, provide 15 inches on either side. Another workable option is 15 inches of counter no more than 48 inches across from the refrigerator front. That landing area is where groceries, leftovers, trays, and ingredients go.
Recommended Free Tools
Check the refrigerator depth carefully. A counter-depth refrigerator may still project beyond 24 inch base cabinets once doors and handles are included. Full-depth refrigerators can project much farther. Built-in and panel-ready units need exact cabinet openings, ventilation gaps, and sometimes floor or wall anchoring.
Dishwasher Placement
The nearest edge of the dishwasher should be within 36 inches of the sink edge. This keeps scraping, rinsing, and loading in one cleanup zone. If the dishwasher opens toward a perpendicular counter, cabinet, or appliance, leave at least 21 inches of standing space so a person can load it without being trapped in the corner.
In tight kitchens, the dishwasher and sink cabinet often compete with the trash pullout. We usually want the trash near the sink and prep zone, but not so close that the trash and dishwasher cannot open at the same time. This is one of those small coordination items that makes a kitchen feel professionally planned.
Ovens, Microwaves, And Hot Landing Zones
Wall ovens and ranges need landing space for hot pans. Plan at least 15 inches of counter near ovens, microwaves, and cooking surfaces. For microwaves, a comfortable bottom height is about 3 inches below the principal user’s shoulder, but not more than 54 inches above the floor. If the microwave is below the counter, the bottom should be at least 15 inches above the finished floor.
Do not place a microwave so high that the user has to lift hot liquid above eye level. Over-the-range microwaves can save space, but they are not always the best ventilation solution, and they can be uncomfortable for shorter users or children.
Rank #3

- Strong Enough Blade - This WORKPRO 25 FT tape measure blade is 1 inch wide and 0.0047 inch thick which ensures the ruler can stand out 7.2 feet without bending.Excellent stiffness reduces measurement errors and improves measurement convenience
- Portable - The design of wrist strap and belt clip makes the tape measure easy to carry in various occasions.When your hands are not free, you can hang it around your waist or tie it around your wrist. Of course, the design of the strap also makes the product more convenient to hang and store
- Easy to Read - Clear scale markings every 1/8 inch, 1 foot, 1.5 feet make reading easier. And the minimum accuracy of the measuring tape is 1/32 inch, which enables more accurate measurement of items. The yellow background and black and red text make the tick marks more visible. At the same time, the tape measure has nylon coating which can prevent the blade from rusting and make the blade more wear-resistant, so that the mark will not be easily scratched
- Drop Protection - The rubber protective casing wrapping the tape measure makes it more resistant to drops. The rubber ergonomic grip can also make you feel better when you're working long hours
- Magnetic Hook & Thumb Lock - The end of the measuring tape is outfitted with a powerful magnet, allowing you to easily measure both non-metallic and metal surfaces. Simply attach the end of the ruler to any surface to keep it in place by thumb lock while you get the measurements you need. The thumb lock can also slow down the blade retraction speed to prevent accidental injury
Landing Areas And Prep Zones
A kitchen can have plenty of countertop square footage and still have poor prep space. The key is not total counter length. The key is where the usable counter lands relative to the sink, refrigerator, range, trash, and pantry.
At the sink, plan at least 24 inches of landing space on one side and 18 inches on the other. The primary prep area should be at least 36 inches wide by 24 inches deep next to a sink. That gives enough room for a cutting board, mixing bowl, knife, and ingredients without constantly moving things out of the way.
At the cooking surface, plan 12 inches of landing on one side and 15 inches on the other. This is a safety issue as much as a convenience issue. A hot sheet pan, skillet, or stockpot needs a place to land immediately. If the range is jammed against a tall pantry or refrigerator panel, the cook loses both elbow room and safe landing space.
Quick wins for a faster PC:
Clear out junk files and repair common Windows errorsFree Scan →Scan for outdated or missing drivers - takes under a minuteDriver Scan →At the refrigerator, landing space keeps grocery unloading from spreading across the floor. At a coffee station, landing space keeps mugs, grinder, filters, and small appliances from invading the main prep zone. At a pantry wall, a short landing shelf or adjacent counter can make the difference between pleasant storage and constant juggling.
Seating Clearances At Islands, Peninsulas, And Breakfast Bars
Seating clearances are often underestimated because empty stools look small on a showroom floor. Real seated people need knee room, chair movement, and space behind them. Use 32 inches behind a seated diner where no traffic passes. Use 36 inches where someone may edge past. Use 44 inches where people regularly walk behind the seating.
Counter overhang also matters. Many counter-height seating areas use about 12 inches of overhang. More generous seating may need 15 inches, especially for taller adults. Stone overhangs may require brackets, corbels, steel supports, or engineered support depending on material, thickness, span, and fabricator requirements. A beautiful waterfall island still has to support real loads.
For seat width, 24 inches per person is a practical baseline. Three stools need about 72 inches of usable width, not counting end panels, legs, waterfall edges, or decorative posts. Trying to fit four stools into a 72 inch run usually means elbows collide and the end seats go unused.
Accessibility And Aging-In-Place Clearances
Even when a kitchen is not being built to a formal accessibility standard, accessible planning makes the room easier to use over time. If wheelchair access is a design goal, plan 30 by 48 inch clear floor spaces at appliances and work areas, 60 inches between opposing arms in a U-shaped kitchen, and a 60 inch turning diameter where a full turn is needed.
Reach ranges matter as much as floor space. Keep frequently used storage between roughly knee and shoulder height when possible. Consider drawers instead of deep lower cabinets, pullout shelves in pantries, lever handles, touch-latch or easy-grip hardware, and lighting controls placed where they can be reached from the main entry.
Microwave height deserves special attention. A microwave bottom about 3 inches below the principal user’s shoulder is comfortable for many people, while 54 inches above the floor should be treated as an upper limit. Below-counter microwave drawers can work well, but the bottom should be at least 15 inches above the finished floor and the aisle in front must allow someone to stand and open it safely.
Accessible planning is easiest before rough-in. Moving a switch bank, widening a doorway, changing a cabinet run, or lowering a work surface after tile, counters, and electrical are complete is far more disruptive.
Windows Errors? Fix Them Before They Spread
Repair common Windows errors and clear accumulated junk for a smoother, more stable PC - no reinstall needed.Free scan · no reinstallCrashes, No Sound, or Screen Glitches?
Random freezes, missing sound and display glitches usually trace back to one bad driver. Find and replace yours safely.Free scan · under a minuteElectrical, Ventilation, And Safety Clearances
Kitchen spacing is not only about cabinets. Electrical and ventilation decisions can drive layout, inspection, and safety. Model electrical rules have changed around island and peninsula receptacles, but local adoption varies. Some jurisdictions may still expect receptacles in locations that newer model language treats differently. If an island has no receptacle under the newer approach, provisions for a future receptacle may still be required.
Ventilation is another area where generic design advice falls short. NKBA guidance recommends a correctly sized ducted system with 150 cfm minimum. IRC-based model language commonly references 100 cfm minimum for ducted kitchen hoods, discharge outdoors, and makeup air for hoods over 400 cfm. Manufacturer requirements, local amendments, and the actual cooking appliance can push the design higher.
Makeup air is not a detail to leave until inspection. A powerful hood can depressurize a tight home, backdraft combustion appliances, and create comfort problems if replacement air is not addressed. If the hood is over 400 cfm, ask early how the local jurisdiction handles makeup air and whether a mechanical system is needed.
Rank #4

- 2 Pack Soft Fashion Measuring Tape Set. Double sided, 60 inch / 150 cm, portable,durable tape measure. Small and light pocket size measuring tape.
- Easy to Read and Accurate Measurements. The tape measure has accurate, large and clear markings in both inches and centimeters, easy and convenient to read. Wide Application on Home Office School Supplies: Cloth tape measure; body tape measure, sewing tape measure, measuring tape for body, waist tape measure, tailor tape measure. Great measuring tape for body, sewing, tailoring, weight loss, ordering clothes online, waist measurement or measuring any curved surface.
- NOTE: The black tape measure is retractable. There is a retract button in the center, just press on the button when pulling the tape out or retracting the tape back into it, or there will be loud noise.
- Package includes one soft fashion pink tape measure and one retractable black tape measure. Perfect multipurpose measuring tape for body fabric sewing tailor cloth knitting craft measurements. Great gift idea for family friends coworkers seamstress. (Retractable Black Measuring Tape, Size 2 x 2 x 0.5 inches, weight 0.7oz, portable and easy to carry or put into your bag.)
Vertical clearance above a cooking surface also needs verification. IRC-based guidance is generally 30 inches to combustible material or metal cabinets above, or 24 inches where protected by an approved hood or noncombustible material. Appliance instructions can be stricter. We verify the exact range, cooktop, hood, and cabinet configuration before the cabinet order because a wrong hood height can affect sightlines, tile layout, upper cabinet height, and inspection.
Free tools Windows power users keep installed
One-click scans. No signup required.
Small Kitchen And Galley Layout Rules
Small kitchens can work very well when the plan is honest about clearances. The mistake is trying to force a large-kitchen wish list into a tight room. A narrow galley can be efficient if appliance doors do not conflict, vertical storage is used well, and the main prep zone remains at least 36 inches wide by 24 inches deep near the sink.
In a galley, opposing runs should be checked with the dishwasher, oven, and refrigerator open. If a 24 inch dishwasher door opens into a 36 inch aisle, the remaining passage is poor. A 42 inch aisle is more workable for one cook, and 48 inches is better if two people use the kitchen together.
For a small L-shaped kitchen, protect the sink-to-prep-to-cook sequence. Do not sacrifice the only good prep area for a tall pantry unless storage is truly the bigger problem. Use full-height cabinets, drawers, tray dividers, shallow pantry pullouts, and appliance garages carefully. Every added feature should earn its space.
Small kitchens may cost less in total, but not always per square foot. Angi’s 2026 figures put small kitchen remodels around $10,500 to $20,000, while galley kitchens can range from about $16,200 to $65,000 depending on cabinets, appliances, finishes, and whether utilities move. Tight rooms can take more labor because installers have less tolerance for out-of-square walls, filler strips, door swings, and countertop handling.
What Most Kitchen Spacing Guides Miss
Many spacing articles repeat the work triangle and island aisle numbers, then stop. On real remodels, the missed details are where money and frustration show up.
Door conflicts are first. The refrigerator door, dishwasher door, oven door, pantry pullouts, trash pullout, corner cabinet, and nearby room doors all need to be tested together. A plan that works one door at a time may fail during dinner cleanup.
Cabinet fillers are second. Fillers are not wasted space when they let drawers clear casing, handles clear walls, and doors open past 90 degrees. A 1 1/2 inch or 3 inch filler can save a corner cabinet from becoming a daily nuisance.
Countertop overhangs and supports are third. Seating overhang, waterfall panels, stone thickness, bracket locations, and appliance panels change real dimensions. The cabinet drawing, slab template, and seating plan should agree before fabrication.
Recommended Free Tools
Ventilation path is fourth. A hood that needs to discharge outdoors may require duct routing through an upper cabinet, ceiling cavity, exterior wall, soffit, roof, or mechanical chase. The best range location on paper may be expensive if the duct path is poor.
Outlet and inspection planning is fifth. Island and peninsula receptacle rules have changed in the model codes, but local adoption is uneven. Electrical planning should happen before slab work, not after someone realizes there is no clean place to route power.
Cost Impact Of Spacing Mistakes In 2026
Spacing decisions are design decisions, but they quickly become budget decisions. Angi’s 2026 national kitchen remodel range is $14,588 to $41,551, with an average near $26,946. That broad consumer average can understate full-gut remodels, larger projects, and high-cost markets. Houzz’s 2026 kitchen study reports median spend of $55,000 for major kitchen remodels and $20,000 for minor remodels. Larger kitchens show a $75,000 median major-remodel spend compared with $46,000 for smaller kitchens.
High-end spending moves much higher. Houzz reports the top 10 percent of major remodel spending around $150,000 for larger kitchens and $120,000 for smaller kitchens. Zonda’s 2025 Cost vs. Value data, still cited in 2026 cost guides, places a minor midrange kitchen remodel at $28,458 with $32,141 resale value and 112.9 percent cost recouped.
What’s actually slowing this PC down?
Pick the symptom - the matching free tool is one click away.
Per square foot, Angi’s 2026 guidance puts remodeled kitchens commonly around $75 to $250 per square foot, while new kitchens often run $100 to $300 per square foot. The spacing-related costs usually come from moving plumbing, gas, electrical, walls, ductwork, cabinet layouts, countertop slabs, flooring transitions, and lighting.
Best Value

- Tape measure with MID accuracy and both inch and metric scales; measures up to 16 feet (5 meters)
- Self-locking mechanism with push button release allows inner tape to be smoothly extended and retracted
- Heat-treated spring ensures long-lasting performance; anti-skid ABS and soft rubber exterior for impact protection
- Belt clip and comfortable wrist strap for convenient carrying and easy access
- Product measures 3.43 x 2.83 x 1.69 inches
| Spacing change | Best time to catch it | Likely cost impact if caught late |
|---|---|---|
| Island aisle is 36 inches where 42 to 48 inches is needed | Before cabinet order | Cabinet modification, slab resizing, flooring patching, outlet relocation, pendant relocation |
| Range lacks landing space | During layout and appliance selection | New cabinet run, changed filler layout, different appliance size, countertop remake |
| Hood route is not workable | Before framing and rough mechanical | Ceiling opening, soffit work, exterior penetration, makeup air design, inspection delay |
| Dishwasher blocks corner access | Before plumbing rough-in | Sink base change, drain and supply relocation, cabinet reorder |
| Refrigerator projects into aisle | Before appliance purchase | Different refrigerator, recessed wall work, panel changes, cabinet depth changes |
| Island outlet plan fails local inspection | Before slab template | Floor coring, cabinet drilling, stone modification, electrical rework |
Time matters too. A cabinet revision after order can add weeks. A countertop change after template can mean a new slab layout or fabrication delay. Electrical, plumbing, and mechanical changes after rough-in often require reinspection. The least expensive spacing fix is the one made while the kitchen is still lines on a plan.
When To DIY Vs When To Hire A Pro
A homeowner can do useful spacing work before hiring anyone. Measure the room, mark doors and windows, list appliance model numbers, tape the proposed island on the floor, and test traffic paths. You can also compare the plan against the main numbers in this guide: 42 inch work aisle, 48 inch two-cook aisle, 36 inch walkway, 24 and 18 inch sink landing, 12 and 15 inch cooking landing, and 32 to 44 inches behind seating.
DIY review is reasonable when you are replacing finishes, keeping the same appliance locations, repainting cabinets, changing hardware, or swapping a freestanding refrigerator with a similar size. Even then, check that new appliances match the old cutouts and clearances.
Hire a pro when walls move, utilities move, the island changes size, the range changes fuel type, the hood changes capacity, cabinets are custom or semi-custom, the panel may need more capacity, structural work is possible, or the kitchen must support aging-in-place access. A contractor, kitchen designer, electrician, plumber, HVAC contractor, and cabinet installer may all touch decisions that look like simple spacing on paper.
Permits depend on location and scope. Some interior residential remodels qualify for streamlined or over-the-counter permits in certain cities, while other jurisdictions require separate trade permits and inspections. Verify locally before work starts. Do not assume a kitchen is permit-free because the footprint looks similar.
Pre-Construction Layout Review Checklist
Before ordering long-lead items, review the kitchen as one coordinated system. We use this type of checklist because it catches expensive conflicts early.
- Confirm field dimensions after drywall conditions, not only from old plans.
- Measure aisles from finished counter, appliance, and panel faces.
- Test the refrigerator, dishwasher, oven, microwave, pantry, trash, and cabinet doors open.
- Verify 42 inch or 48 inch work aisles where cooking and cleanup happen.
- Keep walkways at least 36 inches wide.
- Confirm seating clearances of 32, 36, or 44 inches based on traffic.
- Protect a 36 by 24 inch prep zone near the sink.
- Check sink, range, refrigerator, microwave, and oven landing areas.
- Review appliance installation manuals for cutouts, ventilation gaps, anti-tip hardware, and combustible clearances.
- Confirm hood cfm, duct route, outdoor discharge, and makeup air requirements.
- Confirm island and peninsula receptacle requirements with the local jurisdiction.
- Check cabinet fillers, end panels, trim, casing, and hardware projections.
- Coordinate pendant locations with the actual island size, not an early sketch.
- Review flooring transitions if walls or islands move.
- Confirm permit scope before demolition.
This review should happen before cabinet order, countertop template, and rough-in signoff. Once those milestones pass, the cost of changing spacing rises sharply.
Bottom Line
The best kitchen spacing rules are practical, measurable, and verified before construction. Start with 42 inch work aisles for one cook, 48 inches for two cooks, 36 inch walkways, 32 to 44 inches behind seating, and a work triangle with 4 to 9 foot legs and 26 feet maximum total. Then check landing areas, appliance doors, cabinet fillers, outlet rules, hood requirements, and local permits.
A kitchen does not have to be huge to work well. It has to be coordinated. Good spacing makes a remodel feel calm, durable, and worth the money every day after the crew leaves.
Frequently Asked Questions
What is the minimum space between kitchen counters and an island?
For a working aisle, plan 42 inches for one cook and 48 inches for two cooks or where appliance doors open into the aisle. A 36 inch clearance is better reserved for a lower-use walkway, not the main cooking or cleanup zone.
How much space should be behind island seating?
Allow 32 inches behind a seated diner if no one passes behind, 36 inches if someone needs to edge past, and 44 inches where people regularly walk behind the stools. Also plan about 24 inches of width per seated person.
PC Slower Than It Used to Be?
A free scan shows the junk files, broken settings and background clutter dragging Windows down - then fixes them in one click.Free scan · Windows 10 & 11Crashes, No Sound, or Screen Glitches?
Random freezes, missing sound and display glitches usually trace back to one bad driver. Find and replace yours safely.Free scan · under a minuteIs the kitchen work triangle still useful?
Yes, but it is not the whole layout. Keep sink, refrigerator, and cooking surface legs between 4 and 9 feet, with no more than 26 feet total. Then also test prep space, appliance doors, trash location, landing areas, and traffic paths.
Are island outlets still required?
Under newer 2024 IRC and 2023 NEC model language, island and peninsula receptacles may be optional in many jurisdictions, but provisions for future receptacles are required if none are installed. Local adoption varies, so confirm with your building department before countertop fabrication.
How much landing space do I need beside a sink and stove?
At the sink, plan at least 24 inches on one side and 18 inches on the other. At the cooking surface, plan at least 12 inches on one side and 15 inches on the other so hot pans and prep items have safe landing space.
When should I hire a professional for kitchen spacing?
Hire a pro when walls, plumbing, gas, electrical, ventilation, appliance locations, or island dimensions change. Spacing changes made after cabinet ordering, rough-in, or countertop template can become expensive multi-trade revisions.
Quick wins for a faster PC:
Fix the driver behind crashes, sound loss and screen glitchesFind Drivers →Clear out junk files and repair common Windows errorsFree Scan →Quick Recap
Product prices and availability are accurate as of the date/time indicated and are subject to change. Any price and availability information displayed on Amazon at the time of purchase will apply.

