The Tool Desk
Outbyte PC Repair FREERepair Windows errors before they cause bigger problemsFix Now →Outbyte Driver Updater FREEScan for outdated or missing drivers - takes under a minuteDriver Scan →A soil test kit tells you what your soil actually needs before you spend money on fertilizer, lime, compost, seed, sod, shrubs, or raised beds. Used correctly, it can explain weak turf, yellowing plants, poor vegetable yields, mossy areas, and stubborn bare spots. Used carelessly, it can give you numbers that look scientific but point you in the wrong direction.
The short version is this: divide your yard into similar zones, collect several small soil cores from each zone, mix them into one clean composite sample, dry and label the soil, then run the kit or mail it to a lab. For quick pH and rough nutrient screening, a $10 to $25 home kit is useful. For reliable lime and fertilizer rates, a university Extension or private lab test is usually the better tool, often costing $0 to $45 per sample for basic lawn and garden testing in 2026.
One line matters for homeowners planning construction: a lawn and garden soil test is not a geotechnical report. It cannot tell you allowable bearing pressure, settlement risk, expansive clay behavior, groundwater conditions, slope stability, compaction, or foundation requirements. On our job sites, we treat fertility testing and construction soil evaluation as two different jobs with two different standards.
As an Amazon Associate I earn from qualifying purchases.
Do these 3 things before closing this tab:
1Fix the driver behind crashes, sound loss and screen glitches2Repair Windows errors before they cause bigger problems3Scan for outdated or missing drivers - takes under a minuteWhat a Soil Test Kit Can and Cannot Tell You
Most homeowner soil tests are designed for plant health. They help answer questions like: Is the soil too acidic? Does the lawn need phosphorus or potassium? Is the vegetable bed short on nutrients? Should you add lime before fertilizing? Is soluble salt a concern? Is organic matter low?
Basic DIY kits usually measure pH, nitrogen, phosphorus, and potassium, often called NPK. Some use capsules, tablets, strips, or color-comparison chambers. They are convenient and inexpensive, but they are screening tools. They can show that your soil is strongly acidic or that a nutrient is low, medium, or high. They usually do not provide the same calibrated recommendations you get from a regional lab.
#1 Best Overall

- Quick, at home results for Soil pH, Nitrogen, Phosphorous and Potash Innovative and inexpensive soil test kit features an easy-to-use capsule system and patented color comparators
- Contains all components needed for 20 tests. 5 for each of pH, N, P and K
- Contains all components needed to test all variables in several spots in the yard or garden
- Simple, detailed instructions included. Great for beginners and experienced gardeners alike.
- Soil pH preference list for over 450 plants included
Mail-in lab kits and Extension soil tests are more useful when you need exact rates. A lab report may include soil pH, buffer pH, phosphorus, potassium, calcium, magnesium, cation exchange capacity, organic matter, soluble salts, texture class, and lime recommendations. The best part is not just the number. It is the recommendation tied to your crop or use: cool-season lawn, vegetable garden, flower bed, trees, shrubs, blueberries, or new landscape installation.
Nitrogen deserves a special mention. It moves through soil quickly with rainfall, irrigation, plant uptake, and microbial activity. That is why many lab reports emphasize pH, phosphorus, potassium, organic matter, and lime needs more heavily than a one-time nitrogen reading. A DIY nitrogen color result can be useful, but it should not be treated like a structural measurement.
Quick wins for a faster PC:
Scan for outdated or missing drivers - takes under a minuteDriver Scan →Clear out junk files and repair common Windows errorsFree Scan →Fix the driver behind crashes, sound loss and screen glitchesFind Drivers →Choose the Right Soil Test for the Job
Before you collect a sample, decide what decision you are trying to make. The right test for a patchy lawn is not the same test for a new addition, retaining wall, septic field, or drainage failure.
| Test Type | Best For | Typical 2026 Cost | What It Will Not Tell You |
|---|---|---|---|
| DIY pH/NPK kit | Quick checks for lawn, garden, and potted soil | $10-$25; many 40-test kits run about $14-$20 | Precise amendment rates, regional calibration, bearing capacity, drainage design |
| Mail-in consumer lab kit | Homeowners who want a simple report with fertilizer guidance | $25-$45 per sample | Foundation design, slope stability, compaction, septic approval |
| University Extension basic fertility test | Reliable lawn and garden recommendations tied to regional soils | $0-$30 per sample in many states | Structural soil behavior or building-code engineering requirements |
| Expanded homeowner lab test | Organic matter, soluble salts, texture, topsoil evaluation, lead screening | $50-$100+ per sample depending on add-ons | Footing design, settlement prediction, retaining wall engineering |
| Percolation or septic soil evaluation | Septic system suitability and drainage rate review | Varies widely by county, site, and professional scope | Lawn fertilizer needs or full structural foundation design |
| Geotechnical report | New homes, additions, foundations, retaining walls, slopes, fill, expansive soils | Common homeowner ranges run $1,000-$5,000; many standard residential reports fall around $2,000-$3,500 in some regions | Routine fertilizer recommendations unless specifically included |
If your goal is greener turf, better vegetables, or healthier shrubs, start with a garden or lawn soil test. If your goal is to build, repair structural settlement, evaluate a hillside, design a retaining wall, or understand why water is undermining a foundation, call a geotechnical engineer or the local building department before you rely on a retail kit.
Materials You Need Before Sampling
You do not need expensive tools to collect a good soil sample. You do need clean tools and a consistent process. A bad sample is the most common reason good testing produces bad decisions.
Gather these materials before you start:
- Soil test kit, lab submission bag, or lab-provided sample box
- Clean plastic bucket; avoid galvanized, rusty, or dirty metal containers
- Soil probe, auger, bulb planter, trowel, spade, or shovel
- Clean plastic bag if the lab does not provide a container
- Permanent marker and labels for each zone
- Garden gloves
- Tape measure or measuring wheel for square footage
- Clean sheet of newspaper, cardboard, or plastic tray for air-drying samples
- Notebook or phone notes for sample locations, dates, and recent treatments
On our job sites, clean sampling matters because contamination can change the result. Fertilizer granules, compost chunks, mulch, roots, rust, concrete dust, and lime residue can all skew a sample. If you use a shovel that just cut through a treated planting bed, clean it before sampling the lawn.
Free tools Windows power users keep installed
One-click scans. No signup required.
Step 1: Divide the Property Into Testing Zones
Do not test the whole property as one sample unless it is truly uniform. Most residential yards are not uniform. The front lawn may have different sun exposure, irrigation, traffic, soil compaction, and fertilizer history than the back lawn. A vegetable garden that receives compost every year should not be mixed with soil from a struggling side yard.
Create a separate sample for each area with a different use or history. Common zones include front lawn, back lawn, vegetable garden, new planting bed, established landscape bed, low wet area, high dry area, compacted construction area, and problem patch.
If you are diagnosing a problem, sample the healthy and unhealthy areas separately. For example, if half the lawn is dark green and half is pale, collect one composite sample from the healthy turf and one from the weak turf. Comparing the two reports is often more useful than averaging them together.
Label each zone clearly before you collect. Use plain names like “Front lawn near street,” “Back vegetable bed,” or “Wet side yard by downspout.” You will need those labels later when the report gives rates per area.
PC Slower Than It Used to Be?
A free scan shows the junk files, broken settings and background clutter dragging Windows down - then fixes them in one click.Free scan · Windows 10 & 11Crashes, No Sound, or Screen Glitches?
Random freezes, missing sound and display glitches usually trace back to one bad driver. Find and replace yours safely.Free scan · under a minuteStep 2: Collect a Composite Sample
A proper soil test sample is not one scoop from one hole. It is a composite sample made from multiple small subsamples taken across a uniform area. Many Extension guides recommend 6 to 15 small subsamples per area. For a typical lawn or garden bed, that range is practical and gives the lab a better representation of the soil you are actually managing.
Walk the zone in a zigzag or grid pattern. At each stop, remove surface debris first. Pull away grass thatch, mulch, sticks, leaves, stones, roots, and visible fertilizer granules. Then take a narrow slice or core of soil at the correct depth. Put each subsample into the clean plastic bucket.
For established turf, sample roughly 3 to 6 inches deep, following the instructions for the lab or kit you are using. For vegetable gardens, landscape beds, trees, shrubs, and general topsoil, many labs commonly ask for about 6 to 12 inches. The key is consistency. A sample made from three 2-inch scoops and three 10-inch scoops can blur the result.
Once you have 6 to 15 subsamples from that zone, break up the clods and mix the soil thoroughly in the bucket. Remove stones, roots, mulch, thatch, and debris. Then place the amount required by your kit or lab into the sample bag or box. Many lab boxes hold roughly 1 to 2 cups of mixed soil, but follow the exact instructions that came with your kit.
Rank #2

- KNOW BEFORE YOU GROW | Grow the healthiest, sustainable lawn and garden with the most accurate and easy to use professional soil test kit on the market
- FAST & ACCURATE | Unlike at-home pH meters and test strips, our mail-in professional lab analysis accurately measures 13 plant-available nutrient levels, including Nitrogen and pH. Results in 6-8 days
- FOR ANY GROWING SCENARIO | Tests any soil type and growing condition - lawn & turf, vegetable gardening, flowers, compost, trees, vines, ornamental landscape, house plants, soil-less media or hydroponics
- SAVE TIME & MONEY | Stop applying products you don’t need. Learn exactly what products and amounts you need to grow the healthiest plants possible
- CUSTOM RECOMMENDATIONS | What to apply, how much to apply, and when to apply it. Provides both organic and non-organic fertilizer recommendations to effectively amend your soil
Step 3: Dry, Label, and Submit the Sample
If you are mailing soil to a lab, air-dry it unless the lab tells you otherwise. Spread the mixed soil in a thin layer on clean newspaper, cardboard, or a plastic tray. Let it dry at room temperature. Do not bake it in an oven, microwave it, or dry it with high heat. Heat can change some readings and create a mess you do not need.
Wet soil costs more to mail and can delay lab processing because the lab has to dry it before analysis. Dry soil is lighter, cleaner, and easier to handle. Once dry, put the required amount into the lab bag or box, label it clearly, and complete the submission form.
The form matters. A soil lab cannot recommend the right lime or fertilizer rate unless it knows what you are growing. A lawn target is different from tomatoes, azaleas, blueberries, shrubs, or a new seeded area. If the form asks for crop code, plant type, or intended use, fill it out carefully.
Step 4: Run a DIY Kit Correctly
If you are using a home soil test kit, read the instructions before opening the capsules or strips. Most kits require you to mix soil with distilled water, allow sediment to settle, add a reagent, and compare the resulting color to a chart. Timing, water amount, soil amount, and lighting all affect the reading.
What’s actually slowing this PC down?
Pick the symptom - the matching free tool is one click away.
Use distilled water if the kit calls for it. Tap water can contain minerals that affect pH or nutrient readings. Measure the soil and water rather than guessing. Shake or stir for the specified time, then let the sample settle long enough for the color to develop.
When comparing colors, use natural light or bright neutral light. Do not read the test under colored LED lighting, deep shade, or glare. If the result lands between two colors, record the range instead of forcing precision the kit cannot support.
DIY kits are most helpful when you use them to make broad decisions. A pH reading around 5.2 for turf tells you acidity may be limiting growth and a lab lime recommendation is worth getting. A very high phosphorus result tells you not to blindly apply starter fertilizer. A low potassium reading can explain weak stress tolerance. But when it is time to buy and spread amendments, a lab rate is safer.
How to Read the Results Without Overreacting
Start with pH. Soil pH controls nutrient availability and determines whether lime or sulfur is appropriate. Many lawn grasses prefer slightly acidic to near-neutral soil, often around the mid-6 range, while acid-loving plants such as blueberries need lower pH. If pH is wrong, adding more fertilizer may not fix the visible problem because the plant cannot use nutrients efficiently.
Next look at phosphorus and potassium. These nutrients do not move through soil the same way nitrogen does, and excess phosphorus can create environmental problems. If the report says phosphorus is high, do not add more just because a bag of fertilizer is marketed for “all-purpose” use. Choose a fertilizer that matches the report.
Then review organic matter, soluble salts, calcium, magnesium, and texture if included. Organic matter affects water holding, nutrient retention, and soil structure. Soluble salts can be a problem in arid regions, heavily fertilized beds, poorly drained planters, or areas affected by deicing salts. Texture influences drainage and compaction: sandy soil behaves differently from clay soil, and both require different management.
Finally, read the recommendation section. Reports often give lime and fertilizer rates per 100 square feet or per 1,000 square feet. Measure your treatment area before buying material. If the recommendation is 40 pounds of lime per 1,000 square feet and your lawn zone is 2,500 square feet, you need 100 pounds for that zone, not one random bag.
When to Test Soil During the Year
Fall is usually the best time to test lawns and gardens when you have a choice. Labs are often less backed up than spring, and lime has time to react before the next growing season. Fall testing also gives you winter to plan seed, sod, amendments, irrigation changes, or bed preparation.
Recommended Free Tools
Spring testing still works, especially before starting a garden or installing a new lawn. Just avoid sampling immediately after fertilizer, lime, compost, manure, or heavy rain. Fresh amendments can distort the reading. If you recently applied product, check the kit or lab guidance; waiting several weeks is often smarter than testing immediately.
For routine maintenance, many homeowners can retest lawns and gardens every 3 to 5 years. Test sooner when converting lawn to garden, building new landscape beds, importing topsoil, diagnosing poor growth, changing fertilizer programs, or after major grading and construction disturbance.
Rank #3
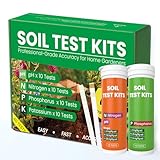
- Complete 4-in-1 Soil Test Kit (pH, N, P, K) – This garden soil test kit measures soil pH, Nitrogen, Phosphorus, and Potassium, giving you a full picture of your soil condition to improve fertilization and plant growth.
- 40 Accurate Tests for Long-Term Use – Includes 10 tests for each element (40 total tests), making this soil testing kit ideal for repeated use across multiple areas of your lawn, vegetable garden, or flower beds.
- Fast & Easy Soil Testing at Home – No calibration or complex tools needed. Simply mix soil with water, add the reagent, and compare the color chart for instant results. Perfect for beginners and experienced gardeners.
- All Tools Included for Convenience – This soil testing kit comes with test tubes, reagents, droppers, and a color comparison chart. Everything you need is included to perform reliable soil tests right at home.
- Improve Plant Growth & Save Fertilizer – By using this soil test kit for lawns and gardens, you can accurately balance soil nutrients, reduce waste, and grow healthier vegetables, flowers, and grass.
What Soil Testing Costs in 2026
Costs vary by state, lab, shipping, turnaround time, and the number of measurements included. For homeowners, the biggest decision is whether you need a quick screen, a calibrated fertility recommendation, expanded environmental information, or engineering work.
| Service | Typical 2026 Price | Best Use |
|---|---|---|
| DIY pH/NPK kit | $10-$25 | Fast checks before basic lawn or garden decisions |
| Retail mail-in lab kit | $25-$45 per sample | Convenient homeowner reports with nutrient recommendations |
| Extension basic fertility test | $0-$30 per sample in many states | Reliable pH, nutrient, and lime recommendations |
| Expanded homeowner lab testing | $50-$100+ per sample | Lead, soluble salts, organic matter, texture, topsoil evaluation |
| Professional geotechnical report | Commonly $1,000-$5,000 | Construction, foundations, retaining walls, fill, settlement, slopes |
Examples from current public pricing show the range. Maryland Extension lists many basic soil tests around $11 to $30 plus mailing. Wisconsin lists a standard lawn and garden analysis at $30. Rutgers lists a landscape fertility test at $20, with expanded services such as soil and plant suitability at $55, topsoil evaluation at $90, and lead screening at $95. North Carolina’s routine soil testing is free for residents most of the year, with a $5 peak-season fee from December 1 through March 31.
For construction, pricing changes completely. Homeowner-facing national ranges commonly fall between $1,000 and $5,000, with published averages around $2,900. Standard residential geotechnical reports in some regions may run about $2,000 to $3,500, while waterfront, hillside, expansive clay, organic soil, deep boring, or difficult-access sites can cost more.
Common Mistakes That Ruin Soil Test Results
The most common mistake is taking one scoop from one spot. Soil changes across a yard. A single sample near a downspout, compost pile, pet area, old tree, or fertilizer spill can misrepresent the whole area.
The second mistake is mixing unlike areas together. Do not combine lawn and vegetable garden soil. Do not mix a wet low spot with a dry slope. Do not mix a healthy area with a problem area when you are trying to diagnose the problem.
Depth errors are also common. If the lab asks for a 4-inch turf sample, collect 4-inch turf samples throughout that zone. If the garden instruction says 6 to 8 inches, stay in that range. Sampling deeper in one spot and shallower in another can change pH and nutrient readings.
Keep debris out. Thatch, mulch, compost chunks, roots, rocks, fertilizer granules, lime pellets, and surface crust do not belong in the sample. Use a clean plastic bucket, not a rusty pail or a container that held fertilizer, concrete mix, paint, or chemicals.
Do not test immediately after applying products. Lime, fertilizer, compost, manure, and soil conditioners need time to react and blend. Testing too soon can make the report look worse or better than the soil actually is.
Applying Amendments After the Test
A soil test does not improve the soil by itself. The value comes from applying the right product at the right rate over the right square footage.
Start by measuring the area. A 20-foot by 50-foot lawn section is 1,000 square feet. A 12-foot by 16-foot vegetable bed is 192 square feet. If the report gives a rate per 1,000 square feet, scale it to your actual area. Over-application wastes money and can burn turf, harm plants, or move nutrients into stormwater.
For lime, follow the report closely. Lime changes pH slowly, and heavy rates are often best split into multiple applications. For sulfur, be even more careful. Lowering pH is harder than raising it, and too much sulfur can damage plants.
For fertilizer, match the report to the bag analysis. A bag labeled 10-10-10 contains 10 percent nitrogen, 10 percent phosphate, and 10 percent potash by weight. A 40-pound bag of 10-10-10 contains 4 pounds of each listed nutrient. If your soil is already high in phosphorus, choose a fertilizer with little or no phosphorus instead of applying a balanced product out of habit.
For compost and organic matter, more is not always better. A thin layer worked into a garden bed can improve structure, but repeated heavy compost applications can raise phosphorus and salts. In established lawns, topdressing should be light enough that grass blades are not buried.
Independent reader supportYour contribution helps us test, update, and keep practical guides available for everyone.When to DIY and When to Hire a Pro
Use a DIY kit when you want a quick pH check, a rough NPK screen, or a low-cost way to compare two areas. It is a good first step for a homeowner trying to understand why grass is thin, why moss is showing up, or why a raised bed is underperforming.
Rank #4

- Accurate Soil pH Testing: Dewildetradingco Soil pH Test Strips offer measurements of soil pH levels (pH 3.5-9). As an essential tool for every gardener and grower, these test strips help determine the optimal pH for various plants, such as outdoor plants, indoor plants, gardens, grass lawns, fruit trees, flowers, vegetables, and forest shrubs.
- User-Friendly Testing Procedure: The testing process is simple and efficient. Mix the sample soil with water, let the solution sit for 30 minutes, dip one strip into the solution for 3 seconds, and then hold it horizontally for 60 seconds. Compare the results against the provided color chart on the bottle for quick and reliable readings.
- Cost-Effective and Versatile: With 100 Soil PH checker strips included in each package, Dewildetradingco provides a cost-effective solution for soil testing. It caters to various planting needs, offering valuable insights for a wide range of horticultural applications.
- Optimize Plant Health and Growth: Maintaining the correct pH is crucial for optimal plant growth and bountiful yields. Dewildetradingco Soil pH Test Strips enable gardeners and growers to adjust their soil conditions, ensuring nutrient availability and preventing wasteful spending on ineffective amendments.
- Convenient On-the-Go Monitoring: The Dewildetradingco Soil pH Test Strips are designed for portability, allowing gardeners to perform quick soil testing in various locations. As an essential tool in every gardener's soil tester kit, these pH strips help ensure thriving plant life and efficient resource management.
Use a mail-in lab or Extension test when you are about to spend real money on sod, seed, fertilizer, lime, plants, topsoil, or garden renovation. The cost of one $20 to $45 soil test is small compared with replacing a failed lawn or guessing through several rounds of amendments.
Use expanded lab testing when you are dealing with imported topsoil, suspected contamination, old painted structures, urban gardens, roadside areas, salt damage, or poor growth that basic fertility numbers do not explain. Lead screening, soluble salts, texture, and organic matter can be worth the extra cost in the right setting.
Hire a geotechnical engineer when the question involves building performance. That includes new construction, additions, foundation repairs, retaining walls, steep slopes, drainage failures affecting structures, suspected fill, expansive clay, soft organic soil, groundwater issues, or septic suitability. A garden kit cannot replace borings, lab classification, compaction review, groundwater observations, or an engineer’s sealed recommendations.
Safety, Permits, and Construction Limits
For normal lawn and garden work, soil testing is low risk. Wear gloves, wash your hands, and avoid breathing dry soil dust. If you are testing near old paint, industrial property, treated lumber, heavy traffic, or suspected contamination, choose a lab test that includes lead or relevant screening instead of relying on a basic NPK kit.
Quick wins for a faster PC:
Fix the driver behind crashes, sound loss and screen glitchesFind Drivers →Clear out junk files and repair common Windows errorsFree Scan →Scan for outdated or missing drivers - takes under a minuteDriver Scan →For construction, talk to the building department early. The International Building Code includes requirements related to soils and foundations, and local officials can require soil investigation when conditions warrant it. Requirements vary by jurisdiction, site conditions, and project type. A small shed may not trigger the same review as a room addition, retaining wall, hillside home, waterfront foundation, or commercial structure.
On our construction projects, we do not use garden fertility reports to make foundation decisions. If there is fill, soft soil, unusual settlement, standing water, steep grade, or a structural load, the right path is professional evaluation. The cost of a geotechnical report is minor compared with correcting a foundation that was built on assumptions.
A Practical Soil Testing Workflow
Here is the process we recommend for homeowners who want useful results without overcomplicating the job.
- Decide what question you are answering: lawn health, garden fertility, topsoil quality, contamination concern, drainage, septic, or construction.
- Choose the test type: DIY kit for quick screening, lab test for amendment rates, geotechnical report for structural work.
- Divide the property into uniform zones based on use, soil, slope, drainage, sunlight, and treatment history.
- Collect 6 to 15 subsamples from each zone at a consistent depth.
- Mix each zone’s soil in a clean plastic bucket and remove debris.
- Air-dry mailed samples unless the lab says otherwise.
- Label every sample with the zone name and intended use.
- Read pH first, then phosphorus, potassium, organic matter, salts, and recommendations.
- Measure the treatment area in square feet before buying lime or fertilizer.
- Apply amendments at the recommended rate, keep records, and retest in 3 to 5 years or sooner if conditions change.
The payoff is simple: you stop guessing. Instead of buying whatever fertilizer is on sale, you apply what the soil and plants actually need. That saves money, protects the lawn and garden, and prevents small site problems from being mistaken for construction-ready ground.
Frequently Asked Questions
How deep should I dig for a soil test sample?
For established turf, sample about 3 to 6 inches deep unless your lab gives different instructions. For vegetable gardens, landscape beds, trees, shrubs, and general topsoil, many labs commonly use about 6 to 12 inches. Keep the depth consistent within each sample zone.
Is a DIY soil test kit accurate enough for fertilizer decisions?
A DIY kit is useful for quick pH checks and rough NPK screening, but a lab test is better when you need exact lime or fertilizer rates. Lab recommendations are usually calibrated to regional soils and the crop or lawn type you list on the form.
How much does a soil test cost in 2026?
DIY pH/NPK kits usually cost about $10 to $25. Mail-in consumer lab kits often run $25 to $45 per sample. University Extension basic fertility tests commonly range from $0 to $30 per sample in many states, while expanded tests can cost $50 to $100 or more.
How often should homeowners test lawn or garden soil?
For routine maintenance, retest every 3 to 5 years. Test sooner when starting a new lawn or garden, converting lawn to beds, importing topsoil, diagnosing poor growth, or after major grading, drainage work, or construction disturbance.
Can a soil test kit tell me if my yard is safe for building?
No. A lawn and garden soil kit cannot determine bearing pressure, settlement risk, expansive clay behavior, groundwater, slope stability, compaction, or foundation design requirements. For additions, retaining walls, septic work, structural concerns, or suspected fill, use a qualified geotechnical professional.
Why do I need soil from several spots instead of one hole?
One scoop may reflect a fertilizer spill, wet spot, old planting hole, compost pile, or unusual patch. A composite sample made from 6 to 15 small subsamples gives a much better picture of the whole lawn or bed.
Quick Recap
Product prices and availability are accurate as of the date/time indicated and are subject to change. Any price and availability information displayed on Amazon at the time of purchase will apply.

