Recommended Free Tools
Fallen leaves make effective, free weed-suppressing mulch when you remove existing weeds first, spread the leaves only 2–3 inches deep, and keep them off plant stems and perennial crowns. Use thin, quick-breaking leaves whole; shred thick leaves that tend to mat; and avoid leaves carrying disease or pests and leaves from black walnut trees. Add small top-ups as the layer settles rather than starting with a deep blanket.
UC Master Gardener Program of Contra Costa County, Iowa State University Extension and Cornell University provide home-garden guidance for this method. Your leaf size, bed design, climate and plants determine how quickly the mulch breaks down and where it needs thinning.
As an Amazon Associate I earn from qualifying purchases.
Why fallen leaves suppress weeds
A leaf layer covers bare soil, reducing the open surface and light that many weed seeds need to establish. It also moderates soil moisture as it decomposes and eventually adds organic matter. Those benefits apply to surface mulch, not to leaves mixed deeply into the soil or piled against plants.
Crashes, No Sound, or Screen Glitches?
Random freezes, missing sound and display glitches usually trace back to one bad driver. Find and replace yours safely.Free scan · under a minuteWindows Errors? Fix Them Before They Spread
Repair common Windows errors and clear accumulated junk for a smoother, more stable PC - no reinstall needed.Free scan · no reinstallLeaf mulch is preventive rather than a reliable cure for an established weed. A normal 2–3-inch layer may limit new germination, but it generally will not kill a rooted weed already growing through the bed. Pull, hoe or otherwise remove those weeds before applying leaves. New seeds can still arrive on wind, birds, tools or the mulch itself, so inspect the bed during the season.
#1 Best Overall

- Powerful AC electric 13 Amp - 8000 RPM motor with adjustable settings for dry and wet leaves
- Shred 12 bags of leaves to 1, reduce the number of bags you have to haul to the curb or recycling center saving you time, energy, and money
- No-tools quick-change line replacement gets the job done faster, uses standard . 095-in trimmer line
- Individually adjustable legs allow leveling on all terrain for safe and stable operation
- Attached bungee cord bag clamp adapts to both paper and plastic waste bags
Choose leaves that will behave well
Thin leaves that break down quickly
Light leaves such as Japanese maple, Chinese pistache, liquidambar, red maple, poplar, willow and cherry can usually be spread whole if they are not accumulating in a thick, wet layer. Their relatively quick breakdown makes them practical where you can check the bed periodically and redistribute any piles.
Thick leaves that benefit from shredding
Bay, magnolia, sycamore and oak leaves are thicker and take longer to decompose. Shredding reduces the size of the pieces and the tendency of a continuous sheet to mat. It also reduces the volume of collected leaves, making them easier to distribute evenly. Shredding is helpful, not mandatory: a thin layer of whole leaves can still work if you prevent piling and inspect it after rain.
Leaves to set aside
Do not use leaves affected by fireblight or anthracnose, or leaves carrying whiteflies or thrips, as garden mulch. Identify an uncertain disease or pest problem before spreading the material. UC Cooperative Extension also warns that black walnut leaves may contain compounds harmful to other plants. When the tree source is unknown, sort the leaves before they reach a planting bed rather than trying to correct a problem after symptoms appear.
What’s actually slowing this PC down?
Pick the symptom - the matching free tool is one click away.
| Leaf group | Examples | Preferred preparation | What to watch |
|---|---|---|---|
| Light, quick-breaking leaves | Japanese maple, Chinese pistache, liquidambar, red maple, poplar, willow, cherry | Whole leaves can be used in a thin layer | Piles can still mat when wet; redistribute accumulations |
| Thick, slower leaves | Bay, magnolia, sycamore, oak | Shred when convenient, then spread evenly | Whole leaves take longer to break down and are more likely to form a sheet |
| Leaves with plant-health concerns | Leaves affected by fireblight or anthracnose, or carrying whiteflies or thrips | Do not use as mulch | Identify the problem and follow local disease or pest guidance |
| Potentially phytotoxic source | Black walnut | Keep out of beds unless you have reliable, plant-specific guidance | Compounds in the leaves may harm other plants |
How to apply leaf mulch step by step
1. Remove established weeds
Start with bare, weeded soil around the plants you want to protect. Pull weeds while the soil is workable, hoe shallowly, or use another method that removes the existing plants and their roots. Do not simply cover a tall weed with leaves and assume it is gone; the weed may continue growing through the mulch.
2. Sort and inspect the leaf supply
Separate leaves by source when possible. Remove obvious diseased or pest-infested material, and keep black walnut leaves away from beds unless you have confirmed they are appropriate for the specific planting. A known, healthy leaf source is more useful than a larger but uncertain pile.
3. Shred thick leaves if you have a practical way to do it
A mower, leaf shredder, shredder/vac or string trimmer can process thick leaves. UC Cooperative Extension describes using a string trimmer in a metal can filled about one-third full as one possible approach. Use equipment you already have; buying a machine is not required for leaf mulch. Work in small batches and avoid creating a compact, wet mass that will be difficult to spread.
4. Apply at the right season
For fall protection, Iowa State University Extension advises applying mulch after plants have gone dormant. For spring applications, wait until the soil has warmed and perennial plants have emerged. A layer placed too early in spring can slow emergence or plant growth, especially when it stays cold and wet.
Rank #2
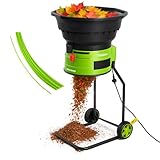
- BRILLIANTLY BLADELESS: No dangerous blades here, shred and mulch leaves using the extra strong 10 gauge nylon cutting lines. Easily change cutting lines without tools for super simple maintenance, with 20 additional lines included.
- INCREDIBLE SIZE REDUCTION: With an 18:1 reduction ratio, the bladeless shredder significantly reduces the size of your garden waste to be more manageable and useful. Spread the nutrient rich mulch on flower beds and lawns for ultimate convenience.
- POWER & PERFORMANCE: The 15Amp motor delivers a market leading 9,000RPM for superior cutting performance. Process 55 gallons of debris per minute to make your garden work fast and efficient.
- CUSTOM CONTROLS: Toggle through the cutting modes for different types of debris and mulch requirements. From Pine Needles, to Wet Leaves and Grass, there’s a setting perfect for the job.
- LIGHT & PORTABLE: The sturdy frame features 2 robust wheels for easy transportation and storage. Don’t be fooled by the 18lbs lightweight design, the bladeless shredder is made from durable ABS plastic – the same stuff as football pads!
5. Spread 2–3 inches, not a deep blanket
Use the leaf-specific starting depth recommended by UC Cooperative Extension: a thin 2–3-inch layer. Measure the depth after the leaves have been spread and settled rather than judging a loose pile by eye. Leave some leaves available for later top-ups because they decompose faster than many woody mulches. Adding a little later is safer than beginning with a heavy layer that must be removed.
6. Create a clear ring around plants
Keep leaves away from desirable plant stems. Do not bury perennial crowns under a thick mat, and keep leaves off evergreen perennials such as creeping phlox and Lenten rose. Around shrubs and larger perennials, the mulch can cover the surrounding soil while the stem base remains visible. Where wind or water moves leaves against a crown, pull the material back promptly.
7. Walk the bed after weather changes
Rain, snow, irrigation and wind can move leaves into corners or press them into a dense layer. Check the bed after wet weather, lift or thin any mat, and redistribute material to maintain a loose, fairly even 2–3-inch cover. This inspection is part of the method, not an indication that leaf mulch has failed.
How deep should leaf mulch be?
For leaves specifically, start with 2–3 inches. That range is a practical recommendation from UC Cooperative Extension, not a measured population statistic. It is deliberately narrower than broad guidance for mulch in general.
Iowa State University Extension and Cornell University both discuss roughly 2–4 inches for mulch generally, depending on the material and conditions. Those broad figures should not be treated as a universal prescription for whole leaves. Whole leaves can knit into an impermeable mat before they decompose, so the lower, leaf-specific range is the safer starting point. If the layer settles below the target, add a modest amount rather than dumping on several inches at once.
Signs the layer is too thick
- Water sits on top or runs off instead of reaching the soil.
- The leaves form a continuous, wet sheet that does not lift easily.
- Air movement at the soil surface is restricted.
- Small plants or perennial crowns disappear under the material.
- Leaves have collected against stems or evergreen foliage.
Thin a mat with a rake or by hand, move it to bare spots, and expose crowns and stems. If the bed repeatedly mats, shred the remaining leaves or use a thinner application next time.
Whole leaves or shredded leaves: choosing the right option
| Decision | Use whole leaves when | Shred leaves when |
|---|---|---|
| Leaf thickness | The leaves are light and quick to break down | The leaves are thick, such as bay, magnolia, sycamore or oak |
| Plant size | The bed has open soil and no low-growing foliage that will be covered | Small plants or dense plantings would be smothered by large intact leaves |
| Available effort | You can spread a thin layer and inspect it after rain | You already have a mower, shredder, shredder/vac or suitable trimmer |
| Insect shelter priority | You can leave selected whole leaves or an undisturbed area outside sensitive crowns | You need a uniform, low-mat layer in a formal bed |
There is no requirement to process every leaf. Use whole light leaves where they remain loose, shred the thick fraction, and retain some material separately if you want to preserve leaf-litter shelter for insects. The important controls are depth, placement and inspection.
Rank #3

- 【POWERFUL】: Leaf shredder with a 15 amp motor that spins at 8,200 rpm can shred up to 55 gallons of leaves per minute, making your garden work fast and efficient.
- 【BLADE-FREE DESIGN】: The leaf shredder uses a nylon cutting line to shred leaves and weed control. Maintenance is super simple as the cutting line can be easily replaced without tools. Comes with 20 extra cutting lines.Line diameter is: 0.098"x 12.59" (0.25 cm x 32cm)
- 【MORE EFFICIENT DISPOSAL】: With a 17:1 mulching ratio, the bladeless Leaf Crusher dramatically reduces the size of your garden waste, making it easier to manage and use.
- 【ADJUSTABLE CONTROL DIAL】: The control dial switches cutting modes for different types of debris and mulch requirements. From pine needles to wet leaves and grass, there is a setting that is best suited. Note: This product is not suitable for use with highly resilient objects such as melons, fruits, or grass roots.
- 【LIGHTWEIGHT AND PORTABLE】: The leaf crusher can be disassembled and is not heavy itself, making it easy to store, and the product is equipped with two sturdy wheels for easy transportation.
Protecting plants while suppressing weeds
Stems and trunks
Leaves should cover the soil around a plant, not form a wet collar around its stem. Pull back leaves that have blown against stems, particularly where the material stays damp. Keeping the base visible makes it easier to spot movement and to correct accumulation before it becomes a compact mass.
The Tool Desk
Outbyte Driver Updater FREEScan for outdated or missing drivers - takes under a minuteDriver Scan →Outbyte PC Repair FREERepair Windows errors before they cause bigger problemsFix Now →Perennial crowns
A crown is the low point where stems arise from a perennial’s root system. Thick leaves over that point can delay spring emergence or smother the plant. Leave the crown exposed and remove mats as soon as they form.
Evergreen perennials
Do not leave leaves resting on evergreen perennials such as creeping phlox and Lenten rose. Lift the foliage clear and place the leaves on the surrounding soil instead.
Low-growing plants
Whole leaves can cover plants that sit close to the ground. Before spreading, identify the plant edges and leave a visible buffer. Shredding may make it easier to fill the bare spaces without laying large sheets over the foliage.
Independent reader supportYour contribution helps us test, update, and keep practical guides available for everyone.Timing by season
Fall
Wait until plants have gone dormant before applying a fall layer. Remove active weeds first, inspect the leaves, then spread the 2–3-inch layer around—not over—the plants. Recheck after storms because wind can move leaves into crowns and corners.
Winter
Winter weather can compress leaves into a mat. If you can safely reach the bed, loosen or redistribute heavy accumulations. Keep some dry material available for a later correction, since the original layer may settle unevenly.
Spring
Do not rush to cover emerging perennials. Iowa State advises waiting until soil has warmed and perennials have emerged before a spring application. Remove any winter mat from crowns and evergreen foliage first, then place fresh mulch only on the exposed soil.
Rank #4

- High Performance: Equipped with three 11-inch blades rotating at 4,100 RPM, this electric mulcher delivers powerful, quiet, and eco-friendly operation, ideal for efficiently shredding leaves, grass, and clippings.
- Heavy-Duty Construction: Built with a robust 15-AMP, 1800 Watt motor and durable steel housing, this mulcher easily handles branches and twigs up to 0.5 inches in diameter, ensuring long-lasting performance.
- Eco-Friendly Design: Designed with the environment in mind, featuring a powder-coated steel body, instant start switch, and overload protection, all while producing zero emissions.
- Portable and Convenient: Includes two 6-inch wheels for easy transport and is engineered for outdoor use with specific extension cord requirements; plug into a GFCI outlet for safe operation.
- Safety First: Meets rigorous safety standards; always consult the owner’s manual for proper use and extension cord guidelines to ensure safe and effective mulching.
Summer
Leaves continue to decompose and the layer may become thin. Add small amounts where bare soil has reappeared, keeping the total depth within the 2–3-inch leaf guideline and maintaining clear space around stems and crowns.
Maintenance and troubleshooting
The leaves form a hard mat
Whole or thick leaves are most likely to mat when they are wet and piled deeply. Break the surface with a rake, remove excess material, and spread it in a thinner layer. Shred the remaining thick leaves before using them again. Avoid adding fresh leaves on top of a mat; that increases the barrier rather than correcting it.
Quick wins for a faster PC:
Fix the driver behind crashes, sound loss and screen glitchesFind Drivers →Clear out junk files and repair common Windows errorsFree Scan →Weeds appear through the mulch
Pull new weeds while they are small and inspect how they started. If the original weed was already rooted when the leaves were applied, remove it completely and repair the layer. If weeds are arriving on top or through gaps, close those gaps with a light top-up while keeping the total depth and plant clearances in range.
Leaves collect around one plant
Move the accumulation to bare soil elsewhere in the bed and expose the stem or crown. A low edge, wind direction or irrigation pattern may be concentrating the leaves; check the area again after the next weather event.
The mulch disappears quickly
Leaves break down faster than wood chips. Keep a reserve of healthy leaves for later top-ups, and add only enough to restore the target depth. The rapid breakdown is also what allows leaf mulch to contribute organic matter over time.
Plants emerge slowly in spring
Check whether a thick layer is covering a crown or whether spring mulch was applied before the soil warmed. Pull leaves back from the crown and reduce the depth. For future spring applications, wait until the soil has warmed and perennial growth is visible.
Leaf mulch and insect habitat
Not every leaf needs to be processed or placed in a formal bed. If preserving insect shelter matters, retain some whole leaves or leave selected areas undisturbed, provided they are not against vulnerable plant crowns and do not contain known disease or pest problems. In cultivated beds, keep the protective layer thin and managed; in a designated litter area, you can leave a separate patch untouched while maintaining clear plant bases elsewhere.
This approach separates two goals that can conflict: a uniform, low-mat surface for weed suppression and a less-disturbed layer for habitat. Decide which goal has priority in each part of the garden instead of applying one depth and preparation method everywhere.
Common mistakes to avoid
- Covering live weeds: Ordinary leaf mulch mainly limits new seed germination; it does not reliably eliminate established roots.
- Starting with a deep pile: Thick leaves can block air and water and smother small plants.
- Using generic mulch depths blindly: General 2–4-inch guidance from Iowa State and Cornell is not a universal instruction for whole leaves; use the leaf-specific 2–3-inch starting range.
- Leaving leaves on crowns: Pull mats away from perennial crowns and keep them off evergreen perennials.
- Making a stem collar: Keep the base of desirable plants visible rather than packing leaves against it.
- Ignoring the leaf source: Exclude leaves with fireblight, anthracnose, whiteflies, thrips or a potentially harmful black walnut source.
- Assuming shredding is compulsory: Shredding is most useful for thick leaves; light leaves can be used whole when kept thin and loose.
- Applying spring mulch too early: Wait for warmed soil and emerged perennials.
- Never checking the bed again: Wind, rain and decomposition change the depth, so inspect and adjust.
A simple decision checklist
- Have all established weeds been removed?
- Are the leaves identified and free of the disease, pest and black-walnut concerns listed above?
- Are thick leaves shredded, or can whole leaves be spread thinly enough to stay loose?
- Are fall plants dormant, or has spring soil warmed and perennial growth emerged?
- Can you maintain a 2–3-inch layer without covering stems, crowns or evergreen foliage?
- Will you keep reserve leaves for small top-ups and inspect the bed after wet or windy weather?
If the answer to each question is yes, fallen leaves can provide a practical weed-suppressing mulch while decomposing into organic matter. The safest pattern is simple: weed first, use healthy leaves, spread them thinly, protect plant bases and adjust the layer as conditions change.
Quick Recap
Product prices and availability are accurate as of the date/time indicated and are subject to change. Any price and availability information displayed on Amazon at the time of purchase will apply.
Do these 3 things before closing this tab:
1Scan for outdated or missing drivers - takes under a minute2Clear out junk files and repair common Windows errors3Fix the driver behind crashes, sound loss and screen glitches
