Do these 3 things before closing this tab:
1Repair Windows errors before they cause bigger problems2Fix the driver behind crashes, sound loss and screen glitches3Clear out junk files and repair common Windows errorsTo set up a PetSafe wireless fence, place the indoor transmitter near the center of the intended yard, configure its circular radius, test the signal with the collar and test light, install model-specific boundary flags, fit the collar snugly, and train your dog under supervision for at least 14 days. Installation alone does not make the system ready for unsupervised use.
The exact battery, controls, correction settings, coverage, and flag-spacing instructions depend on the PetSafe model. Use this guide for the installation sequence, then use the official instructions for your specific rechargeable, replaceable-battery, compact, or stubborn-dog system.
As an Amazon Associate I earn from qualifying purchases.
Key takeaways
- A PetSafe wireless fence creates a circular signal around an indoor transmitter, so transmitter position—not your property line—determines the containment shape.
- PetSafe’s current wireless-fence catalog lists maximum coverage of up to 3/4 acre for several models, but the usable area depends on the exact system, terrain, interference, and boundary settings.
- Flag spacing is model-specific: some PetSafe instructions use approximately 5-foot intervals, while a compact-model instruction uses 10-foot intervals.
- The collar must sit snugly with the electronic section centered at the front of the dog’s neck and both contact points making suitable skin contact.
- Installation may take about one day, but PetSafe recommends at least 14 days of gradual, supervised training before considering unsupervised use.
How do I set up a PetSafe wireless fence?
To set up a PetSafe wireless fence, identify the exact model, place the indoor transmitter near the center of the intended yard, configure the circular boundary, prepare the model-compatible collar, test the signal at several locations, install the flags, fit the collar correctly, and complete at least 14 days of supervised training. The system is an electronic containment aid, not a physical fence, and should not be trusted immediately after plugging it in.
PetSafe’s official instructions say, “The base unit sends out a circular signal to create the wireless fence.” That circular design makes transmitter placement the most important planning decision: the system cannot automatically follow an irregular property line, avoid a road, or create a rectangular boundary. Review the current PetSafe wireless-fence catalog before buying or installing a system because PetSafe sells several models with different controls, coverage descriptions, and collar power options.
#1 Best Overall

- For Persistent Pets: Great for the most hard-to-train pets a tone-only mode and 5 levels of static correction adjust based on how your dog responds during training
- Protect A 3/4-Acre Yard: Create a circular boundary that adjusts up to 3/4-acre (22 5 -105 ft in all directions) from where you place the transmitter indoors
- No Digging Or Wire to Bury: Sets up in just a few hours; a wireless boundary allows you to create a secure barrier around your yard to protect your pets without the time or hassle of burying wires
- Most Accurate Wireless Fence: Our proprietary circular boundary gently guides your dog back to the play area
- Portable: This portable system is terrific for camping, vacation homes, or anywhere you travel with access to an outlet
What should you check before installation?
Before opening the kit, confirm the model name and collar type. A rechargeable Stay & Play system, a replaceable-battery system, a compact model, and a stubborn-dog version may differ in battery, power controls, correction settings, coverage controls, and flag instructions. Generic PetSafe advice cannot replace the manual for the exact model.
A typical kit contains the following items:
- Indoor transmitter or base unit
- Receiver collar
- Power adapter
- Boundary flags
- Contact probes and, where supplied, longer probes for thick or long fur
- Test-light tool
Replaceable-battery instructions identify the PetSafe RFA-67 battery for compatible collars. Rechargeable collars use a charging adapter instead. Do not assume that every PetSafe wireless fence collar uses the RFA-67 battery.
PetSafe wireless fence installation checklist
| Item | What to confirm | Why it matters |
|---|---|---|
| Exact model | Rechargeable, replaceable-battery, compact, or stubborn-dog version | Controls, battery, coverage, correction options, and flag spacing can differ |
| Transmitter location | Indoor, near an outlet, elevated, and away from metal and appliances | Placement affects the circular signal and possible interference |
| Yard plan | Roads, driveways, slopes, property lines, and neighboring land marked | The signal follows a circle rather than the shape of the yard |
| Collar preparation | Correct battery or full charge, contact probes, and model-specific correction setting | A poorly prepared collar may not activate or may fit incorrectly |
| Training plan | Short supervised sessions for at least 14 days | The dog must learn the flags and boundary; installation alone is not training |
Where should I put the PetSafe wireless fence transmitter?
Put the PetSafe wireless fence transmitter indoors, near the center of the intended containment area, approximately 2–4 feet above the ground unless the exact model’s instructions specify a different height. One current PetSafe model page specifies 5 feet and another specifies 3 feet, so the model-specific manual takes priority.
Recommended Free Tools
Choose a dry, climate-controlled or otherwise weather-protected location near a standard wall outlet. Keep the transmitter away from large metal objects, metal structures, appliances, and other electronics that could affect the signal. Do not place the base unit inside a metal building, and do not assume that a garage, shed, or exposed outdoor location is suitable without model-specific confirmation.
Before connecting power, sketch the circular coverage area around the proposed transmitter position. Check whether any part of the circle reaches a road, driveway, pond, steep slope, neighboring property, or another unsafe location. A transmitter placed off-center may leave too little usable space on one side and send the boundary too far into an unsafe area on the other.
How do you plan a circular PetSafe boundary?
Plan the boundary as a radius around the transmitter, not as a line around the property. Walk the planned circle on a map or in the yard and identify every point where the dog could approach traffic, leave the property, become trapped outside the safe area, or encounter a physical hazard.
According to PetSafe’s 2026 current product catalog, several current wireless-fence models list maximum coverage of 3/4 acre. The listed maximum is not a promise that every yard will provide that much safe, usable space: the shape of the circle, terrain, metal, appliances, electronics, and signal fluctuation can reduce practical coverage.
The Tool Desk
Outbyte Driver Updater FREEScan for outdated or missing drivers - takes under a minuteDriver Scan →Outbyte PC Repair FREERepair Windows errors before they cause bigger problemsFix Now →Rank #2
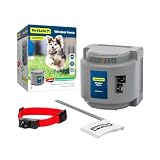
- 1/2 Acre Of Circular Coverage: The adjustable circular range can cover up to 1/2 acres from the placement of the portable indoor transmitter, and can be expanded further with purchase of an additional transmitter
- Most Accurate Wireless Fence: Our proprietary circular boundary gently guides your dog back to the play area
- No Digging Or Wire to Bury: Sets up in just a few hours; a wireless boundary allows you to create a secure barrier around your yard to protect your pets without the time or hassle of burying wires
- Static-Free Reentry: Unlike traditional in-ground fences, this wireless fence allows your pet to return home without being corrected if your pet passes the boundary
- Trust The Best: Awarded best wireless dog fence overall by Forbes, our proprietary circular boundary gently guides your dog back to his play area
| Yard situation | What the circular boundary may do | Installation decision |
|---|---|---|
| Broad, open yard with the transmitter near the center | Provides the most balanced usable area around the base unit | Continue with careful signal testing |
| Long, narrow, or irregular lot | May place part of the circle outside the property while leaving other areas unused | Compare the circle with the property map before purchase or installation |
| Road or driveway near one side of the property | May send the warning zone into traffic or a vehicle route | Move the transmitter or reduce the radius; do not release the dog until tested |
| Large metal structure, appliances, or electronics nearby | May create local signal changes or interference | Relocate the transmitter or remove the interference where possible |
| Sloped or uneven terrain | May produce an inconsistent boundary in some locations | Test the slope repeatedly at the dog’s neck height |
How do you connect and configure the base unit?
Connect the power adapter to the base unit and then to the wall outlet, switch the unit on, and set the boundary radius using the controls provided on that model. Depending on the system, the control may be a dial, high/low switch, display, or another model-specific setting.
Do not transfer a number from one PetSafe model to another. For example, the stubborn-dog documentation describes a high/low control that distinguishes coverage below or above 45 feet, while a separate boundary dial controls distance from the transmitter. That description is model-specific, not a universal operating rule for every PetSafe wireless fence.
PetSafe’s current catalog lists approximately 1–2 hours for setup on current wireless-fence models, while PetSafe’s support instructions describe approximately one day for setup. Treat those figures as manufacturer-published estimates for installation, not as the time required for the dog to learn the boundary.
How do you prepare the PetSafe collar?
Prepare the collar according to its power system and the instructions for the exact model. Charge a rechargeable collar fully before testing it, or install the specified replacement battery in a replaceable-battery collar.
PetSafe states that a full rechargeable-collar charge may take 2–3 hours and may last up to three weeks depending on use. These are manufacturer-published figures, so actual charge life depends on the collar, correction activity, and operating conditions. Check the collar’s charge or battery regularly during training.
Select the correction level using the model’s instructions and the dog’s needs. Correction-level numbering and adjustment procedures should not be assumed to be identical across PetSafe collars. Use the supplied contact probes, and install longer probes only when the compatible model provides them and the dog’s coat requires them.
How do you test a PetSafe wireless fence?
To test a PetSafe wireless fence, turn on the prepared collar, hold it at the dog’s neck height, and walk slowly from the safe area toward the boundary with the supplied test light attached or positioned as directed. The collar should beep and the test light should flash when the collar reaches the warning zone.
Rank #3

- No Digging Or Wire to Bury: Sets up in just a few hours; a wireless boundary allows you to create a secure barrier around your yard to protect your pets without the time or hassle of burying wires
- 3/4 Acre Of Circular Coverage: Adjust the circular boundary range up to 3/4-acre (22-105 ft in all directions) from the placement of the indoor transmitter
- Most Accurate Wireless Fence: Our proprietary circular boundary gently guides your dog back to the play area
- Trust The Best: Our proprietary circular boundary gently guides your dog back to his play area
- Lcd Display: An easy to read display shows you how far your pet’s play area expands; the screen also has warning indicators to let you know if there is an error with the wireless fence system
- Confirm that the transmitter is powered and that the collar has a usable charge or battery.
- Hold the collar with the electronic section at approximately the height and position it will have on the dog.
- Approach the boundary slowly until the collar beeps and the test light flashes.
- Mark that location with a flag, then step back into the safe area before continuing.
- Repeat the test at a minimum of four sections of the boundary when following the compact/rechargeable setup instructions.
- Also test every important side of the yard, especially near roads, driveways, slopes, metal structures, appliances, and property edges.
A single successful test is not enough. The boundary may not be perfectly uniform, and the dog’s collar position changes while the dog moves. If the signal appears inconsistent, test again before fitting the collar for training.
Free tools Windows power users keep installed
One-click scans. No signup required.
How far apart do PetSafe fence flags go?
PetSafe fence flags go approximately 5 feet apart on the rechargeable Stay & Play instructions and several replaceable-battery instructions, while the compact-model instructions specify approximately 10-foot spacing. Use the flag interval in the manual for the exact model rather than treating 5 or 10 feet as universal.
Place the first flag where the collar first beeps as you approach the boundary at the dog’s neck height. Step back into the safe area, move along the planned boundary, and repeat the test-and-flag process. Flags are visual training markers; flags alone do not prove that the electronic boundary is correctly positioned.
If the boundary fluctuates by more than a few feet, PetSafe recommends investigating interference and suggests moving flags inward by 5% to account for normal fluctuation. Do not use that adjustment to conceal a major signal problem. First check the transmitter position, nearby electronics, metal objects, appliances, terrain, and changed settings.
How do you fit a PetSafe wireless fence collar?
Turn the collar off before fitting it. Center the electronic portion on the front of the dog’s neck, position both contact points against suitable skin contact, and tighten the strap so it is snug without being uncomfortably tight. PetSafe’s instructions state that one finger should fit behind the contact points.
- Keep the electronic section centered rather than shifted to the side.
- Use longer compatible contact probes for thick or long fur when the model supplies them.
- Check that both contact points can make appropriate skin contact.
- Inspect the fit and probe tightness periodically, especially during a long training period.
- Never assume that a loose collar will provide reliable correction.
A collar that is too loose may fail to make contact or may move away from the dog’s neck. A collar that is too tight can cause discomfort. If the dog develops irritation or the fit cannot be made safely, stop and seek advice from a qualified professional rather than tightening the collar further.
How long does it take to train a dog on a wireless fence?
Training a dog on a wireless fence takes at least 14 days according to PetSafe’s current support guidance, and some dogs need longer. Installation may take about one day, but the dog’s training time is separate. PetSafe states, “A minimum of 14 days of training is recommended.”
Rank #4

- For Persistent Pets: Great for the most hard-to-train pets a tone-only mode and 5 levels of static correction adjust based on how your dog responds during training
- Multi-Pet System: Kit includes two collars and boundary flags to get started with your new system. Additional Add-A-Dog collars can be purchased separately.
- Protect A 3/4-Acre Yard: Create a circular boundary that adjusts up to 3/4-acre (22 5 -105 ft in all directions) from where you place the transmitter indoors
- No Digging Or Wire to Bury: Sets up in just a few hours; a wireless boundary allows you to create a secure barrier around your yard to protect your pets without the time or hassle of burying wires
- Most Accurate Wireless Fence: Our proprietary circular boundary gently guides your dog back to the play area
PetSafe’s training guidance describes short, positive, supervised sessions. One official replaceable-battery setup guide specifies 10–15 minutes per session, three times per day, followed by at least five minutes of play. If the dog seems stressed, slow the progression, add training days, and increase play time.
| Training stage | What to do | When to progress |
|---|---|---|
| Boundary awareness | Walk the dog on a leash near the flags and let the dog notice the visual markers. | When the dog can approach the flags calmly and begins responding to the boundary cues |
| Correction introduction | Follow the model’s instructions while supervising closely; keep sessions short and calm. | When the dog understands that the flag area marks the limit |
| Distractions | Introduce ordinary yard distractions gradually while remaining close enough to intervene. | When the dog responds reliably without becoming distressed |
| Supervised freedom | Allow limited off-leash time while watching the dog and checking the collar and boundary. | Only after the dog has demonstrated consistent boundary behavior |
| Ongoing monitoring | Continue checking the collar, battery or charge, flags, transmitter settings, and boundary. | Throughout use; do not treat training as a one-time installation step |
PetSafe’s training article describes the process as needing to be “fun, fair, firm, and consistent.” A dog that repeatedly crosses the boundary, appears frightened, or does not understand the flags should return to supervised training rather than being given more freedom or simply being moved to a higher correction level.
What’s actually slowing this PC down?
Pick the symptom - the matching free tool is one click away.
Why is my PetSafe wireless fence correcting my dog inside the boundary?
A PetSafe wireless fence may correct inside the intended boundary because of normal signal fluctuation, nearby metal, appliances, electronics, changed transmitter settings, sloped terrain, or an improperly positioned collar. PetSafe says, “If you find that your boundary fluctuates more than a few feet, there may be something causing interference with the signal.”
- Confirm that the transmitter has not moved and that its boundary setting has not changed.
- Check for newly operating appliances, electronics, metal objects, vehicles, or structures near the transmitter or boundary.
- Retest the location with the collar held at the dog’s neck height.
- Compare the result at several nearby points to determine whether the issue is local or affects the entire boundary.
- Move the flags inward by 5% if the variation is minor and the model’s instructions support that adjustment.
- Relocate the transmitter or seek model-specific support if the variation is substantial or persists.
Read PetSafe’s official boundary troubleshooting guidance when the collar behaves unexpectedly. The support article is written for the Stay & Play system, so use the exact model’s documentation when controls or symptoms differ.
What should you do if the collar does not activate at the boundary?
If the collar does not activate at the boundary, check the transmitter power and location, collar charge or battery, contact points, collar fit, correction setting, and boundary setting before allowing the dog near the edge.
Make sure both contact points are installed, equally appropriate for the collar, and able to touch the dog’s skin. Confirm that the collar is not loose or rotated. Then test the collar with the supplied test light. Nearby electronics, appliances, metal structures, and a transmitter placed in an unsuitable location can interfere with the signal.
What should you do if your dog crosses the boundary?
If a dog crosses the boundary, bring the dog back under control, check the collar and transmitter, and return to supervised training. Do not assume that increasing the correction level or immediately allowing more freedom will solve the problem.
Best Value

- Safest GPS Dog Fence: Guardian’s AccuGuard tech blends GPS satellite data, real-time motion detection and AI for advanced protection no other GPS dog fence can offer
- New, Innovative Collar Design: Redesigned collar is slim, lightweight and boasts up to 5 days of battery life on a single charge
- No Subscription Fee: No tracking or portability means no subscriptions or fees; if you'd prefer a portable fence with tracking features, check out Guardian GPS + Tracking
- Easy Installation and Setup: Install in as little as 1 hour and design your wireless dog fence from the comfort of your couch in the My PetSafe app (for properties 3/4 acres or larger)
- Choose Between Tone and Vibration Or Static: Rechargeable, waterproof collar lets you choose between tone and vibration or 10 levels of static
Verify the collar fit, battery or charge, correction setting, transmitter setting, and flag position. Retest the boundary at the crossing location and nearby points. Then repeat the training progression for additional days. A wireless fence depends partly on learned behavior, so a functioning collar does not remove the need for training.
What should you do if your dog seems stressed?
If the dog shows stress, stop escalating the session and slow the training schedule. Add training days, keep sessions shorter, increase play time, and maintain close supervision. PetSafe recommends adapting the pace when a pet shows signs of stress. If stress persists or the dog repeatedly crosses the boundary, consult a qualified dog-training professional for individualized help.
Is a PetSafe wireless fence suitable for every yard?
A PetSafe wireless fence is most practical where a circular boundary fits the safe portion of the property and the transmitter can be placed in a suitable indoor, central location. A wireless system may be a poor match for a long, narrow, irregular, steep, metal-obstructed, or road-adjacent yard.
| Decision factor | Wireless system may fit | Consider another containment approach |
|---|---|---|
| Boundary shape | The intended safe area is reasonably circular | The property requires a precise irregular or rectangular line |
| Coverage | The usable circle remains safely inside the property | The maximum circle reaches roads, neighboring land, or hazards |
| Portability | You want a base unit that can be moved when the setup is retested | You need a permanent physical barrier or fixed access control |
| Terrain and interference | The yard has limited metal, appliances, electronics, and severe slopes | Signal testing shows persistent local fluctuation or dead areas |
| Dog behavior | The dog can learn gradual boundary behavior with supervision | The dog repeatedly crosses, panics, or cannot be safely trained with the system |
Final installation check
Before relying on the system, confirm that the boundary has been tested in every important direction, flags are visible and correctly spaced for the model, the collar fits securely, the battery or charge is adequate, the transmitter settings are recorded, and the dog has completed a gradual supervised training program.
PetSafe’s rechargeable-collar setup instructions and replaceable-battery setup instructions should be the final authority when they conflict with general guidance. The exact model manual controls the battery, boundary controls, correction procedure, collar fit details, and flag interval.
Frequently Asked Questions
Is a PetSafe wireless fence a physical fence?
No. A PetSafe wireless fence creates an electronic circular boundary, not a physical obstruction. The dog must be trained to respond to the flags and boundary cues, and the system should not be used for unsupervised containment immediately after installation.
What battery does a PetSafe wireless fence collar use?
The PetSafe RFA-67 battery is specified for compatible replaceable-battery collars, but not every PetSafe wireless fence collar uses that battery. Rechargeable models use a charging adapter, so confirm the exact collar model before buying a replacement.
Quick wins for a faster PC:
Repair Windows errors before they cause bigger problemsFix Now →Fix the driver behind crashes, sound loss and screen glitchesFind Drivers →Clear out junk files and repair common Windows errorsFree Scan →How long does a rechargeable PetSafe fence collar take to charge?
A rechargeable PetSafe collar may take 2–3 hours to charge fully and may last up to three weeks depending on use, according to PetSafe’s support guidance. Actual battery life varies, so check the charge throughout training.
How long does it take to train a dog on a wireless fence?
PetSafe recommends at least 14 days of gradual training. One official setup guide describes 10–15-minute sessions three times per day, followed by at least five minutes of play, but a stressed or unreliable dog may need additional days.
The Bottom Line
A PetSafe wireless fence can be installed in a day, but safe use takes longer: plan the circular signal carefully, test it at multiple points, fit the model-compatible collar correctly, and train the dog under supervision for at least 14 days. Roads, slopes, metal, electronics, signal fluctuation, and poor collar fit all require extra caution.
Quick Recap
Product prices and availability are accurate as of the date/time indicated and are subject to change. Any price and availability information displayed on Amazon at the time of purchase will apply.

