Some links on this page are affiliate links: if you buy through them we may earn a commission, at no extra cost to you.
The short answer: rub a very thin layer of oil over clean, completely dry bare cast iron, wipe away almost all of it, then bake the pan upside down at 450–500°F for one hour. Let it cool in the oven. That is seasoning—not a mysterious coating and not a ritual that must be repeated a fixed number of times.
Seasoning is a baked-on film of polymerized oil. It helps protect iron from moisture and rust and creates a smoother, more water-resistant cooking surface. A new factory-seasoned skillet may already be ready to use; a bare, rusty, stripped, or badly worn pan needs preparation first.
As an Amazon Associate I earn from qualifying purchases.
Recommended Free Tools
First, determine whether your pan needs seasoning
Not every cast-iron pan needs a full oven-seasoning session.
| Pan condition | What to do |
|---|---|
| New Lodge or other factory-seasoned bare cast iron | Rinse, dry thoroughly, add a little cooking oil, and start cooking. A full initial seasoning cycle is optional, not automatically required. |
| Bare or visibly stripped iron | Clean, dry, oil, and complete one or more thin oven-seasoning cycles. |
| Lightly uneven, dull, or patchy seasoning | Keep cooking and maintain it. Variations do not mean the pan is ruined. |
| Rust or flaking residue | Remove the loose material and rust before seasoning. Do not bake seasoning over active rust. |
| Enameled cast iron | Do not season the porcelain-enamel cooking surface. Follow the manufacturer’s care instructions instead. |
This guide applies to uncoated, bare cast iron. Enameled cookware is a different product: its glass-like porcelain surface does not need a seasoning layer and generally handles prolonged acidic cooking better than bare iron.
Popular on Amazon

- Mild and Easy: Grapeseed Oil is at its best in stir-fries and sautés; it doesn't overwhelm other ingredients and lets fresh flavors shine. When grilling or frying, it is a must-have in the pantry.
- Quality You Can Taste: The mainstay of all La Tourangelle’s artisanal oils is premium taste derived from the best quality ingredients. Add the flavor of La Tourangelle to any meal!
- Delicious and Versatile: Our oils make it easy to create distinctive dishes for professional chefs, novice cooks, and foodies. Great for salads, meats, pastas, and more!
- Gourmet and Sustainable: La Tourangelle's natural artisan oils provide the perfect touch to make a delicious breakfast, lunch, or dinner. We are passionate about making high-quality ingredients that are good for the table, community, and planet. Through artisan production methods and nature-friendly tin packaging, we want to empower people to cook like they care.
- Flavors of the World: From Extra Virgin Olive Oil and sustainably produced Grapeseed Oil, to award winning Toasted Sesame Oil, La Tourangelle brings the best oils and flavors from around the world straight to your kitchen.
What seasoning actually is
Seasoning is oil that has been transformed by heat into a hard, thin film on the iron. Heating promotes oxidation and polymerization of oil molecules—especially the unsaturated fatty-acid chains in vegetable oils. The resulting film fills some microscopic surface irregularities and becomes relatively water-repellent.
“The oil bonds to the pan” is a useful beginner-friendly description, but it is an oversimplification of the microscopic chemistry. The practical lesson is straightforward: thin coats that are fully heated work better than thick, wet-looking coats.
The Tool Desk
Outbyte PC Repair FREEClear out junk files and repair common Windows errorsFree Scan →Outbyte Driver Updater FREEScan for outdated or missing drivers - takes under a minuteDriver Scan →How to season a cast-iron pan in the oven
What you need
- A clean bare cast-iron pan
- Canola oil, ordinary vegetable oil, or melted vegetable shortening
- Paper towels or a clean, lint-free cloth
- An oven
- Aluminum foil to catch drips
- Dry oven mitts or a handle holder
1. Wash the pan
Wash the skillet by hand with warm water and mild dish soap. If there is rust, scrub the affected area with steel wool, a rust eraser, or another suitable rust-removal tool until you expose clean iron. Remove loose flakes and residue rather than sealing them under a new layer of oil.
Rust should be removed before the pan is used for cooking. A small amount of dark residue on a towel is not the same thing as visible orange-brown rust, but any actual rust needs attention.
2. Dry it completely
Towel-dry the pan immediately. Then place it over low heat for a few minutes, or put it in a warm oven, to evaporate moisture from the cooking surface, handle, underside, and any rough areas.
This step matters because bare iron can rust quickly when moisture remains on it. Drying is part of the seasoning and maintenance process, not an optional finishing touch.
Quick wins for a faster PC:
Repair Windows errors before they cause bigger problemsFix Now →Fix the driver behind crashes, sound loss and screen glitchesFind Drivers →Clear out junk files and repair common Windows errorsFree Scan →Also popular on Amazon
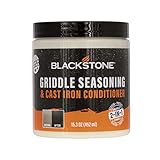
- TLC for your griddle cooktop: All you need to build a slick, easy-release surface that's protected from rust and easy to work with using Blackstone griddle seasoning and cast iron conditioner
- 2 in 1 formula (conditions & protects): Our cast iron seasoning formula creates a nonstick seasoning layer that makes cooking and cleanup of your cooktop easy while also protecting it from rust, moisture and other elements
- Not just for griddles: Season or re-season your cast iron pans as well
- Proprietary Blend: Made of a proprietary blend of palm oil shortening, beeswax, palm oil, canola oil, and soy oil
- A little goes a long way: Just spread a thin layer evenly across the surface and let it burn off. Since only one or two small scoops are needed, each bottle lasts a long time
3. Apply an extremely thin coat of oil
Rub a small amount of oil over the entire pan: the cooking surface, sides, exterior, handle, and underside if you are seasoning the whole piece. Then use a fresh towel to wipe it again—and again—until the surface looks almost dry.
The pan should not look wet or glossy. If oil is visibly pooling or forming shiny patches, there is too much. Excess oil is the most common cause of a sticky, uneven finish.
At this stage, a purpose-made cast iron seasoning oil can make application convenient, but ordinary canola or vegetable oil works well and is usually all you need. The spray is an optional applicator, not a requirement.
4. Bake the pan upside down
Place a sheet of foil on a lower oven rack to catch any drips. Put the pan upside down on the center or upper rack, then bake it at 450–500°F for one hour.
Positioning the pan upside down allows excess oil to run off instead of pooling on the cooking surface. The thin film that remains is what you want.
5. Let it cool in the oven
Turn off the oven and leave the pan inside until it is cool enough to handle. Cooling in the oven reduces the chance of a sudden temperature change and gives the new film time to set.
Use a dry oven mitt or handle holder when removing it. Cast iron retains heat for a long time, including in the handle.
Also popular on Amazon

- YOUR NEW GO-TO SEASONING SPRAY: The Lodge Seasoning Spray is the perfect seasoning spray to maintain your cast iron cookware. It is made of 100% canola oil - no additives or propellants, to protect your cookware and enhance its finish.
- HOW TO CLEAN CAST IRON COOKWARE: Step 1. Wash your cast iron cookware by hand, using a small amount of soap (for stubborn, stuck-on food, simmer water for 3-5 minutes. Use a pan scraper after the pan has cooled. Step 2. Dry promptly and thoroughly with a lint-free cloth or paper towel. Step 3. Rub a light layer of Seasoning Spray onto the surface of your cookware. Use a paper towel to wipe the surface until no oil residue remains.
- FAMILY-OWNED: Lodge is more than just a business; it is a family. The Lodge family founded the company in 1896, and they still own it today. From environmental responsibility to community development, their heads and hearts are rooted in America. Lodge products are made in the USA with non-toxic, PFOA & PTFE free material.
6. Repeat only if the pan needs it
A completely bare or heavily restored pan may benefit from several separate thin cycles. Let each cycle cool, inspect the surface, and repeat only when useful.
There is no universal rule that every pan needs three, five, or any other fixed number of coats. Repeated thick applications can make the finish worse. Once a pan is functional, ordinary cooking with a little oil usually maintains and gradually builds the surface more effectively than repeatedly stripping it back to bare iron.
Which oil should you use?
For home oven seasoning, canola oil and ordinary vegetable oil are practical defaults. They are neutral, inexpensive, widely available, and suitable for the recommended oven temperatures. Melted vegetable shortening is another option.
Oil chemistry does matter: unsaturated oils are chemically reactive during heating and can form the polymerized film used for seasoning. But application technique matters just as much. A well-wiped, thin coat is more reliable than a thick application of a supposedly ideal oil.
Beef tallow, lard, and ghee are not the best primary choices for a pan that will be stored for a while because animal fats can go rancid. They can be used for cooking, provided you wash, dry, and lightly oil the pan afterward. Avoid treating any single oil as universally superior, and do not assume flaxseed oil is automatically the best choice.
How to maintain seasoning after cooking
For most meals, the maintenance routine is simple:
- Let the pan cool enough to handle safely. Do not rush to grab a hot handle.
- Wash it by hand with warm water and mild dish soap. Modern dish soap is acceptable for routine cleaning and does not automatically strip properly established seasoning.
- Scrub stuck food with a nylon brush, pan scraper, or other suitable scrubber.
- Dry immediately. Towel-dry first, then warm the pan briefly if needed to remove residual moisture.
- Apply a very light coat of oil. Wipe until the surface looks nearly dry.
Do not soak bare cast iron or leave it submerged. Do not put it in the dishwasher: prolonged water exposure and dishwasher detergent can remove seasoning and encourage rust.
Also popular on Amazon

- RESTORES & RESEASONS | Includes our Cast Iron Scrub designed to restore & remove stubborn rust spots. Helps to remove burnt & stuck on food spots that develop over time. Made with high quality coconut oil to help season & enhanced with essential oils to eliminate odours.
- CLEANS CAST IRON | Includes our Cast Iron Soap unlike detergent based soaps, this soap is formulated with 100% natural plant-based oils & free of sulfates, phosphates, parabens & petrochemicals! Gentil on cast iron seasoning & on your hands!
- SEASONS & CONDITIONS CAST IRON | Made with FOOD grade, solvent-less, refined coconut oil that is safe for food contact and cast iron surfaces. The result is a premium product that is guaranteed to be made exclusively from coconuts
- ELIMINATES FOOD ODORS | Premium products specially designed to help clean, restore & build and maintain the natural seasoning. Enhanced with a proprietary blend of pure essential oils that help to naturally eliminate food odors, making your kitchenware easier to clean & your food tasting better!
- BACKED BY THE CARON FAMILY GUARANTEE | Our family takes great pride in the products we create & are confident you & your family will enjoy them as much as we do.
Cooking is the most useful long-term maintenance. Meals made with some oil or fat gradually contribute additional thin layers. Preheat gradually, use enough cooking fat to prevent sticking, and avoid treating every uneven patch as a reason to strip and restart.
Acidic foods and cast iron
Tomato-based sauces, lemon, vinegar, and other acidic ingredients can weaken seasoning, especially on a new or lightly seasoned pan. A well-established surface generally tolerates short acidic cooking sessions better, but prolonged acidic simmering is still a poor choice for bare cast iron.
PC Slower Than It Used to Be?
A free scan shows the junk files, broken settings and background clutter dragging Windows down - then fixes them in one click.Free scan · Windows 10 & 11Outdated Drivers Are Slowing You Down
One free scan finds every outdated or missing driver and matches the right update for your exact hardware.Free scan · exact hardware matchFor a long tomato braise or another strongly acidic recipe, use enameled cast iron or a different type of cookware. That is one of the practical differences between bare and enameled cast iron.
Troubleshooting: what went wrong?
| Problem | Likely cause | Fix |
|---|---|---|
| Sticky or tacky surface | Too much oil was left on the pan before baking, or the film did not fully set. | Scrub away the tackiness, wash and dry the pan, then reseason with a much thinner coat. Wipe until it looks nearly dry. |
| Flaking or black chips | One or more layers were too thick, loose, or poorly adhered. | Remove loose material with a nylon brush, salt, or an appropriate scrubber. Rinse, dry, oil lightly, and reseason if necessary. |
| Orange-brown rust | Moisture remained on the iron, or the pan was soaked or stored damp. | Remove all visible rust with steel wool, a rust eraser, or an appropriate tool. Wash, dry, oil, and reseason before cooking. |
| Food sticks | The pan may be under-seasoned, insufficiently preheated, or the food may have been turned too soon. | Preheat gradually, use a little cooking oil, and wait for food to release naturally before turning it. Continue cooking with the pan rather than stripping it automatically. |
| Dark residue on a towel | Normal loose residue from new cookware, high heat, or acidic food can sometimes transfer during cleaning. | Wash and dry normally. It is not automatically a sign of failure, but distinguish it from visible rust, which must be removed. |
If rust is widespread, the seasoning is extensively flaking, or the surface needs substantial restoration, a cast iron rust eraser or suitable scrubber may help with surface rust. A pan scraper is useful for stuck food; neither accessory is required for routine care.
Independent reader supportYour contribution helps us test, update, and keep practical guides available for everyone.Safety rules worth remembering
- Handle heat safely: cast iron retains heat and can cause severe burns. Use a dry oven mitt or handle holder.
- Avoid thermal shock: do not pour cold water into extremely hot cookware. A sudden temperature change can warp or crack iron.
- Never use a dishwasher: it can remove seasoning and promote rust.
- Remove rust before cooking: do not rely on a new oil coat to make loose rust acceptable.
- Inspect serious damage: persistent structural cracks, a badly damaged cooking surface, or rust that cannot be fully removed may make the pan unsuitable for continued food use.
The simplest reliable routine
For most bare cast-iron pans, the winning routine is not complicated:
Free tools Windows power users keep installed
One-click scans. No signup required.
Cook with it, wash it by hand, dry it promptly, and wipe on a nearly invisible layer of oil.
Use the oven method when the pan is bare, rusty after restoration, or genuinely in need of rebuilding. Use thin coats, bake upside down, and repeat only when the condition of the pan calls for it. A few dull patches or a little dark residue do not require dramatic intervention.
Also popular on Amazon

- HOW TO USE: The key to naturally nonstick cast iron cookware? Cook often, and apply Seasoning Oil every time you clean your pan. Clean your cast iron with soap and a brush, then use a chain mail scrubber to smooth out existing seasoning layers. Apply a dab of Seasoning Oil and spread it thinly over the surface with a paper towel or clean rag. Wipe away excess oil to leave a dry, matte finish.
- HOW IT WORKS: We use organic oils high in polyunsaturated fats because these oils polymerize easily—creating a hard, durable, nonstick layer that improves with every use. Each time you heat your cast iron, the oil bonds to the surface, strengthening your seasoning over time.
- WHY IT MATTERS: Our cast iron seasoning oil and conditioner blend naturally restores, protects, and maintains your cookware. It builds a smooth, nonstick surface without synthetic coatings—so your cast iron performs beautifully for decades..
- INGREDIENTS: Organic grapeseed oil, organic sunflower oil, and beeswax. For best results, use within one year or refrigerate to extend shelf life.
Frequently Asked Questions
Do I need to season a brand-new cast-iron pan?
Not necessarily. Many new bare-cast-iron skillets, including Lodge cookware, are factory-seasoned and ready to use after rinsing and thorough drying. You can apply a light coat of cooking oil before the first meal, but a full oven cycle is optional unless the pan is bare or needs restoration.
Can I use dish soap on cast iron?
Yes. Mild modern dish soap is suitable for routine hand-washing and does not automatically strip established seasoning. Avoid soaking the pan and dry it immediately after washing.
Why is my seasoned pan sticky?
Usually, too much oil was left on the surface before baking. Scrub, wash, dry, and reseason with a much thinner coat. The pan should look almost dry rather than wet or glossy.
How often should I season cast iron in the oven?
There is no fixed schedule. Use the oven method when the pan is bare, heavily restored, rusty after cleaning, or losing substantial seasoning. For a functional pan, regular cooking, hand-washing, prompt drying, and light oiling are usually enough.
Can I cook tomatoes in cast iron?
Short acidic cooking sessions are generally more tolerable once seasoning is well established, but prolonged simmering of tomato-based or strongly acidic foods can weaken seasoning. Use enameled cast iron or another cookware type for long acidic recipes.
The Bottom Line
Seasoning cast iron means creating and maintaining a thin, heat-cured oil film. Clean the pan, dry it completely, wipe on an almost invisible layer of canola or vegetable oil, bake it upside down at 450–500°F for one hour, and cool it in the oven. After that, ordinary cooking and prompt, careful maintenance do most of the work.
Do these 3 things before closing this tab:
1Clear out junk files and repair common Windows errors2Scan for outdated or missing drivers - takes under a minute3Repair Windows errors before they cause bigger problemsQuick Recap
Product prices and availability are accurate as of the date/time indicated and are subject to change. Any price and availability information displayed on Amazon at the time of purchase will apply.

