Do these 3 things before closing this tab:
1Scan for outdated or missing drivers - takes under a minute2Repair Windows errors before they cause bigger problems3Fix the driver behind crashes, sound loss and screen glitchesFor a leaking glass-aquarium seam, first protect the room and move the fish to a suitable temporary container. Then drain and clean the tank, remove only the old interior silicone bead, and reseal with a product explicitly rated for aquarium use. A substantial crack through a glass pane is a different problem: silicone is not a structural repair for cracked glass.
Before you start: confirm what is leaking
A wet tank can come from condensation, a fitting, plumbing, a seam, or cracked glass. Find the source before choosing a repair. If water is actively escaping, protect the floor and nearby belongings, and lower the water below the leak while you prepare a safe temporary home for the livestock.
-
1. Trace the leak
Dry the outside of the aquarium, then run a paper towel along the seams and around fittings. Note where it first becomes wet. Loctite recommends this kind of check to help locate a leak; moisture at a fitting or hose connection calls for a different repair than a failed glass seam. Loctite’s aquarium resealing guide.
-
2. Reduce the immediate water risk
Move water below the suspected leak if you can do so safely, and protect the surrounding area from further water damage. Do not rely on an exterior smear of sealant as a permanent fix while the aquarium remains full; a proper seam reseal requires draining the tank and preparing the bonding surfaces.
The Tool Desk
Outbyte Driver Updater FREEFix the driver behind crashes, sound loss and screen glitchesFind Drivers →Outbyte PC Repair FREERepair Windows errors before they cause bigger problemsFix Now →Special offer. See more information about Outbyte and uninstall instructions. Please review EULA and Privacy policy.#1 Best Overall
Sale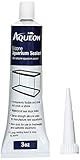 Aqueon Silicone Sealant Clear 3 Ounces
- Waterproof seal stops leaks
- Permanently flexible; does not crack or shrink
- Easy to apply long-lasting bond
- 100% Non-toxic silicone for use on freshwater or saltwater aquariums
- Clear silicone color - also available in black silicone
-
3. Move fish and other livestock
Transfer fish and other aquatic life to an appropriate temporary container with suitable water and care. Keep them out of the work area and away from uncured sealant. Loctite’s guide lists a container for holding fish among the repair materials. Loctite’s materials and resealing instructions.
-
4. Decide whether this is a seam repair
Inspect the glass around the leak. If a pane has a substantial crack, do not treat it as a failed silicone bead: seek a professional assessment or arrange for the pane or tank to be replaced. Loctite advises professional input for substantially cracked glass and notes that a new pane may be needed. Silicone seam repair is not a guarantee against glass failure. Loctite’s guidance on cracked glass.
Rank #2
 SELSIL Aquarium Silicone Clear Sealant - High Elasticity, Safe for Fish, Solvent-Free, Ozone-Resistant, Transparent 10.14 Fl Oz, 1 Pack
- SAFE FOR THE FISH: Selsil Aquarium Silicone is a silicone sealant used in glass bonding work. It does not contain chemicals or solvents that are not friendly to your fish or other organisms in the aquarium. This product is made from 100% silicone polymer, is used in aquarium manufacturing, and conforms with the ISO 11600 –F&G–25 LM standards.
- ADHESIVE FOR VARIOUS NON-POROUS SURFACES: This transparent silicone sealant offers an excellent grip on the glass without using an additional primer. It adheres well to acetoxy system curing glass and many non-porous surfaces. This is a silicone adhesive that also offers insulation for many kinds of materials like aluminum, glazed ceramic tiles, and glass. You may use this product for freshwater and saltwater aquariums.
- STRONG BOND: Highly elastic and flexible, this adhesive putty offers a quality adhesion effect. It is also resistant to ozone, ultra-violet radiation, and extreme temperatures. It does not lose its elasticity at high and low temperatures and it will not crack, pull, or discolor.
- FAST CURING: This aquarium glue offers quick curing time. Apply the aquarium silicone on the surfaces you need to work on and wait only a few hours for it to cure. It is, however, best to wait up to 24 hours if you want it to completely cure. Its application temperature should be between + 5 ° C and +40 ° C (41.0 ° F and 104 ° F). This product conforms to ISO 11600–F & G – 25 LM.
- MULTI-PURPOSE: This is not just a sealant for your making or repairing aquariums. You may also use this silicone glue for other applications like sealing seams, stopping leaks, or securing decorations in the aquarium. As long as the surface you will work on is non-porous, this clear silicone caulk will do its job well.
Prepare the empty aquarium
-
5. Drain and clean the tank
For a normal interior seam reseal, fully drain the aquarium and clean the work area. Do not apply new sealant over water, dirt, or a wet surface. Both Loctite and iFixit call for draining and cleaning before resealing. iFixit’s aquarium resealing guide.
-
6. Inspect every seam
While the aquarium is empty, check the other seams for peeling, gaps, or visible damage. Loctite recommends examining all joints rather than focusing only on the spot where water appeared. If you find damage beyond a localized interior bead, get an informed assessment before putting the tank back into service. Loctite’s resealing guide.
Free tools Windows power users keep installed
One-click scans. No signup required.
Special offer. See more information about Outbyte and uninstall instructions. Please review EULA and Privacy policy.Rank #3
Sale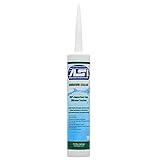 Clear Aquarium Silicone Sealant - 10.2 Fluid oz Cartridge
- This high modulus component RTV Silicone Sealant forms strong cohesive bonds to glass without the need of primers
- The bonds are unaffected by continuous immersion in water and, when fully cured, is non-toxic to fish
- ASI Aquarium Silicone Sealant is a non-slump sealant and can be applied to vertical surfaces without flowing or sagging
- Can be applied to surface temperatures from -18°C to +50°C (0°F to +120°F) and after curing, withstands constant operating temperatures from -57°C to +233°C (-70° F to 450°F)
- Formulated for use with fresh and salt-water aquariums or a Vivarium. This product does not have an expiry date printed on it, only batch id is there on the product.
-
7. Gather materials and choose the sealant
Have an aquarium-rated sealant, a single-edge scraper or straight razor, a clean cloth, and the temporary livestock container ready. Read the selected product’s directions before opening it. “Silicone” alone is not enough: confirm the product is explicitly intended for aquarium sealing or repair, suitable for your freshwater or saltwater setup, and rated for continuous submersion where applicable. Check any tank-size limits, preparation requirements, safety directions, and cure instructions.
Product Claims stated by manufacturer Important qualifications Aqueon Aquarium Silicone Sealant Aqueon describes it as non-toxic silicone for freshwater and saltwater aquariums; the page lists a 3 oz clear version, SKU 100165003, and also identifies a black option. Check the product page and label for current directions and any cure or use limitations. Aqueon product page. Seachem 100% RTV Aquarium Sealant Seachem describes it as a sealant for aquarium sealing and repair, suitable for freshwater and saltwater aquatic life, in 85 g / 3 oz clear or black. Uncured product can irritate skin and eyes; inhalation may cause drowsiness or dizziness. Use in a well-ventilated place and follow the product safety directions. Seachem product and safety information. Loctite Clear Silicone Loctite’s reseal guide promotes this product for tanks up to 30 gallons. The 30-gallon figure is Loctite’s stated limit for its product, not a universal tank-size rule. Check current packaging and directions. Loctite reseal instructions. EVERBUILD AquaMate Sika lists a 295 ml cartridge, describes it as formulated for aquarium manufacture and suitable for continuous immersion, and gives a curing rate of 3 mm per 24 hours. Sika says surfaces must be clean, dry, dust-free, and free of old sealant. The stated cure rate is specific to this product and is not a universal full-cure or livestock-return time. Availability may depend on region. Sika’s EVERBUILD AquaMate page. -
8. Remove the old interior bead carefully
Use a sharp blade or scraper to lift and remove the old interior silicone bead. Work slowly and keep the blade away from your hands. Do not cut into the silicone bond between the glass panes: it is part of the tank’s structure, and damaging it can weaken the aquarium. iFixit specifically warns about both cuts and damage to this structural seal. iFixit’s blade-safety guidance.
Rank #4
 1 Pack Aquarium Silicone Clear Sealant, High Elasticity, Safe for Fish,Fast Curing Waterproof Aquarium Safe Silicone,10 Fl Oz Non-Toxic Fish Tank Safe Sealant,Strong Adhesion
- Fish Safety:Aquarium sealant clear is a non-toxic, solvent-free acid cured silicone sealant, 100% Silicone, which is friendly to underwater organisms, protects fish safety, and is your best repair choice.
- Quick Curing: This waterproof silicone sealant can cure quickly. Aquarium silicone sealant onto the surface that needs to be treated, and the surface will dry within 30 minutes. However, if you want to fully solidify, it's best to wait for 48 hours. Cure time will increase with lower temperature, humidity, and large bead size. The optimal surface temperature for application is+41 ° F -+104 ° F (+5 ° C -+40 ° C).
- Strong Adhesion: Aquarium silicone solidifies under the action of atmospheric moisture, forming a permanently soft silicone rubber with characteristics such as fast curing, high strength, good toughness, and compatibility with most building materials. Cured silicone rubber can maintain excellent performance within the temperature range of -50 ° C to 100 ° C.
- All Day Elasticity: Aquarium silicone sealant maintains its integrity, does not shrink, crack, or discolor, whether in tropical warm or cold water environments, ensuring that the waterproof seal can withstand temperature.
- Multipurpose: This aquarium silicone can be used not only for aquariums, but also for other purposes such as windows, door frames, kitchen sinks, bathrooms, cars, boats, pipes, etc.
-
9. Prepare clean bonding surfaces
Remove old sealant residue and prepare the glass exactly as the chosen product requires. Sika’s AquaMate instructions say surfaces must be clean, dry, and dust-free, and old sealant must be removed. Do not assume a solvent is safe for every aquarium material or sealant; use one only if the product directions and material compatibility support it. Sika’s surface-preparation instructions.
Apply the new seal and let it cure
-
10. Apply the new bead as directed
Follow the selected product’s application directions and cover the intended joint without gaps or trapped air. Loctite’s guide describes applying sealant on both the outside and inside of the joint and repeating for other joints; use the instructions for your specific product rather than assuming every aquarium or repair requires identical bead dimensions. Loctite’s bead-application instructions.
Quick wins for a faster PC:
Scan for outdated or missing drivers - takes under a minuteDriver Scan →Clear out junk files and repair common Windows errorsFree Scan →Special offer. See more information about Outbyte and uninstall instructions. Please review EULA and Privacy policy.Best Value
 4 Pack Aquarium Silicone Clear Sealant, High Elasticity, Safe for Fish,Fast Curing Waterproof Aquarium Safe Silicone,10 Fl Oz Non-Toxic Fish Tank Safe Sealant,Strong Adhesion
- Fish Safety:Aquarium sealant clear is a non-toxic, solvent-free acid cured silicone sealant, 100% Silicone, which is friendly to underwater organisms, protects fish safety, and is your best repair choice.
- Quick Curing: This waterproof silicone sealant can cure quickly. Aquarium silicone sealant onto the surface that needs to be treated, and the surface will dry within 30 minutes. However, if you want to fully solidify, it's best to wait for 48 hours. Cure time will increase with lower temperature, humidity, and large bead size. The optimal surface temperature for application is+41 ° F -+104 ° F (+5 ° C -+40 ° C).
- Strong Adhesion: Aquarium silicone solidifies under the action of atmospheric moisture, forming a permanently soft silicone rubber with characteristics such as fast curing, high strength, good toughness, and compatibility with most building materials. Cured silicone rubber can maintain excellent performance within the temperature range of -50 ° C to 100 ° C.
- All Day Elasticity: Aquarium silicone sealant maintains its integrity, does not shrink, crack, or discolor, whether in tropical warm or cold water environments, ensuring that the waterproof seal can withstand temperature.
- Multipurpose: This aquarium silicone can be used not only for aquariums, but also for other purposes such as windows, door frames, kitchen sinks, bathrooms, cars, boats, pipes, etc.
-
11. Wait for the product’s full cure
Do not refill on a generic timeline. The required wait depends on the selected product and its instructions, including the amount of sealant applied. Sika lists AquaMate’s curing rate as 3 mm per 24 hours; that rate is specific to AquaMate and does not by itself establish a full-cure time or a safe time to return livestock. Keep the room ventilated and keep animals away from uncured sealant, following the product’s label or technical sheet.
-
12. Refill gradually and check for leaks
Once the product’s instructions say the sealant is fully cured, refill slowly in stages and inspect the repaired seam as the water level rises. Loctite recommends gradual filling and checking seam security. Keep livestock in the temporary container until the refill inspection is satisfactory and the aquarium is ready for use under the sealant’s directions. Loctite’s refill and inspection advice.
Quick Recap
Bestseller No. 2
Product prices and availability are accurate as of the date/time indicated and are subject to change. Any price and availability information displayed on Amazon at the time of purchase will apply.




