
Crashes, No Sound, or Screen Glitches?
Random freezes, missing sound and display glitches usually trace back to one bad driver. Find and replace yours safely.Free scan · under a minuteWindows Errors? Fix Them Before They Spread
Repair common Windows errors and clear accumulated junk for a smoother, more stable PC - no reinstall needed.Free scan · no reinstallShower mold can usually be cleaned from hard surfaces like glazed tile, glass, fiberglass, and sealed grout. But if it keeps coming back in the same spot, the problem is not the cleaner. It is moisture, soap scum, failed caulk, weak ventilation, or water getting behind the shower assembly.
The short version: clean the surface, remove organic residue, dry the shower completely, replace failed caulk instead of trying to bleach it forever, and make sure the bathroom fan actually exhausts outdoors. If the affected area is larger than about 10 square feet, follows a leak, involves drywall or backer board, or returns within a few weeks, treat it as a moisture intrusion problem and bring in a qualified pro.
As an Amazon Associate I earn from qualifying purchases.
On our job sites, we look at shower mold the same way we look at any water-related defect: first find the source, then repair the assembly, then clean what can be cleaned. Spraying mold without fixing the moisture condition is a temporary cosmetic repair.
Start With The Type Of Shower Mold Problem You Have
Before you pick up a brush, decide which category you are dealing with. The right fix depends on where the mold is growing and whether it is only on the surface.
#1 Best Overall
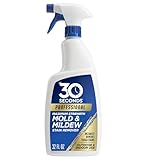
- BRIGHTER RESULTS INSTANTLY: Noticeably brightens indoor and outdoor surfaces, removing black mold and mildew stains as you watch, with no scrubbing or pressure washing required for fast, visible results
- NO SCRUBBING REQUIRED: Avoid the hassle and backbreaking work of scrubbing tough stains; the PRO formula lifts mold and mildew stains on contact so you simply apply, watch and rinse where needed
- 2X STRONGER FORMULA: The PRO formula is 2X stronger than the standard 30 SECONDS Outdoor Cleaner, made for your toughest black mold and mildew stains and messes on both indoor and outdoor surfaces
- OUTDOOR AND INDOOR USE: Use on siding, fences, decks, concrete floors, brick walls, drywall, wood, kitchen surfaces, bathroom tile and grout, bathtub soap scum and showers where mold and mildew can grow
- REMOVES BLACK MOLD STAINS & MORE: Targets stubborn black mold and mildew stains on a wide range of surfaces, giving a brighter, cleaner result indoors and outdoors without scrubbing or pressure washing
Surface mold on tile, glass, fiberglass, or sealed grout
This is the most common homeowner cleanup. You see black, gray, pink, green, or brown growth on grout lines, corners, shower doors, tracks, tile faces, or the lower walls. It usually grows on soap scum, body oils, shampoo residue, and mineral film. If the tile is sound, the grout is intact, and the area is small, this is usually a DIY cleaning job.
Mold embedded in caulk
If the black staining is inside the caulk bead, especially where the tub or shower pan meets the wall, cleaning will not reliably remove it. Silicone and acrylic caulk can separate from the tile, trap water behind the bead, and grow mold from the back side. In that case, remove the caulk, dry the joint, and recaulk with 100% silicone kitchen and bath sealant.
Recurring mold in the same corner
Mold that returns every few weeks after cleaning is a building clue. Common causes include a fan that does not move enough air, a duct that terminates in an attic, cold wall surfaces, missing insulation, a plumbing leak at the valve wall, a shower door leak, cracked grout, or a failed pan liner.
Suspected hidden mold behind tile or wallboard
If tile is loose, grout is powdery, drywall is soft, paint is bubbling, baseboards are swollen, flooring is cupping, or there is a musty odor outside the shower, stop treating it as a simple cleaning job. Mold inside porous materials is harder to clean fully, and the repair may require demolition, drying, waterproofing, and rebuilding.
Safety First: What To Wear And What Not To Mix
For a small shower cleanup, use basic protection. Wear nitrile or rubber gloves, eye protection, and old clothing. If you are sensitive to mold, have asthma, are immunocompromised, or expect heavy scrubbing, use a properly fitted N95 or P100 respirator. A basic DIY supply run usually costs about $15 to $75 for gloves, eye protection, brushes, microfiber cloths, detergent, cleaner, and caulk tools. Add about $25 to $60 for a basic respirator setup, depending on what you buy.
Ventilate the room while cleaning. Run the exhaust fan, open a window if you have one, and keep the bathroom door open when practical. Never mix bleach with ammonia, vinegar, acids, toilet bowl cleaner, or other cleaning products. That is not a fine-print warning; it can create dangerous gas.
If you choose bleach, use no more than 1 cup of household bleach per 1 gallon of water. More is not better. Bleach can lighten staining, but it is not a substitute for scrubbing, rinsing, and drying. Detergent and water are often enough for hard surfaces. Hydrogen peroxide or a bathroom mold cleaner can also be useful, but always follow the product label and test delicate surfaces first.
Free tools Windows power users keep installed
One-click scans. No signup required.
Be careful with natural stone. Marble, limestone, travertine, and some cement-based surfaces can be damaged by acidic cleaners such as vinegar. When we see stone showers, we avoid generic bathroom cleaner assumptions and use products compatible with the stone and sealer.
How To Remove Mold From Shower Tile, Grout, Glass, And Fiberglass
This process works for small areas of surface mold on hard bathroom materials. Plan on 30 to 90 minutes of active work for a typical shower, plus drying time.
1. Remove bottles, mats, and loose items
Take everything out of the shower. Mold often hides under shampoo bottles, in suction cups, behind caddies, along door tracks, and under non-slip mats. Wash or replace anything with visible growth. If a bath mat smells musty after washing, replace it.
2. Clean soap scum before disinfecting
Mold feeds on moisture and organic residue. In showers, that residue is often soap scum and biofilm. Scrub the area first with warm water and detergent or a non-abrasive bathroom cleaner. Use a nylon brush for grout lines and corners. Do not use a wire brush on tile or grout because it can scratch finishes and damage grout.
3. Apply the mold cleaner
After the surface film is removed, apply your cleaner. For many hard surfaces, detergent and water followed by thorough drying is enough. If you use a disinfecting solution, keep the room ventilated and do not mix products. Let the cleaner dwell for the label-recommended time, usually 5 to 10 minutes for many bathroom products, then scrub again.
4. Rinse and dry completely
Rinse with clean water. Then dry the shower with microfiber towels or a squeegee. This step matters. Leaving cleaner and rinse water sitting in corners keeps the moisture cycle going.
5. Check whether staining remains
Some black or orange marks are stains, not active growth. If the surface is clean, dry, intact, and odor-free, a remaining stain in old grout may be cosmetic. If the grout is cracked, missing, soft, or powdery, the repair is not more cleaner. It is grout repair or shower rebuilding, depending on what is behind it.
How To Remove Moldy Shower Caulk The Right Way
Moldy caulk is where many DIY jobs fail. Once growth is behind or inside the bead, surface cleaning only improves the look for a short time. Our crews remove failed caulk completely because a new bead over old caulk traps moisture and fails early.
Recommended Free Tools
Tools and materials
You will need a plastic scraper or caulk removal tool, utility knife, needle-nose pliers, mineral spirits or manufacturer-approved residue remover, rubbing alcohol if allowed by the sealant instructions, painter’s tape, 100% silicone kitchen and bath sealant, a caulk gun, gloves, and towels. For one shower, materials commonly land in the $20 to $60 range. Professional tub or shower recaulking in 2026 commonly runs about $105 to $290, depending on access, old caulk removal, joint condition, and local labor rates.
Step-by-step recaulking
Cut along the top and bottom edges of the old caulk bead. Pull out as much as possible in long strips. Scrape residue carefully without gouging the tub, shower pan, tile, or surround. Clean the joint with a compatible cleaner and let it dry thoroughly. If water has been trapped behind the bead, that may mean waiting 24 to 48 hours with ventilation before applying new sealant.
Use 100% silicone labeled for kitchen and bath use. Apply a steady bead, tool it smooth, and remove painter’s tape while the silicone is still workable. Follow the manufacturer’s cure time before using the shower. Many silicones need about 24 hours before water exposure, but some products require longer. Do not rush this step; uncured caulk can wash out, wrinkle, or lose adhesion.
When Grout Cleaning Is Not Enough
Grout is often misunderstood. Tile and grout are not the waterproofing system. Water can pass through grout and reach the materials behind it. A properly built shower relies on a waterproofing membrane, correct slope, sealed penetrations, sound movement joints, and maintained caulk or sealant at changes of plane.
Do these 3 things before closing this tab:
1Clear out junk files and repair common Windows errors2Fix the driver behind crashes, sound loss and screen glitches3Repair Windows errors before they cause bigger problemsIf the grout is only stained, cleaning may be enough. If grout is cracked, missing, loose, powdery, or repeatedly darkens after showers, water may be getting into the assembly. Regrouting can help when the tile is sound and the waterproofing behind it is intact. It will not fix a failed pan liner, missing membrane, moving substrate, or rotten backer board.
Professional shower regrouting in 2026 commonly costs about $600 to $2,500, or about $15.84 to $34.75 per square foot depending on tile size, grout type, removal depth, access, and local labor. Small touchups cost less, but full shower regrouting is labor-heavy because old grout must be removed without chipping tile.
If tiles are loose, walls flex, the curb is swollen, or mold appears outside the shower footprint, regrouting is probably too small a repair. At that point, a contractor should inspect the shower pan, curb, valve wall, waterproofing membrane, drain connection, and adjacent framing.
Stop Shower Mold From Coming Back
The permanent fix is moisture control. Mold needs moisture and residue. Remove both consistently and the shower becomes a much harder place for mold to grow.
The Tool Desk
Outbyte PC Repair FREERepair Windows errors before they cause bigger problemsFix Now →Outbyte Driver Updater FREEScan for outdated or missing drivers - takes under a minuteDriver Scan →Use the exhaust fan long enough
Run the bath fan during the shower and for at least 20 minutes afterward. A timer switch or humidity-sensing control helps because most people turn the fan off too soon. For bathrooms up to 100 square feet, a common sizing rule is about 1 CFM per square foot. A 50-square-foot bathroom generally needs around a 50 CFM fan as a minimum, and larger or high-use bathrooms may need more.
Code provisions commonly use 50 CFM intermittent or 20 CFM continuous local mechanical exhaust where mechanical bathroom ventilation is used. Just as important, the exhaust must terminate outdoors. It should not dump into an attic, soffit cavity, crawlspace, or wall void. We still see older houses where a bath fan pushes moist air into the attic. That can move the mold problem from the shower to the roof sheathing.
Do not trust the fan box rating by itself
A fan rated at 80 CFM on the box may deliver much less after a long duct run, undersized duct, crushed flex duct, multiple elbows, a stuck backdraft damper, or a restrictive exterior cap. A tissue held to the grille is only a rough homeowner screen. If mold keeps coming back, have the fan airflow, duct size, duct route, termination, damper, and exterior cap inspected.
Bathroom fan installation in 2026 averages roughly $360 to $396 nationally, with common ranges around $120 to $900. Costs rise when the job needs new ducting, a roof or wall penetration, electrical work, a timer or humidity sensor, difficult attic access, drywall repair, or a permit.
Quick wins for a faster PC:
Fix the driver behind crashes, sound loss and screen glitchesFind Drivers →Clear out junk files and repair common Windows errorsFree Scan →Dry the shower after every use
Use a squeegee on glass and tile. Wipe ledges, niches, corners, and the caulk line where the pan or tub meets the wall. This takes about 60 seconds and prevents hours of cleaning later. Leave the shower door or curtain open so air reaches the wet surfaces.
Rank #2

- KILLS MOLD: EPA-registered formula kills mold and helps control mold and mildew on hard, nonporous surfaces when used as directed
- CLEANS AND DISINFECTS: Ready-to-use disinfectant cleaner provides non-acid cleaning performance while disinfecting treated hard, nonporous surfaces
- INHIBITS MILDEW GROWTH: Helps inhibit the growth of mold and mildew and the odors they cause when applied according to label directions.
- BLEACH-FREE FORMULA: Bleach-free cleaner deodorizes treated surfaces and leaves behind a fresh scent
- READY-TO-USE SPRAY: 32 fl oz trigger bottle is designed for household, commercial and industrial cleaning applications
Keep indoor humidity under control
A practical target is below 60% relative humidity, with 30% to 50% ideal where climate and comfort allow. Air conditioning, dehumidification, and ventilation all help. In humid regions, a bathroom fan alone may not solve the problem if the house itself stays damp.
Clean weekly before residue builds up
A weekly wipe-down with a bathroom-safe cleaner keeps soap scum from becoming a food source. Pay attention to shower door tracks, bottle ledges, grout lines near the floor, and the underside of built-in seats. Those are common wet spots.
When Shower Mold Is A Construction Problem
Recurring shower mold can be a symptom of a failed building assembly. This is where a construction mindset matters.
What’s actually slowing this PC down?
Pick the symptom - the matching free tool is one click away.
At changes of plane, such as wall-to-wall corners and wall-to-pan joints, grout often cracks because the surfaces move differently. Those joints should typically be sealed with flexible sealant, not rigid grout. If the sealant fails, water can get behind tile and stay there.
At the valve wall, small plumbing leaks can run behind escutcheon plates and into the wall cavity. Around niches and benches, poor waterproofing or flat surfaces without proper slope can hold water. At curbs, screws through waterproofing, poorly wrapped membranes, or failed corners can send water into framing. At the shower pan, a failed liner, clogged weep holes, incorrect slope, or bad drain connection can keep the mortar bed saturated.
Backer board is another common misconception. Cement board is not damaged by water the same way drywall is, but it is not a waterproofing membrane. A shower needs a properly detailed waterproofing layer behind or on the face of the backer board, depending on the system used. Penetrations, seams, corners, niches, benches, and curbs are where failures usually start.
If mold appears on the ceiling above the shower, look at ventilation and condensation first. If it appears at the baseboard outside the shower, look at the pan, curb, shower door, and adjacent flooring. If it appears on the wall behind the valve, look at plumbing and waterproofing. Repeated mold is information. Use it to find the water path.
DIY Vs Professional Help: A Practical Decision Guide
Small, surface-level shower mold is often a reasonable DIY project. Larger, recurring, or hidden mold needs a different level of control, especially when demolition or containment may be involved.
| Situation | Best Next Step | Typical 2026 Cost |
|---|---|---|
| Light mold on tile, glass, fiberglass, or sealed grout under 10 sq. ft. | DIY clean with detergent, scrubbing, ventilation, and full drying | About $15-$75 for supplies; add $25-$60 for respirator setup |
| Mold embedded in caulk but no wall damage | Remove and replace all failed caulk | DIY about $20-$60; pro recaulking about $105-$290 |
| Stained or deteriorated grout with sound tile | Clean, then regrout if cracked, missing, or powdery | Pro regrouting commonly $600-$2,500 or $15.84-$34.75 per sq. ft. |
| Bathroom fan missing, weak, noisy, or vented incorrectly | Install or correct mechanical exhaust to outdoors | Usually $120-$900; national averages around $360-$396 |
| Recurring mold, musty odor, soft drywall, loose tile, or leak history | Inspect for hidden moisture and repair the source before cleanup | Bathroom work often $500-$2,000; broader remediation averages $2,300-$2,400 |
| More than about 10 sq. ft. of mold or contamination inside materials | Hire a remediation professional with containment and moisture correction | Common ranges around $1,125-$3,750; extensive jobs can reach $10,000-$30,000+ |
The 10-square-foot threshold is a practical dividing line for homeowners. It is about a 3-foot by 3-foot area. Smaller areas on hard surfaces can often be cleaned carefully. Larger areas, hidden damage, or contamination after a leak call for more caution, containment, personal protective equipment, and professional judgment.
What A Good Mold Remediation Contractor Should Do
A good mold contractor does more than spray a chemical. The professional standard of care is based on source removal, moisture correction, containment when needed, HEPA filtration or vacuuming, appropriate PPE, and post-remediation verification. The current industry reference is ANSI/IICRC S520-2024.
Ask for a written scope. It should identify the moisture source, the containment plan, what materials will be cleaned or removed, how dust will be controlled, how the area will be dried, and what verification will be done before rebuild. For a bathroom, the scope may also need to include a plumber, tile contractor, drywall repair, fan replacement, or shower reconstruction.
Check insurance, local licensing requirements, and experience with bathrooms specifically. Shower work is not just mold work. It touches waterproofing, plumbing, tile, ventilation, and sometimes framing. A contractor who cannot explain how the water is getting there is not ready to promise the mold will stay gone.
Permits, Codes, And Bathroom Fan Details
Cleaning mold does not require a permit. Recaulking usually does not require a permit. Regrouting usually does not either, assuming you are not changing plumbing, electrical, structure, or the shower receptor. But fan installation, new electrical wiring, new duct penetrations, plumbing repairs, shower pan replacement, and full shower remodels may require permits depending on your city or county.
For ventilation, the main construction points are simple: the fan must be sized appropriately, connected to a duct that supports the airflow, and exhausted outdoors. Short, straight duct runs perform better than long runs with multiple elbows. Smooth metal duct generally performs better than sagging flex duct. Exterior caps should open freely and should not be blocked by paint, lint, insulation, nests, or roof debris.
If a bath fan is being replaced, it is worth adding a timer switch or humidity sensor at the same time. The added cost is usually modest compared with opening the ceiling twice. In homes with persistent humidity, we also look at door undercuts, makeup air, HVAC operation, and whether the bathroom is being kept closed up for long periods after showers.
Do these 3 things before closing this tab:
1Clear out junk files and repair common Windows errors2Scan for outdated or missing drivers - takes under a minute3Repair Windows errors before they cause bigger problemsA Simple Maintenance Schedule That Works
After every shower, squeegee the glass and walls, wipe the wettest horizontal surfaces, leave the door or curtain open, and run the fan for at least 20 minutes. This is the highest-value habit.
Once a week, clean soap scum from tile, glass, fixtures, grout lines, door tracks, and corners. Wash fabric shower curtains and liners as needed. Remove bottles from ledges so the surfaces underneath can dry.
Once a month, inspect the caulk line, grout joints, shower door sweep, fan grille, and ceiling above the shower. Look for gaps, cracks, peeling sealant, rust staining, slow-drying areas, and musty odor.
Once a year, clean the fan grille and check the exterior vent cap. If the fan is weak, loud, or ineffective, do not wait for mold to tell you again. Fixing ventilation is usually cheaper than repairing a wet wall assembly.
Bottom Line
To remove shower mold, clean the residue first, scrub mold from hard surfaces with detergent and water or an appropriate cleaner, rinse, and dry completely. Replace moldy caulk instead of trying to rescue it. Repair cracked or failing grout when it is allowing water into the assembly. Then solve the moisture problem with real ventilation, drying habits, and inspection of leaks or waterproofing defects.
If the mold is small, surface-level, and on hard materials, a careful homeowner can usually handle it. If it is larger than about 10 square feet, keeps returning, follows a leak, or points to hidden wall or pan damage, hire a professional who can correct the moisture source and follow recognized remediation practices. The goal is not a cleaner-looking shower for two weeks. The goal is a dry, sound bathroom assembly that does not keep growing mold.
Frequently Asked Questions
What kills mold in a shower permanently?
No cleaner kills shower mold permanently if the shower stays wet. Clean the surface, remove soap scum, replace failed caulk, repair cracked grout, and improve ventilation. Permanent prevention comes from moisture control.
Should I use bleach on shower mold?
Bleach can be used on some hard, nonporous surfaces, but it should never be mixed with other cleaners. If used, keep it to no more than 1 cup of household bleach per 1 gallon of water, ventilate the room, and wear protection.
Can moldy shower caulk be cleaned?
Surface staining may lighten, but mold embedded behind or inside caulk usually needs removal and replacement. Remove all failed caulk, dry the joint thoroughly, and recaulk with 100% silicone kitchen and bath sealant.
When should I call a professional for shower mold?
Call a pro if the mold covers more than about 10 square feet, returns every few weeks, follows a leak, smells musty behind walls, or appears with loose tile, soft drywall, swollen trim, or damaged flooring.
How long should I run the bathroom fan after a shower?
Run the fan during the shower and for at least 20 minutes afterward. A timer or humidity sensor helps. The fan also needs to exhaust outdoors and move enough real airflow through the installed duct.
How much does professional shower mold cleanup cost in 2026?
Basic bathroom mold cleaning can start around $2.30-$2.80 per square foot. Bathroom-specific remediation often runs about $500-$2,000, while broader professional mold remediation commonly averages about $2,300-$2,400 nationally.
Crashes, No Sound, or Screen Glitches?
Random freezes, missing sound and display glitches usually trace back to one bad driver. Find and replace yours safely.Free scan · under a minuteWindows Errors? Fix Them Before They Spread
Repair common Windows errors and clear accumulated junk for a smoother, more stable PC - no reinstall needed.Free scan · no reinstallQuick Recap
Product prices and availability are accurate as of the date/time indicated and are subject to change. Any price and availability information displayed on Amazon at the time of purchase will apply.

