The reliable way to quiet a squeaky wooden stair is to find the exact joint that moves, decide whether the sound is simple rubbing or a loose component, and match the repair to the staircase’s construction. Powdered graphite can quiet friction at an otherwise sound tread-riser joint, but it is temporary. A tread that lifts, sags, or has damaged wood needs fastening, blocking, or replacement—not lubricant alone.
Have one person walk each step slowly while another listens and watches for movement. Mark the noisy step, inspect the tread, riser, and supporting stringer or carriage, and choose an above- or below-stair repair based on access and the finish you need.
As an Amazon Associate I earn from qualifying purchases.
What causes stairs to squeak?
A stair squeak is usually a movement problem. As a house settles, wood shrinks, and stairs receive repeated loads, joints can loosen and allow a tread to move against its support. The U.S. Department of Housing and Urban Development explains that settlement, wood shrinkage, and constant use can separate treads from the supporting carriage or risers, producing squeaks. HUD’s rehabilitation guide describes this mechanism in its stair-repair guidance.
Quick wins for a faster PC:
Scan for outdated or missing drivers - takes under a minuteDriver Scan →Clear out junk files and repair common Windows errorsFree Scan →The National Institute of Standards and Technology identifies two common sources: a loose or warped tread, or binding and rubbing where the tread meets the top or bottom edge of a riser. Its noise-control handbook uses these definitions:
#1 Best Overall

- Eliminate Squeaky Floors for Good – A trusted US brand since 1993, The SQUEEEK NO MORE squeaky floor repair kit has been the ultimate fix to all creaks and squeeks on the floor, for the past 30 years. It’s a complete kit—simply grab a power drill and start eliminating those floor squeaks.
- Works on All Flooring Types – It's the only squeaky floor repair kit you'll need for carpet, hardwood, or linoleum. This floor repair system secures loose boards to joists, eliminating movement that causes creaks and squeaks. Works on stairs, too!
- Complete Floor Squeak Repair Kit – Includes 50 counter-snap breakaway screws, 2 joist finding screws, a square head driver bit, a tripod fixture for carpet, and a hardwood adapter to stop squeaky floors under carpet and hard surfaces.
- Fast & Accurate Joist Location – Joist finder drill bits help pinpoint joists beneath carpet and wood floors, ensuring precise placement for the floor fix screws kit. If squeaks persist, add more screws along the joist line.
- Damage-Free, Invisible Fix – Breakaway screws snap below the surface, ensuring a clean finish. The tripod fixture and hardwood adapter guide proper installation, allowing for a clean-finish squeaky hardwood floor fix.
- Tread: the flat, horizontal surface you step on.
- Riser: the upright board between two treads.
- Stringer or carriage: the sloping structural support that carries the treads and risers.
A squeak at the center of a tread may indicate movement between the tread and its support. A squeak at the front or rear edge often points to rubbing against a riser. A sound at one side can indicate a gap between the tread and a stringer or carriage. These clues narrow the search, but the joint must still be observed under load before you select a repair.
How do I find the exact squeaky step and joint?
Do not start by driving random screws or spreading lubricant over every stair. Locating the moving joint first prevents unnecessary holes and helps distinguish a noise nuisance from a safety defect.
- Clear the stairway. Remove loose runners, toys, and anything that could trip the person testing the steps. Keep a hand on the handrail while walking.
- Use a slow, deliberate test. Have a helper walk one step at a time, placing weight near the center, then near each side and edge. Pause on a noisy step so you can identify whether the tread flexes, lifts, or shifts.
- Mark the location. Use removable painter’s tape on the wall or skirt board to identify the step number and the noisy edge. Marking the joint is more useful than marking only the room below.
- Watch from below when possible. While the helper loads the marked step, look for a gap opening between tread and riser, a tread moving against a stringer, or a loose block or fastener. Never place your fingers in a moving joint.
- Test adjacent components. A tread can transmit movement to the riser or neighboring tread. Check the step above and below before deciding that only one fastener is involved.
HUD specifically recommends walking the stairs to locate squeaky treads and risers before making repairs. Its guide also distinguishes locating the noise from selecting the fastening or wedging method.
What’s actually slowing this PC down?
Pick the symptom - the matching free tool is one click away.
When is a squeaky stair unsafe?
Noise alone does not prove that a stair is structurally unsound, but movement and visible damage require more than a friction treatment. Stop using the affected step until it is made safe if the tread lifts under a foot, sags noticeably, feels loose at one side, or has a protruding nail or screw.
Rank #2

- JAOAJO Loose Floor repair kit includes - 50 specific scoring screws and 5 AIDS: Joist finder screws *2;Tripod calibration and depth control fixture for floor repair *1;Double-hole fixture *1, bearing *2; Detailed instructions *1 to guide the specific use process.
- Suitable for all types of wood flooring - these floor repair kits will work on carpeted, cork and linoleum floors.Screws hold the floor to the joists, and no parts walk on it.The book also details how the different floors work.No longer affected by the creaking of loose floors.
- JAOAJO Loose Floor Repair Professional kit is made of 2 fixtures made of engineering plastic and formed perfectly.The gripper on the 2 fixtures is designed to easily clamp the head of the screw from under the surface.2 joist finder tools help you quickly and accurately locate joists from above the floor.Together with the square bit, it effectively helps you adjust the depth so that the screw can safely pass through the carpet or floor.
- The JAOAJO Floor fixing screw repair kit is specifically designed to prevent loose floors from creaking.Screws hold the floor to the keel, then effectively eliminate the squeaking between the floor and the keel, and provide you with a quiet environment, if you are annoyed with the floor, this floor fixing screw kit will be your effective solution.
- Rugged, high hardness, and resilient feet, use this kit to stop loose floor movement and squeaking.Caution - Do not rock the screw head back and forth to minimize damage to the floor. The spacing between floor repair screws must be close enough. If you still have a squeak, put more screws on the joist line. The problem that the end of the notched screw is not easy to break and the joist is not easy to break is effectively solved. Complete facilities, rest assured to use.
Inspect the tread, riser, stringer, carriage, and any visible blocking for splits, crushed edges, water damage, or decay. NC State Extension’s preventative-maintenance guidance advises checking stairs for loose treads and handrails and looking for decay in structural wood. NC State Extension’s checklist is a useful condition screen, not a substitute for an inspection of concealed framing.
A cracked, broken, or rotten tread may need replacement and an examination of the surrounding wood. A quick wedge or graphite cannot restore missing or deteriorated material. If several treads are compromised, or if the underside is enclosed so you cannot see the support, have a qualified carpenter or stair professional assess the assembly.
OSHA’s construction stairway rule states that stairways in its covered construction-work settings must be free of hazardous projections such as protruding nails. 29 CFR 1926.1052 applies to those workplace stairways; it is not a universal residential building-code instruction. The practical safety point is still clear: do not leave a fastener standing proud of a walking surface.
Which repair fits the cause?
| What you find | Likely issue | Appropriate response | Access and finish |
|---|---|---|---|
| The joint is tight and the wood is sound, but the tread rubs when loaded | Friction at a tread-riser or tread-support interface | Apply powdered graphite as a temporary friction treatment | Usually performed from above; no filled holes, but the effect can wear away |
| The tread moves but is intact | Loose connection to a stringer, carriage, riser, or blocking | Fasten the tread, add a glued wedge or block, or install a bracket from below | Below-stair work can be hidden; above-stair work may require countersinking and filler |
| The tread is warped and rubbing, yet still structurally sound | Distorted wood creating a changing contact point | Secure the movement and correct the contact with a suitable wedge or block; reassess the wood | Method depends on where the warp bears against the support |
| The tread lifts, sags, or has a crack, break, or rot | Potential structural damage | Stop treating it as a noise problem; inspect and repair or replace the damaged component | Professional assessment is prudent when damage extends into concealed supports |
The materials mentioned in the technical guidance are purpose-specific: powdered graphite for friction, thin wooden shims or wedges, wood screws or finishing nails, pilot-hole bits, wood glue, wood filler, and blocks or metal angle brackets for work from below. A generic screw kit is not automatically suitable for every stair design.
Rank #3
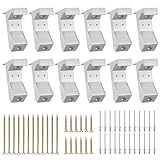
- Quick Repairs: This squeaky floor repair kit can swiftly and effectively address floor squeaking issues without the need for extensive dismantling.
- Efficient and Durable: Made of aluminum alloy, ensure that the repaired floor remains stable for an extended period, preventing future squeaking issues.
- Saving your Repair Costs: Compared to hiring professional workers or undergoing extensive floor replacement, this squeaky floor repair kit saving on repair costs.
- Application: The aluminum alloy floor repair tool is suitable for new l-joists or standard wood. It also can be used on subfloor 5/8 inch or thicker. If any questions, please feel free to contact us anytime.
Will graphite stop a stair squeak?
Graphite can reduce noise when two sound, relatively secure wood surfaces rub. HUD describes blowing powdered graphite into the tread-riser joint as a quick fix, while warning that it wears away and the squeak may return. The HUD method is therefore a temporary friction treatment, not a way to secure a moving tread.
How to apply the temporary treatment
- Confirm that the tread is not lifting, sagging, cracked, broken, or rotten.
- Clean loose dirt from the visible seam where the tread meets the riser. Do not force tools into the joint.
- Apply a small amount of powdered graphite into the seam, following the product’s handling directions and avoiding unnecessary airborne dust.
- Step on the stair several times to work the powder into the contact area, then wipe residue from the walking surface.
- Retest the step. If it still moves or the squeak returns quickly, move to a fastening or blocking repair.
Graphite is appropriate only when the joint is otherwise secure. It cannot close a structural gap, replace a missing fastener, or repair decayed wood.
How do I fix squeaky stairs from above?
Repairing from above is useful when the underside is finished, inaccessible, or blocked by the stair layout. The trade-off is cosmetic: screws or nails can leave visible holes that must be countersunk and filled, and an above-stair fastener may not reach the actual source of movement.
Outdated Drivers Are Slowing You Down
One free scan finds every outdated or missing driver and matches the right update for your exact hardware.Free scan · exact hardware matchPC Slower Than It Used to Be?
A free scan shows the junk files, broken settings and background clutter dragging Windows down - then fixes them in one click.Free scan · Windows 10 & 11Prepare and choose the fastening point
- Identify the marked step and the support beneath it. A fastener must enter sound stringer, carriage, riser, or blocking—not just the thin edge of a tread.
- Check for hidden wiring, plumbing, or other services before drilling. If you cannot establish what lies below the drilling point, stop and obtain professional help.
- Select a screw, trim-head screw, or finishing nail suited to the wood and joint. The required length depends on the tread thickness and the support; it must not emerge through the walking surface.
- In hardwood, drill a pilot hole sized for the fastener. HUD and NIST both describe pilot holes as a way to reduce splitting when fastening stair components. HUD’s guide and the NIST handbook provide the underlying repair principles.
Secure the moving tread
- Press the tread down and toward its support while driving the fastener so the joint closes rather than remaining open under load.
- Use more than one fastening point only when the stair construction provides sound support and the added fasteners will not split the wood or interfere with a riser.
- For a visible screw, countersink the head without breaking through the tread surface.
- Fill the countersunk hole with compatible wood filler, allow it to cure, and sand and touch up the finish as needed.
- Load-test the step slowly. If the squeak persists, the movement may be at a different edge or at the tread-riser interface; do not keep adding fasteners without relocating the joint.
Above-stair fastening is not guaranteed to solve every squeak. A screw placed only in the tread, or one that misses the carriage or stringer, can leave the underlying movement unchanged.
Rank #4
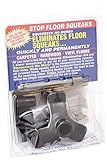
- Easy DIY installation with no special tools required
- Eliminates the need to pull up your carpeting to make the repair
- Works from above the carpeted or hardwood floors
- Dual pitch screw pulls the flooring tight to the joist; The screws are scored to snap consistently at the correct spot
How do I fix squeaky stairs from underneath?
When the underside is open, working below is usually the least visible approach and lets you watch the joint while someone stands on the tread. It also exposes the relationship between the tread, riser, stringer or carriage, and existing blocks.
Install a glued wedge or block
- With the helper loading the step lightly, identify the gap that opens between the tread and its support.
- Cut or select a thin wooden shim or wedge that fits the gap without forcing the tread upward or changing the stair’s finished height.
- Apply wood glue to the mating faces, place the wedge or block firmly in the gap, and hold it in position while the adhesive cures according to its label.
- Where the construction allows, add a short fastener through the block into sound wood. Pre-drill hardwood to reduce splitting, and verify that the fastener cannot break through the tread.
- After curing, retest the step. Remove or reshape a wedge that prevents the tread from seating naturally.
Use a block or angle bracket
A small wood block or metal angle bracket can tie a tread to a riser or other support from below. Place it across the moving joint so it bears on both members, then fasten it with suitable screws. The bracket must sit flat and clear adjacent stair components; forcing a bracket into a cramped corner can create a new stress point.
Below-stair access is not always available. A finished ceiling, storage enclosure, or closed stair design may conceal the joints. Do not remove a ceiling or cut structural framing casually; if opening the underside is the only way to inspect a suspected defect, have the work planned by someone familiar with stair construction.
How should I choose screws, nails, and pilot holes?
The correct fastener is determined by the joint, the wood thickness, and the support behind the tread. HUD and NIST describe screws or nails driven into the supporting carriage or stringer, along with wedges, blocks, and brackets, but neither source provides one universal fastener size for every stair.
Best Value

- Works Perfectly with SQUEEEK NO MORE Kit. These high-strength, zinc-plated, rust-resistant scored screws are designed for use with the SQUEEEK NO MORE Squeaky Floor Repair Kit to fix new or recurring squeaky spots.
- Snaps Below Surface for Clean Finish - Each scored counter-snap screw is engineered to break 1/4 inch below the surface when used with the SQUEEEK NO MORE Squeaky Floor Repair Kit fixtures, leaving a clean, invisible finish.
- Durable, Damage-Free Floor Repair. Counter-snap screws fasten floorboards to joists to eliminate squeaks—without damaging carpet or cracking hardwood when installed using the kit’s guides.
- Works on All Floor Types. Ideal for use on carpet, hardwood, vinyl, or linoleum when paired with the SQUEEEK NO MORE system.
- Keep Extra Screws for a Quick Fix. Select the 50-pack for smaller fixes or the 250-pack for larger projects. Note: This product has screws only—pair with the full SQUEEEK NO MORE Squeaky Floor Repair Kit for proper installation.
- Length: reach the supporting member with adequate engagement while remaining shorter than the combined thickness that could expose the tip on the walking surface.
- Diameter: provide holding strength without splitting a narrow tread edge or a thin riser.
- Pilot hole: use one where appropriate, especially in hardwood or near an edge, to reduce splitting.
- Head style: use a trim-head or finishing fastener where appearance matters, then countersink and fill visible holes.
- Support: confirm that the fastener enters a stringer, carriage, riser, or blocking rather than an unsupported void.
If you cannot identify the support or calculate a safe length, do not guess. A fastener that protrudes through the tread creates a hazard, while one that never reaches the support does not secure the joint.
What if the tread is cracked, broken, rotten, or badly loose?
Escalate from noise reduction to stair repair when the wood itself is compromised. Remove the stair from service if the tread shifts under normal weight, lifts enough to catch a toe, has a structural crack, or shows decay. Inspect the surrounding tread ends, riser, stringer or carriage, and any blocking for the same damage.
A damaged tread may need to be removed and replaced rather than screwed down. Replacement work must reproduce the original support and attachment points; fastening a new board only at its ends is not a reliable substitute for restoring the supporting assembly. If decay reaches a stringer or carriage, the repair is structural and should be evaluated by a qualified professional.
Multiple loose or damaged treads indicate a broader movement or moisture problem. In that situation, repeated graphite applications or isolated wedges can mask symptoms while the stair continues to deteriorate.
Can I prevent squeaks from returning?
Keep the stairway dry and promptly investigate changes in movement. During routine home maintenance, look for loosened treads, handrails, separated joints, and signs of decay. Avoid driving new fasteners into a joint that has not been located and inspected.
- Recheck a repaired tread after the adhesive has cured and after several normal uses.
- Watch for a recurring gap, new movement at the opposite side, or squeaks spreading to adjacent steps.
- Keep filled holes and repaired surfaces flush so they cannot catch footwear.
- Address leaks or dampness that could be degrading stair wood.
- Keep the handrail usable while testing or repairing the stairs.
A temporary graphite treatment may be reasonable for a sound, rubbing joint. A recurring squeak after graphite is evidence that the joint needs a mechanical repair or that the original noise was misidentified.
Quick Recap
A practical decision checklist
- Locate: identify the exact step and edge while a helper loads it slowly.
- Inspect: determine whether the tread is sound and whether it lifts, sags, or shifts.
- Classify: choose friction treatment for a secure rubbing joint; choose fastening, blocking, or wedging for movement.
- Choose access: work from below for hidden reinforcement when the underside is open; work from above when below is inaccessible and visible repairs are acceptable.
- Fasten safely: use pilot holes where appropriate, drive into sound support, and prevent any fastener from protruding through the tread.
- Escalate: replace or professionally assess cracked, broken, rotten, significantly loose, or multiply compromised components.
- Retest: walk the repaired step slowly and confirm that the surface is stable, flush, and free of hazardous projections.
Product prices and availability are accurate as of the date/time indicated and are subject to change. Any price and availability information displayed on Amazon at the time of purchase will apply.
Free tools Windows power users keep installed
One-click scans. No signup required.

