What’s actually slowing this PC down?
Pick the symptom - the matching free tool is one click away.
A built-in refrigerator is not silent, and some warmth at its cabinet frame is deliberate. Start with the model’s installation and use instructions, then check stability, vibration contact, and the designed ventilation path. Compressor and fan hum, refrigerant movement, water flow, clicks, and ice-maker sounds can all be normal. Heat around the door frame may come from an anti-condensation loop rather than a fault.
Noise or heat deserves service when it is new, dramatically louder, persistent, or accompanied by poor cooling, alarms, electrical symptoms, or abnormal hot spots. The checks below are limited to safe external observations and maintenance that a model’s documentation explicitly permits.
As an Amazon Associate I earn from qualifying purchases.
What sounds and warmth are normal?
Operating sounds do not automatically indicate a failure
Refrigerators cycle through several processes. The compressor starts and stops, fans move air, refrigerant changes pressure and direction, and water valves or ice-making systems fill and release. Those events can create a low hum, buzz, click, brief rattle, rushing or gurgling water sound, or a change in pitch when a cycle begins. Maytag’s guidance lists compressor, fan, ice-maker, and refrigerant-related sounds as possible normal operation; JennAir likewise identifies refrigerant or water flow as a source of rattling or vibration. See Maytag’s refrigerator-noise guidance and JennAir’s built-in rattling guidance.
Quick wins for a faster PC:
Clear out junk files and repair common Windows errorsFree Scan →Fix the driver behind crashes, sound loss and screen glitchesFind Drivers →Repair Windows errors before they cause bigger problemsFix Now →A sound’s presence alone cannot identify a failed compressor, fan, valve, or refrigerant system. The useful clues are whether the sound is new, whether its volume or character has changed, whether it follows a recognizable cycle, and whether the refrigerator is still cooling normally.
#1 Best Overall

- PATENTED MAGNET TRACK: Level features a patented magnet track that prevents powerful Rare-Earth magnets from falling out during use
- THUMB SCREW ATTACHMENT: Thumb screw allows for easy attachment of the level to conduit, enabling measurement of angles while bending
- EASY-TO-READ VIALS: Large, high-visibility vials at 4 angles (level, 90, 45, and 30 degrees) ensure easy and accurate readings
- TOP-VIEW VIAL WINDOWS: Large top-view vial windows provide convenient readability from multiple angles
- HIGH-VISIBILITY ORANGE BODY: Professional-grade billet aluminum body in high-visibility orange is easily visible on conduit and at the jobsite
Warmth at the frame can be intentional
Manufacturers may route heat through tubing near the door gasket or frame to prevent condensation and frost where warm room air meets the cold cabinet. JennAir describes this heat loop as a design feature in its built-in models. The outer cabinet or condenser housing may also feel warm while the appliance rejects heat; a Midea user manual identifies condenser-housing warmth as potentially normal for the specified model. Read the JennAir explanation of a warm built-in cabinet and the Midea MDRB548MIC46 manual for those model-specific examples.
Use the symptom pattern to choose the next check
| What you notice | Most useful first check | Stop and arrange service when |
|---|---|---|
| Low hum or fan sound that starts and stops with cooling cycles | Confirm that cooling is normal and that nothing is touching the cabinet or grille. | The sound becomes persistently loud, changes sharply, or cooling and alarms are affected. |
| Rattle or vibration transmitted through the cabinetry | Check level, floor stability, objects on top, adjacent surfaces, and the water line. | The unit cannot be stabilized using the model’s documented adjustment procedure. |
| Noise after installation or cabinet work | Inspect grilles, trim, panels, and neighboring cabinetry for contact or blocked airflow. | Correct installation requires moving the appliance or opening a service compartment. |
| Warmth concentrated around the door frame or gasket | Compare the location with the model’s manual and verify that ventilation openings are clear. | Warmth persists with poor cooling, alarms, a burning odor, or an expanding hot area. |
| Warm cabinet or condenser area with normal cooling | Check the designed ventilation route and the model’s explanation of normal heat rejection. | Heat is abnormal for the model, increases steadily, or is paired with performance problems. |
| Dust or suspected condenser restriction | Clean only if the exact model permits owner cleaning; unplug before the approved procedure. | Access requires removing unapproved panels or exposing electrical or refrigerant parts. |
Follow this safe first-pass procedure
- Read the model documents. Find the refrigerator’s model number and open its installation and use instructions. Record the specified ventilation route, leveling method, service access, and whether the condenser area is owner-cleanable. Built-in units differ in how their legs, rollers, grilles, and panels are adjusted.
- Describe the sound before touching anything. Note whether it occurs at compressor start, during a fan cycle, while the ice maker fills, during defrost, or continuously. A short recording taken from a safe distance can help a technician compare the symptom later. Do not put hands, tools, or a phone into a moving fan area.
- Check cooling and alarms. Verify that food is staying properly chilled according to the appliance’s normal operation and that no temperature, door, or service alarm is active. If cooling is poor or an alarm appears, skip invasive checks and arrange qualified service.
- Remove external vibration sources. Take objects off the top of the refrigerator and make sure decorative trim, cabinet sides, doors, shelves, and wall surfaces are not pressing against the appliance. A small gap or contact detail must follow the model’s installation instructions; do not force the cabinet or trim.
- Inspect the water line, if fitted. A water tube that touches the cabinet or surrounding woodwork can transfer a normal valve or fill vibration into the room. Rerouting or securing it should follow the installation instructions and should not kink the line or disturb a water connection.
- Check stability and level. With the doors closed, observe whether the unit rocks or whether the floor flexes. A small bubble or torpedo level can help you identify tilt, but use only the refrigerator’s documented leg or roller procedure. Do not drag a built-in refrigerator out of its enclosure unless the manual or a qualified installer provides a safe method.
- Trace the ventilation path. Identify where room air enters and where heated air exits. Clear dust, packaging, loose insulation, or stored items from accessible grilles without removing panels that the instructions do not authorize you to remove. Never cover a grille to make the room quieter.
- Recheck after one complete operating cycle. Once an external contact or obstruction is corrected, listen through a compressor or fan cycle and check whether the heat pattern changes. If the symptom remains unusually loud or hot, stop troubleshooting and contact the manufacturer or a qualified appliance technician.
Restore the built-in refrigerator’s ventilation
Why airflow matters
A built-in refrigerator rejects heat through a designed path in the cabinet and appliance. If an intake or exhaust opening is blocked, the compressor may run longer, the surrounding cabinet may become warmer, and fans may sound louder as they move air through resistance. Ventilation also depends on the cabinet installation, not just the refrigerator itself, so a decorative panel, plinth, or later remodeling work can create a problem even when the appliance has not changed.
Use model-specific dimensions
There is no universal clearance or grille size for every built-in refrigerator. Zanussi’s support guidance for the integrated products covered on its page states a minimum of 200 cm² of ventilation at both the top and bottom. That figure is specific to that guidance, not a rule that can be applied to another make or model. Consult Zanussi’s integrated-ventilation instructions and then use your own model’s installation diagram for the actual opening, route, and trim requirements.
Rank #2

- VERSATILE VIALS - The 12" Torpedo Level has 4 vials for quick and accurate readings: Vertical, Horizontal, 45 Angle, and Multi-Pitch Vial. The multi-pitch vial reads slope in 1/8'' per foot increments
- MAGNETIC - The leveler has a strong holding magnetic edge. Magnetic force is greater than 2 lbs for hand-free convenience
- DURABILITY - Shock-absorbing structure holds up to daily use. Aluminum frame reinforced construction for durability and strength
- ACCURACY - This torpedo level comes with 4 bubble vials and provides maximum accuracy of 0.001-inch/ ft. (1mm/M)
- PRACTICALITY - Top view holes for easy reading. V-groove bottom fits the contour of curved workpiece. Hanging holes for easy reach and storage. It features a tapered design that fits in a tool pouch or pocket
Checks for a newly enclosed or remodeled cabinet
- Confirm that the upper and lower openings shown in the installation diagram were actually built and were not covered by a kickboard, seal, paint, or decorative grille.
- Check that insulation, packing material, and construction dust are not blocking an accessible opening.
- Make sure a replacement door panel or trim does not press against the refrigerator door, gasket, or ventilation grille.
- Verify that the cabinet has not been pushed tight against a wall or neighboring unit in a way the installation guide prohibits.
- If checking the route requires disconnecting the appliance, moving cabinetry, or removing a service panel, use the installer or a qualified technician rather than improvising.
Reduce vibration without damaging the installation
Level the appliance and floor interface
An unlevel refrigerator, an unstable subfloor, or a cabinet that does not support the appliance evenly can turn a normal compressor or fan vibration into a rattle. JennAir lists an unlevel unit or floor among possible causes of built-in rattling. Leveling is not a generic “tighten everything” job: built-in models use different feet, rollers, brackets, and anti-tip arrangements. Follow the exact sequence in the installation manual, keep the appliance secured, and do not defeat an anti-tip device.
Eliminate contact points
Sound travels efficiently through rigid cabinetry. Look for a shelf, side panel, countertop underside, kickboard, door panel, or wall that touches the refrigerator and vibrates when the compressor runs. Also check items stored on top and any loose trim. Correct the contact only in a way allowed by the installation instructions; shaving, wedging, or drilling cabinet parts can compromise support, alignment, or ventilation.
Separate normal plumbing sounds from rattling
Water entering an ice maker or dispenser can produce a brief valve buzz or pipe movement. That event may be normal, but a tube tapping the cabinet can amplify it. Observe whether the sound occurs only during a fill cycle. If so, inspect the accessible line for contact and have a plumber or appliance technician correct a persistent vibration or leak.
Rank #3

- Torpedo Level Magnetic: Featuring a magnetic base, Firecore spirit level attaches securely to metal surfaces for a variety of needs.
- Shockproof Rubber End Cups: Rubber end caps are shock absorbing to alleviate strain against the body of the product if dropped, and help protect the bubble vial and frame.
- 3 Different Vials: With 90°vertical bubble, 0° horizontal bubble and 45° bubble, Firecore small torpedo level tool provides maximum readability for the measurement.
- Lightweight Yet Durable: The high-impact ABS plastic housing is durable and lightweight. The hanging holes also allow the user to hang the leveler so that it will not be harmed when not in use.
- Wide Application: Firecore 9 inch torpedo level is designed for for a variety of projects, such as bricklaying, carpentry, wood construction, concrete/masonry construction, window fitting, road construction, gardening and landscaping.
Clean only what the model allows
Dust around a condenser area can restrict heat transfer, but the safe cleaning method is model-dependent. Maytag advises cleaning the condenser area only when the particular model permits user cleaning and says to unplug the appliance before that procedure. Apply that principle to every built-in refrigerator: check the manual first, disconnect power as instructed, use only the approved access and tools, and reinstall every removed cover before restoring power. The Maytag procedure and cautions illustrate why a generic “remove the grille and vacuum everything” instruction is unsafe.
Recommended Free Tools
Do not remove sealed-system covers, electrical boxes, fan guards, or refrigerant components to chase a sound. If the condenser is inaccessible without moving the appliance or opening a service compartment, book qualified service. Built-in units can be connected to water, cabinetry, and anti-tip hardware that make casual movement hazardous.
Understand heat around the door gasket and cabinet
Frame warmth
When warmth is limited to the front frame or the area beside the gasket, it may be the anti-condensation heat loop described by JennAir. Its purpose is to keep moisture from collecting and freezing at the boundary between the cold interior and humid room air. A warm frame with normal cooling and no alarm is therefore not, by itself, evidence of a failing compressor.
Rank #4

- HIGH-VISIBILITY BUBBLES FOR EASY READING: The 8" level and 6.25" torpedo level feature four high-visibility bubbles (0°/30°/45°/90°). The 2.5" torpedo level has a 90° high-visibility bubble. Large hexagonal and top-view vial windows make it easy to read from three angles (front, back, and top). The fluorescent yellow-green vials highlight the bubble edges, enhancing contrast and improving readability.
- PROFESSIONAL TOOLS: Features a durable aluminum alloy frame for strength and longevity. The V-groove base provides legitimate stability on round stock and pipes. A convenient thumb screw design frees up your hands, allowing for secure attachment to pipes or thin objects to measure angles during bending. The shock-absorbing structure holds up to daily use. This multi-purpose level is ideal for household furnishings, woodworking, and carpentry, making it perfect for a wide range of decoration and home improvement projects.
- POWERFUL MAGNETISM: Powerful rare-earth magnets prevent the level from falling during use. The 8" level features four N35 rare-earth magnets on its base, generating a magnetic force greater than 9.92 lb (4.5 kg). The 6.25" model also features four N35 magnets, while the 2.5" torpedo level features two. This ensures secure contact on metal surfaces for safe, hands-free operation.
- ACCURATE SAE AND METRIC SCALES: The vials provide a maximum accuracy of 0.0005" per inch (0.5mm/m). Combined with precise SAE and metric scales, this allows for exceptionally precise project completion. The DURATECH level is suited for a wide variety of work scenarios and meets all daily needs.
- EASY TO CARRY AND STORE: Get three versatile levels for a single purchase. All models feature a compact profile and a hanging hole for convenient storage and portability. 2.5" Level: 2.5" L x 1.45" W x 0.67" H | 2.65 oz. 6.25" Level: 6.25" L x 1.45" W x 0.67" H | 5.47 oz. 8" Level: 8" L x 1.45" W x 0.67" H | 7.58 oz.
Broader or increasing heat
Heat that spreads beyond the expected frame or condenser area, becomes uncomfortable compared with the appliance’s usual behavior, or coincides with longer running, poor cooling, or an alarm needs attention. First verify the ventilation path and any model-specific normal-temperature explanation. If the condition remains, turn to the manufacturer or a qualified technician rather than opening the cabinet.
Warning signs requiring prompt escalation
- Poor or unstable cooling, food warming, or a temperature alarm.
- A burning smell, smoke, sparking, damaged power cord, or repeated electrical trip.
- A sudden loud mechanical noise, scraping, grinding, or a fan that appears to strike something.
- Continuous operation with worsening cabinet heat after ventilation and contact checks.
- Water leakage, a damaged water connection, or evidence that the appliance has shifted in its enclosure.
If the refrigerator was just installed
Installation-related noise and heat deserve a focused review because the appliance may be operating normally inside an incorrect enclosure. Ask the installer to confirm that the cabinet dimensions, ventilation openings, floor support, anti-tip hardware, door alignment, and water connection match the refrigerator’s current installation instructions. Compare the finished trim with the manufacturer’s drawings rather than relying on a generic cabinet standard.
Do these 3 things before closing this tab:
1Clear out junk files and repair common Windows errors2Scan for outdated or missing drivers - takes under a minute3Repair Windows errors before they cause bigger problemsDo not assume a replacement grille with the same appearance has the same free-air area. A grille can look open while its net opening is too small or its route is blocked behind the panel. If a new cabinet, flooring, or plinth was installed after the refrigerator, identify exactly what changed and have the responsible installer correct any conflict.
Best Value
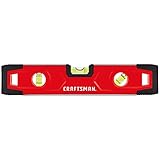
- Package dimensions: 2.1 cms L x 4.7 cms W x 24.7 cms H
- Product type: Tools
- package quantity: 1
- Country of Origin: Thailand
What not to do
- Do not diagnose a compressor, fan, or refrigerant failure from a sound alone.
- Do not block, tape over, or permanently modify ventilation openings to reduce noise.
- Do not use an invented clearance dimension in place of the model’s installation diagram.
- Do not rock, force, or pull out a built-in unit without a safe, documented procedure.
- Do not remove electrical or sealed-system panels to inspect a hidden source.
- Do not clean a condenser area while energized or when the manual does not permit owner access.
- Do not keep operating an appliance with electrical danger signs, severe overheating, poor cooling, or an active alarm while waiting to see whether it improves.
When to call the manufacturer or a technician
Arrange qualified service when the noise or heat is persistent, unusually loud, worsening, or unresolved after the external checks above. Provide the model number, installation date, sound description, when it occurs, whether cooling is normal, any alarm or error message, and what changed before the symptom appeared. Tell the technician whether the unit is connected to water and whether access is constrained by fixed cabinetry.
Service is also the right choice when a check would require moving the refrigerator, disconnecting a water line, opening a service compartment, working on electrical parts, or handling refrigerant. Manufacturer support can confirm whether a sound or temperature is expected for that exact model and can specify warranty-approved repairs.
A practical maintenance record
For a built-in appliance, a short record helps separate a normal cycle from a developing fault. Note the date, room conditions if relevant, the location of warmth, the sound’s timing, cooling performance, and any work recently done to the cabinetry. Record only observations; do not claim a component has failed unless a qualified service report confirms it. This information lets an installer or technician reproduce the symptom without unnecessary disassembly.
The Tool Desk
Outbyte PC Repair FREERepair Windows errors before they cause bigger problemsFix Now →Outbyte Driver Updater FREEScan for outdated or missing drivers - takes under a minuteDriver Scan →Quick Recap
Product prices and availability are accurate as of the date/time indicated and are subject to change. Any price and availability information displayed on Amazon at the time of purchase will apply.

