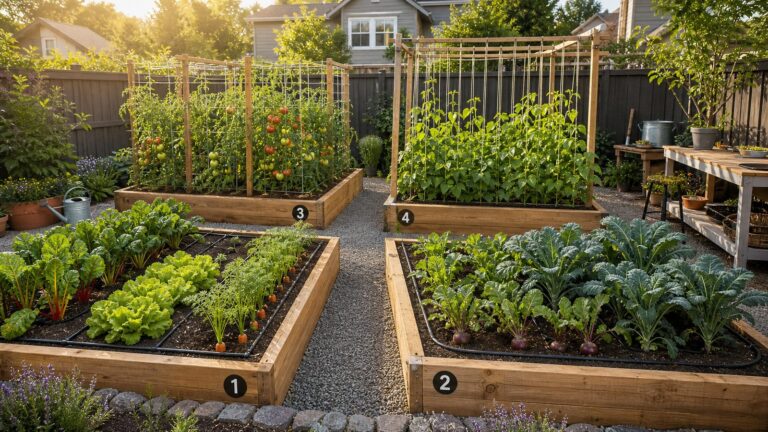
To plant potatoes successfully, use certified seed potatoes, wait until the soil is about 50°F (10°C), and plant the pieces 3–5 inches deep with the eyes facing upward. Space seed pieces 6–12 inches apart in rows 30–36 inches apart, keep the soil evenly moist, and hill around the stems as the plants grow.
This guide covers the complete process—from choosing and preparing seed potatoes to hilling, watering, harvesting, and storing the crop. The diagrams show the correct planting position, spacing, and hilling profile.
Potato planting at a glance
| Task | Practical target |
|---|---|
| Sunlight | At least 4–6 hours of direct sun daily |
| Planting temperature | Soil near 50°F (10°C) |
| Seed material | Certified seed potatoes, whole or cut |
| Planting depth | About 3–5 inches deep, covered with approximately 4 inches of soil |
| Plant spacing | 6–12 inches apart |
| Row spacing | 30–36 inches apart |
| Water | Generally about 1 inch per week; sometimes 1–2 inches depending on conditions |
| First hilling | When shoots are established and approximately 6–12 inches tall |
Spacing, depth, and timing can be adjusted for the variety, soil type, and growing method. The ranges above are practical home-garden standards supported by university and extension guidance.
As an Amazon Associate I earn from qualifying purchases.
Before you plant: choose the right site
Choose a location with full sun and loose, well-drained soil. Potatoes perform best with at least 4–6 hours of sunlight each day. Saturated or poorly drained soil keeps seed pieces wet and increases the chance of disease and tuber rot.
A soil test is the most reliable way to determine whether fertilizer or lime is needed. Do not automatically add large amounts of fertilizer: excessive fertility can produce abundant foliage while reducing tuber development and storage quality. See the University of California Integrated Pest Management site’s potato-growing guidance and the University of Minnesota potato guide for site and soil recommendations.
#1 Best Overall

- VARIETY TYPE: Yukon Gold is a determinate potato variety, meaning tubers form in one main layer near the seed piece and mature uniformly for a concentrated harvest window, ideal for home gardens and raised beds
- CERTIFIED QUALITY: Blue Tag Certified seed potatoes ensure disease-free, true-to-type stock that is Non-GMO, providing reliable performance and peace of mind for healthy, high-yielding harvests
- APPEARANCE AND FLAVOR: Features smooth golden yellow skin with creamy yellow flesh and a rich, buttery, slightly sweet flavor profile that makes these potatoes a kitchen favorite for countless recipes
- GROWING CHARACTERISTICS: Easy to grow for beginners and experienced gardeners alike, these short-season potatoes mature in 50-60 days and produce heavy yields when planted 4-6 inches deep with 12-inch spacing
- CULINARY VERSATILITY: Perfect for mashing, roasting, baking, frying, soups and stews thanks to their creamy texture that holds shape beautifully while absorbing flavors, delivering golden, crispy exteriors and soft interiors
If the bed drains slowly, use a raised bed or improve the growing area with suitable organic matter before planting. Avoid planting potatoes where tomatoes, peppers, eggplants, or tomatillos grew during the previous 3–4 years. These related crops can share soil-borne diseases.
When to plant potatoes
Plant when the soil reaches approximately 50°F (10°C) and is workable rather than saturated. In many climates, this is about 1–3 weeks before the local last-frost date, but the correct calendar date varies by region and soil conditions.
Recommended Free Tools
Potato shoots are vulnerable to frost, and cold, wet soil can cause the seed pieces to decay before they emerge. If the bed is muddy or cold, waiting is safer than planting by the calendar. In hot climates, plant early enough for tubers to develop before soil temperatures become excessive; soil above approximately 90°F can interfere with tuber set and filling.
How to plant potatoes in 12 steps
1. Buy certified seed potatoes
Start with certified seed potatoes from a reputable garden supplier. Certification means the seed was produced and inspected to reduce the transmission of pests and diseases.
Do not assume a sprouting grocery-store potato is equivalent to certified seed. Grocery potatoes may carry disease, may have been treated to suppress sprouting, and may perform poorly after repeated generations. Saving tubers year after year also allows viruses and other diseases to accumulate.
2. Decide whether to plant whole or cut tubers
Small seed potatoes can be planted whole. Cut larger potatoes into blocky pieces, with at least one healthy eye—the small bud from which a stem will grow—on each piece.
Quick wins for a faster PC:
Clear out junk files and repair common Windows errorsFree Scan →Fix the driver behind crashes, sound loss and screen glitchesFind Drivers →Repair Windows errors before they cause bigger problemsFix Now →Extension recommendations vary slightly, but a useful target for each cut piece is about 1.5–2 ounces, or approximately 1¾–2¼ ounces in the University of Maine guidance. Make smooth cuts rather than tearing or jagging the pieces. A piece without a viable eye may fail to produce a plant.
3. Cure cut seed pieces
Do not immediately plant freshly cut pieces if you can avoid it. Spread them in a single layer and let the cut surfaces cure at room temperature for approximately 1–3 days. The surface should dry and form a protective layer.
Rank #2
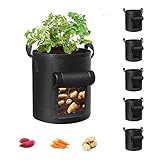
- Durable Material: Made of 300g thick non-woven fabric that can be reused for more than 3 years.
- Excellent Drainage: Breathable material ensures rapid drainage and provides ideal growth environment.
- Reinforced Handle: Strong polypropylene webbing with X-shaped stitching provides support.
- Preventing Root Circling: Good ventilation and breathability prevent root circling.
- Visualization Design: Visualization window allows you to determine when plants are mature for harvest.
University of Maine guidance also describes cutting seed well before planting and holding it at approximately 50–55°F with humidity above 90 percent. Whatever method you use, discard pieces with rotten, soft, or badly damaged cut surfaces.
4. Chit the potatoes only if it helps your season
Chitting is optional. It can encourage earlier emergence or maturity, but potatoes do not have to be chitted before planting.
For an optional chitting process, begin about four weeks before planting. Keep the tubers dark until sprouts begin, then place them in gentle light for more than 10 hours per day for roughly two weeks. The goal is short, sturdy, green sprouts rather than long, pale shoots. The University of Saskatchewan’s potato guidance explains this technique in more detail.
5. Prepare the furrow or planting trench
Make a furrow or trench about 3–6 inches deep, depending on your soil and planting method. For a straightforward garden-bed approach, plan to place the seed pieces about 3–5 inches below the finished soil surface and cover them with approximately 4 inches of soil.
Light, friable soil may allow somewhat deeper planting, but depth alone does not create more potatoes. Excessive depth can delay emergence and make harvesting difficult. In heavy or poorly drained soil, a raised bed or shallower planting with later hilling is often more practical.
6. Place each seed piece correctly
Set each piece with the cut side down and the eye or sprout facing upward. Cover the pieces gently so they remain in position without compacting the soil around them.
7. Space plants and rows
Space seed pieces 6–12 inches apart and leave 30–36 inches between rows. Use the seed supplier’s instructions when growing a particular variety.
Closer spacing usually produces smaller tubers because plants compete for space. Wider spacing generally gives each plant more room for larger tubers, although it may produce fewer tubers per unit of garden area.
Rank #3

- Whole Certified Seed Tubers Grown And Raised In the USA Are Non GMO So Can Be Grown Organicaly
- Certified Potato Tubers Are Stored In Cold Storage And Then Packed and Shipped So They Are Alaways Fresh
- Order Now So You Can Have Fresh and Healthy Potatoes From Your Garden
8. Keep fertilizer away from the seed pieces
Use a soil test to guide fertilizer decisions. If fertilizer is needed, incorporate it into the soil before planting or place it beside and below the seed piece with a layer of soil separating the two.
Direct contact between fertilizer and a seed piece can cause rapid decay. Too much fertilizer—especially when applied without a soil test—can encourage leaves and stems at the expense of tubers and may reduce storage quality.
Outdated Drivers Are Slowing You Down
One free scan finds every outdated or missing driver and matches the right update for your exact hardware.Free scan · exact hardware matchPC Slower Than It Used to Be?
A free scan shows the junk files, broken settings and background clutter dragging Windows down - then fixes them in one click.Free scan · Windows 10 & 119. Water evenly after planting
Water the bed after planting if the soil is dry, but do not keep it saturated. During active growth, potatoes generally need about 1 inch of water per week; some guidance gives a range of 1–2 inches depending on rainfall, soil, temperature, and the growing system.
Consistency matters more than alternating drought with heavy irrigation. Irregular watering can cause knobs, cracks, hollow tubers, and other abnormal growth. Containers, cages, and bins dry out faster than in-ground beds and need more frequent checks and irrigation.
10. Hill the plants as they grow
Begin hilling once the shoots are established and approximately 6–12 inches tall—about 8 inches is a practical trigger. Pull loose soil around the stems, leaving the growing tips exposed. One UC recommendation leaves approximately 4 inches of plant top above the added soil.
Repeat hilling once or twice at roughly 2–3-week intervals. The total soil added along the row commonly reaches about 6–8 inches. Hill gently and avoid burying the growing tips.
Hilling is useful because it covers developing tubers from light, provides additional space for stolons and tuber formation, improves drainage, and suppresses weeds. It is not the only valid method: potatoes can also be grown with deep planting in light soil or with a deep-mulch system. Whichever method you use, keep developing tubers covered.
11. Protect tubers from light and heat
Sunlight turns exposed tubers green and causes bitter glycoalkaloids to develop. Inspect the row after rain, watering, or soil erosion and cover any exposed potatoes with soil or opaque mulch.
Rank #4

- Whole Certified Seed Tubers Grown And Raised In the USA Are Non GMO So Can Be Grown Organicaly
- Certified Potato Tubers Are Stored In Cold Storage And Then Packed and Shipped So They Are Always Fresh
- Order Now So You Can Have Fresh and Healthy Potatoes From Your Garden In A Few Short Weaks
Mulch can also moderate soil temperature. This is especially helpful in warm conditions, because soil temperatures above approximately 90°F can inhibit tuber set and filling. Avoid cultivating deeply near established plants: hoeing or tilling can damage roots, stolons, and developing tubers.
12. Harvest at the right stage
Harvest timing depends on whether you want tender new potatoes or mature potatoes for storage.
The Tool Desk
Outbyte PC Repair FREEClear out junk files and repair common Windows errorsFree Scan →Outbyte Driver Updater FREEScan for outdated or missing drivers - takes under a minuteDriver Scan →For new potatoes
New potatoes can often be dug approximately 7–8 weeks after planting, before their skins have fully toughened. Carefully dig beside a plant and remove a few tubers while leaving the plant growing if you want a continuing harvest.
Flowering may coincide with new-potato harvest, but flowers are not a universal signal that every potato is mature.
For storage potatoes
Wait until the vines yellow, dry, or die back. Mature skins should resist rubbing off. Dig in dry conditions with a spading fork, working far enough from the plant to reduce punctures.
Handle the crop gently. Punctured, bruised, diseased, soft, or shriveled potatoes spoil quickly; use damaged tubers first rather than placing them in long-term storage.
What’s actually slowing this PC down?
Pick the symptom - the matching free tool is one click away.
How to cure and store potatoes
After digging, cure sound potatoes in a dark, ventilated place. Extension recommendations vary with the intended storage conditions, including:
- At least 10 days at approximately 60–65°F; or
- 2–3 weeks at approximately 55–60°F with high humidity.
After curing, move the potatoes to a dark location with good airflow, commonly around 38–45°F. Darkness matters: light encourages greening and glycoalkaloid formation. Do not wash potatoes before long-term storage; brush off loose soil and reserve any damaged specimens for prompt use.
Best Value

- EARLY SEASON HIGH YIELD PERFORMANCE Superior White Seed Potatoes are an early maturing variety producing consistent high yields within 85–90 days, making them ideal for gardeners seeking fast growing reliable vegetable harvests
- EXCELLENT FOR CHIPPING AND COOKING These white potatoes are widely valued for their smooth texture and mild flavor, making them perfect for chips frying boiling and everyday cooking with versatile kitchen applications
- OPTIMIZED FOR HOME GARDEN SUCCESS Designed for easy planting in spring, these seed potatoes thrive in well drained soil and full sun, offering strong growth performance even for beginner gardeners
- IDEAL FOR ROW PLANTING AND RAISED BEDS With recommended spacing of 15–18 inches, these potatoes perform well in traditional rows raised beds or container gardening setups for efficient space utilization
- RELIABLE HARVEST WITH MODERATE STORAGE Produces a generous harvest of quality potatoes with fair storage capability, ensuring you enjoy fresh homegrown produce while maintaining usability after harvest
Troubleshooting common potato-planting problems
The seed pieces never emerge
- Cold, wet soil: Pieces may have decayed before sprouting. Wait for soil near 50°F and workable moisture next time.
- No viable eye: A cut piece without a healthy eye or sprout may not produce a plant.
- Jagged cuts or immediate planting: Torn surfaces are more vulnerable to decay. Cut cleanly and cure the pieces before planting.
- Excessive depth: Very deep planting can delay emergence, especially in heavy soil.
The potatoes are cracked, hollow, or misshapen
Uneven watering is a common cause. Aim for steady moisture rather than repeated severe drying followed by heavy watering. Hot soil can also interfere with tuber development. Mulch and consistent irrigation help moderate the root-zone environment.
The bed stays wet
Poor drainage increases disease and rot risk. Improve the bed before the next crop, use a raised bed, and avoid watering again while the soil is already saturated.
Do these 3 things before closing this tab:
1Scan for outdated or missing drivers - takes under a minute2Repair Windows errors before they cause bigger problems3Fix the driver behind crashes, sound loss and screen glitchesThe leaves are being eaten
Inspect the undersides of leaves for orange egg masses and check for Colorado potato beetle adults and larvae. Hand-pick adults and remove egg masses where practical. These beetles can rapidly defoliate plants and are resistant to many insecticides, so early monitoring is important.
The tubers have rough, dark skin
This may be potato scab. Scab produces rough, corky lesions but does not usually rot the tuber. Affected potatoes are generally edible after scrubbing or removing the damaged skin. Crop rotation and suitable soil management can help reduce future problems.
Some potatoes turned green
Green color indicates light exposure and potential glycoalkaloid formation. Prevent it by hilling or covering tubers promptly. A small green area may be cut away generously, but very green potatoes should be discarded; peeling is not a reliable way to make a heavily green potato safe.
Common potato-growing claims that need qualification
- “You must chit potatoes.”
- No. Chitting is optional and may help with earlier emergence or maturity, but untreated seed potatoes can be planted without it.
- “Hilling is required to make potatoes.”
- Not necessarily. Conventional hilling is effective, but deep planting in light soil and deep-mulch systems are alternatives. The essential goal is to provide suitable growing space and keep tubers covered.
- “Potatoes are ready when they flower.”
- Flowering can be a rough sign that some new potatoes are forming. Storage potatoes should remain in the ground until the vines die back and the skins set.
- “A grocery-store potato that sprouts is the same as certified seed.”
- No. Grocery potatoes may carry disease or have been treated to prevent sprouting. Repeatedly saving planting stock can also allow viruses and diseases to build up.
- “The deeper the planting, the bigger the harvest.”
- Depth is not a guaranteed yield increase. Planting too deeply can delay emergence and complicate harvest. Choose depth according to soil and method.
Printable potato planting checklist
- Choose a sunny site with loose, well-drained soil.
- Rotate away from tomatoes, peppers, eggplants, and tomatillos for 3–4 years.
- Wait until the soil is near 50°F (10°C) and not saturated.
- Buy certified seed potatoes.
- Cut large tubers into blocky pieces with at least one healthy eye each.
- Cure cut pieces for 1–3 days, or use an appropriate cool, humid holding method.
- Plant cut side down, eyes up.
- Set pieces 3–5 inches deep, 6–12 inches apart, with 30–36 inches between rows.
- Keep fertilizer separated from seed pieces by soil.
- Water evenly, generally providing about 1 inch per week.
- Hill when shoots are 6–12 inches tall, leaving growing tips exposed.
- Harvest new potatoes early or wait for vine dieback and skin set for storage potatoes.
- Cure sound potatoes in darkness before storing them in a cool, ventilated place.
Frequently Asked Questions
Can I plant potatoes without cutting them?
Yes. Small seed potatoes can be planted whole. Cut larger potatoes into blocky pieces, making sure each piece has at least one healthy eye.
Free tools Windows power users keep installed
One-click scans. No signup required.
How deep should potato seed pieces be planted?
A practical home-garden depth is 3–5 inches, with approximately 4 inches of soil covering the pieces. Depth can vary with soil and method; very deep planting is not automatically better.
Do potato eyes face up or down?
Place the cut side down and the eyes or sprouts facing upward so the new stems can grow toward the surface.
How long after planting can I harvest potatoes?
New potatoes may be ready in approximately 7–8 weeks. For storage potatoes, wait until the vines have yellowed, dried, or died and the skins resist rubbing off.
Can I eat green potatoes?
Avoid heavily green potatoes because light exposure can produce bitter glycoalkaloids. A small green area may be cut away generously, but very green potatoes should be discarded; peeling is not a dependable remedy.
The Bottom Line
Plant certified seed potatoes in sunny, well-drained soil once it reaches about 50°F (10°C). Set whole or cured cut pieces 3–5 inches deep with the eyes up, space them 6–12 inches apart, water consistently, and hill around the stems while keeping the tubers covered. Harvest tender new potatoes early or wait for vine dieback and firm skins when growing potatoes for storage.
Quick Recap
Product prices and availability are accurate as of the date/time indicated and are subject to change. Any price and availability information displayed on Amazon at the time of purchase will apply.