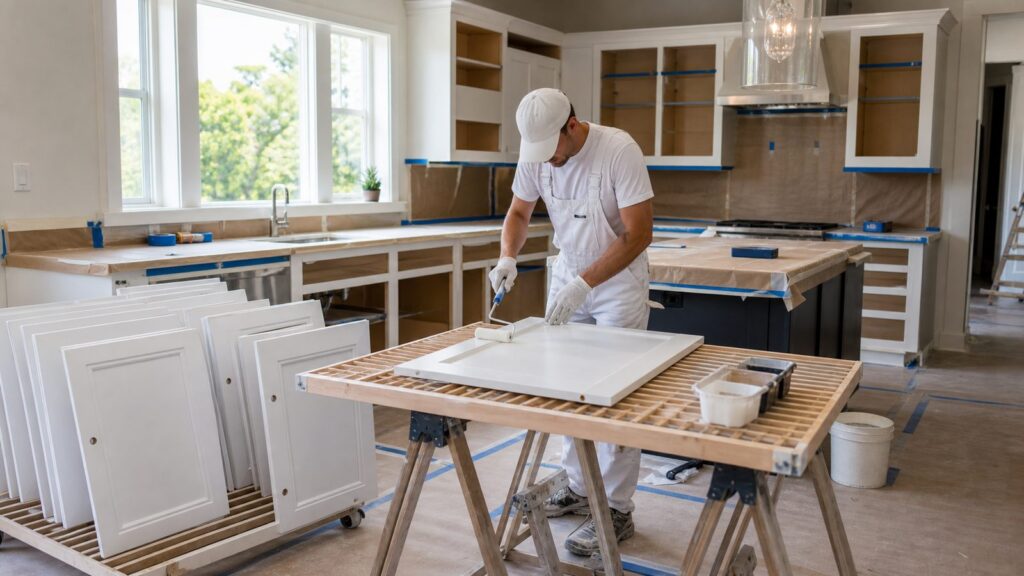
Painting kitchen cabinets like a pro is not mainly about choosing a color. It is a surface preparation, adhesion, and cure-time project. The difference between a finish that looks good for two weeks and one that survives years of cooking, cleaning, and daily handling usually comes down to cleaning, sanding, primer selection, thin coats, and patience.
For a typical U.S. kitchen in 2026, DIY cabinet painting materials often run about $200 to $600 for degreaser, abrasives, filler, primer, cabinet-grade paint, caulk, masking supplies, brushes, rollers, trays, and basic PPE. Renting or buying a sprayer can add noticeably to that. Professional cabinet painting commonly lands between about $1,400 and $7,000 nationally, with many average kitchens falling around $2,000 to $4,500 depending on door count, repairs, finish system, spraying, local labor, and whether oak grain filling is included.
On our job sites, we treat cabinet painting as a controlled finishing process, not a weekend wall-painting job. Doors come off. Hardware is labeled. Grease is removed before sanding. Primer is chosen for the surface. Coats are thin. Pieces cure before they are handled hard. That is the process this guide follows.
As an Amazon Associate I earn from qualifying purchases.
Crashes, No Sound, or Screen Glitches?
Random freezes, missing sound and display glitches usually trace back to one bad driver. Find and replace yours safely.Free scan · under a minutePC Slower Than It Used to Be?
A free scan shows the junk files, broken settings and background clutter dragging Windows down - then fixes them in one click.Free scan · Windows 10 & 11Before You Start: Make Sure Your Cabinets Are Worth Painting
Paint is a cosmetic finish. It can make solid cabinets look current, clean, and intentional, but it cannot repair a bad layout or failing cabinet boxes. Cabinet painting is usually a smart choice when the cabinets are structurally sound, the doors close properly, the boxes are square, and the main problem is dated stain, worn clear coat, minor scratches, or an old color.
Painting is usually the wrong fix for swollen MDF, water-damaged sink bases, delaminating thermofoil, crumbling particleboard, badly warped doors, peeling previous paint, or a kitchen layout that does not function. If a cabinet side is soft from a leak or a thermofoil door is lifting at the edge, paint will not turn it into a durable substrate. You need repair, refacing, door replacement, or full cabinet replacement first.
#1 Best Overall
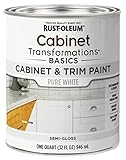
- CABINET TRANSFORMATION: Refresh outdated cabinets, vanities, furniture and trim with rich Pure White color and a smooth semi-gloss finish
- DURABLE PERFORMANCE: Easy-to-clean finish resists dirt and grime while standing up to household chemicals
- SMOOTH APPLICATION: Outstanding flow and leveling help create a beautiful finish with brush, roller, pad applicator or airless sprayer
- FAST PROJECT COMPLETION: Dries to touch in 30 minutes, recoats in 2 hours and is ready for normal use after 24 hours
- INTERIOR CABINET COATING: Ideal for kitchens, bathrooms, laundry rooms and other interior cabinet and trim applications
Also check the age of the home. If your house was built before 1978, assume there may be lead-based paint somewhere until proven otherwise. Disturbing old coatings by sanding or scraping can create hazardous dust. For pre-1978 homes, use EPA lead-safe practices and consider testing before you sand. Contractors working on covered pre-1978 renovation projects must follow lead-safe renovation rules. Homeowners should still treat the risk seriously, especially in kitchens used by children or pregnant occupants.
Tools, Materials, and Time You Should Plan For
A professional-looking cabinet job usually takes longer than homeowners expect. A small kitchen may take three to five working days plus cure time. A larger kitchen with an island, 30 to 45 doors and drawer fronts, oak grain filling, or repairs can stretch to a week or more. Dry-to-touch is not cured. Many cabinet coatings need several days to a few weeks to reach full hardness, depending on the product, humidity, temperature, and coat thickness.
The Tool Desk
Outbyte PC Repair FREERepair Windows errors before they cause bigger problemsFix Now →Outbyte Driver Updater FREEFix the driver behind crashes, sound loss and screen glitchesFind Drivers →At minimum, gather a dedicated degreaser or TSP substitute, clean buckets, microfiber cloths, sponges, painter’s tape, masking paper or plastic, drop cloths, zip bags, labels, a marker, a screwdriver or drill-driver, wood filler or two-part filler, paintable caulk, 120- to 220-grit sandpaper, sanding sponges, a vacuum with a brush attachment, tack cloth or clean damp cloths, primer, cabinet-grade paint, high-quality synthetic brushes, foam or microfiber rollers, trays, nitrile gloves, eye protection, and a respirator appropriate for the coating and sanding dust.
For paint, do not use ordinary wall paint. Kitchen cabinet doors and drawers are touched, wiped, bumped, and cleaned constantly. Cabinet-grade acrylic enamel, urethane-modified enamel, alkyd enamel, or waterborne alkyd products usually perform better because they dry harder and resist blocking, abrasion, and cleaning damage. A satin, semi-gloss, or low-sheen enamel is common. Very flat finishes show fingerprints and are harder to clean.
| Item | Typical 2026 Range | What Changes the Price |
|---|---|---|
| DIY materials | $200-$600 | Kitchen size, primer type, paint quality, masking supplies, PPE, repairs |
| Sprayer rental or purchase | Often adds $75-$400+ | Rental length, sprayer quality, tips, strainers, practice materials |
| Professional cabinet painting | About $1,400-$7,000 | Door count, repairs, spraying, grain filling, local labor, warranty |
| Per linear foot pricing | About $30-$70 per linear foot | Can miss details like drawer count, islands, profiles, glass doors, crown |
| Square foot pricing | About $5.40-$10.79 per sq. ft. starting range | Surface condition, prep level, finish system, regional labor |
Step 1: Build a Door and Drawer Map
Before removing a single screw, make a simple map of the kitchen. Number every door and drawer front. Mark the matching cabinet opening on painter’s tape inside the box or on a protected area that will not be painted. Put each hinge, screw set, and pull into a labeled bag.
This step sounds fussy until reinstallation starts. Even doors that look identical may have hinge cup locations, screw holes, or slight adjustments that only fit cleanly in the original opening. Swapping two similar doors can turn a simple reinstall into an hour of alignment work.
Free tools Windows power users keep installed
One-click scans. No signup required.
Remove knobs, pulls, hinges, and old door bumpers. Do not paint around hardware. Paint buildup around hinges looks amateur, interferes with fit, and can chip when hardware is tightened. If you plan to change pull sizes, fill the old holes and drill new ones before priming and painting. A common cabinet pull spread is 3 inches, 3-3/4 inches, 5 inches, or 6-5/16 inches center-to-center, so measure the actual hardware before drilling.
Step 2: Protect the Kitchen and Create a Drying Zone
Cabinet painting creates sanding dust, overspray risk, wet edges, and several days of kitchen disruption. Empty the cabinets near work zones or at least pull dishes and food away from open edges. Cover countertops, appliances, floors, backsplashes, and adjacent walls with drop cloths, plastic, or masking paper. Turn off nearby ceiling fans while sanding and painting.
If spraying, masking becomes a major part of the job. Floors, walls, appliances, ceilings near uppers, windows, openings, and HVAC returns may need protection. Spraying can produce the smoothest factory-like finish, but only when ventilation, masking, dust control, and technique are handled correctly.
Set up a separate drying area with steady temperature, low dust, and enough horizontal space. Doors should not be stacked while the finish is soft. A garage can work if it is clean, dry, and not full of wind-blown dust. In occupied homes, plan a temporary kitchen setup with a microwave, coffee maker, cooler or secondary refrigerator access, paper goods, and a realistic meal plan for three to seven days.
Do these 3 things before closing this tab:
1Repair Windows errors before they cause bigger problems2Scan for outdated or missing drivers - takes under a minute3Clear out junk files and repair common Windows errorsRank #2

- Includes 30 featured and newest released color card. Sprayed on color to see our colors in your homes lighting for more accurate color choices.
- ALL-IN-ONE Paint - NO Sanding, NO Priming, NO Top Coat Required, Low Luster, Velvet Sheen Finish
- Interior/Exterior - Paint your whole house - Ideal for hard surfaces including walls, doors, cabinets, counters, furniture, metal, glass, ceramics and floor and wall tile
- Durable yet stretches to paint smooth fabrics, vinyl and leather
- Results cannot be guaranteed. Digital screens may not show color accurately. Product search "ALL-IN-ONE PAINT by Heirloom Traditions, Color Confidence Card", for an accurate color choice.
Step 3: Degrease Every Surface Twice If Needed
Kitchen cabinets collect grease even when they look clean. Oils drift from cooking, hands touch the same edges daily, and some cabinets have silicone polish or wax residue. Primer needs to bond to the cabinet surface, not to a film of cleaner, grease, or furniture polish.
Use a dedicated degreaser or TSP substitute according to the label. Scrub around handles, rails, stiles, panel edges, range-adjacent doors, and the undersides of upper cabinets. Change water often. If the cleaner requires rinsing, wipe with clean water afterward and let the surfaces dry fully.
On our jobs, we pay extra attention to the doors closest to the stove, trash pullout, sink base, and coffee area. Those pieces usually carry more oil and hand residue than the rest of the kitchen. If you sand before cleaning, you can grind grease into the surface and make adhesion worse.
Step 4: Repair Damage, Fill Holes, and Caulk Selectively
After cleaning, inspect with raking light from the side. Look for dents, chipped corners, open seams, loose veneer, old drips, failing caulk, and screw-hole damage. Fill small dents and hardware holes with a quality wood filler or two-part filler. Let it dry fully, then sand flush.
Use paintable caulk only where it belongs: small stationary gaps between cabinet boxes and trim, or fixed seams that will not move much. Do not caulk floating panel gaps on doors unless the door construction and product allow it. Wood panels expand and contract. Caulk in the wrong joint can crack and look worse later.
For oak, ash, and other open-grain woods, decide what finish you actually want. If you paint oak without grain filler, you will usually still see the wood grain texture. That can be perfectly acceptable if the expectation is painted wood. If the goal is a smoother furniture-style finish, grain filler adds labor, sanding, and cost. This is one of the biggest places where DIY expectations and professional estimates can differ.
Step 5: Sand or Degloss for Adhesion
Sanding cabinets is not about removing every bit of old finish. It is about dulling glossy surfaces, leveling repairs, smoothing rough areas, and giving primer a mechanical bite. For most previously finished cabinets, start around 120- to 180-grit for scuff sanding and move to 180- to 220-grit between primer and topcoat. Avoid aggressive sanding that cuts through veneer or rounds over crisp door profiles.
Use sanding sponges for profiles and flat sanding blocks for rails, stiles, and slab fronts. Vacuum dust thoroughly, including corners and panel grooves. Then wipe with a tack cloth or a clean, slightly damp cloth, depending on the coating manufacturer’s recommendation.
Can you paint kitchen cabinets without sanding? Sometimes a liquid deglosser and high-bond primer can work on certain surfaces, but we still prefer at least a controlled scuff sand on most cabinet jobs. Slick factory finishes, old clear coats, and glossy paint are common peeling risks. If you are trying to skip sanding because of possible lead paint, stop and address the lead risk properly instead of dry sanding.
Step 6: Run an Adhesion Test on One Door
A sample door test is cheap insurance. Choose a less visible door or the back of a drawer front. Clean it, sand or degloss it, prime it, apply the intended paint system, and let it cure according to the label. Then test scratch resistance in an inconspicuous spot with a fingernail or gentle tape pull.
Rank #3

- Includes 30 featured and newest released color card. Sprayed on color to see our colors in your homes lighting for more accurate color choices.
- ALL-IN-ONE Paint - NO Sanding, NO Priming, NO Top Coat Required, Low Luster, Velvet Sheen Finish
- Interior/Exterior - Paint your whole house - Ideal for hard surfaces including walls, doors, cabinets, counters, furniture, metal, glass, ceramics and floor and wall tile
- Durable yet stretches to paint smooth fabrics, vinyl and leather
- Results cannot be guaranteed. Digital screens may not show color accurately. Product search "ALL-IN-ONE PAINT by Heirloom Traditions, Color Confidence Card", for an accurate color choice.
This test is especially useful on glossy factory finishes, laminate-like surfaces, old unknown coatings, heavily polished cabinets, and stained wood that may bleed. If the primer scratches off easily after the recommended cure period, do not keep painting the whole kitchen with the same system. Change the cleaning method, sanding approach, primer, or coating before committing.
Professionals do this because cabinet failure is expensive. Repainting 35 doors after adhesion problems show up is far worse than spending a day validating the system on one piece.
Recommended Free Tools
Step 7: Prime With the Right Primer
Primer choice should match the cabinet surface and the problem you are solving. Bonding primer is useful for slick factory finishes and previously coated surfaces. stain-blocking primer is important for tannin-rich woods such as oak, cherry, mahogany, and some darker stained cabinets. Shellac-based or oil-based primers can help with stubborn bleed-through where allowed by local rules and where ventilation and PPE are handled correctly.
Apply primer in thin, even coats. Heavy primer can sag in profiles, soften detail, and create sanding work. Prime backs first, let them dry, then prime fronts so the most visible side gets the cleaner final handling. Keep track of recoat windows. Some primers need to be recoated within a certain period or sanded if that window is missed.
After primer dries, sand lightly with 180- to 220-grit to remove raised grain, dust nibs, and roller texture. Vacuum and wipe again. This primer sanding step is one of the reasons pro cabinet finishes feel smoother than quick DIY jobs.
Step 8: Apply Two Thin Finish Coats
Most cabinet systems need two finish coats over primer. Thin coats are stronger than thick coats. Thick paint sags on vertical face frames, puddles in door profiles, shows brush marks, traps water or solvents, and stays soft longer. Follow the paint manufacturer’s spread rate and recoat time instead of trying to cover in one pass.
If brushing and rolling, use a high-quality synthetic brush for inside corners, profiles, and edges, then a foam or fine microfiber roller for flat areas. Tip off lightly where needed, and keep a wet edge. Do not overwork enamel as it starts to set. Many cabinet coatings level well if you lay them on evenly and leave them alone.
If spraying, practice first. Strain the paint if recommended. Use the proper tip size for the product, keep the gun moving, overlap passes consistently, and watch edges where buildup happens fast. Spraying doors horizontally often gives a smoother result, but it requires a clean drying setup and enough space. Face frames can be sprayed in place only with careful masking and ventilation.
Paint the backs first, then the fronts. That way, any tiny handling marks are less likely to end up on the most visible face. Use raking light before the final coat to catch missed edges, sanding scratches, caulk ridges, drips, and dust nibs.
Step 9: Let the Finish Cure Before Reinstalling Hard
Dry-to-touch is not the same as cured. A cabinet door can feel dry in a few hours and still be too soft for stacking, slamming, aggressive cleaning, or pressure from bumpers. Many cabinet coatings need days to weeks to reach full hardness. Temperature, humidity, ventilation, film thickness, and product chemistry all matter.
What’s actually slowing this PC down?
Pick the symptom - the matching free tool is one click away.
Rank #4

- Includes 30 featured and newest released color card. Sprayed on color to see our colors in your homes lighting for more accurate color choices.
- ALL-IN-ONE Paint - NO Sanding, NO Priming, NO Top Coat Required, Low Luster, Velvet Sheen Finish
- Interior/Exterior - Paint your whole house - Ideal for hard surfaces including walls, doors, cabinets, counters, furniture, metal, glass, ceramics and floor and wall tile
- Durable yet stretches to paint smooth fabrics, vinyl and leather
- Results cannot be guaranteed. Digital screens may not show color accurately. Product search "ALL-IN-ONE PAINT by Heirloom Traditions, Color Confidence Card", for an accurate color choice.
Reinstall carefully after the product allows handling, but treat the kitchen gently during the early cure period. Avoid closing doors tightly if the finish still feels soft. Do not scrub with abrasive pads. Do not hang wet towels over doors. Do not let children pick at edges. Install new clear bumpers after the finish has cured enough that they will not imprint or stick.
If doors are reinstalled too soon, the paint can block, which means two painted surfaces stick together. This often happens where doors contact face frames or where fresh pieces are stacked. Blocking can tear paint when the door opens and can make a good job look damaged within days.
Independent reader supportYour contribution helps us test, update, and keep practical guides available for everyone.Step 10: Reinstall, Adjust, and Maintain the Finish
Use your numbered map and labeled bags to reinstall each door and drawer front in its original location. Tighten hardware carefully. Over-tightening pulls on fresh paint can crush the finish around screw holes. Adjust hinges so reveals are even, doors do not rub, and pairs meet cleanly.
Once the kitchen is back together, maintain the finish with mild soap, water, and a soft cloth. Avoid abrasive pads, harsh degreasers, magic eraser-style scrubbing, and strong solvents unless the paint manufacturer specifically allows them. Wipe spills and cooking oils promptly, especially near the range and sink.
Quick wins for a faster PC:
Scan for outdated or missing drivers - takes under a minuteDriver Scan →Clear out junk files and repair common Windows errorsFree Scan →Expect some normal wear over time on high-contact areas, especially around trash pullouts, sink bases, and frequently used drawers. Keep a small labeled container of touch-up paint. For best results, note the exact brand, product line, sheen, color formula, primer used, and date applied.
When to DIY and When to Hire a Pro
DIY cabinet painting can make sense if the cabinets are in good shape, the kitchen is small to medium, you can live with several days of disruption, and you are patient enough to clean, sand, prime, sand again, and apply thin coats. It is also a reasonable project if you accept a clean hand-finished look rather than a sprayed shop finish.
Hire a professional if the kitchen is large, the cabinets are expensive, the finish must look close to factory-smooth, the wood is oak and you want grain filled, the color change is severe, the existing finish is peeling, the home may involve lead-safe work, or the job needs to be done on a predictable schedule. Professional crews also bring dust control, spray equipment, drying racks, repair materials, and a repeatable coating system.
The price gap is real. A careful DIY job may cost $200 to $600 in materials, plus tools and a significant amount of labor. A professional job may cost $1,400 to $7,000, with an average kitchen often around $2,000 to $4,500. The higher number is not just paint. It reflects labor for removal, labeling, cleaning, sanding, masking, priming, spraying or brushing, repairs, grain filling, transport if doors are finished off-site, warranty risk, and return trips for adjustment.
Painting is still far cheaper than cabinet replacement in most kitchens. New cabinets can run from several thousand dollars for stock options to tens of thousands for custom cabinetry. If your cabinet layout works and the boxes are solid, painting can deliver a major visual change without tearing apart the kitchen.
Safety, Ventilation, and Permit Notes
For most homes, painting existing kitchen cabinets does not require a building permit because you are not changing structure, plumbing, electrical, gas lines, walls, or egress. Permits may become relevant if the cabinet work is part of a larger remodel involving layout changes, electrical alterations, plumbing relocation, structural work, or new ventilation. Local rules vary, so check your city or county building department when the project goes beyond paint.
Best Value
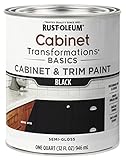
- CABINET TRANSFORMATION: Refresh outdated cabinets, vanities, furniture and trim with rich Black color and a smooth semi-gloss finish
- DURABLE PERFORMANCE: Easy-to-clean finish resists dirt and grime while standing up to household chemicals
- SMOOTH APPLICATION: Outstanding flow and leveling help create a beautiful finish with brush, roller, pad applicator or airless sprayer
- FAST PROJECT COMPLETION: Dries to touch in 30 minutes, recoats in 2 hours and is ready for normal use after 24 hours
- INTERIOR CABINET COATING: Ideal for kitchens, bathrooms, laundry rooms and other interior cabinet and trim applications
Ventilation matters. Follow coating labels for respirators, airflow, temperature, and humidity. Waterborne products are usually easier to manage indoors than solvent-heavy coatings, but sanding dust and aerosolized spray still require protection. Keep ignition sources, pilot lights, and open flames away from flammable products. Store rags and solvents according to the label.
Lead safety deserves special attention in pre-1978 homes. Do not dry sand unknown old coatings and spread dust through the kitchen. Use testing, containment, HEPA vacuuming, wet methods where appropriate, and certified help when required. This is not a place to improvise.
Common Mistakes That Ruin Cabinet Paint
The most common mistake is skipping real degreasing. Household soap and a quick wipe are rarely enough around a working kitchen. Paint that bonds to oil residue will eventually peel, chip, or scratch off more easily than it should.
The second mistake is painting doors in place. It causes drips, missed edges, hardware buildup, uneven cure lines, and poor access to profiles. Removing doors and drawer fronts takes time, but it produces a cleaner job.
Other common failures include using wall paint, applying thick coats, ignoring glossy factory finishes, skipping primer sanding, reinstalling too soon, leaving old bumpers in place, underestimating oak grain, and working in a dusty area. Pet hair, HVAC airflow, sanding dust, and kitchen traffic can all land in wet enamel and stay there.
The professional approach is simple but disciplined: clean thoroughly, scuff properly, prime for the surface, sand between key stages, apply two thin coats, and let the finish cure. Follow that sequence and your cabinets have a real chance of looking intentional, not just painted.
Frequently Asked Questions
How much does it cost to paint kitchen cabinets in 2026?
DIY materials commonly cost about $200 to $600. Professional cabinet painting in the U.S. often ranges from about $1,400 to $7,000, with many average kitchens around $2,000 to $4,500 depending on size, repairs, spraying, grain filling, and local labor.
Can I paint kitchen cabinets without sanding?
Sometimes, but it is risky. A liquid deglosser and bonding primer may work on some surfaces, but most glossy cabinet finishes need at least a light scuff sand for reliable adhesion. If the home was built before 1978, address lead safety before sanding.
What kind of paint is best for kitchen cabinets?
Use cabinet-grade acrylic enamel, urethane-modified enamel, alkyd enamel, or waterborne alkyd. Ordinary wall paint is usually too soft for doors and drawers that are handled and cleaned every day.
Do I need primer before painting kitchen cabinets?
Yes in most cases. Primer improves adhesion, blocks stains or tannins, and creates a more consistent base for the finish coat. Use bonding primer for slick surfaces and stain-blocking primer for woods such as oak or cherry.
Is it better to spray, roll, or brush cabinet paint?
Spraying gives the smoothest factory-like finish, but it requires masking, ventilation, dust control, and skill. A high-quality synthetic brush and foam or microfiber roller can still produce a strong DIY finish if coats are thin and sanding is careful.
How long should painted cabinets cure before use?
Follow the coating label, but expect gentle handling for several days and full cure to take days to weeks. Avoid heavy scrubbing, slamming doors, stacking pieces, or installing bumpers too early.
Quick Recap
Product prices and availability are accurate as of the date/time indicated and are subject to change. Any price and availability information displayed on Amazon at the time of purchase will apply.

