Windows Errors? Fix Them Before They Spread
Repair common Windows errors and clear accumulated junk for a smoother, more stable PC - no reinstall needed.Free scan · no reinstallCrashes, No Sound, or Screen Glitches?
Random freezes, missing sound and display glitches usually trace back to one bad driver. Find and replace yours safely.Free scan · under a minuteYou can repaint sound kitchen cabinets yourself, but lasting results depend less on a magic paint than on clean, dry surfaces, preparation suited to the existing finish, a compatible primer and topcoat, and enough time for the coating to dry before reassembly. The ten steps below are an organized homeowner workflow—not a universal manufacturer protocol. If cabinets are badly damaged or their finish needs specialized remediation, a cabinet refinisher may be the better choice.
Before you start: check the cabinets and gather supplies
Identify what you are painting: wood, laminate, previously painted material, or wood with stain and a clear coat. Look for peeling, loose coating, deep damage, and slick or glossy areas. The right preparation and primer depend on both the substrate and the existing finish. Behr recommends weighing cabinet condition, desired finish, and the time commitment when deciding whether to DIY or hire a professional (Behr’s cabinet-painting guide).
As an Amazon Associate I earn from qualifying purchases.
Set out a compatible cabinet, door, or trim coating; the primer recommended for your surface and chosen coating; cleaner or degreaser; suitable filler; sandpaper or a sanding sponge; painter’s tape and drop cloths; a screwdriver; clean rags; an angled brush; and a mini roller and cover. A sprayer is optional, not a shortcut: it requires more masking and control of overspray. Check the current product label and technical data sheet for substrate compatibility, application method, ventilation, cleanup, coat count, and drying instructions before buying or beginning.
Do these 3 things before closing this tab:
1Scan for outdated or missing drivers - takes under a minute2Repair Windows errors before they cause bigger problems3Fix the driver behind crashes, sound loss and screen glitchesHow to paint kitchen cabinets in 10 steps
-
Assess the finish and choose a compatible system
Decide whether the surface is sound and suitable for repainting, then select primer and topcoat for that substrate and existing finish. A slick surface may call for bonding primer; a dark or bleeding finish may need stain-blocking primer. Treat manufacturer examples—such as Sherwin-Williams Emerald Urethane Trim Enamel, Benjamin Moore Advance, and Behr Premium Cabinet, Door & Trim Enamel—as options from their respective manufacturers, not as an independent ranking. Do not mix products unless their instructions confirm compatibility.
#1 Best Overall
 Nuvo Titanium Infusion Cabinet Makeover Kit - Easy DIY 7-Piece Set, Brilliant White, Long-Lasting Finish
- Ultra-White Brilliance: Experience the transformative power of Titanium Infusion, an ultra-white hue inspired by the artist’s palette – perfect for a modern, timeless look.
- One-Day Transformation: Redefine your kitchen cabinets in a single day with our brush-and-roll application - no professional help needed.
- All-Inclusive Kit: Each package covers 100 square feet, ideal for the typical kitchen, and includes all the necessary tools for a flawless finish.
- Eco-Friendly & Safe: Enjoy the peace of mind with our low-VOC, water-based formula, ensuring a safer painting experience.
- Effortless Transformation: No stripping or priming required; our paint adheres beautifully to wood, laminate, and metal cabinets with minimal preparation.
-
Empty and label each opening
Remove everything from the cabinets. Mark doors and drawers discreetly so each can return to its original opening; numbering them is one approach recommended by Sherwin-Williams’ cabinet guide.
-
Remove doors, drawers, and hardware
Take off doors and drawer fronts where practical, then remove handles, knobs, and hinges. This lets you reach edges more evenly and keeps paint off hardware. Store screws and hardware by door or opening.
Rank #2
Sale Mister Rui 4 Inch Mini Paint Roller Kit 12-Pc with Tray, Liners & Brush
- COMPLETE 12-PC PROFESSIONAL SET:Includes 4" tray ×1, snap-fit handle ×1, reusable liners ×2, liner cover ×1, dual-brown microfiber sleeves ×4, white microfiber sleeves ×2, and 1.5" angled brush ×1. Perfect for walls, ceilings, trim, cabinets, and furniture
- SMOOTH FINISH WITH MICROFIBER SLEEVES:Dual-density roller sleeves (9mm nap for textured surfaces, 6mm nap for smooth walls) hold paint evenly, prevent drips, and deliver streak-free results. Microfiber fibers resist shedding for pro-grade coverage
- EASY COLOR CHANGE & CLEANUP WITH LINER:Reusable plastic liners snap into the tray for quick color swaps; the airtight cover stores paint overnight without drying. Save time and reduce waste
- NO-SPILL TRAY & COMFORT GRIP HANDLE:Deep tray design holds ample paint without leaks, while the ergonomic handle reduces fatigue during extended painting sessions. Ideal for DIYers and contractors
- VERSATILE FOR ALL SURFACES + DETAIL BRUSH:Tackle edges and corners with the 1.5" angled brush. Sleeves work flawlessly on drywall, wood, concrete, and more. Get professional results with minimal effort
-
Protect the room and set up a drying area
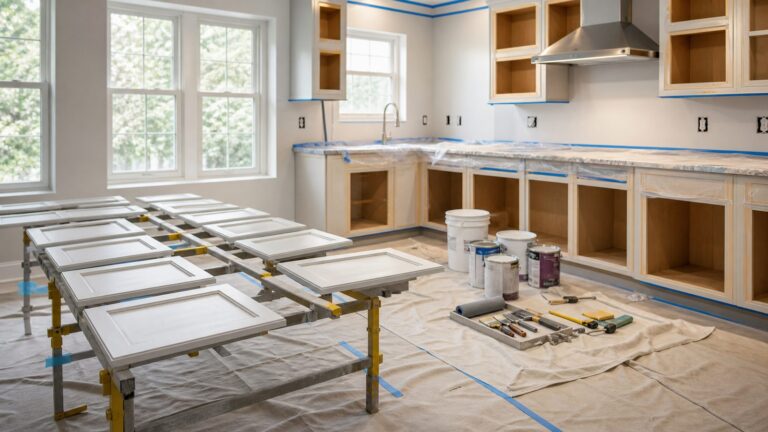
Cover floors and counters, mask surfaces that should not be painted, and prepare a level, protected place where doors and drawer fronts can dry undisturbed. Choose a separated work area with conditions suitable for the product, as described in Sherwin-Williams’ cabinet guide.
Recommended: PC Feels Slow? A Free Scan Shows What's Dragging Windows Down →Recommended: Crashes or Glitches? A Free Driver Scan Usually Finds the Culprit →Special offer. See more information about Outbyte and uninstall instructions. Please review EULA and Privacy policy. -
Degrease and let the surfaces dry
Clean every surface to be painted with an appropriate cleaner or degreaser, following its directions. Rinse if required, then let the cabinets dry completely. Kitchen grease, dust, moisture, and glossy residue can undermine adhesion; Behr identifies these as potential adhesion problems, and Sherwin-Williams also stresses clean, dry surfaces.
Rank #3
 Giani Nuvo All-In-One Cabinet Paint Kit (Tidal Haze)
- Coastal Serenity: Tidal Haze offers a dusty, pale blue reminiscent of misty mornings on the U.S. Eastern coastline, perfect for bright, airy contemporary decor.
- One-Day Transformation: Redefine your kitchen cabinets in a single day with our brush-and-roll application - no professional help needed.
- All-Inclusive Kit: Each package covers 100 square feet, ideal for the typical kitchen, and includes all the necessary tools for a flawless finish.
- Eco-Friendly & Safe: Enjoy the peace of mind with our low-VOC, water-based formula, ensuring a safer painting experience.
- Effortless Transformation: No stripping or priming required; our paint adheres beautifully to wood, laminate, and metal cabinets with minimal preparation.
-
Repair and scuff-sand as the system requires
Fill holes and surface flaws with a suitable filler, let repairs dry, then smooth them. Sanding advice varies with the surface and coating system: Benjamin Moore generally recommends 100–150 grit to dull glossy finishes, while Behr lists 150–220 grit for its project supplies and calls for scuff-sanding or deglossing previously glossy paint. Sherwin-Williams describes an adhesion test that may allow some clean, paintable surfaces to avoid sanding. Follow the instructions for your chosen system rather than treating any grit or sanding rule as universal. Remove dust and let surfaces dry.
If old paint may contain lead, do not sand or scrape it casually. Consult the EPA’s current lead-safe renovation guidance for DIYers and applicable local rules before disturbing it.
Rank #4
 Nuvo Antique White Cabinet Makeover Kit - Easy DIY 7-Piece Set, Warm Cream, Long-Lasting Finish
- Warm Cream Elegance: Antique White offers a warm, light cream shade reminiscent of ancient Egyptian Ivory, perfect for both classic and contemporary settings.
- One-Day Transformation: Redefine your kitchen cabinets in a single day with our brush-and-roll application - no professional help needed.
- All-Inclusive Kit: Each package covers 100 square feet, ideal for the typical kitchen, and includes all the necessary tools for a flawless finish.
- Eco-Friendly & Safe: Enjoy the peace of mind with our low-VOC, water-based formula, ensuring a safer painting experience.
- Long-Lasting Durability: Achieve a long-lasting, satin finish that withstands daily usage without the need for extra sealers or topcoats.
-
Prime for the substrate and existing finish
Apply the primer specified for your surface and topcoat. Use a bonding primer where the system calls for it on a slick surface, or a stain-blocking product where stains or a bleeding finish need to be contained. Manufacturer instructions differ: Benjamin Moore warns against pairing its Advance paint with lacquer-based primer, while Sherwin-Williams describes an alkyd-primer approach for a particular stained-and-clear-coated cabinet scenario. These examples are not interchangeable instructions. Check compatibility and the label, and make a hidden-area adhesion test if directed.
Recommended Free Tools
Special offer. See more information about Outbyte and uninstall instructions. Please review EULA and Privacy policy. -
Let primer dry, smooth if directed, and remove dust
Allow the primer to dry for the time stated for that product and conditions. Lightly sand only if the chosen system directs you to; Benjamin Moore’s sequence specifies light 220-grit sanding after primer, but that is not a universal requirement. Remove sanding dust before applying finish paint.
Best Value
Sale Mister Rui 4 Inch Foam Paint Roller Kit with Tray, Liners & Brush
- Get everything you need for any painting project with this all-in-one set: 1 sturdy 4-inch roller frame with a soft ergonomic handle, 1 durable magnetic paint tray, 2 tray liners, 5 high-density foam roller covers, 1 angle 2-inch paintbrush, and a drop cloth. Designed for easy use and cleanup, this kit is ideal for DIYers and professionals alike
- The innovative 4-inch paint tray, made from durable, recyclable PP material, supports up to 220 lbs (100 kg) without bending or deforming. Its built-in magnetic paint tray holder keeps your brush secure when not in use, while dual paint removal ridges ensure smooth application. A non-slip base adds stability, and the tray’s ergonomic design includes a curved spout for easy paint recycling and slots to hold the roller frame securely
- The upgraded roller frame features a soft, ergonomic rubberized handle, reducing hand fatigue during extended use. Its sturdy design provides reliable support for the roller and ensures smooth, even paint application, making every project more comfortable and efficient
- These high-density foam roller covers are perfect for water-based or oil-based paints, delivering smooth, streak-free finishes. Retain more paint with fewer trips to the tray, ensuring even coverage on walls, cabinets, doors, or trim. Achieve professional results every time with these durable foam rollers
- The included precision paintbrush with non-shedding bristles is ideal for cutting in edges and corners, delivering clean lines and a polished look. Paired with the sturdy roller frame and high-quality tray, these tools help you complete painting projects faster while simplifying cleanup with reusable tray liners
-
Apply the cabinet finish coats
Use a coating rated for cabinets, doors, or trim and confirmed suitable for your substrate and application method. With a brush and roller, brush recessed details and roll flat areas, a method described by both Sherwin-Williams and Benjamin Moore. Apply evenly, avoid overworking the paint, and respect the stated recoat interval. Follow the product directions for coat count and application conditions.
-
Allow drying time before careful reassembly
Use the selected product’s current instructions for dry, recoat, and cure times; these are not the same milestone. Manufacturer examples differ: Sherwin-Williams advises 24–48 hours between coats of its cited enamel and another 24–48 hours before reinstalling hardware; Benjamin Moore recommends at least 24 hours before reassembly, with two or three days better. Those are product-specific directions, not one schedule for every paint. Reinstall carefully only when the instructions and conditions allow, since premature handling can smudge or stick painted surfaces.
How to choose between paint systems
Manufacturer guides provide product instructions, not independent comparative trials, so they do not establish a universally best cabinet paint. Compare the actual system you are considering on the points below, using its current label and technical data sheet:
Quick wins for a faster PC:
Scan for outdated or missing drivers - takes under a minuteDriver Scan →Clear out junk files and repair common Windows errorsFree Scan →Quick Recap
- Compatibility with the cabinet substrate and existing finish.
- Whether bonding or stain-blocking primer is needed.
- Required cleaning, sanding, and other surface preparation.
- Whether brush-and-roller or spray application is supported and what setup it requires.
- Coat count and product-specific recoat, drying, and curing times.
- Any stated block-resistance claims and available sheen.
- Ventilation, cleanup, and safety directions.
Common mistakes that undermine the finish
- Painting over grease or dust: A clean, dry surface is essential to adhesion; cleaning is preparation, not an optional shortcut.
- Using one sanding rule for every cabinet: Substrate, existing finish, primer, and coating instructions determine whether and how to scuff-sand.
- Choosing primer by habit: A primer that suits stained, clear-coated wood may not be appropriate for another surface or paint system.
- Reassembling on a convenient schedule: Respect the coating’s instructions and give doors and frames time to dry before handling or putting them back together.
- Assuming a sprayer is simpler: Spraying can increase masking and overspray-control demands; brush-and-roller application is a viable option when supported by the product directions.
Product prices and availability are accurate as of the date/time indicated and are subject to change. Any price and availability information displayed on Amazon at the time of purchase will apply.