PC Slower Than It Used to Be?
A free scan shows the junk files, broken settings and background clutter dragging Windows down - then fixes them in one click.Free scan · Windows 10 & 11Outdated Drivers Are Slowing You Down
One free scan finds every outdated or missing driver and matches the right update for your exact hardware.Free scan · exact hardware matchA refrigerator should be organized around food safety first, convenience second, and appearance last. The right setup keeps the refrigerator at 40°F or below, protects ready-to-eat food from raw meat leaks, leaves cold-air vents open, and puts the items your household actually uses where people can reach them without digging.
On our kitchen projects, we see the same pattern often: the homeowner buys organizers, the fridge looks better for two weeks, then food still spoils early or gets lost in the back. That usually means the problem was not just clutter. It was poor zones, blocked airflow, weak temperature control, a bad gasket, or a refrigerator opening that was never sized correctly during a previous remodel.
As an Amazon Associate I earn from qualifying purchases.
This guide treats refrigerator organization as a working home system. You will still use bins, trays, labels, and containers, but the goal is performance: safer food, less waste, easier meal prep, and a refrigerator that does not have to fight its own layout.
Recommended Free Tools
Start With a Temperature Audit
Before moving shelves or buying a set of acrylic bins, verify what your refrigerator is actually doing. The food-safety baseline in the United States is simple: keep the refrigerator at 40°F or below and the freezer at 0°F. Do not rely only on the digital display on the door. That display may show the control setting or an average, not the temperature at the upper shelf, lower shelf, door, or crisper drawer.
#1 Best Overall

- Convenient and practical: Our refrigerator thermometer is suitable for traditional refrigerators, freezers, insulated boxes, etc. It has a large dial with clear blue and red area indication on the surface of the fridge thermometer, making it easier for you to read the temperature.
- Temperature range: Refrigerator thermometer measures refrigerator temperature -20~80 °F/ -30~30 °C, meeting different requirements and requirements. Clear reading scale helps you measure food stored at the right temperature to ensure safety.
- Exquisite design: The refrigerator thermometer uses a hook type panel design, can be hung or placed in different positions, reading instant with the mechanical design, no need for battery power with our freezer thermometer.
- Durable material: Refrigerator thermometer is made of stainless steel material, not easy to break, long life, durable, easy to clean structure and glass protective lens, very suitable for use in the refrigerator and freezer.
- What you get: 2 x PECULA Refrigerator Thermometer and our 7*24 friendly customer service for peace of mind.
Use a standalone refrigerator/freezer thermometer. A basic model is usually $5 to $15, and it is one of the best low-cost tools in the kitchen. Put it in four places over 24 hours: upper shelf, lower shelf, door, and crisper area. Check the readings after the refrigerator has been closed for several hours, then again after normal family use.
If one shelf is 35°F and another is 43°F, you do not have a storage problem alone. You have a zone problem. That may be caused by overloaded shelves, blocked rear vents, a weak door gasket, dirty coils, or a failing thermostat. Organization helps, but only after you know the cold and warm areas.
What the Readings Tell You
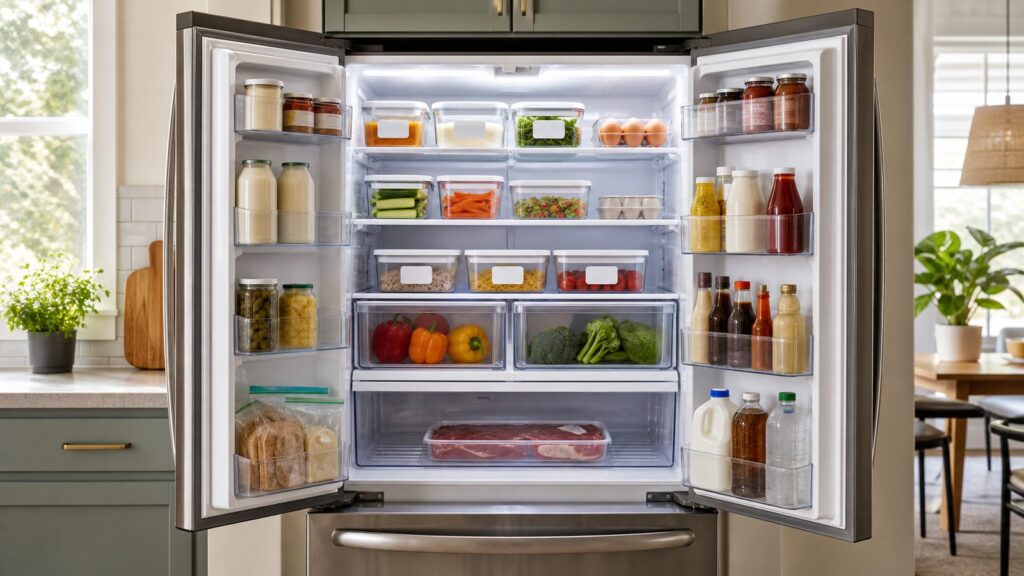
The coldest stable shelf is the best place for raw proteins in a rimmed tray. The most visible shelf between shoulder and knee height is best for leftovers and ready-to-eat food. The door is usually the warmest and most variable area, so it should hold condiments, sauces, and drinks, not milk, eggs, or raw meat.
What’s actually slowing this PC down?
Pick the symptom - the matching free tool is one click away.
If the refrigerator cannot stay at 40°F or below with normal loading, do not keep rearranging bins and hoping the food lasts longer. Clean the coils, inspect the gasket, confirm the vents are open, and consider appliance service if temperatures stay high.
Use Food Safety as the Main Layout Rule
The safest refrigerator layout works from low-risk foods at the top to higher-risk foods at the bottom. This matters because gravity is not negotiable. If raw chicken leaks above a salad container or cooked rice, the organization system has failed.
Use this order as a practical default:
- Top shelves: ready-to-eat foods, cooked leftovers, opened jars that need visibility, prepared lunches, and foods that will be eaten without further cooking.
- Middle shelves: dairy, eggs in their original carton, deli items, meal-prep containers, yogurt, and frequently used breakfast foods.
- Lowest shelf: raw meat, poultry, seafood, and thawing frozen foods, always in a rimmed tray or leakproof bin.
- Crisper drawers: produce, separated by humidity needs and ethylene sensitivity where possible.
- Door: condiments, sauces, pickles, jams, beverages, and other items that tolerate temperature swings.
Raw meat, poultry, and seafood belong below ready-to-eat food. Even sealed packaging can fail. A $5 to $20 rimmed tray gives you a physical failure layer. Choose one that can go through the dishwasher and is shallow enough to slide out without tipping.
Eggs should stay in their original carton in the main compartment, not loose in the door. The carton protects them from odors, keeps the date visible, and holds them in a more stable temperature zone.
Build Zones That Match How Your Household Eats
A refrigerator should not be organized for a photograph. It should be organized for Monday morning, school lunches, late dinners, and grocery unloading. The best zones are repeatable enough that everyone in the house can put food back in the same place.
For most families, these zones work well:
- Breakfast: yogurt, fruit cups, butter, cream cheese, breakfast meat, and ready-to-heat items.
- Lunches: deli meat, cheese, cut vegetables, prepared containers, wraps, and lunchbox sides.
- Leftovers: shallow containers at eye level, dated and easy to grab.
- Produce: drawers or shallow bins for greens, herbs, fruit, and vegetables.
- Raw proteins: lowest shelf only, in a tray or dedicated bin.
- Beverages: door shelves or a stable lower shelf if the household stores many cans or bottles.
- Condiments: door shelves grouped by use, such as sauces, dressings, spreads, and cooking condiments.
For older adults, shorter users, or busy households, put the most-used and highest-risk foods between shoulder and knee height. That reduces bending, spills, and forgotten containers. In remodeling work, we also look at door swing, adjacent counter landing space, and whether the refrigerator drawers can open fully without hitting an island or wall.
The Eat-First Zone
One of the most effective waste-reduction tools is a labeled “eat first” bin or shelf. Use it for leftovers, opened packages, cut fruit, produce nearing the end of its life, and small containers that would otherwise disappear behind larger items.
Rank #2
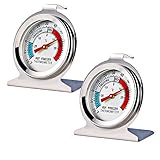
- Measuring range:-20~80℉
- Material type:Stainless steel
- Installation mode:Wide base and integrated hook allow it to be placed anywhere in the refrigerator
- Easy to read
- Please give the thermometer enough reaction time
Keep this zone at eye level. Make it small enough that it forces decisions. A single 10- to 14-inch-wide bin is usually better than a large drawer, because the point is visibility, not storage volume. Check it before grocery shopping and before cooking dinner.
Quick wins for a faster PC:
Scan for outdated or missing drivers - takes under a minuteDriver Scan →Clear out junk files and repair common Windows errorsFree Scan →Choose Organizers That Improve Function, Not Just Appearance
Clear bins can help, but only when they solve a specific problem. A bin that is too deep simply hides food in a different container. A bin that blocks a rear vent can make cooling worse. A bin that requires two hands to remove will not be used consistently by a busy household.
For most refrigerators, shallow bins between 4 and 6 inches tall work better than tall bins. They keep categories together without blocking visibility. Deep bins are useful for snacks, cheese, or lunch items only if they pull out fully and have a front label.
Useful supplies usually include a refrigerator thermometer, two to six clear bins, one lazy Susan or turntable for jars, a leakproof raw-meat tray, labels, and shallow airtight containers for leftovers. A basic setup generally costs $20 to $150. A premium setup with modular acrylic systems, produce keepers, glass meal-prep containers, can dispensers, under-shelf drawers, and label systems can run $150 to $400 or more, especially in French-door and large-capacity refrigerators.
| Item | Typical 2026 Cost | Best Use |
|---|---|---|
| Refrigerator/freezer thermometer | $5-$15 | Verifying shelf-level temperature |
| Rimmed raw-meat tray | $5-$20 | Leak control on the lowest shelf |
| Clear shallow bins | $6-$25 each | Lunch, breakfast, snacks, and eat-first zones |
| Turntable | $10-$25 | Small jars, sauces, and condiments |
| Airtight leftover containers | $15-$80 per set | Shallow storage and faster cooling |
| Premium modular system | $150-$400+ | Large refrigerators or highly structured households |
Labels are useful when they reduce decision-making. Label broad zones such as “lunch,” “leftovers,” “raw meat,” and “eat first.” Avoid over-labeling every small container unless the household will maintain it.
Protect Airflow and Refrigerator Performance
A refrigerator cools by moving cold air through the cabinet. When shelves are packed tight from wall to wall, cold air cannot circulate evenly. The result is predictable: frozen lettuce near one vent, warm dairy in another area, and leftovers that age faster than they should.
Leave visible gaps around bins and containers. Do not block rear or side vents. If a bin sits directly in front of a vent, resize the bin or adjust the shelf height. The right answer is not to accept uneven cooling because the organizer looks neat.
As a practical rule, keep the refrigerator comfortably full but not packed. A moderately full refrigerator holds temperature better than an empty one, but an overloaded refrigerator forces the compressor to work harder and creates warm pockets. After a large grocery trip or holiday meal, give cold air a path to move through the cabinet.
Clean Coils and Gaskets on a Schedule
Organization will not overcome neglected maintenance. Clean condenser coils before peak cooling season and before holidays when the refrigerator will be heavily loaded. For many homes, that means once or twice a year. Homes with pets, dust, or a refrigerator near a high-traffic kitchen may need more frequent cleaning.
Inspect the door gasket at the same time. If it is cracked, loose, dirty, or no longer seals evenly, cold air escapes and temperatures become less stable. A simple dollar-bill test can help: close the bill in the door and pull. If there is little resistance in several spots, the gasket may need cleaning, adjustment, or replacement.
Rank #3

- Measuring range:-20~80℉
- Material type:Stainless steel
- Installation mode:Wide base and integrated hook allow it to be placed anywhere in the refrigerator
- Easy to read
- Great quality
Use Crisper Drawers Correctly
Crisper drawers are not general junk drawers for produce. They control humidity, and they work only when you use them intentionally. High humidity helps leafy greens, herbs, broccoli, and similar vegetables hold moisture. Low humidity is better for many fruits and ethylene-producing items that need more airflow.
If your drawers have humidity sliders, use them. If they do not, separate delicate greens from fruit as much as the layout allows. Do not overfill drawers. Packed drawers restrict airflow, crush produce, and trap moisture where it does not belong.
Wash and dry greens only if your household will use them quickly or if you have a storage method that controls moisture well. Excess water shortens shelf life. A towel-lined container or produce keeper can help, but the best system is still visibility and rotation.
The Tool Desk
Outbyte PC Repair FREEClear out junk files and repair common Windows errorsFree Scan →Outbyte Driver Updater FREEFix the driver behind crashes, sound loss and screen glitchesFind Drivers →Store Leftovers So They Cool Fast and Get Eaten
Leftovers should be cooled quickly and stored in shallow, airtight containers. Large, deep containers hold heat too long. Divide soups, casseroles, rice, pasta, and cooked meat into smaller containers before refrigerating.
USDA/FSIS guidance generally puts cooked leftovers at 3 to 4 days in the refrigerator. That is why date labels matter. You do not need a complicated label system. Painter’s tape and a marker work. Write the date cooked or the discard date, then place the container in the eat-first zone.
For meal prep, use containers that stack securely but do not create a wall of identical mystery boxes. Clear lids help. So do broad categories: lunches on one shelf, dinner leftovers on another, and sauces or components in a smaller bin.
Know What Belongs in the Door
The refrigerator door is convenient, but it is usually the least stable temperature zone. Every opening exposes door items to warm kitchen air. That makes the door a poor location for highly perishable foods.
Free tools Windows power users keep installed
One-click scans. No signup required.
Good door items include condiments, mustard, ketchup, hot sauce, pickles, olives, jams, bottled drinks, and cooking sauces. Avoid storing milk, eggs, raw meat, and delicate leftovers in the door. If your household uses a lot of milk, give it a consistent spot on a middle or lower shelf where the temperature is more stable.
Door bins should not be overloaded. Heavy glass bottles can stress plastic rails over time, and crowded door shelves make it harder to see duplicates. Group condiments by use so you do not end up with three open bottles of the same sauce.
Plan the Refrigerator Opening During a Remodel
Refrigerator organization starts outside the appliance too. During kitchen remodels, we plan the refrigerator opening for the next replacement, not just the current model. A tight opening limits future product choices and can hurt ventilation.
Rank #4

- Temperature range: -40°to 80°F or -40°to 27°C
- Thermometer material:Plastics + Stainless Steel
- Good quality
- Easy to install
- Cheap
Manufacturer instructions control the exact clearances. As a general example, GE’s refrigerator clearance guidance commonly falls around 1/8 inch to 1 inch at each side, 1 inch at the top, and 1 to 2 inches at the back, depending on the model. Built-in, counter-depth, and panel-ready units may have very different requirements.
Measure more than width. Check height, depth with handles, door swing, hinge clearance, drawer pullout, water-line location, outlet location, baseboard interference, and whether the refrigerator can physically travel through doors, halls, stairs, and tight turns. A refrigerator that fits the cabinet opening but cannot open its drawers fully is not a good fit.
Electrical and Water-Line Notes
Modern refrigerator planning may involve dedicated circuits, GFCI/AFCI requirements, accessible receptacle placement, and water-line routing for ice and water features. Electrical code requirements vary by jurisdiction and edition adopted, so this is an area where the local inspector and licensed electrician matter.
If a refrigerator has an ice maker or water dispenser, the water line should include an accessible shutoff and a route that does not kink when the appliance is pushed back. Poorly placed lines are a common cause of slow leaks behind refrigerators. During remodeling, we prefer to solve this before cabinets and flooring are finished, not after a leak stains the floor.
When to DIY and When to Hire a Pro
Most refrigerator organization is a straightforward DIY project. Empty one zone at a time, discard expired food, clean shelves, verify temperature, and rebuild the layout around food-safety zones. For a typical household, the first reset takes 1 to 3 hours. Weekly maintenance takes 10 to 15 minutes if the zones are simple.
DIY makes sense when the refrigerator cools properly, doors seal well, shelves and drawers are intact, and you are only changing storage habits or adding organizers. Expect to spend $20 to $150 for a practical setup, or $150 to $400+ for a premium organizer system.
Hire a pro when the problem moves beyond storage. If food spoils quickly despite correct organization, if temperatures stay above 40°F, if the compressor runs constantly, if there is frost buildup, if the gasket fails, or if the refrigerator trips a breaker, bring in appliance service or the right trade.
Appliance-service labor in 2026 commonly runs about $44 to $143 per hour, with an average near $80 per hour. Refrigerator repair averages around $350, with broad real-world ranges from about $40 to $1,000. Common repairs include thermostats at roughly $150 to $300, fan motors at $200 to $350, defrost system work at $150 to $400, refrigerant leaks at $250 to $600, and compressor or sealed-system work at $400 to $700 or more.
If you are replacing the refrigerator, common freestanding 16- to 25-cubic-foot models run about $600 to $2,300 in 2026, while extra-large models up to about 32 cubic feet often run $1,300 to $3,000. Refrigerator installation typically ranges from about $148 to $328 for standard work. Built-in refrigerator replacement can run roughly $2,900 to $12,000 including unit and labor, especially when cabinet panels, niche sizing, electrical work, or plumbing changes are involved.
Do these 3 things before closing this tab:
1Clear out junk files and repair common Windows errors2Fix the driver behind crashes, sound loss and screen glitches3Repair Windows errors before they cause bigger problemsThink About Energy Use and Replacement Timing
A disorganized refrigerator can waste food, but a poorly performing refrigerator can waste electricity too. Reviewed 2026 estimates put the average U.S. household cost to run a primary refrigerator around $111 per year, or about $151 per year when including secondary refrigeration and freezer use, based on roughly $0.18 per kWh. In high-rate markets, operating cost can be much higher.
Best Value
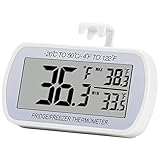
- Large Screen, Small Size: LCD display, big digits. You can visually observe the temperature, and also won't take too much places.(Tips: Please remove the protective film on the screen surface before use)
- Wide Measuring Range & Accurate: Temperature range is -4°F to 122°F with high accuracy 2°F up/down. Max/Min temperature value display on screen, you can easily monitor the temp change of your fridge.
- Hook, Magnet, Stand: Temperature sensing point is on the back. Hanging inside the refrigerator, the measuring temperature is more accurate.
- New Design Upgrade: Waterproof structure level IPX3, ABS environmentally friendly material. Worked with CR2032 battery(included), batteries can be replaced.
- Multiple uses: Digital refrigerator thermometers can be used in household fridge, restaurants, bars, cafes, large supermarkets and convenience store freezers, pharmacy medicine chests, rooms, wineries, etc.
ENERGY STAR certified refrigerators are about 9% more efficient than models that only meet the federal minimum. Replacing and recycling an old refrigerator can save about $150 over a 12-year life, according to ENERGY STAR guidance. That savings alone usually does not justify replacing a working newer unit, but it matters when you are already facing expensive repairs, poor cooling, or a kitchen remodel.
A practical repair-versus-replace decision should consider appliance age, repair cost, energy use, food loss, fit, and whether the current refrigerator meets the household’s storage needs. If a repair approaches several hundred dollars on an older unit and the layout has never worked for the kitchen, replacement may be the better long-term decision.
Power Outages and Food Safety
A good refrigerator layout also helps during a power outage because it reduces unnecessary door opening. FoodSafety.gov and USDA guidance says a refrigerator generally keeps food safe for up to 4 hours during a power outage if the door stays closed. After 4 hours without power, discard perishable refrigerated foods.
The Tool Desk
Outbyte PC Repair FREERepair Windows errors before they cause bigger problemsFix Now →Outbyte Driver Updater FREEScan for outdated or missing drivers - takes under a minuteDriver Scan →During an outage, keep the refrigerator and freezer doors closed. Do not browse. Do not reorganize. If you have a thermometer inside, use it to verify temperature when power returns. When in doubt about meat, dairy, cooked leftovers, cut fruit, or prepared foods that have been above safe temperatures too long, throw them out.
A Practical Refrigerator Reset Plan
Here is the job-site-simple version of the reset:
- Put a thermometer in the refrigerator and freezer and record temperatures before changing the layout.
- Empty one section at a time so perishable food is not sitting out longer than necessary.
- Discard expired food, spoiled produce, duplicate condiments, and leftovers past the 3- to 4-day window.
- Clean shelves, drawers, gaskets, and door bins with food-safe cleaner or mild soap and water.
- Set the lowest shelf for raw proteins with a rimmed tray.
- Create eye-level space for leftovers and an eat-first bin.
- Put dairy, eggs in the carton, and meal-prep containers in stable middle-shelf zones.
- Use crisper drawers by humidity need and avoid overpacking them.
- Move condiments, sauces, and drinks to the door.
- Leave vents visible and gaps around bins so cold air can circulate.
- Check temperatures again after 24 hours of normal use.
The right refrigerator organization system is not complicated. It is consistent. Once every person in the household knows where raw meat, leftovers, lunches, produce, and condiments go, the refrigerator becomes easier to use and easier to maintain.
That is the real goal: fewer mystery containers, fewer spoiled groceries, safer food storage, and an appliance that can do its job without being overloaded or blocked by the very products meant to organize it.
Frequently Asked Questions
What is the correct order to organize food in a refrigerator?
Store ready-to-eat foods and leftovers on upper shelves, dairy and eggs in the main middle section, raw meat and seafood on the lowest shelf in a leakproof tray, produce in crisper drawers, and condiments or drinks in the door.
Quick wins for a faster PC:
Scan for outdated or missing drivers - takes under a minuteDriver Scan →Repair Windows errors before they cause bigger problemsFix Now →What temperature should a refrigerator and freezer be set to?
Keep the refrigerator at 40°F or below and the freezer at 0°F. Use a standalone refrigerator/freezer thermometer because the built-in display may not show the actual shelf-level temperature.
Should milk and eggs be stored in the refrigerator door?
No. The door has the most temperature fluctuation. Store milk and eggs in the main compartment, with eggs kept in their original carton so they stay protected and the date remains visible.
How long are leftovers safe in the refrigerator?
Cooked leftovers are generally safe for 3 to 4 days in the refrigerator. Store them in shallow, airtight containers, label the date, and keep them at eye level so they are used before they expire.
How much does refrigerator organization cost?
A practical setup usually costs $20 to $150 for a thermometer, bins, labels, a meat tray, and containers. Premium modular systems can cost $150 to $400 or more in large French-door refrigerators.
Recommended Free Tools
When should I call a pro instead of reorganizing the fridge myself?
Call a pro if the refrigerator cannot stay at 40°F or below, food spoils quickly, the compressor runs constantly, frost builds up, the gasket fails, water lines leak, or electrical issues appear.
Quick Recap
Product prices and availability are accurate as of the date/time indicated and are subject to change. Any price and availability information displayed on Amazon at the time of purchase will apply.

