To flatten ridges in an existing dado cut with a stacked dado set, use a bearing-guided dado cleanout bit in a handheld router. Set the bit so its bearing rides on the dado shoulder, then take a light pass to shave the bottom level. For a hand-cut dado, remove waste carefully and level the bottom with a router plane or light chisel paring.
Flatten ridges in an existing dado
Small ridges can remain after a stacked dado set cuts a channel, even when the blades are sharp. WOOD Magazine attributes them to slight height differences between the chippers and blades. Its recommended cleanup is a shallow dado cleanout bit whose bearing registers on the dado shoulder. WOOD Magazine’s dado-cleanup guidance describes cutters 1/8 to 1/4 inch thick and a light pass shaving about 1/32 inch from the bottom.
- Decide whether cleanup is needed. If the dado will be hidden after assembly and the ridges do not affect the fit, they may not matter.
- Choose a suitable bit. Use a dado cleanout bit with a cutter shallow enough to leave room for its bearing to ride on the shoulder. The shoulder must be wide and accessible enough to support the bearing.
- Set a light cut. Arrange the router depth to remove only the material needed to level the bottom. The roughly 1/32-inch shaving cited by WOOD Magazine is an example, not a required depth for every dado.
- Keep the bearing registered. Guide it against the shoulder and rout down the dado and back, keeping the router and bearing supported throughout.
- Check final depth and fit. Test the mating piece. It should seat fully without excessive force or noticeable side-to-side play.
If you are cutting a new dado and plan to clean it up afterward, set the dado stack slightly shallower than the required finished depth. Include the planned cleanup in the depth calculation so leveling the bottom does not make the channel too deep.
Make and level a hand-cut dado
For a hand-cut dado, lay out the width from the actual mating board rather than its nominal size. A combination square, marking knife, backsaw, sharp chisel, and straight guide fence are useful; a router plane is optional but makes it easier to reference the bottom to the board face. Woodsmith’s hand-cut dado guide describes the layout and waste-removal approach.
Free tools Windows power users keep installed
One-click scans. No signup required.
#1 Best Overall
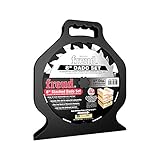
- Versatile Set Configuration - Includes 2 blades, 3 chippers, spacers, and a precision shim set, allowing micro-adjustments for custom groove widths and cleaner cuts.
- Wide Range of Groove Sizes - Designed to cut flat-bottom grooves from 1/4" to 7/8" in materials like laminated plywood, melamine, and solid hardwood, offering flexibility for cabinetry, joinery, and shelving applications.
- Optimized for Safety Brake Saws - Engineered for smooth, efficient performance on safety-equipped and lower-powered saws to other compatible models.
- Advanced Carbide Technology - Features Premium TiCo HI-Density Carbide with a crosscutting blend formulation, delivering maximum durability, longer cutting life, and consistent precision.
- Silver I.C.E. Coating Protection - High-performance coating resists pitch build-up, reduces heat during operation, and keeps blades cleaner for smoother, longer-lasting performance.
- Mark the width and depth. Use the mating piece to establish the dado width, mark the shoulders with a sharp knife, and establish a clear depth baseline.
- Saw the shoulders. Guide the backsaw along each shoulder and stop short of cutting below the depth baseline.
- Remove waste gradually. Use shallow, controlled chisel cuts, working along the shoulders and through the center. Alternate cuts as needed, then pare lightly toward the baseline.
- Level the bottom. Set a router plane to take a light cut; its base rides on the board face while its blade trims the dado bottom. Lower the blade gradually to the intended depth. Fine Woodworking’s router-plane guidance recommends working in from both ends to reduce the chance of breaking out the far side.
- Test and correct the fit. The mating piece should seat without excessive force or side-to-side play. If it starts into the dado but will not bottom out, check whether the walls lean inward and carefully correct the tight area.
Choose the method that fits the job
| Method | Best suited to | Trade-off |
|---|---|---|
| Dado cleanout bit in a handheld router | Flattening ridges in an existing stacked-dado cut | Needs a suitable bit and enough shoulder for bearing contact. It removes material, so account for it in the depth plan. |
| Router plane | Finishing a hand-cut dado or leveling a bottom by hand | Offers controlled depth, but takes more time than a machine cut. |
| Chisel paring | Small corrections and hand-cut dado finishing | Requires light, careful cuts to avoid going below the depth baseline. |
| Stacked dado set | Repeated machine-cut dadoes on a compatible table saw | May leave ridges. Setup, allowable stack width, and installation requirements vary by saw and dado set. |
As one product-specific example, DEWALT lists a stacked set with two outer blades, three chippers, spacers, and shims, and claims its four-tooth chippers produce smooth, flat-bottom cuts. That is the manufacturer’s product claim, not independent comparative testing. The listed 1/4- to 7/8-inch groove range applies to that product, not to dado sets generally.
Independent reader supportYour contribution helps us test, update, and keep practical guides available for everyone.Check saw and dado-set compatibility before cutting
Follow the manuals for the specific table saw and dado set. Grizzly’s dado setup guidance says to offset the teeth of the outer blades and chippers so no teeth touch, check the assembled stack width, and follow the manuals for both products.
Rank #2

- stacked dado blades set cuts smooth and precise grooves with clean edges, square shoulders and flat bottoms
- Set includes two 8 inch outer blades, five two-wing chippers and seven metal shims for fine adjustments with storage case.
- Create 20 different widths of dados anywhere from slot widths range from 1/4" to 13/16", in 1/16" increments
- Features a 5/8-inch arbor for compatibility with the majority of 10-inch table saws on the market
- Carbide tooth blades and chippers feature negative hook angles to make flat bottom grooves that are smooth and virtually splinter-free
Dado capacity varies by table saw model. The limits in a Ryobi saw manual apply to that saw and should not be treated as a general capacity for other models.
Quick Recap
Rank #4

- Cuts smooth and precise grooves with clean edges, square shoulders and flat bottoms
- Set includes two 8" outer blades, five two-wing chippers and seven metal shims for fine adjustments
- Slot widths range from 1/4" to 13/16", in 1/16" increments
- Carbide tooth blades and chippers feature negative hook angles to make flat bottom grooves that are smooth and virtually splinter-free
- Durable case has internal dividers to keep all of the components safe and secure
Rank #3

- Complete Set - Set includes 2 outside blades, 2 wing chippers, and shims that are designed to fit 5/8" laser cut arbors, allowing for accurate and efficient blade rotation.
- Efficient - With its specially engineered design, Diablo's Dado Saw Blade Set requires less power to feed, making it perfect for underpowered saws without sacrificing performance or quality.
- Versatile - The set provides a range of groove widths from 1/4" to 13/16" and includes shims for micro adjustments down to .004". Resharpenable blades ensure long-term use and precision.
- Clean Cuts - Ensures precise, clean cuts and smooth flat bottom grooves with negative hook angles that minimize splintering, even on delicate woodwork.
- Durable - Featuring a Perma-SHIELD non-stick coating, the blades are protected from heat, gumming, and corrosion, ensuring longevity and consistent performance even through heavy use.
Product prices and availability are accurate as of the date/time indicated and are subject to change. Any price and availability information displayed on Amazon at the time of purchase will apply.




