You can build a basic box-style solar oven from a cardboard box, aluminum foil, clear plastic wrap, tape or glue, and a prop stick. This guide teaches the flap-and-window design described by NASA Climate Kids, then shows how to aim, test, and improve it. It is a learning project, not a guaranteed replacement for a conventional oven.
What you need
- Cardboard box with a lid
- Aluminum foil
- Clear plastic wrap
- Tape or glue
- Scissors or a box cutter
- A straight stick or other secure prop
- Optional: an oven thermometer for recording internal temperature
The foil-lined milk-container oven in NASA JPL’s lesson is a different design. Do not combine its wire-support and container-cutting instructions with this box build unless you are intentionally comparing designs.
As an Amazon Associate I earn from qualifying purchases.
How to make the solar oven in 7 steps
1. Prepare the box and materials
Choose a clean, dry cardboard box with a lid that closes reasonably well. Gather the foil, plastic wrap, adhesive, cutting tools, and prop. If children are participating, an adult should handle the box cutter or any sharp blade.
What’s actually slowing this PC down?
Pick the symptom - the matching free tool is one click away.
2. Cut the reflector flap
On the lid, mark a rectangle and cut along three sides, leaving a border and one side attached as a hinge. Fold the flap upward. The attached flap will hold the reflector; keep the opening large enough for sunlight to enter while leaving the lid structurally sound.
#1 Best Overall
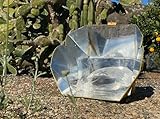
- ECO-FRIENDLY & EFFICIENT – Save money on fuel by harnessing the power of the sun to cook delicious meals! This essential piece of camping gear is a sustainable, earth-friendly alternative to traditional cooking methods
- PERFECT FOR CAMPING & OUTDOOR ADVENTURES – Utilizes up to 12 hours of sunlight for optimum convenience. Whether you're camping, hiking, or off-grid, this solar cooker ensures you can prepare hot meals anywhere—no fire, gas, or electricity required
- LIGHTWEIGHT & PORTABLE – Designed for easy transport, this compact solar cooker folds neatly for hassle-free storage and carrying, making it ideal for camping, backpacking, and emergency situations
- DURABLE & WEATHER-RESISTANT – Built with high-quality polypropylene, this solar oven withstands outdoor elements, ensuring long-lasting performance in harsh outdoor environments
- VERSATILE FOR COOKING – Bake, boil, steam, or roast a variety of meals, from soups and veggies to meats and desserts. Achieve consistent cooking results with the power of sunlight and the right equipment
3. Cover the flap with foil
Apply aluminum foil to the underside of the raised flap using tape or glue. Smooth it as flat as practical so wrinkles do not scatter the reflected light. The foil-covered flap directs sunlight toward the box interior.
4. Line the oven interior
Cover the inside surfaces of the box with foil and secure the edges with tape or glue. Smooth the lining so it does not collapse into the opening. The reflective interior helps redirect incoming light toward the container placed inside.
5. Add the clear window
Stretch clear plastic wrap across the opening and tape it in place. NASA Climate Kids’ version uses one layer on top and another on the underside of the lid, creating a covered window while retaining the hinged flap. Seal gaps as well as your materials allow without covering the reflector.
Rank #2
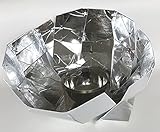
- Top Ranked Solar Cooker
- Cook Delicious Meals Using the Power Of the Sun
- For Home Use, Camping or Keep On Hand for Power Outages and Emergencies
- Adjustable to Maximize Sun Power
- Easy to Set-Up and Store
6. Prop and aim the oven
Set the box in direct sunlight and use the stick to hold the reflector flap at an angle. Tilt the flap until reflected light falls into the box. Reposition or re-angle the oven as the sun moves or clouds change; a setup that faces the sun at one time may be poorly aligned later.
7. Test, record, and improve
Place the oven thermometer inside if you have one, then record the starting temperature, time, weather, season, location, flap angle, and any changes you make. Adjust the flap to increase the light entering the box. You can also add insulation around the outside if it does not shade or block the sunlight collector, a suggestion noted by NASA JPL. Compare readings under similar conditions rather than treating one result as a guaranteed temperature or cooking time.
Why the design works
- Reflector: The foil-covered flap redirects sunlight into the box.
- Absorbing interior and container: Light entering the oven is converted to heat by the surfaces and cookware inside.
- Clear window: Plastic wrap admits sunlight while helping retain warmed air.
- Alignment: Direct sunlight and regular re-aiming generally provide better conditions than shade or indirect light.
- Insulation: Extra material around the outside may reduce heat loss, provided it does not block incoming light.
Safe use and realistic limits
Solar ovens and their cookware can become hot enough to burn. Science Buddies recommends oven mitts and careful handling, and its project guidance also stresses caution with utility knives: read the safety guidance. Keep an adult in charge of cutting, supervise children throughout construction and testing, and treat the box, plastic, and cookware as hot after exposure to sunlight.
Rank #3

- 【Latest Solar Oven】The solar cooker works in all seasons as long as the sun is up. It even functions on cloudy days or in snowy conditions, effectively capturing ultraviolet light and retaining heat.
- 【Fast & Delicious】It takes only 20 minutes to cook a meal, reaching a maximum temperature of 300°F(150°C) in full sunlight. Solar cooking also delivers better flavor—with minimal air movement inside the oven, food cooks evenly and stays moist and tender.
- 【Easy to Use】The solar stove can be set up and stored in seconds thanks to the zipper design on both sides. It requires no supervision, so even children can join in the fun. It saves you time and energy, letting you relax while enjoying your meal.
- 【Portable & Durable】Its exterior resembles a one-piece handbag with an adjustable strap. The durable vacuum tube cooking chamber provides excellent insulation, keeping heat in and cool air out.
- 【Wide Application】Use it anywhere there is sunlight—whether camping in a tent, in a motorhome, mountaineering, hunting, fishing, kayaking, or even on military maneuvers. Our solar oven is a reliable source of hot beverages and safely cooked food, anytime.
- Do not look directly at bright reflected sunlight.
- Keep the oven away from flammable materials and unstable surfaces.
- Use heat protection when touching cookware or moving the oven.
- Check food with an appropriate food thermometer if you plan to eat it; a solar-oven temperature reading alone is not a food-safety validation.
The cited construction lessons do not establish that this simple box reliably reaches food-safe internal temperatures or cooks every type of food. Weather, season, latitude, cloud cover, wind, box size, sealing, and alignment all affect performance. NASA JPL notes that the activity works better on hot, sunny days and that cooking time varies; the U.S. Department of Energy-hosted NEED activity also recommends an oven thermometer to help estimate cooking time: see the activity PDF.
Quick wins for a faster PC:
Scan for outdated or missing drivers - takes under a minuteDriver Scan →Repair Windows errors before they cause bigger problemsFix Now →How to get useful test results
- Choose a mostly clear day and note the date, time, location, and weather.
- Place the same thermometer and test container in the same position for each trial.
- Record temperature at regular intervals rather than relying on a final impression.
- Re-aim the flap whenever the reflected patch of light moves off the interior.
- Repeat on another day or at another time so you can separate a design change from a weather change.
- Change one feature at a time—such as flap angle, window sealing, or exterior insulation—and keep the notes with each reading.
This approach lets you determine what improves your particular oven without claiming a universal performance number.
Box oven or milk-container oven?
Both approaches use reflection and a clear cover, but they suit different materials and teaching goals. NASA JPL’s lesson states that the objective is to “use the available materials to build the most efficient solar oven, able to cook a food item in the least amount of time.” The sources do not provide a controlled head-to-head efficiency test, so choose based on what you have or test both under the same conditions.
| Feature | Flap-and-window box (this guide) | Milk-container design (NASA JPL) |
|---|---|---|
| Main body | Cardboard box with a lid | Milk container |
| Reflector support | Hinged lid flap and a stick or prop | Wire support described in the JPL activity |
| Cover | Clear plastic wrap across the opening | Clear plastic wrap |
| Best reason to choose it | Large, accessible parts and straightforward cutting | Compact alternative when the listed container and wire are available |
| Relative efficiency | Not established by a controlled comparison | Not established by a controlled comparison |
What to do if the oven stays cool
- Little or no reflected light: Re-angle the flap until sunlight visibly enters the box.
- Sun moves during the test: Reposition the box or adjust the prop periodically.
- Heat escapes: Check for loose plastic-wrap edges and unnecessary openings, while keeping the window clear.
- Wind or clouds interfere: Repeat in steadier, sunnier conditions and record the difference.
- Insulation blocks sunlight: Move insulation to the outside walls and keep the reflector and window unobstructed.
For educators who want a more formal classroom activity, the Museum of Science’s Youth Engineering Solutions program describes curriculum resources for designing solar ovens: view its solar-oven curriculum page.
Quick Recap
Product prices and availability are accurate as of the date/time indicated and are subject to change. Any price and availability information displayed on Amazon at the time of purchase will apply.
Do these 3 things before closing this tab:
1Fix the driver behind crashes, sound loss and screen glitches2Clear out junk files and repair common Windows errors3Scan for outdated or missing drivers - takes under a minute
