To make a DIY project board, first decide whether you need to write on it, pin items, display magnetic notes, or hang tools and supplies. That choice determines the surface: use pegboard for hanging, cork for pins, dry-erase or chalkboard for writing, and sheet metal for magnets. Plan the board’s size and wall location before cutting or assembling; the dimensions and mounts in the examples below are specific to their designs, not universal standards.
Here, “project board” means a physical display or organizer. For shared task planning, a digital board such as Microsoft Whiteboard may be a better fit.
Choose the board type for its job
| Approach | Best fit | Typical components | What to plan for |
|---|---|---|---|
| Pegboard display | Hanging lightweight items or flexible storage | Pegboard, backing, screws, hooks, and a hanging method | Backing and mounting matter; accessory fit and safe load depend on the panel, hardware, and installation. |
| Mixed-surface idea board | Combining writing and magnetic display | MDF or plywood, chalkboard paint, and sheet metal | Cutting and assembly involve more steps than a single-surface board. |
| Message or command center | Schedules, notes, writing, and small household items in one place | Cork, dry-erase or chalkboard surface, calendar, shelf, hooks, or magnetic strip | Choose the location first so the layout and mount suit the space. |
| Digital project board | Shared task planning and collaboration | Templates, shared notes, and collaboration tools | It is not a physical display or storage surface. |
The cited plans do not establish a general ranking of materials for price, durability, or load capacity. Choose by function and verify that the specific panel, accessories, and mounting hardware suit your intended use.
Plan the size, layout, and mounting before building
- Measure the available wall area. Check for doors, switches, nearby furniture, and enough clearance to reach anything that will hang on the board.
- Sketch the zones. Mark where writing, pinned items, magnetic notes, shelves, or hooks will go. Allow room for the items you actually expect to display.
- Choose the backing and mount together. A panel that carries accessories needs a suitable supporting structure and a mounting approach appropriate to the wall. The examples below use either a framed panel with hanging hardware or screws driven into wall studs.
- Check the materials and instructions. Dimensions, hardware, and assembly methods in published plans apply to those designs; they are not universal specifications.
Build a pegboard display
A pegboard is a practical choice when the main job is to hang lightweight supplies and rearrange them as needs change. Bunnings Australia’s project uses pine behind the panel to create a framed structure, then adds D hooks and framing wire for hanging.
The Tool Desk
Outbyte PC Repair FREEClear out junk files and repair common Windows errorsFree Scan →Outbyte Driver Updater FREEScan for outdated or missing drivers - takes under a minuteDriver Scan →#1 Best Overall
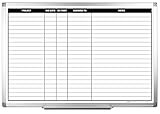
- MAGNETIC DRY-ERASE SURFACE — The whiteboard design is permanently printed onto durable, industrial‑quality dry‑erase vinyl that won’t smudge and is resistant to stains and ghosting. Its smooth, long‑lasting writing surface is also magnetic, giving you added functionality for notes, magnets, and accessories
- EASY INSTALLATION — Comes complete with durable mounting brackets and hardware, ensuring a secure and effortless wall‑mounting
- DURABLE ALUMINUM FRAME — Built with a sleek 1" aluminum border and a spacious 2.5" deep aluminum tray to keep markers and accessories neatly within reach
- SPACIOUS WRITING SURFACE — Ample writing space with a usable area that extends nearly edge‑to‑edge, measuring just 2" shy of the board’s total dimensions
- Please inspect your whiteboard upon arrival — If you notice any issues, please contact us through Amazon's Buyer-Seller Messaging system
Example dimensions and materials
For its example, Bunnings starts with a 1220 mm × 915 mm × 4.8 mm pegboard sheet and cuts it to 915 mm high by 610 mm wide. Those are the dimensions of that project, not a recommended standard size. The materials include pine lengths, screws, D hooks, and framing wire. See Bunnings’ pegboard display guide.
Assembly and hanging
- Measure and cut the panel to the dimensions you planned.
- Make a pine frame or backing to support the panel.
- Attach the pegboard to the pine using screws through existing holes, as in the Bunnings example.
- Sand and paint the assembly if desired, then attach D hooks and framing wire.
- Hang the display from a suitable wall hook. Bunnings advises using a wall hook to prevent the board tipping forward.
Use pegboard accessories that are compatible with your particular panel system. The cited guide does not provide a general load rating, so do not assume a panel or mount can safely carry a particular weight based only on this example.
Rank #2

- Acrylic Material Complete Set: crafted from high transparency acrylic, this wall project planning whiteboard offers a sleek and sturdy surface for all your planning needs; The set includes a generously sized about 24 x 18 inches dry erase board, 8 colorful markers, and a practical eraser; Everything you need is included in one package
- Smooth Writing, Effortless Erasing: the glossy acrylic surface of this acrylic project planning whiteboard ensures a smooth writing experience with no skipping or ghosting; Marks wipe away cleanly with the included eraser, leaving no residue behind; This reusable dry erase calendar maintains its clarity and functionality over repeated use
- Versatile Use for Home Office: ideal for tracking projects, appointments, and family schedules, this acrylic wall schedule planner serves as a functional organizational tool; Its clear surface blends into any environment, making it suitable for offices, kitchens, home offices, or classrooms; It helps visualize deadlines and priorities clearly
- Clear Print Long-lasting Design: the dates and headings on this dry erase planning whiteboard are printed with a heat sublimation technique, ensuring they remain smudge-proof and won't peel off over time; The acrylic wall calendar offers a crisp background that enhances readability while supporting written content
- Thoughtful Functional Accessories: this acrylic project planning whiteboard set includes markers and eraser; The innovative magnetic pen holder and tray can easily attach to the calendar surface; These accessories help keep your writing tools organized and prevent them from getting lost
Build a writing-and-magnetic idea board
A mixed-surface board can combine a writable section with a magnetic section. In Dremel’s US example, a 36-inch-square board is divided into four 18-inch-square sections: two use sheet metal and two use a chalkboard surface. The guide lists MDF or plywood, sheet metal, chalkboard paint, gloves, and a drill driver among the supplies. These dimensions and materials describe Dremel’s design, not a general sizing rule. See Dremel’s Idea Board guide.
Build considerations
- Plan and mark the sections on the MDF or plywood before assembly.
- Apply chalkboard paint to the intended writing sections according to the product instructions.
- Drill pilot holes in the sheet metal before screwing it down, as Dremel instructs.
- Wear gloves when cutting metal. Dremel also advises reading tool manuals, wearing eye and respiratory protection, and clamping work when practical.
Sheet-metal cutting is a specialty step; a simpler board can avoid metal fabrication if magnetic display is not needed. Dremel also identifies pegboard, dry-erase, and cork as possible board surfaces.
Rank #3
- MAGNETIC DRY-ERASE SURFACE — The whiteboard design is permanently printed onto durable, industrial‑quality dry‑erase vinyl that won’t smudge and is resistant to stains and ghosting. Its smooth, long‑lasting writing surface is also magnetic, giving you added functionality for notes, magnets, and accessories
- EASY INSTALLATION — Comes complete with durable mounting brackets and hardware, ensuring a secure and effortless wall‑mounting
- DURABLE ALUMINUM FRAME — Built with a sleek 1" aluminum border and a spacious 2.5" deep aluminum tray to keep markers and accessories neatly within reach
- SPACIOUS WRITING SURFACE — Ample writing space with a usable area that extends nearly edge‑to‑edge, measuring just 2" shy of the board’s total dimensions
- Please inspect your whiteboard upon arrival — If you notice any issues, please contact us through Amazon's Buyer-Seller Messaging system
Make a message or command center
For a household hub, combine only the features you will use. Kreg’s message-center plan attaches a magnetic dry-erase board and cork tiles to a backing; it says that, in that design, two cork tiles hold push pins better than one. Its hanging instructions locate two wall studs and drive screws into them. See Kreg’s message-center plan.
Fiskars’ command-center tutorial uses a plywood base with a shelf, chalkboard vinyl, corkboard, dowel hooks, and a magnetic strip. Its author recommends choosing the location before committing to the mount. That is especially useful when the board includes several zones or projects into the room with a shelf. See Fiskars’ command-center tutorial.
Rank #4

- DRY ERASE PROJECT MANAGEMENT PLANNER: Be made of 250 gsm construction paper, laminated by special formula film that is erasable, make the surface resistant to ghosting or staining. We can erase easily even months later and use this work schedule board over and over again
- PRODUCTIVE PROJECT MANAGEMENT TOOLS: This project management board is a game changer and something physical for managing personal or team projects efficiently. It allows you or members to quickly view and share the status of up to 12 projects at the same time, a very good practical kit of team building
- SCRUM WHITEBOARD FOR OFFICE ESSENTIALS: This project organizer worth the investment for business use. It's easy to use for products development, marketing strategic projects or as a sales goal tracking whiteboard. You can easily measure budget, milestones, resources, inventory and timeline at a glance. It helps you plan, execute, assign tasks efficiently
- MOUNTING IS A BREEZE: This vision board is lightweight and comes with removable mounting stickers. You can mount this program Management Board easily without tools. On the other hand, you can take it down easily too if you need to remount your project board to other place later
- COMPLETE ACCESSORIES INCLUDED: Our huge project manager planner for wall is cost-efficient for daily use in office, home office or family. It comes rolled in a study tube with, premium dry erase eraser, reusable fluorescent colored tabs for entrepreneurs, managers or person working at home
Lay out the components
- Choose the wall and measure the area before building the base.
- Decide which parts need to be writable, pinnable, magnetic, or suitable for holding small items.
- Arrange those surfaces and any shelf or hooks on a sketch or mock-up before attaching them.
- Use a mounting method suited to the completed board and the wall. Follow the plan’s stud-location instructions where applicable.
Build safely and mount for the actual installation
Follow the tool and material manufacturers’ instructions for the equipment and products you use. Dremel’s guide specifically calls for reading tool manuals, wearing eye and respiratory protection, clamping work when practical, and wearing gloves while cutting sheet metal. Bunnings includes safety equipment in its project materials. Keep hands clear of cutting paths, secure the workpiece, and choose a mount appropriate to the board, its contents, and the wall.
Do not treat a project tutorial as a certified load specification. The cited examples do not provide a general capacity for pegboard accessories, framing wire, shelves, or wall fasteners.
Best Value

- MAGNETIC DRY-ERASE SURFACE — Designs are directly printed onto a durable vinyl layer that is resistant to stains and ghosting, ensuring long-lasting visibility and a smooth writing surface. The surface is also magnetic, giving you freedom to accessorize your whiteboard however you like or attach any number of documents
- EASY INSTALLATION — Includes mounting brackets and hardware for secure and hassle-free wall mounting. For a quick tutorial on how to properly install your whiteboard, please watch our video located in this product page
- SPACIOUS WRITING AREA – Large enough to capture a wide range of information without running out of space, encouraging collaboration and communication between departments. Writing area measures 2" less than the board's total dimensions
- DURABLE ALUMINUM FRAME – 1" aluminum border paired with a 2.5" deep aluminum tray for convenient accessory storage
- Please inspect your whiteboard upon arrival – If you notice any issues, please contact us through Amazon's Buyer-Seller Messaging system
Use a digital board for shared task planning
If the goal is coordinating work rather than displaying physical items, Microsoft Whiteboard offers project-planning templates, shared notes, and collaboration. Microsoft Support describes using a Daily Stand-up template for everyday tasks or Project kickoff for longer-term goals, customizing and sharing the board, then moving an agreed plan into project-management software. See Microsoft Support’s project-planning guide. A digital board supports collaboration; it does not replace a physical surface for hanging, pinning, or writing with physical materials.
Quick Recap
Product prices and availability are accurate as of the date/time indicated and are subject to change. Any price and availability information displayed on Amazon at the time of purchase will apply.