Do these 3 things before closing this tab:
1Fix the driver behind crashes, sound loss and screen glitches2Repair Windows errors before they cause bigger problems3Scan for outdated or missing drivers - takes under a minuteThe simplest beginner terrarium is a small closed glass container with a lid, fresh low-fertility soilless mix, one to three humidity-loving plants, and a little horticultural or activated charcoal. Keep the soil lightly damp and place the finished terrarium in bright indirect light—not direct sun. This guide also explains why gravel is optional, which plants belong in open versus closed containers, and how to correct excess moisture.
Choose the right terrarium first
The easiest beginner project is a small closed terrarium: a clear lidded container, fresh low-fertility soilless mix, one to three small humidity-loving plants, and a small amount of horticultural or activated charcoal. Keep the finished terrarium in bright indirect light and add only a little water. A balanced closed terrarium may need very little maintenance, but it is not completely self-sustaining.
A closed terrarium and an open terrarium are different growing environments:
As an Amazon Associate I earn from qualifying purchases.
| Type | Best for | Basic care |
|---|---|---|
| Closed | Mosses, ferns, pilea, peperomia, baby’s tears, miniature begonias, and other humidity-tolerant plants | Use a lid, water sparingly, and monitor condensation |
| Open | Succulents, cacti, air plants, and plants that prefer faster evaporation | Leave the container open and expect to water more often |
Do not put cacti or succulents in a sealed jar. The high humidity and slow evaporation that benefit woodland plants are usually unsuitable for dry-climate plants.
Materials for a basic closed terrarium
- Clear container: Use glass or transparent plastic. A tight-fitting lid is needed for a closed terrarium. A wide opening is easiest for a first project.
- Fresh growing medium: Choose a relatively low-fertility soilless potting mix or a potting mix sold for terrariums.
- Small plants: Select one to three slow-growing plants with similar light, moisture, and humidity requirements. Buy healthy, compact specimens from a nursery or garden center when possible.
- Horticultural or activated charcoal: Use a small amount mixed into the growing medium or a thin layer if your selected method or kit calls for one.
- Optional decorations: Clean stones, bark, driftwood, lichen, preserved moss, or a small non-toxic figurine.
- Useful tools: A narrow spoon or terrarium shovel, chopstick, long tweezers, small scissors, and a mister or syringe.
You can assemble everything separately, or choose a DIY terrarium kit if you want the container, soil, moss, charcoal, tools, and decorative pieces bundled together. Treat a kit as a convenience rather than a requirement, and check whether live plants are included; the documented kit option does not include plants.
Is a gravel layer required?
No. Gravel is optional and should not be presented as essential drainage. In a container without a drainage hole, a thick rock layer does not make excess water disappear. Water can collect above the gravel and leave the soil overly wet, creating conditions that contribute to root problems.
#1 Best Overall
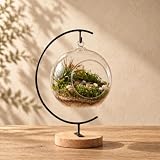
- COMPLETE DIY TERRARIUM KIT — Create your own miniature botanical display with a coordinated set of materials and tools in one kit. The glass globe, live moss, layering materials, decorative pieces and mini tools give you the essentials to build and personalize your terrarium from the ground up
- REAL LIVE MOSS INCLUDED — Unlike kits built only around decorative or artificial materials, this terrarium set includes real live moss to bring natural texture and color into your finished arrangement. Follow the included care guidance to help the moss recover after shipping and maintain it as part of your terrarium.
- LAYER, BUILD & PERSONALIZE — Arrange the included substrates, sand, gravel, moss and decorative accents to create depth, texture and your own miniature landscape. Mini tools help with placing and adjusting smaller details, making the building process part of the experience rather than simply displaying a finished product.
- GLASS GLOBE DISPLAY — The clear glass globe keeps the miniature arrangement visible from multiple angles, while the coordinated wood base and metal frame create a finished display for desks, shelves, tables and other indoor spaces. The compact design turns the completed terrarium into part of your decor.
- STAND OR HANG — Display the finished terrarium on its wood base or use the included hanging rope for another presentation option. The flexible format makes it easy to incorporate the finished piece into a desk, shelf, tabletop or other indoor display area.
You may add clean pebbles for appearance, especially in an open terrarium, but careful watering and an appropriate growing medium matter more than a drainage layer. If you use gravel, keep it decorative and do not compensate for heavy watering by adding more of it.
What’s actually slowing this PC down?
Pick the symptom - the matching free tool is one click away.
How to make a basic terrarium
1. Choose plants that can share the same environment
For a closed terrarium, look for small, humidity-loving plants such as mosses, miniature ferns, pilea, peperomia, baby’s tears, and some miniature begonias. The exact selection varies by region and season, so inspect plants locally for pests, damaged leaves, and signs of disease.
Group plants according to their needs. A sun-loving succulent, a dry-climate cactus, and a shade-loving fern should not share the same sealed container simply because they are all small.
2. Select and clean the container
Choose a container large enough for the plants’ current root balls and some future growth. A wide-mouth jar is more forgiving because you can place and prune plants without reaching through a narrow neck. A narrow container can work, but you will need a chopstick, long spoon, or long-handled tweezers.
Wash the container with soap and hot water, rinse it thoroughly, and let it dry. Remove all traces of glass cleaner or other chemicals before planting. Clean your hands or gloves, tools, decorative materials, and plant containers as well. A humid enclosure can amplify problems introduced by dirty materials or unhealthy plants.
3. Prepare the growing medium
Use fresh, relatively low-fertility soilless mix. Ordinary garden soil is usually too heavy and may compact inside the container, leaving little air around the roots.
Rank #2

- COMPLETE DIY PLANTING KIT – NO EXPERIENCE NEEDED — Everything you need to pot any plant or build a self-sustaining glass ecosystem. Just follow the included step-by-step instructions — simple, intuitive, and suitable for all skill levels.
- ALL MATERIALS INCLUDED – JUST BRING YOUR CONTAINER — Kit contains: potting soil, decorative stones, sphagnum moss, activated charcoal, bamboo tweezers, bamboo spoon, and instructions — perfectly dosed for a single project. No waste, no leftovers. (Container & plant not included)
- WORKS WITH ANY PLANT OR CONTAINER — Perfect for terrariums, succulents, cacti, Fittonia, bonsai, moss or any indoor plant. Use a glass jar, vase, bowl or pot — layer the materials your way and create something unique.
- SELF-SUSTAINING OR OPEN PLANTING – YOUR CHOICE — Seal your container for a low-maintenance closed ecosystem with its own water cycle, or use it open for succulents and cacti. One kit, endless possibilities — perfect for beginners and busy plant lovers.
- BEAUTIFUL INDOOR DECORATION & PERFECT GIFT — A stylish addition to any home, living room, or office desk. Makes a unique and creative gift for plant lovers, nature enthusiasts, and kids of all ages.
Mix a small amount of horticultural or activated charcoal into the medium, or use a thin charcoal layer if you are following a specific kit or planting method that recommends one. Charcoal may help absorb odors or some chemicals, but it is not a guarantee against mold, and it does not replace moisture control.
Dampen the mix before it goes into the container. It should feel slightly moist, not muddy, dripping, or saturated.
4. Plan the arrangement outside the jar
Arrange the plants and decorations on a table before planting. This lets you test the scale and decide which plant belongs where without disturbing freshly planted roots.
Recommended Free Tools
- For a terrarium viewed from one direction, place the tallest plant toward the back.
- For a container viewed from all sides, place the tallest plant near the center.
- Use smaller plants or moss toward the front.
- Leave space between plants for growth and airflow.
- Keep enough open area to remove dead leaves and reach the soil later.
A terrarium looks fuller after the plants grow. Packing it tightly at the beginning makes pruning and moisture management harder.
5. Add the soil and plant
Add enough prepared mix to accommodate the largest root ball. You do not need a deep soil bed; use the root balls as your guide and make sure the plants will sit at a natural height below the rim.
Make a planting well, then plant the smallest or most difficult-to-reach specimens first. Remove each plant from its nursery pot, loosen severely crowded roots gently, and set the root ball into the well. Firm the mix lightly around the roots without compacting it.
Rank #3

- All-in-one Diy Terrarium Starter Kit: Get the core materials, tools and step-by-step guide needed to start your terrarium project in one box. Includes potting soil, pumice, zeolite, green moss, sphagnum moss, decorative stone, mesh and care tools. Designed for approximately 5–7 inch terrarium jars or containers, depending on container shape and layer thickness. Plants and glass container are not included.
- Beginner-friendly, Layer-by-layer Guide: New to terrariums? Follow the included guide to arrange the drainage substrate, mesh, potting mix, moss and decorative materials step by step. Each layer has a clear purpose, helping first-time builders create an organized terrarium setup with less guesswork.
- Purposeful Materials For Each Layer: Pumice and zeolite create the lower substrate layer, mesh helps separate the potting mix above it, while moss and decorative stone add natural texture and finishing detail. Adjust the amount of each material based on the size, shape and desired layer thickness of your container.
- Made Primarily For Open Terrariums: Designed primarily for open terrarium projects such as succulent, air plant and miniature garden displays. Choose plants with similar light and moisture needs and follow the included care guide for watering. Different plants may require different materials and care routines, so adjust your setup to match the plants you choose.
- A Relaxing & Creative Diy Project: Turn an empty glass container into your own miniature landscape and customize the layers, plants and decorative finish to match your style. The hands-on building experience makes this DIY succulent terrarium kit a relaxing activity for beginners, nature lovers, families and friends, and a thoughtful DIY gift for special occasions.
Use a narrow spoon, chopstick, or long tweezers to position plants through a small opening. Avoid burying stems or leaves deeper than they were growing in their original pots.
The Tool Desk
Outbyte PC Repair FREEClear out junk files and repair common Windows errorsFree Scan →Outbyte Driver Updater FREEFix the driver behind crashes, sound loss and screen glitchesFind Drivers →6. Add a few clean decorations
Place decorations after the plants are secure. Clean stones, bark, driftwood, lichen, preserved moss, and a small non-toxic figurine can provide scale and visual interest. Natural objects should be free of soil, insects, rot, paint, and chemical treatments.
Use decorations sparingly. Too many objects obstruct access, crowd the plants, and make it more difficult to remove fallen leaves or inspect the soil.
7. Water lightly and establish the moisture balance
Mist the soil and foliage lightly, or add a small amount of water with a syringe. The goal is lightly damp soil, not a miniature pond. It is much easier to add water later than to remove standing water from a closed container.
If the foliage is wet, leave the lid off until the leaves dry, then close the container. After sealing, a small amount of condensation is normal: moisture evaporates, collects on the glass, and runs back toward the soil in a miniature water cycle.
Heavy condensation that remains all day, standing water, or soil that looks constantly saturated means the terrarium is too wet. Remove the lid temporarily to release moisture and allow the interior to dry somewhat.
Rank #4

- COMPLETE DIY TERRARIUM KIT – NO EXPERIENCE NEEDED — Everything you need to build your own self-sustaining glass ecosystem, all in one box. Just follow the included step-by-step instructions — simple, intuitive, and suitable for all skill levels.
- BEAUTIFUL INDOOR DECORATION & PERFECT GIFT — A stylish accent piece for your home, living room, or office desk. Makes a unique and creative gift for plant lovers, nature enthusiasts, and kids of all ages.
- ALL MATERIALS INCLUDED – NOTHING TO BUY SEPARATELY — Kit contains: glass jar with cork lid (34 fl oz / 1L), coconut soil, decorative stones, sphagnum moss, activated charcoal, bamboo tweezers, bamboo spoon, and cultivation instructions — all pre-measured to fit the included jar perfectly. (Plant not included)
- FULLY CUSTOMIZABLE – CREATE YOUR OWN ECOSYSTEM — Choose the plant you love and design your own unique miniature garden. Best suited for: Fittonia, mini Fern, Tillandsia (air plant), or Moss. Layer the materials your way and make it truly yours.
- SELF-SUSTAINING CLOSED ECOSYSTEM — Once sealed, the terrarium creates its own water cycle through condensation and evaporation, requiring minimal watering. A living decoration that takes care of itself — perfect for beginners and busy plant lovers.
8. Place the terrarium in bright indirect light
Put the finished terrarium in a bright room or near a bright window, but out of direct sunlight. An east-facing window or a position slightly back from a sunny window can work well.
Direct sun can heat the air inside a glass enclosure rapidly. The result may be scorched leaves, overheated roots, and a sudden loss of moisture balance even when the surrounding room feels comfortable.
Independent reader supportYour contribution helps us test, update, and keep practical guides available for everyone.Terrarium care after planting
Watering
A closed terrarium generally needs very little water once the moisture cycle is balanced. Check the soil, plants, and glass rather than following a fixed weekly schedule. Add a small amount only when the medium begins to dry or the plants show a genuine need.
Open terrariums lose moisture more quickly and normally need more frequent attention. Their watering schedule depends on the plants, container, room temperature, light, and growing medium.
Condensation
Light fogging or a few droplets that roll down the glass are expected in a closed terrarium. Persistent, heavy condensation is a warning that the enclosure is too wet or the planting is poorly balanced. Ventilate it by removing the lid for a period, then replace the lid once excess moisture has dissipated.
Pruning and cleanup
Remove dead leaves and visibly infected plant material promptly. Trim damaged or overgrown leaves with clean scissors. Long tweezers are useful for retrieving debris from a narrow vessel. If one plant repeatedly outgrows the container or declines while the others thrive, remove or replace it rather than allowing it to disrupt the whole arrangement.
Best Value

- What You Will Get: 1 terrarium glass, about 9.8 inches high; Aquarium light, about 5.9 inches in diameter; 1 adapter 5V2A, US two-pin plug
- Efficient and Adjustable Lighting: our 3W LED light is suitable for small plants, mosses, succulents, and Venus Fly Trap; You can easily change between strong and weak lighting modes, providing the right amount of light for your plants; The adjustable lighting and rotating lamp base make it ideal for creating a small desk terrarium or desktop plant display
- Sturdy and Transparent: our terrarium container is made of high borosilicate glass, which is thinner than ordinary glass; In addition, it has a lower refractive index, which allows you to see the plants inside the bottle more clearly, making it a choice for growing plants in bottles; The polished round bottle mouth also prevents cuts and scratches
- Humidity and Timing Control: the size of the opening can be adjusted by rotating the inner ring to control the humidity inside the bottle; This helps create a suitable environment for moss, Venus Fly Trap, tropical plants, and other small terrarium plants; The light also has a timing mode to help you coordinate the environment inside the bottle
- Versatile Design: our product can be applied as an aquarium or plant bottle, and its transparent appearance also makes it very suitable for DIY crafts, adding a touch of beauty to your creation; Make it an ideal choice for fighting fish tanks, fish tank landscapes, miniature gardening landscapes, bonsai, aquatic and terrestrial plants, mosses, succulents, etc. Whether for person
Mold and disease
Mold is more likely when the terrarium contains too much water, dead plant material, contaminated decorations, or an unhealthy plant. Remove affected leaves and debris, improve ventilation temporarily, and reassess the water level. Charcoal alone will not prevent mold.
Quick wins for a faster PC:
Clear out junk files and repair common Windows errorsFree Scan →Fix the driver behind crashes, sound loss and screen glitchesFind Drivers →Repair Windows errors before they cause bigger problemsFix Now →Fertilizer
Avoid routine heavy fertilization. Terrarium plants have limited space, and excess fertility can encourage unwanted growth or cause salt buildup. If a plant later shows a specific nutritional problem, identify the cause before applying any fertilizer and use a very conservative approach appropriate for the plant.
Common beginner mistakes
- Putting the jar in direct sun: Bright indirect light is safer for an enclosed glass environment.
- Overwatering at setup: Muddy soil and standing water are difficult to correct.
- Relying on gravel for drainage: A rock layer is optional and does not solve overwatering in a container without a drainage hole.
- Using garden soil: It can compact and restrict air around the roots.
- Sealing in cacti or succulents: Use these in an open terrarium instead.
- Mixing incompatible plants: Similar humidity, light, and watering requirements are essential.
- Overcrowding: Leave growing room and a path for pruning and cleanup.
- Adding unclean objects or unhealthy plants: These can introduce pests, pathogens, or decay.
Quick shopping checklist
For the simplest closed terrarium, buy or gather:
- A clear lidded terrarium jar or another transparent container
- Fresh terrarium soil or low-fertility soilless potting mix
- A small bag of horticultural or activated charcoal
- One to three small, humidity-tolerant plants
- A narrow spoon, chopstick, or terrarium tool set
- Clean decorative material, if wanted
- A mister or syringe for controlled watering
Individual supplies are useful when you already have a suitable jar or want to control each material. A complete DIY kit is convenient for a first project, but verify its contents and remember that plants may need to be purchased separately. For the living portion of the project, a local nursery, houseplant retailer, or garden center can help you choose small plants that are healthy and compatible with a closed, humid setup.
Frequently Asked Questions
How often should you water a closed terrarium?
A small closed terrarium usually does not need frequent watering once its moisture cycle is balanced. Check the soil and plants rather than following a fixed schedule, and add only a small amount when the medium begins to dry or the plants genuinely need water.
Do I need to put gravel in the bottom of a terrarium?
No. Gravel is optional and can be decorative, but it does not remove excess water from a container without a drainage hole. Careful watering and a suitable soilless growing medium are more important.
Free tools Windows power users keep installed
One-click scans. No signup required.
What plants are best for a closed terrarium?
Use mosses, small ferns, pilea, peperomia, baby’s tears, and some miniature begonias. Choose plants with similar light, humidity, and watering needs, and avoid mixing dry-climate plants with woodland plants.
What should I do if my terrarium gets moldy?
Remove dead leaves, ventilate the container temporarily, and check whether the soil is saturated. Persistent moisture is a more important mold risk than the absence of charcoal; charcoal does not guarantee mold prevention.
The Bottom Line
Build a basic closed terrarium with compatible humidity-loving plants, fresh soilless mix, a little charcoal, and a clean lidded container. Skip the assumption that gravel is required, water lightly, and keep the finished jar in bright indirect light. If you see persistent heavy condensation or standing water, ventilate the container before root problems develop.
Quick Recap
Product prices and availability are accurate as of the date/time indicated and are subject to change. Any price and availability information displayed on Amazon at the time of purchase will apply.