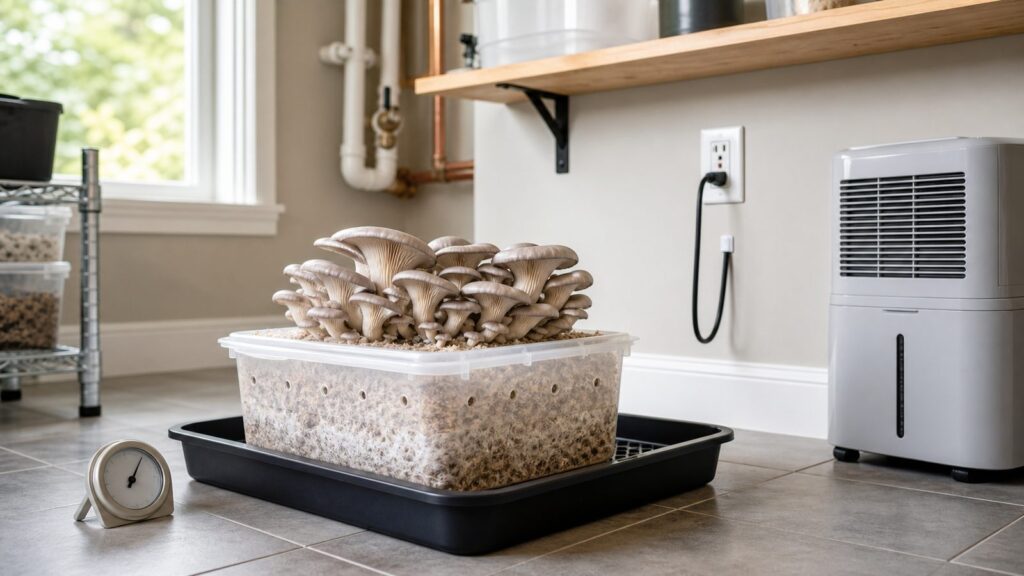
You can grow mushrooms at home in a closet, laundry room, basement utility area, garage corner, or spare room, but the best setups have one thing in common: the mushrooms get the high humidity they need, while the house around them stays dry.
That is the difference between a good indoor grow and a moisture problem. Fruiting mushrooms often want roughly 80% to 95% relative humidity inside the grow chamber. Your house should not live there. For normal indoor air, the EPA recommends keeping humidity around 30% to 50% to reduce mold risk. So the contractor answer is simple: build a contained humidity zone, monitor the room around it, and never let wet substrate, mist, or condensation sit against drywall, carpet, framing, insulation, or HVAC equipment.
As an Amazon Associate I earn from qualifying purchases.
For a first grow, start with oyster mushrooms. They are forgiving, fast, and widely sold as ready-to-fruit kits. Many spray-and-grow oyster kits fruit in about 7 to 14 days after opening under good conditions. A more involved grain-and-substrate grow usually takes 2 to 4 weeks or longer. Outdoor logs can take months to multiple seasons, which is fine gardening, but not the best match for a beginner who wants to learn the process quickly.
Do these 3 things before closing this tab:
1Repair Windows errors before they cause bigger problems2Fix the driver behind crashes, sound loss and screen glitches3Clear out junk files and repair common Windows errorsBelow is the 8-step method we would recommend to a homeowner who wants edible mushrooms without creating a damp corner of the house.
#1 Best Overall

- 100% ORGANIC AND NON-GMO: There's no need to worry about intoxicants that may hinder your plant's growth because the Back to the Roots Mushroom Growing Kit is completely organic and not genetically modified; You can cook them however you want or add them to your favorite dishes
- GROW YOUR PLANT ALL YEAR-ROUND: This organic mushroom indoor kit allows you to grow your own crop all-year round; Just place the box near a window with indirect light, mist twice a day, and you'll see delicious, beautiful mushrooms growing within a week; Included in this kit is an organic plant-based soil infused with mushroom spawn and a booklet with instructions
- CONVENIENT AND EASY: Mushrooms are one of the easiest to grow indoors; All you need to do is open, spray daily with the included mister, and in 10 days you'll be harvesting your own mushrooms right out of the box; Each crop produces three to four servings of mushrooms, and each box can grow up two crops
- THE PERFECT GIFT: The perfect holiday gift, it comes in a beautiful packaging so that it's ready to be given to foodie, garden-loving and eco-conscious friends and family; This kit is also part of our Grow One Give One campaign, simpy share a picture on social media, tag us and use the campaign hashtag, and we'll donate a kit to a classroom of your choice
- GUARANTEED TO GROW: Made in the USA and 100% Guaranteed to grow. If you are not satisfied, simply message us and we will send you a Back To The Roots replacement
Step 1: Choose a Beginner Mushroom Species
Not every edible mushroom belongs in a first home grow. Some need tighter temperature control, some take longer, and some are less forgiving when airflow or humidity is off. Start with a cultivated edible species from a reputable supplier, not wild mushrooms, unidentified mycelium, or anything illegal in your state or city.
For most first-timers, oysters are the practical choice. Blue oyster, pearl oyster, and pink oyster kits are common, fast, and tolerant of small mistakes. Lion’s mane is also a good beginner option, but it has a different harvest cue and prefers steadier conditions. Shiitake can be excellent, though it often needs a little more patience. White button, cremini, and pioppino are accessible, but they are not always as foolproof as oysters in a casual home setup.
| Species | Beginner Fit | Typical Fruiting Range | Harvest Cue |
|---|---|---|---|
| Oyster mushrooms | Best first grow | Often about 55-75°F, with pink oysters preferring warmer rooms | Caps flatten, before edges curl heavily and spores drop |
| Lion’s mane | Good beginner grow | Often comfortable in mild indoor temperatures | Spines elongate, before the mushroom yellows |
| Shiitake | Good but slower | Often happier on the cooler side than tropical oysters | Caps open but still have a rolled edge |
| White button or cremini | Moderate | Species and kit dependent | Harvest when caps are firm and properly sized |
| Pioppino | Moderate | Mild indoor conditions | Harvest while caps are still neat and stems are tender |
If the room is usually 68°F to 72°F, oysters, lion’s mane, and many shiitake kits can work. If the space gets above 78°F, look at warm-weather oyster varieties such as pink oyster. If the space is cool, blue oysters and shiitake may be better choices. The kit supplier’s instructions should always win because strain matters.
Free tools Windows power users keep installed
One-click scans. No signup required.
Step 2: Pick the Room Like a Contractor
A mushroom setup is not just a gardening station. It is a humid object inside a finished building. On our job sites, we think about water first: where it lands, where it evaporates, where it can leak, and what materials are nearby. Use the same logic here.
The best room has a washable floor, nearby sink, decent ventilation, stable temperature, and an electrical outlet that is protected from moisture. A laundry room, mudroom, unfinished basement area, utility room, tiled bathroom with good exhaust, or clean garage corner can work. A carpeted bedroom closet is a poor choice. So is a wall cavity, attic, crawl space, or any location where moisture can collect unseen.
Good Location Checklist
- Washable floor such as concrete, tile, vinyl, or sealed utility flooring
- No carpet, exposed insulation, raw wood shelving, or paper-faced storage boxes directly beside the grow
- At least 12 inches of clearance from drywall and baseboards
- No placement under a return-air grille or beside an HVAC filter rack
- Nearby GFCI-protected power if using a humidifier, fan, light, or controller
- Room for a tray under the tub, tent, or grow block
- A path to dehumidify the room after misting or fruiting
Basements deserve special caution. They are naturally cooler and often good for mushrooms, but they are also where moisture problems hide. If the basement already smells musty, has efflorescence on concrete, shows staining at baseboards, or runs above 55% to 60% relative humidity for long stretches, solve that before adding a grow chamber. Mushrooms should not be used to justify a damp basement.
Step 3: Decide Between a Kit, Monotub, Outdoor Logs, or Tent
The right setup depends on how much control you want and how much risk you are willing to manage. For one or two harvests, a ready-to-fruit kit is the cleanest way to learn. For repeat production, a monotub or grow bag setup gives more yield and flexibility. Outdoor logs are slower but move moisture risk outside. Automated tents can produce more mushrooms, but they also create more condensation, wiring, reservoirs, and cleaning work.
Quick wins for a faster PC:
Repair Windows errors before they cause bigger problemsFix Now →Scan for outdated or missing drivers - takes under a minuteDriver Scan →| Setup | Best For | 2026 Typical Cost | Time to First Harvest | Home Risk Level |
|---|---|---|---|---|
| Ready-to-fruit kit | First grow, small kitchen harvest | About $12-$40 | Often 7-14 days after opening for oysters | Low if kept in a tray or tub |
| Simple contained tub | Cleaner first grow with better humidity control | About $40-$120 beyond the block | Usually 1-3 weeks depending on kit | Low to moderate |
| Monotub or grow bags | Repeat growers | About $80-$250 | Often 2-4+ weeks | Moderate |
| Outdoor logs or beds | Patient gardeners | Varies by logs, spawn, tools, and site | Months to multiple seasons | Low indoors, weather dependent outdoors |
| Automated tent | Experienced growers with multiple successful grows | About $200-$600+ | Species and process dependent | Higher because of humidifiers, fans, and condensation |
For a first run, buy a ready-to-fruit oyster kit and place it inside a clear storage tub with a drip tray. Add a $10 to $16 hygrometer/thermometer inside the tub and a second hygrometer in the room. That second sensor is not optional in a finished house. It tells you whether your mushrooms are staying humid while the room remains in a normal range.
Expect a realistic starter budget of $25 to $75 if you buy one kit, a spray bottle, gloves, alcohol, paper towels, a tray, and one hygrometer. A better contained setup with a tub, two hygrometers, liner, small LED, and cleaning supplies commonly lands around $60 to $140. If you add a room dehumidifier, the total can climb past $150 quickly.
Step 4: Build a Contained Humidity Setup
The cleanest beginner layout is simple: grow block inside a tub or small tent, tub sitting in a tray, hygrometer inside the tub, hygrometer in the room, and no direct mist hitting walls, outlets, trim, or shelving.
Rank #2
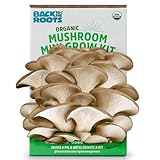
- 100% ORGANIC AND NON-GMO: There's no need to worry about intoxicants that may hinder your plant's growth because the Back to the Roots Mushroom Growing Kit is completely organic and not genetically modified; You can cook them however you want or add them to your favorite dishes
- GROW YOUR PLANT ALL YEAR-ROUND: This organic mushroom indoor kit allows you to grow your own crop all-year round; Just place the box near a window with indirect light, mist twice a day, and you'll see delicious, beautiful mushrooms growing within a week; Included in this kit is an organic plant-based soil infused with mushroom spawn and a booklet with instructions
- CONVENIENT AND EASY: Mushrooms are one of the easiest to grow indoors; All you need to do is open, spray daily with the included mister, and in 10 days you'll be harvesting your own mushrooms right out of the box; Each crop produces three to four servings of mushrooms, and each box can grow up two crops
- THE PERFECT GIFT: The perfect holiday gift, it comes in a beautiful packaging so that it's ready to be given to foodie, garden-loving and eco-conscious friends and family; This kit is also part of our Grow One Give One campaign, simpy share a picture on social media, tag us and use the campaign hashtag, and we'll donate a kit to a classroom of your choice
- GUARANTEED TO GROW: Made in the USA and 100% Guaranteed to grow. If you are not satisfied, simply message us and we will send you a Back To The Roots replacement
Use a clear plastic storage tub roughly 50 to 70 quarts for one small block. Drill or cut airflow holes only if the method requires it; many beginner kits can simply sit in a cracked-lid tub with hand misting and regular fresh-air exchange. If you do make holes, keep them clean and cover them with micropore tape or filter material if recommended by the grow method. Put the grow block on a small rack, inverted lid, or clean plastic platform so it does not sit in standing water.
Safe Layout
- Grow block: centered inside tub or tent
- Drip tray: under the tub, large enough to catch spills
- Outlet: beside or above the setup, not directly below misting or reservoirs
- Power cord: arranged with a drip loop so water cannot run into the plug
- Room hygrometer: mounted 4 to 6 feet away from the grow, not inside the tub
- Dehumidifier: used in the room if ambient humidity stays high after misting
Do not vent a humid grow tent into a wall cavity, attic, crawl space, closet packed with cardboard, or HVAC return. Stagnant wet air and building materials are a bad combination. Mold grows when excessive moisture accumulates on materials like wallboard, wood, insulation, carpet, and HVAC components. If something gets wet, dry it within 24 to 48 hours.
Electrical work is another line not to blur. Plug-in lights, small fans, and listed appliances are one thing. Adding outlets, relocating switches, hardwiring fans, or modifying circuits may require an electrical permit depending on your city. Many U.S. jurisdictions require permits for new wiring, new outlets, and significant mechanical ventilation changes. If you need permanent power, a new exhaust fan, or a dedicated circuit, hire a licensed electrician or qualified pro and follow local permitting rules.
Step 5: Sanitize, Then Open or Inoculate
Mushrooms are not grown in dirt. They are grown on a food source: straw, sawdust, hardwood pellets, supplemented blocks, composted material, or another prepared substrate. That substrate is also attractive to unwanted mold and bacteria. Cleanliness is not fussy; it is the difference between edible mushrooms and a failed block.
For a ready-to-fruit kit, wipe the outside of the bag or box, clean the tub, wash your hands, wear gloves if you have them, and use 70% isopropyl alcohol on tools and work surfaces. Follow the supplier’s cut pattern. Some kits ask for an X cut in the bag. Others ask you to remove a panel from the box and cut the plastic underneath.
The Tool Desk
Outbyte PC Repair FREERepair Windows errors before they cause bigger problemsFix Now →Outbyte Driver Updater FREEScan for outdated or missing drivers - takes under a minuteDriver Scan →For DIY inoculation, the standard beginner path is grain spawn mixed into pasteurized or sterilized substrate inside a clean bag or tub. This is where the failure rate rises. Grain spawn listings in 2026 commonly run roughly $48 to $60 for some organic grain-spawn bags, with price depending heavily on volume and supplier. Add substrate, bags or tubs, gloves, sanitizer, filter patches or micropore tape, and you can be into the $80 to $250 range before you have a harvest.
Do not eat from a block that smells rotten, turns slimy, develops black or green contamination, or grows something you cannot identify. Cultivated mushroom mycelium is usually white and purposeful-looking. Unwanted mold often spreads in colored patches, smells off, or changes the substrate quickly. When in doubt, bag the block and remove it from the house.
Step 6: Colonize First, Then Trigger Fruiting
Mushroom growing has two phases. Colonization is when the mycelium spreads through the substrate. Fruiting is when the mushroom forms the edible body you harvest. A ready-to-fruit kit has usually done most of the colonization before it reaches you. A DIY grow has to complete that step in your home.
During colonization, many growers keep the block or bag closed, warm enough for the species, and out of direct sun. This stage can take 1 to 3 weeks or longer depending on species, spawn rate, substrate, and temperature. Once the substrate is fully colonized, fruiting is triggered by a combination of fresh air, high humidity, light, and the right temperature.
Outdated Drivers Are Slowing You Down
One free scan finds every outdated or missing driver and matches the right update for your exact hardware.Free scan · exact hardware matchWindows Errors? Fix Them Before They Spread
Repair common Windows errors and clear accumulated junk for a smoother, more stable PC - no reinstall needed.Free scan · no reinstallFresh air matters more than many beginners expect. Mushrooms breathe. If carbon dioxide builds up, oysters can grow long stems and small caps, and the block may stall. At the same time, blasting a fan directly on the block can dry it out. Aim for gentle air exchange: open the tub a few times a day, crack the lid slightly, or use filtered openings depending on the system.
Fruiting Conditions to Watch
- Chamber humidity: often about 80% to 95%, species dependent
- Room humidity: ideally about 30% to 50% for the surrounding home
- Temperature: commonly 55°F to 75°F for many gourmet species, with variety-specific exceptions
- Light: indirect room light or a small LED for orientation, not hot direct sun
- Airflow: fresh but not windy
Mist the inside walls of the tub or the air around the block, not the electrical gear. Avoid soaking the mushroom pins directly. If water pools in the tray, dump it. If condensation runs down nearby drywall or the floor stays damp, your setup is too wet for the room.
Step 7: Harvest at the Right Stage
Harvest timing affects flavor, texture, cleanup, and spores. Waiting too long can leave you with tougher mushrooms and a dusting of spores around the grow area. Spores are natural, but they are not something you want collecting in a damp indoor corner, especially if anyone in the home has asthma, allergies, lung disease, or immune suppression.
Rank #3

- GROW MUSHROOMS AT HOME IN 3 STEPS: Open the perforated front panel, mist daily with the included spray bottle, and harvest fresh pink oyster mushrooms in as little as 7 days — no experience, tools, or soil needed
- GOURMET FLAVOR, BEAUTIFUL COLOR: Pink oyster mushrooms are succulent and savory with a firm texture that holds up beautifully when sautéed; use them in pastas, pizzas, burritos, BBQ sandwiches, or as a stunning meat substitute and vegan bacon
- MULTIPLE HARVESTS FROM ONE KIT: Each 4 lb kit yields 0.5–1.5 lbs of fresh mushrooms on the first flush; most kits continue producing additional flushes, so you get more gourmet mushrooms from a single box
- FIRST HARVEST IN 14–21 DAYS: Kits typically begin pinning within 7–14 days; once your mushroom caps start to flatten, they are ready to harvest; keep humidity consistent and avoid direct sunlight for best results
- USDA CERTIFIED ORGANIC, TRUSTED BY 350,000+ GROWERS: Every mushroom spray and grow kit is made in Maine, USA from non-GMO, all-natural organic ingredients and backed by North Spore's 100% satisfaction guarantee
For oyster mushrooms, harvest when the caps have opened and started to flatten, but before the edges curl heavily upward. Cut the cluster at the base with a clean knife or twist it off gently if the kit instructions allow. For lion’s mane, harvest when the teeth or spines elongate and the mushroom is still white, before yellowing. For shiitake, harvest when the caps open but still have a rolled edge.
Put harvested mushrooms in a breathable paper bag and refrigerate them. Do not seal fresh mushrooms in a wet plastic bag where condensation builds. Cook homegrown mushrooms unless you are following a trusted culinary source for a specific edible species. Never eat contaminated mushrooms, unidentified mushrooms, or mushrooms grown from a questionable source.
Most blocks can produce more than one flush. After the first harvest, rest the block as directed, then rehydrate or mist according to the supplier’s instructions. A second flush may be smaller. By the third flush, yields often drop and contamination risk rises, so do not keep a tired wet block indoors just because it might produce one more cluster.
Step 8: Dispose, Compost, and Dry the Space Back Down
The grow is not finished at harvest. The cleanup step protects the house. Wet substrate left indoors after production ends is exactly the kind of material that can sour, mold, attract pests, or keep a room humid.
If the block looks healthy and local rules allow it, compost it outdoors. You can also bury spent oyster or shiitake substrate in a garden bed for a possible bonus flush. If the block is contaminated, bag it, seal it, and discard it. Do not shake it indoors. Do not break it apart in a basement. Do not leave it in an open trash can beside the furnace.
What’s actually slowing this PC down?
Pick the symptom - the matching free tool is one click away.
Clean the tub, tray, rack, and tools with hot water and appropriate cleaner, then dry everything completely before storage. Check the floor, nearby wall, baseboards, shelving, and outlet area. If anything is damp, dry it the same day. Run a dehumidifier or exhaust fan until the room returns to normal household humidity. A room that remains above 55% to 60% relative humidity after the grow needs better moisture control before the next batch.
Cost Breakdown for a Safe First Grow
The kit is only part of the budget. The items that protect your home are inexpensive, but they matter: tray, tub, hygrometer, cleaning supplies, and sometimes dehumidification.
| Item | Typical 2026 Cost | Why It Matters |
|---|---|---|
| Ready-to-fruit mushroom kit | $12-$40 | Fastest way to learn without sterilizing substrate |
| Clear storage tub | $12-$30 | Contains humidity and overspray |
| Hygrometer/thermometer | $10-$16 each | Tracks chamber and room humidity |
| Spray bottle | $3-$10 | Provides controlled misting |
| Gloves, alcohol, paper towels | $8-$20 | Reduces contamination risk |
| Drip tray or waterproof liner | $5-$20 | Keeps water off floors and shelves |
| small LED light, optional | $10-$30 | Helps fruiting orientation in dark rooms |
| Room dehumidifier, optional | $100+ | Controls the surrounding room if humidity runs high |
A bare-bones kit on a kitchen counter can be under $40. A better contained beginner setup usually lands around $60 to $140. A serious repeat setup with spawn, substrate, monotub or bags, sensors, and a dehumidifier can reach $150 to $300. Automated tents commonly run $200 to $600 or more once you add racks, humidifier, controller, fan, ducting, lights, filters, and waterproof floor protection.
Rank #4
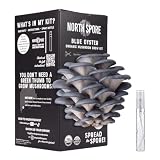
- HARVEST FRESH MUSHROOMS IN 7 DAYS: Open the box, remove the perforated panel, mist daily with the included spray bottle, and harvest gourmet blue oyster mushrooms in as little as 7 days — no special equipment, no experience required
- MULTIPLE FLUSHES FROM ONE KIT: Each 4 lb kit typically yields 0.5–1.5 lbs of mushrooms on the first harvest; with continued misting and proper humidity, most kits produce a second flush — and sometimes more — from the same block
- CHEF-WORTHY FLAVOR FROM YOUR COUNTERTOP: Blue oyster mushrooms are velvety, savory, and mild — perfect sautéed with garlic, tossed into pasta, layered on pizza, or used as a hearty plant-based meat alternative in everything from stir-fries to sandwiches
- USDA CERTIFIED ORGANIC AND NON-GMO: This spray and grow kit is grown on an amended sawdust block fully colonized with mushroom mycelium — 100% organic, non-GMO ingredients, no pesticides; certified organic by USDA so what you grow is as clean as what you eat
- TRUSTED BY 350,000+ GROWERS, HANDMADE IN MAINE: North Spore mushroom spray and grow kits are relied on by beginners, home cooks, chefs, and mycologists alike; every kit ships with a 100% satisfaction guarantee and detailed growing instructions inside the box
Moisture, Mold, and Indoor Air Safety
The biggest mistake is letting mushroom humidity become room humidity. Keep the wet conditions inside the chamber. The surrounding room should feel like a normal room, not a greenhouse.
Use two hygrometers. Put one inside the tub or tent and one in the room. If the chamber is 90% relative humidity but the room is 42%, that is a controlled setup. If the room climbs to 65% and stays there, you are now managing a building moisture issue.
Weekly Moisture Checklist
- Inspect walls, baseboards, shelves, and floor around the grow
- Empty standing water from trays and reservoirs
- Clean spills immediately
- Check that cords have drip loops and plugs are dry
- Confirm the grow is not beside an HVAC return
- Run dehumidification after harvest or heavy misting
- Remove spent substrate promptly after production ends
Anyone with asthma, allergies, chronic lung disease, or immune suppression should be more cautious around damp spaces, visible mold, and heavy spore release. That does not mean every mushroom kit is a hazard. It does mean you should harvest before spore drop, avoid contaminated blocks, and keep the grow out of living spaces used by sensitive household members.
Permits, Electrical Work, and When to Hire a Pro
A countertop kit, hand sprayer, and storage tub do not normally trigger a building permit. The line changes when you alter the building: add outlets, hardwire lights or fans, install new ventilation, modify plumbing, or finish a basement room to support a growing operation. Permit rules vary by city, but electrical and mechanical changes are commonly regulated.
Hire a pro if you need a new GFCI outlet, a dedicated circuit, an exhaust fan through an exterior wall, added plumbing, basement moisture correction, or repairs after leaks. Also bring in help if the room already has mold odor, visible mold, recurring condensation, wet drywall, damp carpet, or water intrusion. Growing mushrooms should be the last layer, not a cover-up for an unresolved moisture problem.
Recommended Free Tools
DIY is appropriate when you are using a small ready-to-fruit kit, a removable tub, plug-in listed equipment, and a room that already stays dry. Keep it reversible. If the setup cannot be removed in 10 minutes and the room dried back to normal, it is too permanent for a first attempt.
Common Beginner Problems and Fixes
Long Stems and Tiny Caps
This usually points to poor fresh-air exchange, especially with oysters. Increase gentle air exchange without drying the block. Crack the tub, fan manually for a few seconds a few times per day, or adjust filtered holes if your system uses them.
Dry, Cracked, or Stalled Pins
The chamber may be too dry or too windy. Mist the tub walls, check the hygrometer, and keep the block out of direct fan blast and hot sun. Do not compensate by soaking nearby walls or shelves.
Best Value

- 100% ORGANIC AND NON-GMO: There's no need to worry about intoxicants that may hinder your plant's growth because the Back to the Roots Mushroom Growing Kit is completely organic and not genetically modified; You can cook them however you want or add them to your favorite dishes
- GROW YOUR PLANT ALL YEAR-ROUND: This organic mushroom indoor kit allows you to grow your own crop all-year round; Just place the box near a window with indirect light, mist twice a day, and you'll see delicious, beautiful mushrooms growing within a week; Included in this kit is an organic plant-based soil infused with mushroom spawn and a booklet with instructions
- CONVENIENT AND EASY: Mushrooms are one of the easiest to grow indoors; All you need to do is open, spray daily with the included mister, and in 10 days you'll be harvesting your own mushrooms right out of the box; Each crop produces three to four servings of mushrooms, and each box can grow up two crops
- THE PERFECT GIFT: The perfect holiday gift, it comes in a beautiful packaging so that it's ready to be given to foodie, garden-loving and eco-conscious friends and family; This kit is also part of our Grow One Give One campaign, simpy share a picture on social media, tag us and use the campaign hashtag, and we'll donate a kit to a classroom of your choice
- GUARANTEED TO GROW: Made in the USA and 100% Guaranteed to grow. If you are not satisfied, simply message us and we will send you a Back To The Roots replacement
Green, Black, Slimy, or Foul-Smelling Growth
Treat it as contamination. Bag the block, remove it from the home, clean the setup, and start over with better sanitation. Do not try to cut around contamination and eat from the same block.
Room Humidity Keeps Rising
Reduce misting, improve containment, empty trays, and run a dehumidifier. If the room cannot stay near normal indoor humidity while the grow chamber is wet, move the grow to a better location or stop until the moisture problem is solved.
The Practical 8-Step Home Mushroom Plan
For a homeowner who wants the shortest reliable path, here is the full sequence in plain terms. Buy a reputable oyster kit. Put it in a clear tub on a tray. Place the setup on a washable surface away from HVAC returns and finished materials. Track humidity inside the chamber and in the room. Open the kit with clean hands and clean tools. Give it humidity, fresh air, indirect light, and the right temperature. Harvest before spores drop. Then remove the spent block and dry the room back down.
That approach gives the mushrooms what they need without asking your house to become a grow room. From a construction standpoint, that is the whole game: contain water, protect materials, keep power dry, and leave the room cleaner than you found it.
Frequently Asked Questions
What is the easiest mushroom to grow at home?
Oyster mushrooms are usually the easiest beginner choice. They colonize quickly, tolerate several substrates, and many ready-to-fruit kits can produce mushrooms in about 7 to 14 days after opening.
How humid should a home mushroom setup be?
The grow chamber often needs about 80% to 95% relative humidity during fruiting, but the surrounding room should stay around normal household levels, about 30% to 50% relative humidity, to reduce mold risk.
How much does it cost to grow mushrooms at home?
A small ready-to-fruit kit often costs about $12 to $40. A safer contained beginner setup with a tub, tray, hygrometer, spray bottle, gloves, and cleaning supplies commonly totals about $60 to $140.
Can I grow mushrooms in a basement?
Yes, if the basement is dry, clean, and monitored. Avoid basements with musty odors, damp carpet, wet drywall, condensation, or relative humidity that stays above 55% to 60%.
Do I need a permit to grow mushrooms at home?
A small removable kit typically does not require a permit. Electrical, plumbing, ventilation, or permanent room modifications may require permits depending on local rules.
What should I do with spent mushroom substrate?
Healthy spent substrate can often be composted outdoors or buried in a garden bed if local rules allow. Contaminated substrate should be sealed in a bag and discarded promptly.
Quick Recap
Product prices and availability are accurate as of the date/time indicated and are subject to change. Any price and availability information displayed on Amazon at the time of purchase will apply.

