Free tools Windows power users keep installed
One-click scans. No signup required.
A butterfly house is a simple build, but a good butterfly habitat is a design project. The small slotted box many homeowners picture can be built in an afternoon for about $25 to $75 in materials. The part that actually attracts butterflies is the site around it: sun, shelter from wind, host plants for caterpillars, nectar plants across the growing season, damp mineral spots, and no pesticide exposure.
On our job sites, we treat even small outdoor projects the same way: start with location and water movement, then choose materials, then think about maintenance access. A butterfly house that looks good on day one but sits in shade, traps moisture, or has no nearby host plants is mostly yard decor. A properly planned setup can become a small, durable pollinator feature that works with the landscape instead of fighting it.
This guide covers both meanings of butterfly house: a small wooden shelter or hibernation box, and a larger walk-in screened butterfly enclosure. They are very different projects. One is a weekend woodworking project. The other can behave like a small accessory structure and may need code review, footings, anchoring, drainage planning, and a real budget.
As an Amazon Associate I earn from qualifying purchases.
The Tool Desk
Outbyte Driver Updater FREEScan for outdated or missing drivers - takes under a minuteDriver Scan →Outbyte PC Repair FREERepair Windows errors before they cause bigger problemsFix Now →Start With the Habitat, Not the Box
The biggest mistake is building the box first and hoping butterflies arrive. Adult butterflies need nectar, but their larvae need specific host plants. Monarch caterpillars need milkweed. Black swallowtails may use parsley, dill, fennel, or native members of the carrot family. Other species need violets, asters, grasses, shrubs, or trees depending on region.
A useful butterfly area should include six basic conditions:
#1 Best Overall
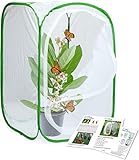
- Professional Version: Monarch butterfly habitat is more square, sits straight, does not rock or move.
- Five mesh panels for good airflow. Clear vinyl window panel for students and families an unforgettable opportunity to watch caterpillars change into chrysalides and then emerge as beautiful Monarch, Painted Lady or Black Swallowtail Butterflies.
- Collapsible design for easy storage and reusable, the unfolded measures: 15.7 x 15.7 x 23.6 inches. Tall and wide, can hold large 2 milkweed plants. The wings of a new butterfly are not risk of breaking when trying to stir up.
- Large zipper side opening for easy feed your butterflies, then release them into the wild. Butterflies will often land on little hands and faces before flying away.
- Includes a quick start guide manual to raise butterflies.
- Full sun: Plan for at least 6 to 8 hours of direct sun. Butterflies are cold-blooded and rely on warmth for activity.
- Wind protection: Use fences, shrubs, walls, or planting mass to reduce gusts without creating deep shade.
- Host plants: Include at least two or three host-plant species suited to your region, not just nectar flowers.
- Season-long nectar: Use plants with staggered bloom times from spring through fall, especially if you want to support monarch migration.
- Moist mineral source: Add a shallow damp sand, soil, or mud spot for puddling. A decorative water bowl is less useful.
- Pesticide avoidance: Avoid broad-spectrum sprays and be careful even with products marketed as natural. Neem can harm developing butterfly larvae on host plants.
For layout, group plants in drifts instead of scattering one plant here and one plant there. A 3-foot by 8-foot bed with repeated clusters is easier for butterflies to find than the same plants spread across a large yard. If you have room, a 50 to 100 square foot pollinator bed is a realistic starting size for a homeowner. Using the 2026 rule of thumb of about $6 per square foot for quart or gallon native plants, that puts the plant budget around $300 to $600 before mulch, edging, compost, irrigation, or labor.
Choose the Right Type of Butterfly House
Before buying lumber, decide which project you are actually building. A small butterfly box and a walk-in screened enclosure have different costs, risks, and maintenance needs.
| Project type | Typical size | 2026 budget range | Best for | Permit risk |
|---|---|---|---|---|
| Small DIY butterfly box | About 5 to 8 inches wide, 18 to 24 inches tall | $25 to $75 materials | Garden shelter accent within a real habitat | Low in most areas |
| Scrap-wood or kit build | Similar to small box | $10 to $35 materials | Budget weekend project | Low in most areas |
| Premium installed butterfly box | Custom box with post or decorative roof | $100 to $300 installed | Finished landscape feature | Usually low, unless tall or unusual |
| Pollinator bed around the house | 50 to 100 sq ft starter bed | $300 to $600 plants only | Actual butterfly attraction and support | Usually low; HOA rules may apply |
| Walk-in screened enclosure | 80 to 300+ sq ft | $50 to $175 per sq ft for many new screened enclosures | Protected viewing space or managed butterfly garden | Moderate to high |
For most homeowners, the best value is a small cedar box plus a well-planted bed. If the budget is limited, spend more on plants and proper site preparation than on decorative trim. Butterflies respond to habitat conditions, not ornate carpentry.
Best Materials for a Small Butterfly House
Cedar is the most practical choice for a small outdoor butterfly house because it resists decay, machines cleanly, and handles seasonal moisture better than cheap untreated boards. Pine also works, especially if the box is sheltered and finished correctly. Purdue-style plans commonly use untreated pine, 1×4 and 1×6 stock, screws or nails, and a small hinge for cleanout access.
For a durable homeowner build, use these specifications:
- Lumber: 3/4-inch cedar or pine boards. One 1x6x8 cedar board listed around $19.24 in 2026 can cover many small box designs, depending on dimensions.
- Fasteners: Exterior-rated stainless or galvanized screws. Use 1-1/4 inch screws for most 3/4-inch stock connections.
- Glue: Exterior wood glue at joints, but do not rely on glue alone outdoors.
- Roof: Sloped roof with at least 1/2 inch overhang on the front and sides. A larger 3/4 to 1 inch overhang is better in rainy climates.
- Access: Hinged side or back panel with a small latch or screw closure for annual cleaning.
- Finish: Exterior stain or low-VOC exterior paint on the outside only. Leave the inside unfinished.
- Drainage: Small drain holes in the bottom, typically 1/8 to 1/4 inch diameter.
Avoid pressure-treated lumber inside a butterfly box. Also avoid heavy interior finishes, sticky coatings, or anything with a strong odor. The goal is a dry, sheltered cavity, not a sealed container.
Quick wins for a faster PC:
Fix the driver behind crashes, sound loss and screen glitchesFind Drivers →Repair Windows errors before they cause bigger problemsFix Now →Recommended Dimensions and Cut List
A small butterfly house does not need to be large. A practical finished size is about 6 inches wide, 5 inches deep, and 20 inches tall. That gives enough internal volume for bark strips or twigs while staying light enough to mount securely on a fence, wall, or post.
Simple cedar box cut list
- Back: 1 piece, 6 inches wide by 20 inches tall
- Front: 1 piece, 6 inches wide by 18 inches tall
- Sides: 2 pieces, 4 inches wide by 18 inches tall
- Bottom: 1 piece, 4 inches by 4-1/2 inches, adjusted to fit between sides
- Roof: 1 piece, about 7-1/2 inches by 6 inches, sloped or mounted with front overhang
- Cleanout panel: use one side as the hinged panel, or hinge the front if your design allows it
Cut three to five vertical entry slots in the front. A common slot size is about 1/2 inch wide by 3 to 4 inches tall. Keep the slots narrow. Oversized openings invite birds, wasps, and other occupants. Do not add exterior perches below the slots; perches can make it easier for predators to work the openings.
Inside the box, add a few rough bark pieces or untreated twigs set vertically. They should be removable during cleaning. Do not pack the box tightly with straw, fabric, or fluffy material that traps moisture.
Rank #2

- Professional Version: Monarch butterfly habitat is more square, sits straight, does not rock or move, Polyester Bottom for Easier Clean.
- New clear mesh materials of butterfly enclosure make it easy to see through. Students and families cloud watch caterpillars change into chrysalis and then emerge as beautiful Monarch, Painted Lady or Black Swallowtail Butterflies.
- Collapsible design allows terrarium to fold almost flat and small, it is easy storage and reusable. The unfolded measures: 16" x 16" x 24" . Tall and wide, can hold large 2 milkweed plants. The wings of a new butterfly are not risk of breaking when trying to stir up.
- Large zipper side opening with double zippers for easy feed your butterflies, then release them into the wild.
- You will see the life cycle of a butterfly and the magic of nature.
How to Build the Butterfly House
Plan on two to four hours for a careful first build, plus drying time for finish. If your shop is already set up, this is a half-day project. If you are buying tools for the first time, the tool cost will exceed the box materials.
What’s actually slowing this PC down?
Pick the symptom - the matching free tool is one click away.
Tools
- Tape measure and pencil
- Speed square or combination square
- Miter saw, circular saw, or handsaw
- Drill and bits
- jigsaw or oscillating tool for slots
- Clamps
- Sandpaper, 120 and 180 grit
- Paintbrush or rag for exterior stain
Build steps
- Cut the boards square. Small boxes show crooked cuts quickly. Mark all pieces first, then cut matching parts together where possible.
- Lay out the entry slots. Mark three to five vertical slots on the front panel, centered side to side. Keep enough wood between slots so the front stays strong.
- Cut and sand the slots. Drill starter holes at the ends, cut between them with a jigsaw, then ease sharp edges with sandpaper.
- Pre-drill screw holes. Cedar and pine can split near edges. Pre-drilling is cheap insurance.
- Assemble the back, sides, and bottom. Use exterior glue sparingly at joints and fasten with galvanized or stainless screws.
- Install the front or hinged panel. If the front is fixed, hinge one side. If the side is fixed, hinge the front. Either way, make inspection possible without prying the box apart.
- Add the sloped roof. Overhang matters. Water should drip away from the slots, not run down into them.
- Drill drainage and ventilation. Add two or three small drain holes in the bottom. Tiny upper side vents can help, but avoid creating large pest openings.
- Sand and finish the exterior. Apply exterior stain or paint outside only. Let it cure fully before mounting near plants.
From a builder’s standpoint, the roof and cleanout access are the details that separate a useful box from a disposable craft project. Water always finds weak joints. Give it a path out, and give yourself a way to clean the inside once a year.
Where to Place a Butterfly House
Mount the butterfly house in or directly beside the pollinator planting, not across the yard from it. Aim for morning sun and some afternoon protection in very hot climates. In cooler regions, more sun is usually better. Avoid shaded fence corners, low wet spots, and open wind tunnels between buildings.
A practical mounting height is roughly eye level, about 5 to 6 feet above grade, or slightly above dense planting. If children will be opening the box, mount it lower, but keep it high enough to avoid splashback and mower damage. The slotted face should point away from prevailing wind and heavy rain. In many US yards that means avoiding direct exposure to the west or northwest, but local conditions matter more than a compass rule.
Mounting options include:
- Fence mount: Simple and sturdy if the fence is sound. Use exterior screws into rails or posts, not just pickets.
- Wall mount: Works on a shed or garden structure. Use spacers behind the box so water does not sit between surfaces.
- Post mount: Best for open beds. Use a 4×4 post set plumb, with the buried portion suited to local frost and wind conditions.
Do not mount a tall post casually in soft soil. A 6-foot exposed post with a decorative box can work loose in wind if it is not embedded correctly. For small garden posts, many crews use at least 24 inches of below-grade embedment where frost depth and local conditions allow, with gravel at the base for drainage. In colder climates, deeper footings may be required for larger structures.
Crashes, No Sound, or Screen Glitches?
Random freezes, missing sound and display glitches usually trace back to one bad driver. Find and replace yours safely.Free scan · under a minutePC Slower Than It Used to Be?
A free scan shows the junk files, broken settings and background clutter dragging Windows down - then fixes them in one click.Free scan · Windows 10 & 11Planting Around the Butterfly House
The planting plan should do the heavy lifting. A good butterfly bed has structure: low plants at the edge, medium bloomers through the center, taller perennials or shrubs as a backdrop, and stones or bare patches where butterflies can warm themselves.
Host plants
Use host plants that match butterflies in your region. Milkweed is essential for monarchs, but it should not be the only host plant in the design. Depending on your location, consider native violets, asters, passionflower, spicebush, pipevine, grasses, or native trees and shrubs known to support local species. A local extension office or native plant nursery can help match species to your USDA zone and county.
Rank #3

- TEARDROP BUTTERFLY HOUSE - Curved wooden shape and natural tone create a decorative habitat-style accent for gardens, yards and patios.
- HANGING ROPE DESIGN - Built-in rope makes placement simple on tree branches, fences, porch hooks, courtyard walls and garden structures.
- WOOD GARDEN ACCENT - wooden body blends with plants, flowers and outdoor textures while adding vertical interest to the landscape.
- GARDEN GIFT IDEA - A thoughtful choice for gardeners, nature lovers, pollinator fans and anyone building a more charming outdoor display.
- FEEDER AND SHELTER FORM - Openings and feeder-style layout create a useful butterfly-focused feature for warm-season garden viewing.
Nectar plants
Choose overlapping bloom windows. A simple target is at least three spring bloomers, three summer bloomers, and three late-summer or fall bloomers. Monarch-focused gardens especially need nectar from spring and summer reproduction through fall migration. Native plants are usually the better foundation because local insects recognize and use them.
Puddling and basking
Add a shallow saucer, birdbath tray, or low spot filled with sand and soil. Keep it damp, not flooded. Butterflies, especially males, use moist soil and sand for minerals and salts. Place flat stones in sunny, sheltered spots for basking. These details cost little but often matter more than adding another decorative garden object.
2026 Cost to Build a Butterfly House and Habitat
For a small wooden box, the material cost is modest. The larger cost is the habitat around it. A homeowner using one cedar board, exterior screws, a hinge, sandpaper, and finish should expect about $25 to $75 in materials. A scrap-wood version can land around $10 to $35 if you already have leftover untreated lumber and fasteners. A contractor-built or premium decorative box with post installation commonly runs about $100 to $300 installed because trip time and labor minimums dominate the price.
The planting area is where the budget grows. At about $6 per square foot for quart or gallon native plants, a 50 square foot bed is roughly $300 for plants alone. A 100 square foot bed is roughly $600. Add mulch, compost, edging, irrigation changes, or turf removal and the installed cost can climb quickly. Professional pollinator garden installation commonly reaches several thousand dollars once design, site prep, soil amendments, planting, mulch, and establishment watering are included.
For a walk-in screened butterfly enclosure, think in square feet. Simple screen additions on existing covered structures may run about $10 to $25 per square foot. New screened enclosures often fall around $50 to $175 per square foot. Windowed enclosed patios can run about $100 to $350 per square foot. Shed-like enclosure benchmarks range broadly from about $15 to $150 per square foot, with many professional shed installations around $40 to $75 per square foot and typical shed installs around $4,500 nationally. Concrete slabs commonly add about $6 to $12 per square foot.
When to DIY vs When to Hire a Pro
DIY is a good fit for a small butterfly box, a modest planting bed, and simple fence or wall mounting. If you can cut straight, pre-drill holes, use exterior fasteners, and keep the box accessible for cleaning, there is no reason to overcomplicate the work.
Hire a pro when the project affects drainage, structure, access, or code compliance. A screened butterfly enclosure is closer to a porch, greenhouse, or shed than a birdhouse. It needs a level base, wind-resistant framing, screen panels that can be repaired, a door that closes reliably, and a water plan that keeps runoff out of the enclosure and away from the house foundation.
We also recommend professional help when the site has slope, poor drainage, retaining walls, underground utilities, electrical additions, irrigation revisions, or HOA review. Those items are where small backyard ideas become real construction projects.
Rank #4

- [Size & Capacity] Foldable design for easy storage and repeated use. Pops open to 12 × 12 × 12 inches, providing ample space for two milkweed plants and accommodating up to 20 caterpillars. The spacious interior helps prevent overcrowding and protects the delicate wings of newly emerged butterflies.
- [Stable Structure & Clear Observation] Square-shaped frame stays firm without wobbling. 5 breathable mesh panels plus a transparent viewing window let you clearly witness the full life cycle of Monarchs and other butterflies, from caterpillars to adult butterflies.
- [Side Zipper Door for Easy Feeding & Release] Large zippered side opening allows hassle-free feeding without disturbing chrysalises on the cage roof. Enjoy the magical moment when butterflies land on your hands before flying off into the wild.
- [Highly Breathable Mesh for a Comfortable Habitat] Fine, breathable mesh creates a safe and cozy environment for caterpillars and butterflies, promoting healthy growth and development.
- [Spacious Design for Versatile Use] Available in different heights and sizes to meet various breeding needs. Perfect for family observation activities or classroom teaching sessions—an excellent cost-effective choice.
Permit and Safety Notes
A small mounted butterfly box usually does not need a building permit, but local rules control. The permit question changes when the project becomes a freestanding structure, a screened enclosure, a patio enclosure, or anything attached to the house. Some municipalities exempt small accessory structures below a certain size, while others care about height, foundation, electrical work, setbacks, easements, wind loads, or whether the structure is attached.
Use this decision tree before building anything larger than a small box:
Do these 3 things before closing this tab:
1Repair Windows errors before they cause bigger problems2Fix the driver behind crashes, sound loss and screen glitches3Clear out junk files and repair common Windows errors- Small decorative box on a fence, wall, or short post: Usually no permit, but check HOA rules and visibility restrictions.
- Tall post, arbor, or trellis feature: Check setbacks, easements, and height limits.
- Freestanding screened enclosure: Treat it like an accessory structure and call the building department before ordering materials.
- Attached screened patio: Expect permit review in many jurisdictions, especially if roof, framing, slab, or electrical work is involved.
- Electrical, lighting, fans, or irrigation controls: These can trigger separate trade permits.
Safety is straightforward but worth respecting. Wear eye protection when cutting slots, clamp small parts before drilling, and avoid holding narrow boards by hand near a saw blade. Call 811 before digging post holes or enclosure footings. Keep treated chemicals and fresh finishes away from host plants until fully cured, and do not spray pesticides on blooming plants or caterpillar host plants.
Maintenance Calendar
A butterfly house should be inspected, not ignored. The goal is to keep it dry, stable, and free of debris without disturbing active use.
- Spring: Check fasteners, roof overhang, hinge operation, drainage holes, and post stability. Clean out old debris before heavy butterfly activity begins.
- Late spring through summer: Water new plantings deeply during establishment. Weed by hand. Avoid pesticide spraying, especially when plants are blooming or larvae are feeding.
- Midseason: Refresh the puddling station so it stays damp but not stagnant. Watch for wasps or spiders occupying the box.
- Fall: Leave some seed heads and stems where appropriate for habitat value, but remove diseased material. Do not strip the garden bare.
- Winter: Inspect for rot, loose screws, cracked posts, and water intrusion. Refinish the exterior if the coating has failed.
For screened enclosures, add door hardware checks, screen repairs, drainage inspection after major storms, and annual review of anchors or footings. Screen panels should be designed so one damaged section can be replaced without dismantling the whole structure.
Common Mistakes to Avoid
Most butterfly house problems come from treating the project as decoration only. The box may look finished, but the habitat is incomplete.
- Skipping host plants and planting only nectar flowers.
- Choosing flowers that all bloom during the same few weeks.
- Mounting the box in shade, wind, or a wet low spot.
- Using untreated pine with no roof overhang, no drainage, and no cleanout access.
- Making slots too wide or adding perches that help predators.
- Spraying insecticides or using neem on host plants where caterpillars feed.
- Building a screened enclosure without checking setbacks, drainage, anchoring, or permit rules.
The better approach is simple: design the bed first, build a durable box second, and maintain both. That gives you a backyard feature that looks intentional and supports butterflies through more than one season.
Best Value
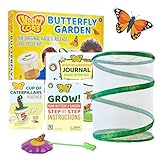
- Explore the Science of Metamorphosis: Bring science to life with a real butterfly metamorphosis experience. Live caterpillars are not included with the kit. Use the included voucher to redeem Painted Lady caterpillars and watch them grow, form chrysalises, and emerge as butterflies. An additional $10.95 redemption fee applies
- Science Kit Kids Can Watch: Give kids a close-up view of one of nature's most fascinating transformations! This hands-on science kit for kids encourages observation, curiosity, and discovery as the butterfly life cycle unfolds
- STEM Learning Through Nature: Explore the butterfly life cycle, growth, development, and metamorphosis through an interactive 3-week project kids can experience at home or in the classroom. A fun way to turn science concepts into hands-on learning kids can see happening in real time
- Raise, Observe, and Release: Includes a reusable butterfly habitat, feeding supplies, instructions, STEM Activity Journal and a voucher for live Painted Lady caterpillars. Additional fee applies for voucher redemption
- Educational Gift for Curious Kids: Make learning an adventure with a memorable science gift for kids who love animals, insects, nature, and discovering how things work. Great for birthdays, holidays, classrooms, homeschooling, or summer learning
Frequently Asked Questions
Do butterfly houses actually attract butterflies?
Sometimes, but the box is secondary. Butterflies are more reliably attracted by full sun, wind protection, host plants, nectar plants, damp mineral spots, and pesticide-free conditions. A butterfly house works best as a shelter element inside a real habitat.
What is the best wood for a butterfly house?
Cedar is the best practical choice because it handles outdoor moisture well. Untreated pine can also work if the box has a sloped roof, overhang, drainage holes, exterior finish, and annual maintenance. Avoid pressure-treated wood inside the box.
Where should I place a butterfly house?
Place it in or beside a sunny pollinator bed with 6 to 8 hours of direct sun, some wind protection, and good drainage. Mount it about 5 to 6 feet high or above dense planting, with the slotted face turned away from prevailing wind and heavy rain.
Recommended Free Tools
How much does it cost to build a butterfly house in 2026?
A small DIY wooden butterfly house typically costs about $25 to $75 in new materials, or $10 to $35 with scrap lumber or a kit. A premium installed box may cost $100 to $300. The surrounding pollinator planting often costs more, with native plants around $6 per square foot.
Do I need a permit for a butterfly house?
A small mounted butterfly box usually does not need a permit, but a walk-in screened butterfly enclosure may. Check local rules for accessory structures, setbacks, height, foundation type, electrical work, and HOA restrictions before building anything occupiable or attached.
How do I clean and maintain a butterfly house?
Inspect it in spring, clean out old debris through a hinged side or back panel, confirm drainage holes are open, tighten fasteners, and check for rot or pests. Refinish the exterior when the coating fails, but leave the inside unfinished.
Quick Recap
Product prices and availability are accurate as of the date/time indicated and are subject to change. Any price and availability information displayed on Amazon at the time of purchase will apply.

