Do these 3 things before closing this tab:
1Fix the driver behind crashes, sound loss and screen glitches2Clear out junk files and repair common Windows errors3Scan for outdated or missing drivers - takes under a minuteA durable paint finish starts with a clean, sound, dry surface and a coating system suited to the material and its exposure. Clean and stabilize the surface, repair and sand where appropriate, remove dust and residue, use a compatible primer where needed, and follow the chosen product’s instructions for application conditions and curing. The right process differs for walls, wood, concrete and metal; no single sequence or paint-and-primer product replaces surface-specific preparation.
Start by identifying the surface and its condition
Before choosing paint or tools, identify both the substrate and the conditions it will face. An interior wall, exterior wood trim, concrete floor and metal railing need different preparation and coatings. Note whether the existing finish is sound, peeling, glossy, chalky, rusty or contaminated, and check for moisture problems that could undermine a new coating.
- Exposure: Interior or exterior? Will the surface face rain, sunlight, moisture, abrasion, frequent scrubbing or chemicals?
- Substrate: Wood, drywall or plaster, concrete or masonry, metal, or vinyl siding?
- Existing finish: Is it firmly attached, or does it peel, powder, rust or show signs of moisture damage?
For concrete coatings in particular, the intended use and exposure affect product selection. Compare candidate systems for substrate compatibility, moisture and UV exposure, abrasion or chemical resistance, appearance, cleanup and VOC constraints, application conditions, and the time required before return to service. The American Coatings Association’s concrete-coating guidance discusses selection and preparation; follow the current data sheet for the specific system rather than assuming one coating fits every slab.
Prepare the surface before opening the paint
Clean, then let it dry
Remove dirt, grease, oil, soap, mildew and other contaminants using a cleaner appropriate to the surface. Rinse when the cleaner’s directions require it, and allow the surface to dry. Residue left behind can interfere with adhesion just as dirt or grease can. CoatingsTech explains how contamination and inadequate mechanical preparation can contribute to poor adhesion or delamination in its surface-preparation article.
Quick wins for a faster PC:
Fix the driver behind crashes, sound loss and screen glitchesFind Drivers →Clear out junk files and repair common Windows errorsFree Scan →Scan for outdated or missing drivers - takes under a minuteDriver Scan →#1 Best Overall

- Ideal for use on interior/exterior surfaces including wood, plastic, plaster, metal, masonry and unglazed ceramic
- Oil-based formula is low odor, resist chips and provides long-lasting protection
- Dries to touch in 20 minutes and covers up to 12 sq. ft. per can
- Durable formula provides excellent hide and goes on smoothly
- Flat primer provides a surface ready for painting
Remove failed paint and corrosion
Scrape or otherwise remove loose, peeling or powdery coating, and remove rust or mill scale from metal using methods appropriate to the substrate and coating instructions. Sound existing paint does not automatically need to be stripped, but it must be clean and adequately prepared for the new system. Glossy surfaces may need light abrasion to create a dull finish when the product instructions call for it.
Lead-safety warning: Sanding, scraping or otherwise disturbing old paint can create hazardous lead dust or fumes. Before disturbing paint on an older surface, check applicable local lead-safe procedures and use the protective equipment, containment and cleanup they require. Do not casually dry-sand old paint. Sherwin-Williams provides lead-safety and preparation guidance.
Repair, sand where suitable, and remove dust
Fill suitable holes and cracks, let repair material dry, then sand repairs smooth. Sand bare wood as directed; lightly abrade glossy surfaces only when appropriate for the substrate and coating. Remove sanding dust and any cleaner residue before priming or painting. An assorted-grit sanding sponge can help with suitable smoothing or deglossing tasks, but it is only a preparation tool—not a guarantee of durability. Avoid sanding where the material, coating instructions or lead-safety requirements make it unsuitable.
Rank #2

- Interior/Exterior use on new or previously painted drywall, concrete, wood, masonry, metal and glossy or difficult surfaces
- Water-based formula seals uniformly and will stick to surface without sanding
- Dries to the touch in just 30 minutes, ready to recoat in 1 hour and covers up to 100 sq. ft.
- Has excellent stain blocking resistance and can be used over any oil or latex topcoat
- Gray color of primer works great under vibrant, vivid colors saving time and money by improving hide and coverage of deep topcoats
Match preparation and primer to the substrate
Bare wood
Fill defects, sand smooth as directed, remove dust and prime bare wood and repairs with a compatible primer. Wood moisture matters to film performance. An American Coatings Association technical reference says paint systems generally cannot be applied successfully when wood surface moisture exceeds approximately 20%, and describes about 12% as typical service moisture in many areas of the United States and Canada. These are contextual figures from that reference, not universal pass/fail thresholds for every wood, climate or coating; use the coating maker’s requirements for the project.
Free tools Windows power users keep installed
One-click scans. No signup required.
Previously painted walls
Wash the wall, remove loose paint, patch defects, let repairs dry, sand them smooth and remove dust. Dull glossy areas if appropriate, and prime exposed bare areas with a compatible primer. A sound painted wall may need a different treatment from a bare or stained surface.
New drywall and plaster
Ensure joints and patches are dry and smooth, then remove sanding dust. Prime as appropriate for the finish system. Plaster must be cured before coating; cure requirements vary by substrate and product, so follow the relevant instructions rather than applying a generic waiting period.
Rank #3
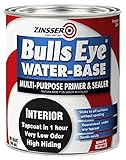
- Use to prime interior surfaces such as walls, doors, trim, plaster, concrete and more
- Water-based low-odor formula provides exceptional stain hiding even on dark or porous surfaces
- Dries to the touch in 30 minutes and covers up to 100 sq. ft. per quart
- Creates a uniform flat-finish surface ideal for top coating
- Adheres to slick surfaces without the need for deglossing or sanding
Concrete and masonry
Check that the concrete or masonry is sufficiently cured and dry for the selected coating. Remove form-release agents and incompatible treatments, repair cracks, and confirm that the coating is intended for the exposure and use. One manufacturer’s contractor guidance includes a 30-day concrete-cure reference, moisture checks and temperature requirements for its own system; those conditions are not universal specifications. Consult the current data sheet for the chosen coating.
Metal
Remove oils and other contamination, address corrosion or mill scale using suitable methods, and use a primer compatible with the metal and finish coat. A Sherwin-Williams homeowner guide says bare steel should be primed the same day it is cleaned; treat this as that guide’s instruction and verify the requirements for the specific metal-primer system.
Vinyl siding
Clean and rinse siding, then follow the siding and coating makers’ instructions. Sherwin-Williams cautions against painting vinyl siding a color darker than its original color because the siding may warp. Verify that guidance for the product and siding on your project.
Rank #4
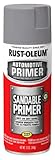
- Wet and dry sandable primer is suitable for use on wood, metal and fiberglass surfaces
- Oil based paint with Stops Rust formula provides rust resistant base coat for cars, trucks and other vehicles
- Covers up to 15 sq ft and dries to the touch (and can be recoated) in 10 minutes.
- High quality spray paint ensures long lasting, durable coating
- Provides superior top coat adhesion and flat finish yields a smooth surface when sanded
Choose a compatible primer and finish system
Use a primer suited to the substrate and any special condition, such as stains, corrosion or difficult adhesion. Prime bare areas and repairs where the system calls for it, then apply a topcoat intended for the surface and exposure. A product labeled “paint and primer in one” does not mean that bare, stained, repaired or difficult surfaces need no separate preparation or substrate-appropriate primer. The product label and technical data sheet determine the required system.
Do not choose a coating solely by its sheen or color. Confirm that it is suitable for interior or exterior use and the relevant moisture, UV, abrasion, chemical or cleaning demands. The American Coatings Association’s coatings overview describes coatings serving different functions and conditions; it does not establish a universally best product for an unspecified project.
Independent reader supportYour contribution helps us test, update, and keep practical guides available for everyone.Apply in the conditions the product specifies
Follow the selected product’s label and technical data sheet for air and surface temperature, humidity, application rate, recoat interval and cure or service time. A surface can feel dry to the touch before the coating is ready for another coat or for regular use. Do not substitute a generic dry-time rule for the instructions on the actual product.
Recommended Free Tools
Best Value
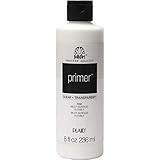
- Water-based, non-toxic
- 8 oz. bottle covers approximately 20 sq ft.
- Clear finish
Sherwin-Williams’ general exterior guidance advises against painting immediately after rain, when rain is predicted, in fog, or below 50°F unless the product is designed for those conditions. These are manufacturer-specific general recommendations, not universal specifications for every paint. The same guidance recommends following label drying times and testing an inconspicuous prepared area for adhesion or compatibility. See Sherwin-Williams’ surface-preparation guidance and exterior painting guidance.
Check the work before coating and allow it to cure
Before applying the full finish, confirm that the surface is clean, dry, stable and free of sanding dust or cleaner residue. Where compatibility is uncertain, follow the manufacturer’s advice about testing a prepared, inconspicuous area. After application, respect the product’s stated recoat and cure times before adding another coat or exposing the surface to normal use. Weather, substrate, product and application conditions all affect results, so a fixed service-life promise would not be reliable.
The American Coatings Association technical reference describes about 10 years in full sunlight for a particular primer-plus-two-topcoat wood system in its stated context, while noting harsher exposure for decks and fences. That figure is neither a warranty nor a transferable estimate for other products, climates, substrates or maintenance conditions.
Quick Recap
Product prices and availability are accurate as of the date/time indicated and are subject to change. Any price and availability information displayed on Amazon at the time of purchase will apply.
What’s actually slowing this PC down?
Pick the symptom - the matching free tool is one click away.