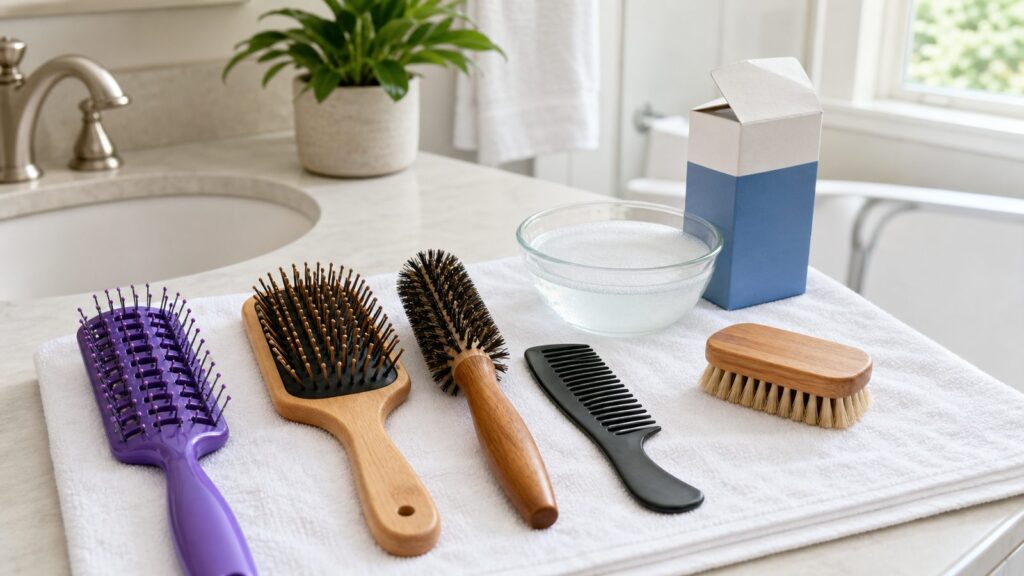
A dirty hairbrush does not just look bad. It carries shed hair, skin cells, scalp oil, lint, dandruff flakes, dust, and styling residue back onto clean hair. The fix is simple, but the method depends on the brush. A plain plastic comb can handle a short soak. A wooden, cushioned, boar-bristle, or round styling brush usually cannot.
For most households, the right rhythm is this: pull loose hair out after each use or every few uses, do a 5-minute cleanup weekly, and deep-clean the brush about once a month. If you use dry shampoo, mousse, gel, heavy hairspray, or have an oily scalp or dandruff, clean weekly or every 1 to 2 weeks.
As an Amazon Associate I earn from qualifying purchases.
On our job sites, we treat small maintenance tasks the same way we treat tools: clean off the debris first, wash the surface, dry it fully, and store it where moisture will not undo the work. Hairbrushes are not construction tools, but the principle is identical. A brush that stays wet inside a cushion or at the bristle base can smell musty, collect more grime, and fail early.
Quick Answer: The Best Cleaning Method for Most Hairbrushes
For a basic plastic brush, vent brush, or comb, remove all trapped hair first. Fill a bowl or sink with warm water and a few drops of gentle shampoo or dish soap. Soak plastic-only tools for 5 to 10 minutes, scrub between the bristles with an old toothbrush, rinse well, shake out water, towel blot, and air-dry with the bristles facing down or angled downward.
#1 Best Overall
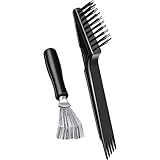
- 2-in-1 Hair Brush Cleaning Set: designed to remove hair, dust, lint and buildup from hair brushes and combs; Includes a dual-sided cleaning brush and metal rake designed for deep cleaning and daily brush maintenance
- Deep Clean Hair Brushes Efficiently: the metal rake reaches between bristles to lift trapped hair, while the cleaning brush removes dust and residue from hard-to-reach areas; Helps restore brushes to a cleaner and more hygienic condition
- Compatible with All Major Brush Types: ideal for paddle brushes, round brushes, boar bristle brushes, detangling brushes, vent brushes, cushion brushes and combs; Suitable for both personal and professional use
- Extend Brush Life Improve Hygiene: regular cleaning helps reduce buildup, maintain brush performance and prolong the life of expensive hair brushes; A simple way to support cleaner grooming habits
- Home, Salon Travel Use: compact and lightweight for convenient storage and travel; A useful beauty accessory for households, hair salons, barbershops and anyone who wants cleaner brushes every day
For wooden brushes, cushioned paddle brushes, round brushes, and boar-bristle brushes, skip the full soak. Clean them with a damp, soapy toothbrush instead. Keep water out of wood seams, rubber pads, air holes, and barrel joints. Wipe, rinse lightly with a damp cloth, then dry with airflow for several hours.
The biggest mistake is trying to clean every brush with one soaking recipe. Water is useful, but trapped water is what ruins many brushes. If the brush has wood, a cushion, natural bristles, glue seams, a padded base, or a hollow barrel, keep the cleaning controlled and shallow.
What You Need and What It Costs in 2026
You do not need a specialty kit. A good cleaning setup costs less than a replacement brush and uses supplies most homes already have. If you already own dish soap or shampoo, baking soda, vinegar, a towel, and an old toothbrush, the consumable cost is usually under $5 per cleaning, often only pennies per brush.
Quick wins for a faster PC:
Clear out junk files and repair common Windows errorsFree Scan →Scan for outdated or missing drivers - takes under a minuteDriver Scan →If you are buying supplies in the United States in 2026, expect a 1-lb box of baking soda to cost about $0.84 to $1.34, white distilled vinegar to run about $3.39 for 64 oz or $4.39 for 128 oz, and a small scrub brush or toothbrush-style cleaner to cost a few dollars. Larger household scrub brushes often start around $7, with specialty or electric kits priced higher.
| Item | Typical 2026 Cost | Best Use |
|---|---|---|
| Gentle shampoo or dish soap | $0-$5 if already on hand | Breaks down scalp oil and styling residue |
| Baking soda, 1 lb | About $0.84-$1.34 | Helps loosen odor and light buildup on plastic tools |
| White distilled vinegar | About $3.39 for 64 oz or $4.39 for 128 oz | Useful for mineral film and odor, when used separately |
| Old toothbrush or small scrub brush | $0-$7+ | Scrubs lint and residue at the bristle base |
| Replacement basic brush or comb | About $3-$12 | When bristles, pad, or handle are failing |
| Midrange paddle, detangling, or round brush | About $10-$25 | Common daily-use replacement range |
| Premium boar-bristle or salon brush | About $25-$100+ | Worth maintaining carefully, not soaking |
Keep the hair you remove out of the sink. Hair clumps and sticky conditioner residue can catch inside a drain trap. Put the dry hair in the trash before any water is involved.
Start Dry: Remove Hair, Lint, and Dust First
Before you add water, remove as much dry debris as possible. This step matters. Dry lint lifts out. Wet lint mats tighter around bristles and can turn into a gray paste at the base of the brush.
Use a rat-tail comb, wide-tooth comb, tweezers, brush-cleaning rake, or your fingers. Work from one side of the brush to the other. For a paddle brush, lift the hair up in sections instead of yanking across the whole pad. For a round brush, use small scissors to cut the wrapped hair along the barrel, then lift it off with a comb. Cut carefully between bristle rows, not into the bristles.
Recommended Free Tools
If the brush has gray lint packed near the base, scrub it dry first with an old toothbrush. Hold the brush over a trash can and work along the bristle rows. Once the loose debris is gone, washing is faster and you need less water.
How to Clean Hairbrushes by Brush Type
The right method depends on what the brush is made from. Think like you would with a finished cabinet or a flooring material: plastic, wood, rubber, glue, and natural fiber do not tolerate moisture the same way.
Plastic Combs
Plastic combs are the easiest. Remove hair, then soak the comb in warm soapy water for 5 to 10 minutes. Scrub between the teeth with a toothbrush, rinse under warm running water, and towel dry. If residue remains, add 1 to 2 teaspoons of baking soda to the water and scrub again.
Avoid boiling water. High heat can warp plastic teeth. Warm water is enough for normal oil and product buildup.
Simple Plastic Vent Brushes
Vent brushes with an all-plastic body can usually handle a short soak. Remove hair and lint first. Soak for 5 to 10 minutes in warm water with a few drops of shampoo or dish soap. Scrub the vent openings, bristle base, and handle. Rinse well and shake water out of the vents.
Dry the brush bristle-side down on a towel with airflow around it. If water sits in the vents or handle, stand it at an angle so gravity can drain it.
Cushioned Paddle Brushes
Paddle brushes often have a rubber or flexible cushion with a small vent hole. Do not submerge them. Water can get inside the pad and stay there. That trapped water is a common reason a brush smells musty after cleaning.
Rank #2

- YOUR MUST-HAVE BRUSH CLEANER: Keep every brush in top shape with this dual-purpose tool that tackles knots, product buildup, and even the tiniest hairs for a spotless, salon-fresh clean.
- DUAL-EDGE DESIGN: The wide comb lifts out excess hair in seconds, while the fine wire bristles sweep away lint, dust, and stubborn buildup around the base and bristles. Durable materials and sturdy bristles ensure reliable performance for years of consistent use.
- WORKS ON EVERY BRUSH: Whether it’s a paddle, round, detangling, boar, or nylon brush, this multipurpose cleaner handles them all with ease.
- LIGHTWEIGHT & TRAVEL-FRIENDLY: Compact and easy to hold, toss it in your bag for quick touch-ups or maintenance on the go.
- EASY & EFFORTLESS CLEANING: The ergonomic handle provides a comfortable grip, making it simple to remove hair and debris without the hassle.
After removing hair, dip a toothbrush in warm soapy water and scrub the bristle field. Keep the brush facing downward or sideways so liquid does not run into the cushion. Wipe the surface with a damp cloth, then blot with a towel.
Dry on the side with the bristles angled downward, or bristle-side down if water can drain freely. Give it several hours of open-air drying before putting it in a drawer.
Round Brushes
Round brushes trap hair because the strands wrap around the barrel. Start with small scissors. Cut along the barrel in one straight line, staying between bristle rows. Lift the cut hair off with a comb or tweezers.
If the round brush is plastic and has no cushion, wood, natural bristles, or hollow areas that trap water, you can wash it with warm soapy water and rinse quickly. For ceramic, metal, wood, boar-bristle, or mixed-material round brushes, use a damp toothbrush and wipe instead of soaking.
Pay attention to the seam where the barrel meets the handle. That joint often holds hairspray, dust, and water. Scrub it lightly and dry it well.
Free tools Windows power users keep installed
One-click scans. No signup required.
Wooden Brushes
Wooden brushes need the least water. Soaking can swell the wood, dull the finish, open cracks, or weaken glue. Remove hair, dry-brush the bristle base, then clean with a barely damp toothbrush dipped in a mild soapy solution.
Wipe the wood handle with a damp cloth, then wipe again with a clean, barely damp cloth to remove soap. Towel dry immediately. Let the brush air-dry bristle-side down or on its side with the handle exposed to air.
Boar-Bristle and Natural-Bristle Brushes
Natural bristles hold oil and lint differently than synthetic bristles. They also do not like long soaking. Remove hair with a comb, then use a dry toothbrush to lift lint from the bristle base. Mix warm water with a small amount of gentle shampoo. Dip the toothbrush, shake off excess water, and scrub lightly through the bristles.
Do not flood the bristle pad. Rinse by wiping with a clean damp cloth instead of running the whole brush under the faucet. Blot with a towel and dry with the bristles facing down or angled downward.
Do these 3 things before closing this tab:
1Repair Windows errors before they cause bigger problems2Fix the driver behind crashes, sound loss and screen glitches3Clear out junk files and repair common Windows errorsA 5-Minute Weekly Routine
This is the routine that keeps a brush from getting ugly in the first place. Once a week, pull out loose hair and scrape visible lint from the bristle base. Wipe the handle with a damp cloth. If you use hairspray or dry shampoo, touch the bristle base with a toothbrush dipped in soapy water, then wipe clean.
For a single-user household brush with light buildup, this is often enough between monthly cleanings. It also keeps bathroom drawers cleaner. Loose hair and product flakes do not stay contained; they migrate into organizers, makeup bags, sink drawers, and linen shelves.
A 20-Minute Monthly Deep Clean
Set aside about 20 minutes of hands-on time, plus drying time. The active work is short. The drying is where most people rush and cause problems.
Rank #3

- KEEP YOUR BRUSHES BEAUTIFUL: Give your brushes the care they deserve. The Brush Cleaner works on all brush sizes and models, quickly removing hair and residue to extend the life of your styling essentials.
- TWO TOOLS, ONE EASY CLEAN: Our hair tool has a 2-in-1 design that delivers perfect results every time. The small side cleans specific areas, while the large side rakes through bristles to remove hair and build-up.
- COMFORT IN EVERY DETAIL: Crafted with an ergonomic, comfort-grip handle, our brush cleaner makes upkeep effortless and strain-free. This universal solution helps every brush stay fresh and ready to create flawless styles.
- EXTEND THE LIFE OF YOUR BRUSHES: Keeping your brushes clean is essential for maintaining their performance and ensuring that their advanced technologies—like ionization or heat conduction—work at their best. Regular cleaning also extends the life of your brush by preventing product buildup, residue, and bristle damage.
- OLIVIA GARDEN: From New York Fashion Week to your countertop, Olivia Garden's styling tools combine industry-leading innovation with beautiful design for salon-quality finishes. Trusted by professional and celebrity stylists worldwide since 1967.
First, remove all hair and dry lint. Second, wash according to brush type. Third, rinse or wipe away soap until no slick residue remains. Fourth, shake out water and blot the brush thoroughly. Fifth, air-dry it in a ventilated spot for several hours, not inside a closed drawer.
Windows Errors? Fix Them Before They Spread
Repair common Windows errors and clear accumulated junk for a smoother, more stable PC - no reinstall needed.Free scan · no reinstallOutdated Drivers Are Slowing You Down
One free scan finds every outdated or missing driver and matches the right update for your exact hardware.Free scan · exact hardware matchFor normal use, monthly deep cleaning is enough. For heavy styling products, oily scalp, dandruff, dry shampoo use, or shared brushes, shorten that to weekly or every 1 to 2 weeks.
Clean vs. Disinfect: They Are Not the Same
Cleaning removes visible hair, oils, skin cells, lint, and product residue. Disinfecting uses a registered disinfectant to reduce germs on a clean surface. You cannot disinfect through a layer of hair, oil, and hairspray. The debris has to come off first.
For most single-user household brushes, regular cleaning is enough. Disinfecting makes more sense after lice exposure, a scalp infection, illness, or sharing a brush. Professional salon standards are stricter: visible debris is removed, tools are washed with soap or detergent and water, dried, and then treated with an EPA-registered bactericidal, fungicidal, and virucidal disinfectant according to the product label when the tool can safely tolerate it.
At home, read the disinfectant label and follow the contact time. Some products need the surface to stay wet for several minutes. Do not mix disinfectants with vinegar, bleach, dish soap, or other cleaners. More chemicals do not mean a better result. Mixing products can create hazardous fumes or leave irritating residue.
The Tool Desk
Outbyte PC Repair FREEClear out junk files and repair common Windows errorsFree Scan →Outbyte Driver Updater FREEScan for outdated or missing drivers - takes under a minuteDriver Scan →Bleach also requires care. Use only when the brush material can tolerate it, dilute according to current label or public health guidance, clean first, ventilate the space, and never mix bleach with ammonia, vinegar, acids, or other cleaners. If the brush is wood, natural bristle, cushioned, cracked, or porous, replacement is often the cleaner and safer answer after a serious contamination issue.
Vinegar, Baking Soda, Soap, or Disinfectant?
For normal buildup, soap is the main worker. Shampoo and dish soap both help break down oils. Baking soda can help with light odor and residue on plastic tools. Vinegar can help with mineral film and odor, but it is not a magic all-purpose answer for every brush.
Use these separately. Do not build a sink cocktail of vinegar, baking soda, bleach, disinfectant, and soap. For a plastic comb with stubborn film, wash with soap first, then use a small amount of baking soda as a mild scrub. For odor on an all-plastic brush, a short vinegar-water rinse may help, followed by a clean water rinse and full drying.
For wood, boar bristles, natural bristles, and cushioned brushes, keep it simple: mild soap, minimal water, careful wiping, and complete drying.
What’s actually slowing this PC down?
Pick the symptom - the matching free tool is one click away.
Drying and Storage Matter More Than People Think
A brush can look clean and still fail if it stays damp. Moisture trapped inside a cushioned pad, under a bristle plug, or in a handle seam can create odor and encourage microbial growth. If you clean a paddle brush at night and toss it into a drawer while damp, the job is not finished.
After washing, shake the brush gently, towel blot the bristles and base, and place it bristle-side down or on its side with the bristles angled downward. Use a dry towel and leave air space around the brush. A small countertop fan can cut drying time, especially in a humid bathroom.
For storage, wait until the brush is fully dry. A dry drawer, ventilated organizer, or clean cabinet is better than leaving it on a bathroom counter where it collects humidity, hairspray overspray, dust, and loose hair. If you store several brushes together, clean the organizer monthly too. Otherwise the clean brush goes right back into a dirty compartment.
Rank #4

- 3 WAY BRUSH CLEANER: Ergonomically designed & provides you comfort & grip.
- STIFF BRISTLES BRUSH: Stiff bristles in the brush head which removes hair from any hairbrush.
- MULTI USE CLEANING TOOL: Bristles at end of the brush can be used to remove hair, dust and fluff.
- STURDY CONSTRUCTION: Cleaning brush is made with high-quality plastic and has a long life.
- CARE INSTRUCTION: Wash in warm, soapy water. Rinse and leave to dry away from direct heat and sunlight.
When to Replace Instead of Clean
Cleaning extends the life of a good brush, but it cannot repair a failing one. Replace the brush when the bristles are melted, missing, bent, cracked, or sharp at the tips. Replace it if the cushion is loose, split, sticky after washing, or holding water. Replace it if the handle is cracked or the brush smells musty after a full cleaning and complete drying.
Many frequently used consumer brushes land in the 6- to 12-month replacement range. Better brushes can last longer if they are cleaned and dried correctly. The economics are straightforward: replacing a $15 to $50 brush every few months costs more than a monthly cleaning routine. But trying to rescue a damaged brush can snag hair and scratch the scalp, which is not worth saving a few dollars.
When to DIY vs. When to Hire a Pro
Hairbrush cleaning is almost always a DIY task. The supplies are inexpensive, the process is low-risk, and the work takes 5 to 20 minutes per brush. Professional cleaning is rarely sold as a standalone home service for hairbrushes.
A housecleaner may wipe organizers, vanity drawers, or bathroom storage as part of a broader cleaning visit, but personal-care tools are not always included. If you want that handled, ask directly before the visit. Ongoing cleaner pricing varies heavily by city, cleaner, minimum booking, and scope, and promotional first-clean offers do not tell you much about the long-term cost.
Hire help for the surrounding problem, not usually for the brush itself. If hair, residue, and product buildup are part of a larger bathroom storage issue, a deep bathroom cleaning or organizer reset can be worth it. If hair has already contributed to a slow sink drain, address the drain separately. Do not wash hair clumps down the sink and hope the trap handles it.
Free tools Windows power users keep installed
One-click scans. No signup required.
Safety Notes Homeowners Should Follow
Use warm water, not boiling water. High heat can warp plastic, soften glue, damage rubber pads, and deform bristles. Keep scissors pointed away from the brush pad and your hand when cutting hair from a round brush. Work slowly; one careless cut can ruin a bristle row.
Never mix cleaning chemicals. Vinegar and bleach do not belong together. Bleach and ammonia do not belong together. Disinfectant labels are instructions, not suggestions. Use one cleaning path, rinse when appropriate, and keep ventilation in mind.
There are no permits involved in cleaning a hairbrush, but there is a practical plumbing note: keep hair out of the drain. On service calls, the problems that look small at the counter often become bigger when hair combines with soap film inside a trap. Throw hair in the trash before washing the brush.
The Bottom Line
A clean hairbrush should feel smooth through the hair, look clear at the bristle base, smell neutral, and dry completely after washing. Remove hair often, deep-clean monthly for normal use, clean weekly or every 1 to 2 weeks for heavy product use, and match the cleaning method to the brush material.
Outdated Drivers Are Slowing You Down
One free scan finds every outdated or missing driver and matches the right update for your exact hardware.Free scan · exact hardware matchWindows Errors? Fix Them Before They Spread
Repair common Windows errors and clear accumulated junk for a smoother, more stable PC - no reinstall needed.Free scan · no reinstallPlastic tools can usually tolerate short soaking. Wood, boar bristles, natural bristles, cushioned paddle brushes, and many round brushes need a damp-clean approach. Drying is not optional. If the brush stays musty, sticky, sharp, cracked, warped, or waterlogged, replacement is the better maintenance decision.
Frequently Asked Questions
How often should you clean a hairbrush?
Remove loose hair after each use or every few uses. Deep-clean about once a month for normal use, or weekly to every 1 to 2 weeks if you use heavy styling products, dry shampoo, have an oily scalp, dandruff, or share brushes.
Can you soak a hairbrush in water?
Only some brushes. Plastic combs and simple all-plastic vent brushes can usually handle a 5- to 10-minute soak. Do not soak wooden, boar-bristle, natural-bristle, cushioned paddle, or many round brushes because water can damage materials or get trapped inside.
How do you get gray lint out of a hairbrush?
Remove it dry first. Use a toothbrush, comb, tweezers, or brush-cleaning rake to lift lint from the bristle base before washing. Wet lint can mat tighter and become harder to remove.
Is vinegar or baking soda better for cleaning hairbrushes?
Soap is usually the best first choice because it breaks down oils and product residue. Baking soda can help scrub light buildup on plastic tools, while vinegar can help with odor or mineral film. Use them separately and avoid mixing cleaners.
How do you disinfect a hairbrush after lice or a scalp infection?
Clean the brush first by removing hair, washing away oil and debris, and drying or rinsing as the brush material allows. Then use an EPA-registered disinfectant according to the label if the brush can tolerate it. If the brush is cushioned, wooden, cracked, porous, or musty, replacement is often the safer choice.
Quick Recap
When should you replace a hairbrush instead of cleaning it?
Replace it when bristles are bent, melted, missing, sharp, or cracked; when the cushion is loose or traps water; when the handle is cracked; or when the brush stays sticky or smells musty after a full cleaning and drying.
Product prices and availability are accurate as of the date/time indicated and are subject to change. Any price and availability information displayed on Amazon at the time of purchase will apply.
Do these 3 things before closing this tab:
1Scan for outdated or missing drivers - takes under a minute2Clear out junk files and repair common Windows errors3Fix the driver behind crashes, sound loss and screen glitches
