Recommended Free Tools
Clean garden pots before reusing them by scraping out old soil, washing with dish soap and water, removing mineral crust with vinegar when needed, disinfecting high-risk containers with a fresh bleach solution, rinsing thoroughly, and letting every pot dry completely. That sequence matters. Bleach does not work well through dirt, vinegar is better for mineral deposits than disease control, and wet pots stored in a shed can grow algae or crack during freeze-thaw weather.
On our job sites, we treat containers the same way we treat exterior materials around a house: clean the solids first, control the water, use the mildest product that does the job, and keep runoff out of drains. A garden pot may be small, but a batch of 30 dirty containers can leave the same kind of muddy, soapy mess that stains patios, clogs drainage, and creates slick algae on hardscape.
As an Amazon Associate I earn from qualifying purchases.
The right method depends on what was in the pot, what the pot is made of, and whether you are cleaning for appearance or sanitation. A healthy annual pulled from a plastic nursery pot is low risk. A seed tray, a pot that held diseased plants, or a container moving between properties deserves a full sanitation step before reuse.
What You Are Really Cleaning Off a Garden Pot
Old containers hold more than leftover potting mix. Used pots can carry fertilizer salts, hard-water minerals, algae, fungal spores, bacteria, viruses, insect eggs, weed seeds, decaying roots, and clogged drainage holes. Some of that is cosmetic. Some of it can affect the next plant.
#1 Best Overall

- Flower pot bristle brush
- Durable material
- Makes easy work of a messy job
- Rounded brush allows you to easily clean flower pots at the end of the season
- Measures 5-inches in diameter
The white crust on clay and terracotta pots is usually mineral buildup from water and fertilizer. It looks rough, but it is not the same problem as plant disease. Vinegar helps dissolve that crust. Bleach is used for disinfection after the pot is already clean. Mixing those two products is unsafe, so keep them in separate steps and rinse between them.
The other overlooked issue is drainage. A container with a clean-looking rim can still have root mats, gravel, or compacted soil jammed in the bottom. Poor drainage causes soggy roots, sour potting mix, algae, mosquito problems, and winter cracking. Before you reuse any pot, check that water can move through every drain hole.
Tools and Supplies for a Proper Pot-Cleaning Setup
You do not need a specialized kit. A practical setup for 10 to 20 pots usually costs about $10 to $35 if you already own a hose and bucket. Starting from scratch, expect about $25 to $90 depending on brush quality, gloves, eye protection, bucket size, hose nozzle, and whether you buy household bleach, vinegar, or a labeled disinfectant.
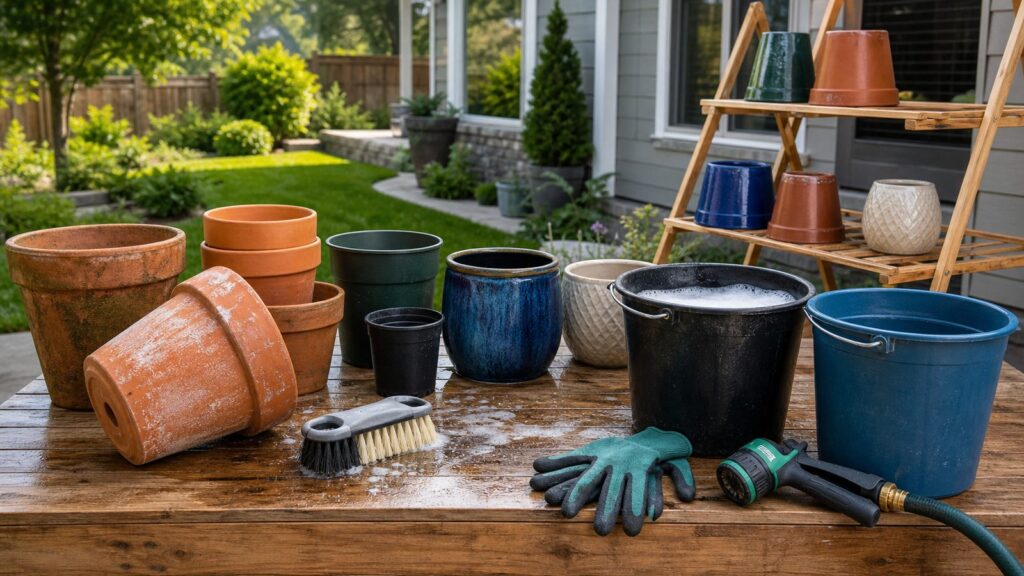
Use a stiff-bristle brush, a small detail brush or old toothbrush, a bamboo skewer or narrow dowel for drainage holes, dish soap, household bleach, white vinegar or cleaning vinegar, nitrile or chemical-resistant gloves, safety glasses, and a tarp or drying rack. A 5-gallon bucket or utility tub usually runs about $5 to $25. Basic scrub brushes and pads are commonly $3 to $20, while long-handled specialty brush sets can cost $20 to $75 or more. For pot cleaning, the basic brush usually wins.
Household bleach commonly runs about $6 to $10 for an 81- to 121-ounce bottle at national big-box retailers in 2026, depending on brand, concentration, and bottle size. White vinegar or cleaning vinegar is generally about $4 to $15 per gallon. Concentrated 30% vinegar costs more and must be diluted carefully; for most homeowners, regular white vinegar is enough for mineral crust.
| Item | Typical 2026 Cost | Best Use |
|---|---|---|
| Dish soap | $3-$8 | General washing after dry scraping |
| Household bleach | $6-$10 | Disinfecting high-risk pots after washing |
| White or cleaning vinegar | $4-$15 per gallon | Dissolving white mineral crust on clay or terracotta |
| Scrub brush or pads | $3-$20 | Removing stuck soil, algae, and residue |
| 5-gallon bucket or utility tub | $5-$25 | Soaking, washing, and controlled rinsing |
| Gloves and safety glasses | $7-$30 total | Protecting skin and eyes from dirty water, bleach, and vinegar |
The Four-Zone Workflow We Use for Batch Cleaning
When you clean more than a few pots, set up four zones: scrape, soapy wash, descale or disinfect, and rinse-dry. This keeps dirty containers from recontaminating clean ones. It also keeps the work moving. A homeowner can clean 10 to 20 average pots in about 60 to 120 minutes, plus drying time, if everything is staged before water starts running.
1. Dry scrape first
Empty the old potting mix into a wheelbarrow or contractor bag. Knock loose soil from the walls and bottom with a gloved hand, putty knife, or stiff brush. Do this while the pot is dry. Dry soil releases faster, uses less water, and is easier to contain.
PC Slower Than It Used to Be?
A free scan shows the junk files, broken settings and background clutter dragging Windows down - then fixes them in one click.Free scan · Windows 10 & 11Outdated Drivers Are Slowing You Down
One free scan finds every outdated or missing driver and matches the right update for your exact hardware.Free scan · exact hardware matchDo not dump old potting mix into a storm drain, street gutter, or patio drain. If the plants were healthy, spent mix can often be worked into an ornamental bed or composted according to your local practice. If the plant was diseased, heavily infested, or unknown, bag the old soil and discard it rather than spreading the problem into the yard.
2. Wash with soap and water
Fill a bucket or tub with warm water and a small amount of dish soap. Scrub the inside, outside, rim, saucer, and base. Pay special attention to the bottom inch of the pot and any grooves or molded ribs. Plastic pots scratch easily, and those scratches can hold soil and pathogens, so scrub firmly but avoid gouging the surface.
Use a small brush, skewer, or narrow dowel to clean drainage holes. If the hole is packed with roots or mineral deposits, the container is not ready for a new plant no matter how clean the sides look.
3. Remove mineral crust when needed
For terracotta, clay, and unglazed ceramic, white crust is common. Soak or wipe those areas with white vinegar, then scrub after several minutes. For heavy buildup, a longer soak can help, but inspect the pot first. Weak, spalling, or cracked clay may not survive aggressive soaking or scrubbing.
Rank #2

- Perfect For Enthusiastic Gardeners: Ideal for daily cleaning in the garden; this flower pot bristle brush removes old soil from flower pots, making a typically messy task simple and efficient
- Natural Bristles: Our flowerpot brush is crafted with strong palmyra fiber bristles that maintain their shape well, these stiff plant fibers are perfect for scrubbing and can be used both wet and dry
- Handcrafted Beechwood Handle: The garden pot brush handle is made from all-natural, oiled beechwood, measuring 10 inches in length, and is durable enough for daily use
- Ergonomic Design: The garden pot cleaning brush offers rounded brush head which easily fits inside flower pots, effectively loosening built-up dirt and plant material, preparing the pots for replanting or reuse
- Easy Maintenance: To maintain this flower pot brush, rinse the bristles with water, towel blot to remove excess moisture, and air dry. Made in Germany, ensuring high-quality craftsmanship
Rinse thoroughly after using vinegar, especially if you plan to disinfect with bleach later. Never combine bleach and vinegar in the same bucket, on the same sponge, or in a sprayer. Use separate containers and rinse the pot and tools between steps.
4. Disinfect high-risk containers
Not every pot needs disinfection every time. Pots from healthy annuals may only need scraping, washing, rinsing, and drying. Seed-starting trays, reused nursery pots, pots that held diseased plants, and containers moving between properties deserve more care.
A common university extension recommendation is a 1:9 bleach-to-water solution, which means 1 part household bleach to 9 parts water. In a 5-gallon bucket, that is roughly half a gallon of bleach plus 4.5 gallons of water. For smaller batches, use 1 cup bleach with 9 cups water. Soak the cleaned pot for about 10 minutes, then rinse thoroughly and let it dry.
Mix only what you need. A bleach solution loses strength after mixing; a practical rule is to use it within about two hours. Also, bleach should be mixed only with water, or with laundry detergent where label directions allow. Do not mix it with vinegar, ammonia, other cleaners, or unknown residues.
How to Clean Different Pot Materials
The same basic process works for most containers, but the pressure, soak time, and chemical choice should change by material. A $2 nursery pot and a $300 glazed planter should not be treated the same way.
Terracotta and clay pots
Terracotta is porous, attractive, and easy to damage if you rush. Dry scrape first, wash with soapy water, and use vinegar for white mineral crust. If sanitation is needed, pre-soak the pot in plain water before the bleach solution so the clay absorbs less chemical solution. After disinfecting, rinse well and dry completely.
Watch for spalling, flaking, hairline cracks, and soft edges. Clay that is already breaking down may fail during soaking or freeze if stored damp. Store terracotta off the ground and under cover in cold climates.
Plastic nursery pots and resin planters
Plastic is forgiving, but scratches are the issue. Soil and algae collect in grooves, seams, and scuffed areas. Use a brush that removes debris without cutting the surface. Thin nursery pots that are cracked, brittle, sun-faded, or badly scratched may not be worth deep cleaning. Replacement can cost less than the time required to sanitize them properly.
What’s actually slowing this PC down?
Pick the symptom - the matching free tool is one click away.
For seed trays and cell packs, sanitation matters. Young seedlings are vulnerable, and reused trays can carry damping-off organisms and other problems. Wash first, disinfect second, rinse, and dry.
Rank #3

- EARTH FRIENDLY MATERIALS: Crafted with a bamboo handle and recycled plastic for environmentally friendly cleaning.
Glazed ceramic pots
Glazed ceramic cleans more easily than raw clay, but cracks in the glaze can trap moisture. Avoid sudden temperature changes, hard impacts, and aggressive pressure washing. Inspect the bottom and saucer. Failed glaze, chips, and freeze cracks can worsen quickly outdoors.
Metal containers
Metal planters need gentler cleaning. Scrub with dish soap and water, rinse well, and dry promptly. Avoid long soaks in bleach or vinegar unless the manufacturer allows it, because harsh chemicals can react with finishes, expose bare metal, or accelerate rust. Check seams, welds, feet, and drainage openings for corrosion.
Wood planters
Wood is not a bucket-soak material. Remove soil, brush the inside, wash lightly with soapy water, rinse with controlled water, and let it dry with airflow on all sides. Inspect for rot, soft boards, failed fasteners, loose liners, and blocked drainage. If the planter is part of a deck, balcony, or railing system, also check that water is not being trapped against building materials.
Do these 3 things before closing this tab:
1Clear out junk files and repair common Windows errors2Fix the driver behind crashes, sound loss and screen glitches3Repair Windows errors before they cause bigger problemsRunoff, Safety, and Storm Drain Rules
Pot cleaning is a small chore, but the wash water can still be a pollution source. Dirty, soapy, or chemically treated water should not run into a storm drain. Storm drains often discharge to waterways without the same treatment as sanitary sewer systems.
Work on gravel, soil, or lawn where plain rinse water can infiltrate, but do not dump concentrated bleach or vinegar onto plants. Better yet, scrape solids into a bag first, use buckets instead of an open hose whenever possible, and keep the water volume controlled. If you are working on a driveway, patio, or walkway, block nearby drains and capture dirty water with a wet vacuum, absorbent socks, or towels you can wash separately.
Wear gloves and safety glasses when using bleach or stronger vinegar. Old potting mix can contain mold, fertilizer salts, and decayed roots. If you are sensitive to dust or cleaning a large batch of dry containers, use a basic dust mask while scraping and switch to eye protection once water and chemicals are involved.
Label any garden-cleaning bucket or sprayer so it is not later used for food, pets, or incompatible chemicals. That simple habit prevents a lot of avoidable mistakes.
Free tools Windows power users keep installed
One-click scans. No signup required.
Should You Pressure Wash Garden Pots?
Pressure washing is usually unnecessary for small pots. It can etch terracotta, force water into cracks, damage glazed finishes, strip paint, and spread contaminated soil by splash. It is also easy to turn a simple cleaning job into a runoff problem.
For large concrete, stone, fiberglass, or heavy-duty commercial planters that cannot be moved, pressure washing can make sense if handled carefully. Scrape and vacuum solids first. Use the lowest effective pressure, keep the nozzle moving, and avoid blasting directly into cracks, seams, drainage holes, wood joints, or fragile glaze.
Rank #4

- Brush for cleaning:garden brush is suitable for cleaning bonsai, planter, flowerpots and so on,coconut fiber vegetable brush
- Hand broom:dense and sturdy palm silk brush make it easy to brush stains off a variety of surfaces without fraying and scratching,planter washing brush
- Sweeping brush:the product's workmanship is impeccable, ensuring that you have a pleasant experience while using it,hand brush
- Portable scrubbing brush:the workmanship of this product is perfect, and you will have a good experience in using it,multifunctional cleaning brush
- Small dust brush:its convenient and user-friendly design significantly enhances work efficiency,bonsai broom
Hiring pressure washing help is usually bundled with patio cleanup, yard cleanup, greenhouse cleanup, or exterior washing rather than sold as pot cleaning alone. In 2026, expect minimum service charges around $100 to $150 or more because travel and setup dominate. Typical residential pressure washing jobs often land around $150 to $500, with square-foot pricing commonly around $0.40 to $0.80 depending on the market, surface, soil level, water access, containment needs, and labor rates. Marketplace hourly averages can be around $52 per hour, but minimums still apply.
When to DIY vs. When to Hire a Pro
DIY is the right call for most homeowners cleaning patio pots, nursery containers, seed trays, and seasonal planters. If you can move the pots, control the water, and spend a Saturday morning on the work, the cost is low and the process is straightforward. A typical 10- to 20-pot cleaning session costs about $10 to $35 in consumables if you already own basic tools.
Consider hiring help when the containers are too heavy to move, the work is tied to a larger patio or greenhouse cleanup, runoff containment is difficult, or algae has created a slip hazard on surrounding hardscape. Large planters on balconies, rooftop areas, commercial entries, and tight urban sites can also justify a pro because water control matters more than the pot itself.
Replacement is sometimes the better answer. Cracked plastic nursery pots, brittle cell trays, and cheap containers with sharp splits are not worth saving. Large ceramic, stone, concrete, fiberglass, or premium terracotta planters are worth cleaning carefully because replacement costs can be much higher than the labor.
Independent reader supportYour contribution helps us test, update, and keep practical guides available for everyone.Drying and Storage Matter More Than Most People Think
After cleaning, set pots upside down or on their sides with airflow. Sunlight and moving air help finish the job, but sunlight is not a substitute for washing a dirty container. Let pots dry completely before stacking or storing. Depending on weather, that may take a few hours on a warm dry day or 24 to 48 hours in a cool garage or shaded shed.
Do not stack damp terracotta tightly. Moisture trapped between pots can encourage mold, odors, algae, and freeze-thaw damage. For clay and ceramic, store under cover and off the ground. For plastic, avoid long exposure to direct sun when empty, because UV damage makes many nursery pots brittle over time.
The Tool Desk
Outbyte PC Repair FREEClear out junk files and repair common Windows errorsFree Scan →Outbyte Driver Updater FREEFix the driver behind crashes, sound loss and screen glitchesFind Drivers →Before a cleaned pot goes back into service, inspect it like a small exterior assembly. Look for cracks, spalling, failed glaze, rust, rot, unstable bases, blocked drainage, and saucers that hold too much standing water. A little exterior patina is not a performance problem. Bad drainage is.
Common Mistakes That Ruin the Job
The biggest mistake is trying to disinfect through soil. Organic matter interferes with disinfection, so the bleach step belongs after dry scraping and washing. If the pot still has dirt in the corners, it is not ready for sanitation.
The second mistake is using vinegar and bleach as if they do the same thing. Vinegar is useful for mineral deposits and mild cleaning. Bleach is the more common sanitation tool for disease-risk containers when mixed correctly and used on already-clean surfaces. They should not be mixed.
Best Value

- CLEANING SUPPLIES BUNDLE- The Pine-Sol scrub brush set contains your dishwashing essentials. 2-piece cleaning brush set includes one round head brush with scraper edge, and one dish brush.
- HEAVY DUTY SCRUBBERS - Heavy duty dish brushes are made with hundreds of strong bristles to effortlessly scrub away stuck-on food or grime. Handheld brushes are perfect for deep cleaning and everyday use.
- MULTIPURPOSE SCRUB BRUSHES - From cleaning dishes and scrubbing sinks, to washing fruits and vegetables, these multi-use brush cleaners will come in handy. Assorted brushes are ideal for use on plates, pots and pans, and sinks.
- LONG HANDLES WITH COMFORT GRIP - Long handled scrub brushes make cleaning less tiresome. Each scrubber is made with a contoured handle and no-slip grip for a comfortable hold.
- EASY TO STORE - Each cleaning tool features a built-in hole for easy hanging. Great for hook storage in cleaning closets.
The third mistake is ignoring drainage holes. A pot with clogged holes can fail the next planting even if it looks spotless. Clean the holes manually and test with water if you are unsure.
Quick wins for a faster PC:
Scan for outdated or missing drivers - takes under a minuteDriver Scan →Repair Windows errors before they cause bigger problemsFix Now →The fourth mistake is letting dirty wash water run across a driveway into the street. Keep solids out of drains, limit the amount of water, and capture runoff when working on hardscape.
The final mistake is saving containers that have already failed. If a pot is cracked, unstable, rotted, rusted through, or shedding clay, cleaning will not make it a reliable planter. Use your time on containers that still have service life left.
A Practical Cleaning Recipe for Most Homeowners
For a normal batch of patio pots, use this sequence. First, sort the pots by material and risk. Put diseased-plant pots, seed trays, and unknown containers in a high-risk group. Put cracked low-cost plastic in a replacement pile.
Second, dry scrape every pot and remove old soil, roots, labels, and debris. Third, wash with dish soap and warm water. Fourth, treat white mineral crust with vinegar, then rinse thoroughly. Fifth, disinfect only the containers that need it using a fresh 1:9 bleach-to-water solution for about 10 minutes. Sixth, rinse again and let everything dry completely before stacking, storing, or replanting.
Free tools Windows power users keep installed
One-click scans. No signup required.
That is the difference between making a pot look clean and making it ready for the next growing cycle. The work is not complicated, but the order is what protects the plant, the planter, and the patio around it.
Frequently Asked Questions
Do I really need to clean garden pots before reusing them?
Yes, especially for seed trays, pots from diseased plants, and containers with old soil or algae. Healthy annual pots may only need scraping, washing, rinsing, and drying, but high-risk pots should also be disinfected.
What is the best bleach-to-water ratio for disinfecting plant pots?
A common extension-recommended mix is 1 part household bleach to 9 parts water. Soak already-washed pots for about 10 minutes, then rinse thoroughly and let them dry completely.
Can I use vinegar instead of bleach to clean terracotta pots?
Vinegar is best for dissolving white mineral crust on terracotta and clay. It is not always a full substitute for disinfection when disease risk is present. If you use both, rinse well between steps and never mix vinegar with bleach.
Is it safe to pressure wash garden pots?
Usually it is unnecessary for small pots. Pressure washing can damage terracotta, cracked ceramic, painted finishes, and wood. It may be useful for large durable planters if solids and runoff are controlled.
How long should pots dry before replanting?
Let pots dry completely. In warm sun that may take a few hours; in a cool garage or shaded shed, allow 24 to 48 hours. Do not stack damp clay or ceramic pots for storage.
Can dirty pot-cleaning water go down a storm drain?
No. Dirty, soapy, or chemically treated wash water should be kept out of storm drains. Scrape solids first, use controlled water volume, and capture runoff when cleaning on driveways, patios, or walkways.
Quick Recap
Product prices and availability are accurate as of the date/time indicated and are subject to change. Any price and availability information displayed on Amazon at the time of purchase will apply.
What’s actually slowing this PC down?
Pick the symptom - the matching free tool is one click away.

