To clean brass safely, start with the finish, not the cleaner. Solid unlacquered brass can usually handle mild household tarnish removers such as lemon juice, vinegar, baking soda paste, or a short-contact brass cleaner. Brass-plated and lacquered pieces need a gentler approach: dusting, warm water, mild dish soap, and a soft cloth. The wrong cleaner can remove thin plating, cloud lacquer, expose pink copper tones, or turn a good aged patina into a patchy repair job.
On our job sites, we treat brass like finished wood or natural stone: identify it first, test a hidden spot, use the least aggressive method that works, then rinse and dry completely. That sequence matters whether you are cleaning cabinet pulls, door hardware, stair rail brackets, bathroom faucets, light fixtures, kickplates, or an antique trunk latch.
As an Amazon Associate I earn from qualifying purchases.
For most homeowners, the cost is low. If you already have dish soap, baking soda, vinegar, lemon juice, salt, flour, microfiber cloths, and a soft toothbrush, the job may cost $0 to $15. Buying those supplies new usually lands around $10 to $35. Commercial products are still inexpensive: baking soda is commonly about $0.99 to $1.69 for a 1 lb box, white vinegar often runs about $4.27 to $8.02 per gallon, Bar Keepers Friend powder is typically about $2.50 to $5 per can, and an 8 oz 3-pack of Brasso has recently listed around $10.96 at Home Depot. The expensive part is not the cleaner. It is fixing damage from using the wrong method.
Windows Errors? Fix Them Before They Spread
Repair common Windows errors and clear accumulated junk for a smoother, more stable PC - no reinstall needed.Free scan · no reinstallCrashes, No Sound, or Screen Glitches?
Random freezes, missing sound and display glitches usually trace back to one bad driver. Find and replace yours safely.Free scan · under a minuteIdentify the Brass Before You Clean It
Before you mix a paste or open a metal polish, figure out what you are holding. Brass items fall into four practical categories: solid brass, brass-plated metal, lacquered brass, and unlacquered brass. A single house can have all four. Older door knobs may be solid brass, newer cabinet pulls may be plated zinc or steel, a decorative lamp may be lacquered, and a high-end faucet may have a living finish designed to darken over time.
Use the Magnet Test for Solid vs. Plated Brass
Hold a small magnet against the item. Solid brass is not magnetic. If the magnet sticks, the piece is likely brass-plated steel or another base metal with a thin brass-colored surface. Treat magnetic pieces gently. Aggressive polishing can cut through the plating and expose steel, zinc, or another substrate underneath.
#1 Best Overall

- Polish and Cleaner: With a fast-acting formula, this brass cleaner effortlessly removes tarnish to give a streak-free, mirror-like shine to your household decor, furnishings, musical instruments, and costume jewelry
- Multi-Surface Protection: This brass polish is safe to use on untreated and unlacquered brass, copper, chrome, and sterling silver; revitalizes the lustrous finish of instruments such as cymbals, tuba, French horn, and euphonium
- Prevents Tarnish: Each application of our metal polish leaves a protective barrier on surfaces to make sure that your decorative fixtures or metal furniture will stay clean and look pristine longer
- Safe: Non-flammable and free from ammonia, coarse abrasives, and harsh chemicals, this brass cleaner and polish leaves your metals gleaming without any unpleasant odors lingering around
- Easy to Use: Shake the bottle thoroughly, apply the brass polishing liquid to a clean cloth, rub the metal surface until tarnish is removed, then turn the cloth and buff to a bright luster; each bottle contains 8 fl oz
The magnet test is useful, but it is not perfect. Some nonmagnetic base metals can still be brass-plated. If the item feels suspiciously light, has worn silver-colored edges, or shows a different metal color at scratches, assume it is plated until proven otherwise. For plated pieces, skip abrasive powders, steel wool, wire brushes, rotary buffing wheels, and long acid soaks.
Check for Lacquer
Lacquered brass has a clear protective coating over the metal. It often looks glossy and even, almost like a clear coat on wood. Failing lacquer may show peeling film, cloudy streaks, dark tarnish creeping under edges, or shiny and dull patches side by side.
What’s actually slowing this PC down?
Pick the symptom - the matching free tool is one click away.
If the brass is lacquered, do not use vinegar, lemon juice, Bar Keepers Friend, baking soda paste, Brasso, ammonia cleaners, or abrasive pads unless you are intentionally removing the coating as part of a refinishing project. Normal cleaning for lacquered brass is warm water, a few drops of mild dish soap, and a soft cloth. Dry it right away.
Decide Whether Patina Is Part of the Finish
Unlacquered brass is a living finish. It oxidizes and darkens because brass tarnish is surface oxidation, not ordinary dirt. Many homeowners choose unlacquered brass because it develops color variation around touch points. Cabinet pulls become brighter where fingers land. Door plates darken in corners. Faucet bases pick up a warmer, aged tone.
Before polishing unlacquered brass, decide whether you want a bright restored look or a natural patina. You cannot polish heavily and keep the exact same aged surface. Polishing removes oxidation. On historic, antique, or high-value pieces, less cleaning is usually better than more.
Choose the Right Cleaning Method
The best brass cleaner is the mildest one that gets the result you want. We generally work in stages: dry dusting, soap and water, mild household paste, then commercial polish only when the metal and finish can handle it.
| Brass Type | Best First Method | What to Avoid | Typical Time |
|---|---|---|---|
| Solid unlacquered brass | Soap and water, then lemon or vinegar paste if needed | Long acid soaks, steel wool, rotary tools on detailed pieces | 10 to 30 minutes |
| Brass-plated hardware | Dry dusting and mild dish soap | Abrasive polish, scouring pads, heavy buffing | 5 to 15 minutes |
| Lacquered brass | Warm water, mild dish soap, soft cloth | Vinegar, lemon, baking soda paste, BKF, Brasso | 5 to 10 minutes |
| Antique or historic brass | Dry cleaning, spot testing, minimal intervention | Removing patina without a restoration plan | Varies |
| Brass faucet exterior | Soap and water, immediate drying | Harsh acids near stone, grout, painted trim, or drain finishes | 5 to 15 minutes |
Start With Dry Dusting
Dust acts like fine grit when rubbed into metal. Wipe the piece first with a clean microfiber cloth. For grooves, hinges, escutcheons, rosettes, and engraved details, use a soft dry toothbrush or natural-bristle brush. Do not start with a wet paste on dusty hardware; you will make a muddy abrasive slurry.
Wash With Mild Soap and Water
Mix warm water with a few drops of mild dish soap. Dampen a microfiber cloth, wipe the brass, then use a second cloth dampened with clean water to remove soap residue. Dry immediately with a clean towel. This step is enough for many lacquered fixtures and lightly handled brass hardware.
For installed hardware, control the water. Do not flood door locks, cabinet doors, electrical fixtures, wall paint, stone countertops, or grout. On a bathroom vanity or kitchen sink, lay a towel around the work area so runoff does not sit on marble, limestone, grout joints, painted millwork, or oil-rubbed adjacent finishes.
Household Brass Cleaning Recipes That Work
Use these only after confirming the piece is solid, unlacquered brass or after a successful spot test on a low-risk area. Work in short contact times. Rinse completely. Dry fully. If the cloth starts turning black or brown, that is normal oxidation coming off. If the metal turns pink, coppery, or patchy, stop.
Lemon Juice and Baking Soda Paste
Mix 1 tablespoon of lemon juice with 1 to 2 tablespoons of baking soda to form a soft paste. It will foam briefly. Apply with a microfiber cloth or soft sponge, rub gently with the grain or shape of the piece, and keep the dwell time short: usually 1 to 3 minutes is enough for light tarnish. Rinse with a damp cloth and dry immediately.
This method works because the mild acid helps dissolve tarnish while baking soda gives the paste body and very mild abrasion. It is not safe for every brass surface. Avoid it on lacquered brass, plated pieces, brushed finishes you do not want to brighten unevenly, and antiques where patina has value.
Rank #2

- Long-Lasting Shine - The finest ingredients keep copper, bronze & brass beautiful for many years to come
- Easy - It takes just seconds to effortlessly polish, rinse & dry for a brilliant, mirror-like shine
- Effective - Helps bring your copper back to its original beauty by erasing the discoloration
- Protect - Anti-tarnish formula leaves behind a protective coating that delays tarnish from reforming
- Use On - Tarnished copper mugs, pots, pans, sinks, doorknobs & other copper pieces around your home
Vinegar, Salt, and Flour Paste
Mix 1/2 cup white vinegar, 1 teaspoon salt, and enough flour to make a spreadable paste. Apply a thin coat to solid unlacquered brass, let it sit for 5 to 10 minutes, then rub gently, rinse thoroughly, and dry. For small hardware, use less: 2 tablespoons vinegar, a pinch of salt, and enough flour to thicken.
Do not let vinegar paste dry on the piece. Dried paste can lodge in seams, screw heads, stamped details, and backplates. Salt crystals can scratch if you scrub aggressively, so dissolve the salt as much as practical and use light pressure.
Quick wins for a faster PC:
Repair Windows errors before they cause bigger problemsFix Now →Scan for outdated or missing drivers - takes under a minuteDriver Scan →Clear out junk files and repair common Windows errorsFree Scan →Ketchup or Tomato Paste
Ketchup and tomato paste contain mild acids that can brighten brass. Apply a thin film, wait 5 to 10 minutes, wipe, rinse, and dry. This is not our first choice on job-site hardware because it is messy around seams and fasteners, but it can work on simple solid brass objects like candlesticks or plain knobs.
Plain Vinegar Wipe for Light Tarnish
For light oxidation, dampen a cloth with white vinegar and wipe a small area for 30 to 60 seconds. Follow with a clean damp cloth and dry. This is more controlled than soaking, which is why we prefer it for installed hardware. Never soak assembled door hardware, locksets, electrical parts, or mixed-material items.
Using Commercial Brass Cleaners Without Damage
Commercial cleaners can save time, but they are not magic and they are not automatically safer. Read the label, wear Gloves when directed, ventilate the area, and keep products away from children, pets, natural stone, painted finishes, and food-contact surfaces until cleanup is complete.
Bar Keepers Friend on Brass
Bar Keepers Friend states that its cleanser can be used on brass and copper. Its brass-cleaning directions are short-contact: wet the brass, apply cleanser, let it sit for about 1 minute, clean with a soft sponge, rinse, and dry. That 1-minute dwell time matters. Longer is not better on decorative metal.
Free tools Windows power users keep installed
One-click scans. No signup required.
Use Bar Keepers Friend only on appropriate brass after spot testing. Avoid it on lacquered brass, delicate antiques, unknown plating, and brushed finishes unless you accept a possible change in sheen. Rinse completely, especially around screw heads, stamped grooves, and seams.
Brasso and Similar Metal Polishes
Brasso and similar polishes are useful for solid unlacquered brass when you want a bright shine. Apply a small amount to a soft cloth, polish in controlled sections, buff with a clean cloth, and keep the area ventilated. Gloves are sensible because metal polish can be messy and may irritate skin.
Do not use metal polish as a default cleaner. On plated hardware, it can remove the thin brass layer. On lacquered pieces, it can cloud or damage the clear coat. On living finishes, it changes the look by removing patina.
Avoid Ammonia Residue
Historic-preservation guidance favors the least aggressive approach first and warns that ammonia-containing compounds can stain brass or bronze hardware if not fully removed. If you use any cleaner containing ammonia, rinse thoroughly and dry. In our work, we usually avoid ammonia on decorative brass because there are enough milder options.
Do these 3 things before closing this tab:
1Fix the driver behind crashes, sound loss and screen glitches2Clear out junk files and repair common Windows errors3Scan for outdated or missing drivers - takes under a minuteStep-by-Step: Cleaning Removable Brass Hardware
Removable hardware is easier to clean well because you can control runoff, reach edges, and dry the back side. Take your time with removal. Old screws often vary slightly by location, and forcing them back into the wrong hole can strip wood or misalign hardware.
- Take photos before removal. Get a straight-on photo and an angle photo so you know the orientation.
- Label screws by location. A piece of painter’s tape marked “top left” or “hinge side” can save frustration later.
- Dry dust the hardware with a microfiber cloth and soft brush.
- Wash with warm water and mild dish soap. Do not soak lock cylinders or parts with hidden springs.
- Spot-test your chosen cleaner on the back or another low-visibility area.
- Apply lemon paste, vinegar paste, BKF, or polish only if the test area looks right.
- Rinse with a damp cloth until residue is gone.
- Dry immediately, including screw holes, edges, backs, and seams.
- Reinstall by hand at first so old screws do not cross-thread or chew up the original hole.
For cabinet pulls and simple knobs, plan on 5 to 10 minutes per piece if tarnish is light. Detailed door plates, old hinges, and ornate pulls can take 15 to 30 minutes each. If you have 40 cabinet pulls, this is a half-day project, not a 20-minute chore.
Cleaning Installed Brass Fixtures and Faucets
Installed brass needs extra care because the surrounding materials may be less tolerant than the brass itself. Vinegar and lemon juice can etch marble and limestone. Abrasive powders can dull polished stone, scratch acrylic tubs, or leave residue in grout. Metal polish can stain porous surfaces and painted millwork.
Rank #3
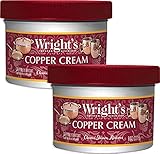
- Restore - Best for bringing your copper back to its original beauty by erasing the discoloration
- Protect - Leave behind a protective coating which prevents tarnish
- Safe - Mild formula allows safe use on jewelry with diamonds or gemstones
- Long-Lasting Shine - Formulated with the finest ingredients that keeps your copper and other metals beautiful for years to come
- Use On - Cups, jewelry, Moscow mule mugs, pots, pans, sinks, doorknobs and other copper pieces around your home
For a brass faucet exterior, use mild dish soap and a soft cloth first. Dry the fixture after each cleaning. Water left around the base accelerates spots and uneven oxidation, especially in bathrooms and kitchens. If the faucet has a living brass finish, check the manufacturer’s care instructions before using any acidic cleaner or polish.
Recommended Free Tools
Plumbing Safety Is Separate From Exterior Cleaning
Cleaning the outside of a brass faucet does not make old plumbing components code-compliant. For drinking-water faucets and wetted plumbing parts, replacement is a different issue from polishing. Under US lead-free plumbing rules, regulated pipes, fittings, fixtures, solder, and flux introduced into commerce must meet lead-free requirements. The legal definition of lead-free for plumbing is a weighted average lead content of no more than 0.25% on wetted surfaces, not zero lead.
Certification requirements for covered manufacturers and importers have applied since September 1, 2023. When replacing faucets, valves, supply lines, or other wetted components, look for appropriate lead-free markings and certifications such as NSF/ANSI/CAN 61 or 372, and follow local plumbing permit rules. Decorative cleaning is DIY-friendly. Plumbing replacement can cross into code, access, shutoff, and leak-risk territory.
How to Protect Brass After Cleaning
Bright brass begins oxidizing again as soon as it is exposed to air, fingerprints, moisture, and cleaning residue. How long the shine lasts depends on humidity, handling, location, and whether you protect it. A rarely touched dining room candlestick may stay bright for months. A bathroom faucet handle may show spots in days if it is not dried after use.
For a Bright Restored Look
After polishing, remove residue with a clean cloth. If the product instructions allow, degrease the surface lightly so wax or lacquer can bond. A microcrystalline wax or appropriate brass wax can slow fingerprints and oxidation. Spray lacquer can last longer, but it is a refinishing step, not a quick cleaning step. The surface must be clean, dry, and evenly polished before coating, or the coating will lock in streaks.
Professional restoration shops commonly disassemble, degrease, polish or buff, repair as needed, and then apply optional spray lacquer to slow future oxidation. That is why professional work looks more even than a quick sink-side polish. The prep and coating control are part of the result.
For a Living Finish
If the brass is unlacquered and you like the natural patina, skip protective lacquer and avoid routine polishing. Clean with a dry or slightly damp cloth, remove sticky grime with mild soap, and dry completely. Accept gradual darkening and brighter touch points. That is the material doing what it was selected to do.
Common Mistakes That Permanently Change Brass
The biggest mistake is skipping identification. If you use abrasive polish on brass-plated hardware, you may expose the base metal. Once that happens, cleaning will not put the brass back. The repair is replating, replacement, or living with the worn-through look.
The second mistake is attacking lacquered brass with acid or abrasive paste. Lemon, vinegar, baking soda paste, Bar Keepers Friend, and Brasso can cloud, streak, soften, or remove failing lacquer. If the coating is already peeling, the solution is usually refinishing, not stronger cleaning.
The Tool Desk
Outbyte PC Repair FREEClear out junk files and repair common Windows errorsFree Scan →Outbyte Driver Updater FREEScan for outdated or missing drivers - takes under a minuteDriver Scan →Long dwell times cause problems too. Acidic homemade pastes should not sit for 30 minutes just because the tarnish is heavy. Work in short rounds, rinse, dry, and reassess. Heavy tarnish may need multiple controlled passes instead of one aggressive pass.
Steel wool, wire brushes, scouring pads, and rotary tools are risky on finished hardware. They can leave scratches, round crisp details, thin plating, and overheat edges. We reserve mechanical buffing for controlled restoration work where the metal type, finish goal, and value of the piece are understood.
Finally, do not forget the rinse and dry steps. Residue left in seams and screw heads can cause spotting, uneven color, or renewed tarnish. Water left around faucets and bath fixtures creates the same problem. Drying is not optional.
Independent reader supportYour contribution helps us test, update, and keep practical guides available for everyone.Cost: DIY Cleaning vs. Professional Brass Restoration
Most brass cleaning is inexpensive when the item is simple, solid, and not historically valuable. The price rises when removal, disassembly, lacquer stripping, dent repair, replating, or on-site commercial work is involved.
| Option | Typical 2026 Cost | Best For | Cost Drivers |
|---|---|---|---|
| Household DIY supplies already on hand | $0 to $15 | Light tarnish, solid unlacquered pieces | Cloths, brush, lemon, vinegar, baking soda, salt, flour |
| Buying DIY supplies new | $10 to $35 | Small home hardware projects | Brand, package size, local pricing |
| Commercial cleaner or polish | About $2.50 to $11+ | Solid brass needing brighter shine | Product type, retailer, quantity |
| Handyman removal or reinstall help | $60 to $125 per hour; $65 to $1,200 total; $390 average | Large hardware sets, access issues, fixture removal | Minimum trip charges, metro labor rates, plumbing or electrical scope |
| Decorative brass shop restoration | Examples include $85/hour minimum shop rates, $128 to $170 for a kickplate, $170 to $255 for exterior lighting, $95 per chandelier arm, $1,100 to $2,100 for brass beds | Valuable, ornate, damaged, or lacquered pieces | Disassembly, pitting, lacquer, repair, shipping, replating |
| Commercial architectural metal restoration | Brass elevator door polishing commonly around $500 to $2,000 per pair; high-end on-site work may list around $400 per hour per employee | Buildings, lobbies, elevators, handrails | Site access, insurance, travel, equipment, linear footage |
When to DIY vs. When to Hire a Pro
DIY makes sense when the piece is solid unlacquered brass, the tarnish is on the surface, the item has low replacement risk, and you are comfortable with spot testing. Cabinet knobs, plain pulls, simple candlesticks, house numbers, and many door plates are good candidates.
Rank #4

- LONG LASTING CLEAN: Tired of your copper and brass kitchenware looking all grimey? Trust Twinkle Brass & Copper Cleaning Kit, a gentle, easy to apply anti-tarnish cream formula. It is specially formulated to clean, protect and polish your copper and brass pots, pans, kitchenware, and dishware so they’re shiny and beautiful for the long haul.
- REMOVES TARNISH ON COPPER & BRASS: Our non-scratch formula gently and quickly dissolves tarnish from copper & brass surfaces. Just dampen the applicator, apply Twinkle to your item, and rinse for a squeaky clean finish.
- SAFE PHOSPHOROUS FREE FORMULA: Our formula contains no phosphorus. That’s because we choose the best anti-tarnish ingredients for your health and safety.
- BULK UP: Get a 12-pack of 4.38 ounce boxes when you order so you can save money, stock up, and not have to worry about running out.
- TRUSTED FOR GENERATIONS: Twinkle has been relied on as a high quality cleaner for generations.
Hire a professional or slow down before cleaning if you see pitting, pink or red copper tones, exposed base metal, peeling clear coat, deep scratches, missing plating, soldered joints, electrical components, or antique value. Those are restoration indicators, not normal dirt. A stronger cleaner may make them more visible.
For chandeliers and exterior lights, consider the removal and reinstall risk. Electrical fixtures add wiring, ladder work, brittle sockets, glass shades, and finish matching. For plumbing fixtures, consider shutoffs, old supply lines, leak risk, lead-free replacement rules, and whether a permit is required locally. A handyman may be enough for simple hardware removal and reinstall, but licensed trade help may be required for plumbing or electrical scope.
A Practical Maintenance Schedule
For lacquered brass, dust weekly or monthly depending on the room and wash with mild soap only when fingerprints or grime appear. For unlacquered brass, wipe touch points as needed and polish only when you want to reset the brightness. In a dry interior room, that may be every 6 to 12 months. In a humid bathroom or near a kitchen sink, visible oxidation can return in a few weeks.
Free tools Windows power users keep installed
One-click scans. No signup required.
After cleaning, handle polished brass with a clean cloth instead of bare fingers. Skin oils leave prints that oxidize unevenly. Around sinks, make drying part of normal cleanup. A 10-second wipe after use does more for brass fixtures than a 30-minute polish every month.
Bottom Line
The safest way to clean brass is to identify the material and finish first, then work from mild to stronger methods. Use soap and water for lacquered or plated brass. Use lemon, vinegar, baking soda, Bar Keepers Friend, or Brasso only when the brass is solid, unlacquered, and spot-tested. Keep dwell times short, rinse fully, and dry immediately.
Brass is forgiving when you respect the finish. It is not forgiving when plating is thin, lacquer is failing, or patina is part of the value. When the piece is historic, expensive, wired, plumbed, or already showing base-metal damage, professional restoration is cheaper than learning on the most visible hardware in the house.
Frequently Asked Questions
How can I tell if brass is solid brass or brass-plated?
Use a magnet first. Solid brass is not magnetic, so if a magnet sticks, the item is likely brass-plated steel or another base metal. Also check worn edges and scratches. If you see silver, gray, or a different metal color under the brass surface, clean it gently as a plated piece.
Crashes, No Sound, or Screen Glitches?
Random freezes, missing sound and display glitches usually trace back to one bad driver. Find and replace yours safely.Free scan · under a minuteWindows Errors? Fix Them Before They Spread
Repair common Windows errors and clear accumulated junk for a smoother, more stable PC - no reinstall needed.Free scan · no reinstallCan I clean brass with vinegar without damaging it?
Yes, but only on appropriate brass. Vinegar can help dissolve tarnish on solid unlacquered brass, but it can damage lacquered brass, affect plated hardware, and harm nearby stone or grout. Use short contact times, spot-test first, rinse completely, and dry immediately.
Is lemon and baking soda safe for all brass?
No. Lemon and baking soda paste is useful for some solid unlacquered brass, but it is not safe for lacquered brass, delicate antiques, unknown plating, or finishes meant to keep a living patina. Start with soap and water before using any acidic or mildly abrasive paste.
Can Bar Keepers Friend be used on brass?
Bar Keepers Friend states that its cleanser can be used on brass and copper. Its brass instructions call for wetting the brass, applying cleanser, letting it sit for about one minute, cleaning with a soft sponge, rinsing, and drying. Do not use it on lacquered brass or unverified plated pieces without a spot test.
How often should brass hardware or fixtures be polished?
Polish only when you want to restore brightness. Interior brass may need polishing every 6 to 12 months, while bathroom or kitchen brass may tarnish sooner because of moisture and handling. If the brass has a living finish, routine polishing may work against the intended patina.
Quick wins for a faster PC:
Clear out junk files and repair common Windows errorsFree Scan →Scan for outdated or missing drivers - takes under a minuteDriver Scan →Repair Windows errors before they cause bigger problemsFix Now →When should I hire a professional brass restoration company?
Hire a pro for antique or high-value pieces, pitting, exposed base metal, pink copper tones, peeling lacquer, chandeliers, exterior lanterns, brass beds, architectural railings, elevator doors, or any fixture involving electrical or plumbing removal. Those jobs often need disassembly, controlled buffing, repair, or new lacquer.
Quick Recap
Product prices and availability are accurate as of the date/time indicated and are subject to change. Any price and availability information displayed on Amazon at the time of purchase will apply.

