Start with a simple closed loop: place matching curved pieces at each end and connect them with straight pieces. A loop is the easiest toy train track layout to build, test, and expand because a child can push a train all the way around without lifting or turning it. Once the loop works, add a siding, bridge, crossing, tunnel, or scenery one feature at a time.
Start with a simple closed loop: place matching curved pieces at each end and connect them with straight pieces. A loop is the easiest toy train track layout to build, test, and expand because a child can push a train all the way around without lifting or turning it. Once the loop works, add a siding, bridge, crossing, tunnel, or scenery one feature at a time.
As an Amazon Associate I earn from qualifying purchases.
What you need before building
- A flat, stable surface such as a floor, rug, train table, or play mat
- Curved track pieces
- Straight track pieces
- Any switches, junctions, bridges, ramps, buffers, or crossings you plan to use
- A train or vehicle for testing the route
- Clearance outside the rails so children can reach the train and accessories
You do not need a dedicated table. A toy train table or play mat can make the layout easier to preserve, but a level floor is often the simplest and most flexible starting surface.
How to build toy train tracks step by step
1. Clear and measure the play area
Remove loose toys and decide how much space the layout can occupy. Leave room around the outside of the track for children to reach trains, switches, bridges, and scenery. A layout that fills the entire available area may technically fit but can be frustrating to operate.
Use the flattest surface available. Uneven carpet can lift connectors, twist the route, or make a bridge approach uneven. If the floor is hard, a rug or play mat can define the play area; it should still lie flat beneath the track.
#1 Best Overall
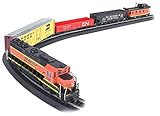
- Complete Ready To Run Electric Train Set: This 130-piece freight train set includes everything needed to start your model railroad journey right out of the box
- Powered Diesel Locomotive: Features an EMD GP40 Diesel Locomotive equipped with an operating headlight for realistic train operations
- Comprehensive Rolling Stock and Accessories: Includes Open Quad Hopper Car, Gondola Car, Steel Reefer Car, Off-Set Cupola Caboose, Signal Bridge, Miniature Figures, Railroad Signs, Street Signs, and Telephone Poles
- Easy Setup Track System: Features a 47 inch by 38 inch oval of Snap-Fit E-Z Track with included Power Pack and Speed Controller for convenient operation
- Authentic HO Scale Model: Built to 1:87 scale ratio, providing detailed and proportionate model railroad experience
2. Sort the track pieces
Separate the pieces into groups before assembling anything:
- Curves
- Short, medium, and long straights
- Switches and junctions
- Crossings
- Buffers or dead-end stops
- Bridges, ramps, and supports
- Buildings, trees, signs, tunnels, and other scenery
Sorting makes it easier to see whether you have enough matching curves to complete a loop. Put scenery aside until the rails themselves have been tested.
Quick wins for a faster PC:
Clear out junk files and repair common Windows errorsFree Scan →Scan for outdated or missing drivers - takes under a minuteDriver Scan →3. Build a closed loop first
For an oval, place matching curved pieces at one end, matching curves at the other end, and connect the two ends with straight pieces. The track should meet naturally. Do not pull the ends sideways to force the final connection.
Wooden track connectors should be pressed together gently. If a joint feels tight, rotate or reposition the neighboring piece instead of bending the track or forcing the connector. BRIO describes its railway system as expandable with rail sets, switches, track, and buffer stops, but the same basic construction principle applies to most modular wooden railway layouts.
4. Test the route by hand
Push the longest train or vehicle in your collection around the complete route. Test it in both directions if the track system permits this. Watch for:
- Wheels catching at a joint
- A raised or upside-down piece
- Track under sideways tension
- A bridge or ramp that is not level with the adjoining track
- Scenery narrowing the train’s path
Fix the basic loop before adding anything else. A manually pushed train is a useful first test even if the set includes a battery-powered engine.
Do these 3 things before closing this tab:
1Clear out junk files and repair common Windows errors2Scan for outdated or missing drivers - takes under a minute3Repair Windows errors before they cause bigger problemsRank #2

- Nickel silver rail with Gray roadbed
- Customize your layout
- Our highest quality rail
- Simple assembly
- Highly detailed
5. Add one feature at a time
After the loop runs smoothly, add one bridge, tunnel, crossing, switch, station, or group of scenery. Run the train again after every change. This makes problems much easier to locate than adding the entire collection at once.
Three dependable toy train track layouts
Layout 1: The oval
The oval is the best first layout for most builders. It has two curved ends and straight sides, with no branch decisions or dead ends.
Best for: first-time builders, younger preschoolers, and limited floor space.
- Arrange matching curves into one end of the oval.
- Arrange the same number or matching combination of curves at the opposite end.
- Join the ends with straight pieces.
- Push the train around the route before adding scenery.
If the oval will not close, the usual causes are mismatched curve counts, a straight piece of the wrong length, or a branch piece being used as though it were a normal connector.
Layout 2: The figure eight
A figure eight creates two loops that cross in the middle. The crossing can be flat, but a bridge is often easier to use because it separates the two routes vertically.
- Build one loop with curved pieces.
- Create the center crossing with a bridge or crossing piece.
- Complete the second loop.
- Check clearance beneath the bridge and around the center crossing.
- Test the longest train and any tall carriages.
A ready-made figure eight train set can be a convenient starting point. Melissa & Doug’s Figure 8 Train Set is described as containing 20 track pieces, an elevated bridge, and a train, with an age label of 3 and up. Product contents can change, so check the current package before buying.
Layout 3: Main line with a siding
A siding is a short branch where a second train, cargo car, or maintenance vehicle can wait without blocking the main route.
Rank #3

- Complete Ready To Run Freight Train Set
- Powered by a F7-A Diesel Locomotive with Operating Headlight
- Includes; Box Car, Steel Gondola Car, Off-Set Cupola Caboose
- 24" Circle of Nickel Silver E-Z Track , Power Pack and Speed Controller
- N Scale 1:160
- Build a basic oval or elongated loop.
- Replace one straight section with a switch or junction.
- Extend the branch with straight pieces.
- Finish the branch with a buffer stop.
- Check that the train body clears the switch, wall, bridge support, and buffer.
When choosing wooden train track switches, verify that the switch belongs to, or is physically compatible with, your track system. BRIO’s official assortment includes switches, junctions, and buffer stops, and independent BRIO layout documentation demonstrates how standard pieces can be combined into branches and sidings.
PC Slower Than It Used to Be?
A free scan shows the junk files, broken settings and background clutter dragging Windows down - then fixes them in one click.Free scan · Windows 10 & 11Outdated Drivers Are Slowing You Down
One free scan finds every outdated or missing driver and matches the right update for your exact hardware.Free scan · exact hardware matchHow to expand an existing train set
Expand in this order so that complexity does not outrun stability:
- Add curves and straights. Increase the footprint or make one side longer.
- Add switches and junctions. Create operational choices and branches.
- Add buffers and sidings. Make parking, loading, and station areas.
- Add bridges and supports. Introduce elevation after the ground-level track is reliable.
- Add scenery and accessories. Place stations, crossings, tunnels, trees, signs, and buildings around a working railway.
A wooden train track expansion pack is useful when you already have a functioning loop and know what the layout lacks. BRIO’s catalog includes short, medium, and long straight pieces, several curved-track sizes, switches, ascending track, turntables, starter packs, and expansion packs. Its Starter Track Pack, article 33394, is described as containing a buffer, three junctions, four mini straights, one long straight, two medium straights, and two small straights.
Use longer straight sections where possible for elevated runs. Short pieces can make a raised route harder to align. Add a wooden train bridge or toy train tunnel only after the approach track is level and the train has enough clearance.
Making the layout stable
- Build on a level surface.
- Let the track rest in its natural shape; do not pull it into alignment.
- Press connectors together gently rather than forcing them.
- Align both sides of every bridge and ramp before running the train.
- Keep buildings, trees, tunnels, and signs outside the train’s minimum clearance area.
- Test the longest and tallest vehicle, not only the smallest engine.
- Place buffers at dead ends to give manually pushed trains a defined stopping point.
- Keep enough space beside switches for a child to operate them without moving the track.
These are practical building techniques, not manufacturer-certified performance guarantees. Track systems differ in connector shape, tolerances, train dimensions, and accessory clearance.
Choosing a starting set
If you are starting from nothing, a complete wooden train track set is usually easier than buying disconnected pieces. Choose according to the layout you want:
| Starting point | What it suits | Published details from the researched product information |
|---|---|---|
| BRIO wooden railway | A collection built around one modular ecosystem | BRIO offers starter sets, expansion packs, switches, buffers, curves, straights, ascending track, and other railway components. Its Starter Track Pack is listed for ages 3 and up. |
| IKEA LILLABO train set | A broad starter layout with scenery | The U.S. IKEA page accessed during research listed a 45-piece set with curves, bridges, tunnels, barriers, buildings, trees, and signs at $34.99. It is marked for ages 3 and older and carries a small-parts warning. |
| Melissa & Doug wooden railway | A ready-made figure eight or a larger all-in-one layout | The Figure 8 Train Set is described as having 22 total pieces, including 20 track pieces and an elevated bridge. The larger Wooden Railway Set is described as having more than 100 track sections, more than 30 accessories, and instructions for four layouts. |
Prices, contents, age labels, and availability can change. Treat the IKEA price above as a research-time U.S. observation, not a permanent recommendation.
Can you mix toy train track brands?
Sometimes, but compatibility is not universal. IKEA says its LILLABO 45-piece train set can be used with most other railway systems on the market. Melissa & Doug describes specific wooden railway products as compatible with popular wooden railway systems. BRIO states that its railway products are designed to connect within the BRIO World system. None of those statements means that every wooden railway brand, generation, train, or accessory will work together.
Before combining brands, check all of the following:
Recommended Free Tools
- Do the track connectors meet without force or excessive looseness?
- Do the rail width and groove shape support the train wheels correctly?
- Does the train body clear bridges, tunnels, crossings, and turntables?
- Do magnetic couplers meet at the same height and with compatible polarity?
- Does the manufacturer limit compatibility to a particular product family or generation?
If mixed-brand pieces fit loosely, do not force the joint and do not depend on scenery to hold it together. Use one known-compatible system for the structural route and reserve mixed-brand accessories for places where fit and clearance have been tested.
Troubleshooting toy train tracks
The track will not close
Separate the layout into sections and rebuild from one known-good curve or a basic starter arrangement. Check for an incorrect number of curves, an unsuitable straight length, or a switch being treated as a regular straight connector. If the final gap is small, do not bend the track to close it; rebuild the preceding section.
Rank #4

- Accurate HO Ratio Compatibility: Designed strictly according to a 1:87 ratio, with a track gauge of 16.5mm, it perfectly adapts to the heads and carriages of major mainstream brands on the market, and supports expansion to complex track networks.
- Free Combination of Straight and Curved Tracks: All interfaces between straight and curved tracks can be perfectly spliced, and circular, elliptical, or custom layouts can be built as needed to meet the needs of sand tables, sandboxes, and exhibition scenes.
- Easy Installation and Stable Structure: Base buckle design, quick splicing in 3 seconds; The seamless integration at the track joint avoids the risk of derailment, and novice model enthusiasts can safely operate it.
- Multi Scenario Application Support: Suitable for home decoration sand tables, STEM education projects, railway model competitions, and collection displays
- Suitable Gift: A great Christmas or birthday gift for model train enthusiasts.
The train derails at one location
Inspect that joint first. Look for a raised connector, an incorrectly rotated piece, an uneven bridge approach, or scenery that narrows the path. Remove the accessory and test again. If the train runs correctly, reposition or replace the accessory rather than altering the entire layout.
The train stalls on a hill
Try a gentler rise, reduce the number of cars, and check wheel alignment. Confirm that the locomotive is intended for the track system. A battery-powered engine may also need fresh batteries, but battery behavior and replacement instructions are specific to the engine model.
A switch blocks the train
Set the switch fully to the intended route and check both branches. A branch that ends immediately beside a wall, bridge support, or buffer may not leave enough room for the full train body. Move the obstruction or extend the branch with straight track.
Mixed-brand pieces are loose
Stop using the loose joint as part of the load-bearing route. Rebuild the structural section with matching pieces, then test the mixed-brand accessory separately. A piece that appears to fit may still cause wheel misalignment or derailment under a longer train.
Independent reader supportYour contribution helps us test, update, and keep practical guides available for everyone.Safety and age guidance
Follow the age label and warnings for the specific train set, not a general assumption about wooden railways. The U.S. Consumer Product Safety Commission says toys intended primarily for children 12 and under must be third-party tested and certified through a Children’s Product Certificate for applicable toy-safety requirements. CPSC guidance also addresses small parts: toys intended for children under three must not contain small parts or release them after required use-and-abuse testing, and CPSC recommends keeping small parts away from children younger than three.
Age labels vary by product. The researched IKEA LILLABO set and BRIO Starter Track Pack are listed for ages 3 and up, while individual signs, figures, magnetic accessories, and detachable scenery may create additional concerns. Inspect the set before play, remove damaged pieces, and supervise children according to the product’s instructions and the child’s developmental ability. Do not infer that a particular layout is suitable for children under three merely because it is made of wood.
Free tools Windows power users keep installed
One-click scans. No signup required.
Best Value

- LUXURY RC TRAIN PLAYSET: The electric train set comes with 2 in 1 remote control, 3-way smoke steam locomotive, 5 carriage train, 117 track components, rechargeable battery, 2 trees, 2 bridge and 4 traffic light, etc. This large train toys is appropriate for children and adults. It is also the finest option for a fun family time.
- UPGRADED 2 IN 1 REMOTE CONTROL: This toy train with full-function remote control. enabling independent operation of forward, pause, reverse, smoke and horn effects, and silent operation by disabling sound effects. It can also function as a train car, joining the locomotive to run on tracks.
- SIMULATE REAL CITY TRAIN DESIGNS: This model train sets will give your kids an immersive play experience and more fun. The steam train toy comes with 3-way smoke, real train running sounds and whistle; working headlights; making the train closer to a real steam locomotive when running.
- 4 SUGGESTED TRACK LAYOUTS + ENDLESS POSSIBILITIES: Multiple styles of track pieces make it easy for little engineers to build 4 classic track layouts (large crossover track, oval track, square track, round track), or kids can use their imagination to build their own brand new railroad creations for hours of fun.
- TOP PRESENT FOR TRAIN LOVERS: This large train track set allows your child to learn about the development of industry and technology up close while playing happily; during the holiday season, you can also place the Christmas train under the Christmas tree to add to the festive atmosphere; comes with a beautiful gift box, perfect for train lovers as a birthday gift, Christmas gift, New Year gift, etc. Best Selection Set 2026
A simple build checklist
- Clear and measure the play area.
- Sort curves, straights, switches, bridges, buffers, and scenery.
- Build a stable oval or other closed route.
- Connect pieces gently without sideways pressure.
- Run the longest train by hand.
- Correct joints, slopes, and clearance problems.
- Add one feature and test again.
- Expand with straights and curves before adding complicated elevation.
- Use buffers at dead ends and keep scenery clear of the train.
- Check the specific product’s age label and small-parts warnings.
Frequently Asked Questions
What is the easiest toy train track layout to build?
A simple oval is the best starting layout. Use matching curves at both ends and connect them with straight pieces, then push the train around the complete route before adding accessories.
Can wooden train tracks from different brands be connected?
Sometimes, but not universally. Check the connector fit, rail groove and wheel alignment, magnetic coupler height and polarity, and clearance through bridges, tunnels, crossings, and turntables.
Do I need a train table to build toy train tracks?
Not necessarily. A dedicated table or mat can provide a stable, defined play area, but a flat floor or rug is sufficient for building and testing most layouts.
What age is a wooden train track set suitable for?
Follow the specific product label. The researched BRIO Starter Track Pack and IKEA LILLABO set are listed for ages 3 and up, but individual sets and detachable accessories may have different warnings. Keep small parts away from children younger than three.
What’s actually slowing this PC down?
Pick the symptom - the matching free tool is one click away.
The Bottom Line
Build a level, gently connected oval first. Test it with the longest train, then add switches, sidings, bridges, tunnels, and scenery one at a time. When mixing brands, verify every track joint, wheel path, magnetic coupler, and clearance rather than assuming universal compatibility.
Quick Recap
Product prices and availability are accurate as of the date/time indicated and are subject to change. Any price and availability information displayed on Amazon at the time of purchase will apply.




