Windows Errors? Fix Them Before They Spread
Repair common Windows errors and clear accumulated junk for a smoother, more stable PC - no reinstall needed.Free scan · no reinstallOutdated Drivers Are Slowing You Down
One free scan finds every outdated or missing driver and matches the right update for your exact hardware.Free scan · exact hardware matchYou can build the trusses for this makerspace shed with a 4-by-8-foot-bed CNC router or cut them with a circular saw or handsaw; CNC equipment is optional. The 2014 Make: example is a 14-by-16-foot workshop, supported on 12 piers, with trusses assembled from OSB and 2×4s. Its build account is useful as a project outline, not as current code guidance, engineering approval, or a safe-lifting plan for your site.
What the project includes
Rick Schertle’s Make: project, published August 19, 2014, describes a standalone workshop intended for a children’s makerspace in a low-income area of San Jose, California. The example measures 14 by 16 feet, or 224 square feet; the article says it can seat 16 people comfortably at worktables. Fabricator Lendy Dunaway collaborated on a design built around custom trusses.

The plans are intended to be adapted, but the article does not establish whether this design meets requirements at another location. Confirm local permitting and building-code requirements, foundation suitability, and site-specific wind and snow loads before construction. The project page is not an engineering approval.
Choose how to cut the truss parts
The project offers two approaches for cutting the OSB contour pieces. Make does not report comparative cost, speed, or accuracy, so the practical choice depends on the equipment and workflow available to you.
Do these 3 things before closing this tab:
1Clear out junk files and repair common Windows errors2Scan for outdated or missing drivers - takes under a minute3Repair Windows errors before they cause bigger problems#1 Best Overall

- List of Materials
- Cutting Lists
- Step-by-step Instructions
- Detail Drawings
- Safety and Helpful Tips
| Approach | What the project specifies | What to consider |
|---|---|---|
| CNC router | A router with a 4′×8′ bed; convert the OSB contour DXF into toolpaths using CAM software. | You need access to the router and a suitable CAM workflow. |
| Hand or power saw | Cut the truss pieces using the project’s hand-cutting diagrams; the article names a circular saw or handsaw. | Follow the diagrams and manage the cutting and handling of the sheet material with appropriate equipment and skill. |
The downloadable plans contain drawings and cut patterns. Check them for dimensions and quantities before buying materials; the project’s general description is not a substitute for the complete plans.
Build the floor and trusses
Materials and equipment
The project lists OSB, lumber, concrete piers with wood-block tops, joist hangers, glue, screws, lag screws, bolts, nuts, washers, and angle stock. Roofing, wall coverings, and doors are selected for the build. Named tools include an optional CNC router, hacksaw, reciprocating saw or cutoff saw, drill and bits, socket set, handheld circular saw, leveling tools, optional nail gun, hammer, clamps, and ladder. Verify sizes and quantities against the plans and the needs of your site.
Floor platform
- Level the 12 piers. The project describes concrete piers topped with wood blocks.
- Frame the floor using 2×6 joists and joist hangers, following the plan dimensions.
- Install 23/32-inch OSB floor panels.
Assemble the trusses
- Cut the OSB contour pieces by CNC or by following the hand-cutting diagrams.
- Make each truss from cut OSB pieces and four 2×4s, sandwiching the 2×4s between the OSB pieces with glue and screws.
- Make angle brackets from angle stock as described in the project, and prepare the brackets used to attach the trusses at the floor joists and ridge beam.
The article’s cutting description says ten sheets of 7/16-inch OSB are used for the truss parts, with one sheet and four 2×4s making one truss. Confirm the count against the downloadable plans before purchase.
How to raise the trusses
Schertle’s account describes attaching brackets at the floor joists and ridge beam, then bolting the trusses in place. It recommends raising the end trusses first, then the middle truss, followed by the remaining trusses. The author says helpers are needed to raise and hold the trusses and ridge beam, and describes the work—especially high on a ladder—as tricky.
Free tools Windows power users keep installed
One-click scans. No signup required.
Rank #3
- List of Materials
- Cutting Lists
- Step-by-step Instructions
- Detail Drawings
- Safety and Helpful Tips
Treat that sequence as the author’s account of his construction, not a lift plan. Determine in advance how the components will be lifted, temporarily braced, and secured for your structure and site. Do not attempt a lift without a safe, site-appropriate plan and enough capable help. The project page’s safety notice states: “Your safety is your own responsibility, including proper use of equipment and safety gear, and determining whether you have adequate skill and experience.”
Sheathing, roof, and openings
After setting the trusses, the project describes checking them for plumb, attaching side sheathing, and completing the roof and end walls with chosen materials. In the example, the author used an 8-foot-wide roll-up door and two large barn-door windows. Built-in shelving and a storage loft are mentioned as possible additions, not required parts of the base build.
Rank #4

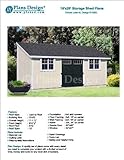
- Roof Style: Cottage, Total Square Feet: 320 square feet ft
- Building Size: 16' x 20', Overall Height: 12'
- Wall Height: 8 ft., Roof Pitch: 5/12
- Roof Span: 16 ft., Window: 30" x 40"
- Double Door: 72" x 80", Foundation: Skid
Plan for roof heat and current costs
Schertle reports that clear plastic roof panels admitted natural light but made the shed so hot it was virtually unusable; he says adding rigid foam insulation on the sunny side helped. The article provides no measured indoor temperatures or thermal-performance data, so treat this as the author’s experience rather than a quantified performance result.
The Make: article’s cost figures—about $1,000 for the project and about $500 for its example roll-up door—date to 2014. They are historical, not current estimates. Price materials, openings, and any site work using current local information.
Quick Recap
Best Value

- List of Materials
- Cutting Lists
- Step-by-step Instructions
- Detail Drawings
- Safety and Helpful Tips
Product prices and availability are accurate as of the date/time indicated and are subject to change. Any price and availability information displayed on Amazon at the time of purchase will apply.




