Recommended Free Tools
Build the trailer and camper body as one design problem: choose a plan that fits your intended use and tow vehicle, then match the chassis, running gear, shell construction, wiring and local registration requirements to that plan. The published designs discussed here are different projects—not interchangeable engineering specifications.
What should you decide before building?
Define the intended use and load
Start with how many people will sleep inside, whether you want a rear galley, what equipment and storage the camper must carry, and whether it will be used on ordinary roads or for off-road travel. Those choices affect the body layout and the loaded trailer weight. Check the tow vehicle’s limits and select a design whose stated assumptions suit the load you expect to carry. The sources cited here do not establish a universal axle location, tongue-weight target, brake threshold or towing-capacity rule.
Choose a design before choosing components
Use one selected design’s drawings, cut list, materials list, axle options and wiring information as a coordinated set. Do not combine dimensions or hardware from unrelated plans just because both describe a teardrop camper. For example, Wander Tears’ Vaga plan specifies one particular body and frame arrangement; OnlineMetals’ tutorial describes a different example build.
Plan for the whole project, not just the cabin
A camper body is only part of a road-ready trailer. Include the chassis, axle and running gear, coupling, lighting, wiring, weather sealing, inspection and registration in the project scope. Decide early whether you will use a suitable titled donor trailer, buy a frame, fabricate one, or begin with a frame kit. Check that the option you choose fits the body plan and its running-gear assumptions.
Free tools Windows power users keep installed
One-click scans. No signup required.
#1 Best Overall

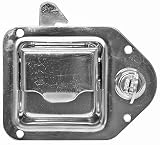
- Low Carbon Steel, Plain Finish
- Steel Thick 3/8"
- Hole Dia. 1-9/16"
- Fis 1-1/2" Shaft
- For Trailer doors, Ramp gates, Dump Trailers, Tailgates, Fence Assemblies, Offroad, Hinge component used for building welded hinge assemblies
Which plans and construction routes are documented?
These options differ in what they supply. A plan may include drawings and instructions without supplying any physical parts; a body kit may leave the frame and wheels to the builder. Confirm the current contents of a product before buying.
| Option | What the source describes | Frame and trailer scope | Useful distinction |
|---|---|---|---|
| CLC wooden camper kit and plans | The wood-parts kit uses CNC-cut BS1088 marine okoume plywood for the shell, cypress parts and a plywood mold. CLC says plans builders may want stitch-and-glue boatbuilding experience, while first-time builders may prefer the pre-cut kit for joinery accuracy. | The body kit does not include the trailer frame or wheels. The builder may also need to source epoxy, fiberglass and hardware. | A documented marine-plywood stitch-and-glue route. The kit is for the body, not a complete road-going trailer. |
| Wander Tears Vaga DIY plans | The vendor lists a cut list, step-by-step instructions, hardware list, electrical component links and wiring diagrams, plus a materials and parts list. | The plans include frame blueprints with three axle options; physical frame parts are not stated on the plan page. | A design-specific plan package that describes progress from frame selection or construction through aluminum exterior work and waterproofing. |
| OnlineMetals DIY tutorial | The tutorial describes an example 4×7-foot build using 0.032-inch 5052 aluminum sheet, steel angle and steel tubing; listed example frame stock includes 2×0.12-inch steel square tube. | The tutorial starts with either a previously owned utility trailer or a new frame built from steel tubing. It does not establish that a frame is supplied. | These are material choices for that published example, not general specifications for teardrop trailers. |
| Overland frame plans | The vendor describes cut lists, drawings, process and safety advice, and government inspection guidance. | Frame-plan scope; body-kit contents are not stated in that description. | Separate from Overland’s 5×10-foot off-road camper plan. That plan page described a steel frame, axle-less suspension, cabin and galley, and 12V and 120V system options, but showed the plans as out of stock when accessed in 2026; current availability is not confirmed. |
The Vaga page gives vendor-stated specifications for that design: a 5×8-foot trailer frame, approximate cabin dimensions of 5×9×4 feet, a normal camper height of 72 inches, and a dry weight of 1,200 pounds. Treat these as specifications for the Vaga design, not independently verified performance data or typical teardrop dimensions. The figures are not directly comparable to the OnlineMetals tutorial’s 4×7-foot example.
Rank #2
How do you build the trailer in a workable order?
-
Set the design, layout and weight target
Choose sleeping dimensions, galley arrangement, storage and intended use. Use the plan’s own dimensions and load assumptions, then compare the expected loaded trailer with the tow vehicle’s limits. Allow for the weight of the completed body, equipment, water or other cargo you actually intend to carry; a vendor-stated dry weight is not the same as a loaded travel weight.
-
Select the chassis route and verify fit
Compare a donor trailer, purchased frame, fabricated frame and frame kit. Check the donor’s title or registration documentation, dimensions and condition against the body design. For a new or kit frame, confirm that its dimensions, axle or suspension arrangement and attachment points suit the chosen plan. The sources do not provide an independent performance comparison between these routes.
The Tool Desk
Outbyte Driver Updater FREEFix the driver behind crashes, sound loss and screen glitchesFind Drivers →Outbyte PC Repair FREEClear out junk files and repair common Windows errorsFree Scan →Special offer. See more information about Outbyte and uninstall instructions. Please review EULA and Privacy policy.Rank #3
 Buyers Products 8520 Replacement Pintle Hook/Combination Hitch Mounting Kit, Four 1/2". x 2" Grade 8 Bolts, Hex Nuts,Heavy Lock Washers, and Flat Washers
- Used to securely mount Buyers Products 8-Ton Combination Hitches, Models: BH81780, BH82000, BH82516, and BH850MM
- Used to securely mount Buyers Products Pintle Hooks, Models: PH5, PH8, and PH15. Also used as replacement hardware for Pintle Hook Kits 10036, 10039, 10040
- Includes: (4) 1/2 in. x 2 in. Grade 8 cap screws, (4) 1/2 in. Grade 8 hex nuts, (4) 1/2 in. heavy lock washers, and (4) /12 in. flat washers.
-
Resolve running gear and safety-critical details
Follow the selected plan’s frame drawings and axle options rather than borrowing a placement or component from another design. Confirm that the coupling, axle, wheels, tires, lighting and electrical layout are suitable for the finished trailer and local requirements. Have safety-critical frame, coupling, axle and electrical decisions checked against the chosen design and applicable rules.
-
Build the shell using one coherent method
For the documented CLC approach, the shell is marine plywood assembled using stitch-and-glue construction, with the kit’s cypress parts and plywood mold. For the OnlineMetals example, the tutorial uses aluminum sheet with steel framing materials. These methods call for different materials and fabrication steps; choose based on the selected plan, your tools and experience, and the supplies you can source. Do not treat one route’s material thicknesses or dimensions as a specification for the other.
Rank #4
 Rv Teardrop Tear Drop Trailer 6' Aluminum Flat Hurricane Hinge for Galley Hatch Door
- VINYL INSERT SCREW CHANNEL: Features a specialized track on the roof flange designed to accept standard vinyl insert trim. This seals over your mounting screws, preventing rust leaks and creating a clean, professional appearance with no visible fasteners.
- LOW-PROFILE "FLAT" DESIGN: This hinge offers a streamlined, aerodynamic profile. Ideally suited for teardrop trailers and RVs where a flush roofline and reduced drag are desired.
- LEAK-PROOF "HURRICANE" SEAL: The 2-piece extruded aluminum construction creates a tight, interlocking labyrinth seal that blocks wind-driven rain. This eliminates the need for messy external sealants and prevents water intrusion at the critical roof-to-hatch connection.
- ELIMINATE HATCH "SLOP": We have re-engineered the hinge crown with a tighter nesting pocket to significantly reduce play and movement. This results in a smooth, solid operation and a premium feel for heavy galley hatches.
- FLUSH-MOUNT SPECIFICATIONS: Designed with no lid-to-roof offset. Total height: 1-1/2"; Roof Flange: 1"; Hatch Flange: 3/4". Installs easily with screws or rivets. Mill finish aluminum is ready to paint or powder coat.
-
Fit openings, hatch and interior to the plans
Install doors, the rear hatch, galley and interior components in the order and positions shown by the selected design. Check that moving parts fit and close as intended before final sealing and finish work. The particular plan controls dimensions and joinery; the source descriptions do not establish a universal door, hatch or galley layout.
-
Install the planned wiring and lights
Use the chosen design’s wiring diagram and component list where provided. Wander Tears lists wiring diagrams and electrical component links for the Vaga. The Overland 5×10-foot off-road plan page describes 12V and 120V options, but its availability was marked out of stock when accessed in 2026. Do not infer a wiring design from another model’s options; check lighting and electrical requirements with the authority responsible for trailer inspection where you live.
Special offer. See more information about Outbyte and uninstall instructions. Please review EULA and Privacy policy.Best Value
 RecPro RV Teardrop Trailer Hurricane Hinge for Galley Hatch Door | 62" Increments | Aluminum | Made in America | Mill Finish
- Perfect for 5’ wide teardrop trailers, these hurricane hinges act as a leak-proof hinge for the rear galley lid doors. This water-tight quality is very important for your galley, helping to make sure that your belongings and anything else inside stay dry during the rain
- Made of aluminum, these hinges are not only meant to protect your belongings but are also meant to protect themselves. If your hinges rust, it could mean contaminating anything inside the galley as well as damaging the trim and having a poor aesthetic appeal. You have no need to worry about these problems with the durable, rust-resistant aluminum.
- Even though you may not see these hinges a lot, you still want them to look good. With the mill finish, they give you that factory look and the neutral color also lets the trim blend in with any exterior style.
-
Seal, finish and weatherproof the completed body
Follow the selected construction method’s sealing and finish details. CLC notes that its builder may need to source epoxy and fiberglass; Wander Tears describes its Vaga build as including waterproofing. Close out penetrations and body joints according to the plan before loading the interior for travel. The cited sources do not establish one finish system suitable for every shell material.
-
Arrange inspection and registration before road use
Check your own motor-vehicle authority’s requirements for a VIN or title, inspection, lighting, brakes and registration. These rules vary by jurisdiction, and the vendor pages do not establish one process that applies everywhere. CLC specifically distinguishes its camper body kit from the trailer and says registration derives from the trailer. Do not assume that buying or building a body kit supplies the documentation needed to register the completed trailer.
How should you compare a donor trailer, a new frame and a kit?
- Donor trailer: Verify its documentation and condition, and confirm that its dimensions and running gear fit the selected body plan. OnlineMetals’ tutorial describes starting with a previously owned utility trailer, but does not establish that every donor is suitable.
- Fabricated frame: This route lets the builder work from a chosen design’s frame drawings, but requires appropriate fabrication capability and careful attention to the plan’s specifications. OnlineMetals’ example uses steel tubing; its listed stock sizes belong to that example only.
- Purchased frame or frame kit: Check what is actually included, how the frame fits the body design, and whether its axle or suspension arrangement matches the plan. The cited descriptions do not establish a universal frame-kit specification.
Whichever route you choose, settle questions of title or registration, fit, running-gear compatibility and documentation before committing to body construction. A chassis that does not match the body plan can turn later assembly into redesign work.
Quick Recap
What should you confirm before the first tow?
- The completed body and its mounting arrangement match the selected frame design.
- Doors, hatch and other openings close as intended, and the body is weather-sealed according to its construction method.
- Coupling, axle, running gear, wiring and lighting have been checked against the chosen plan and applicable local rules.
- Required inspection and registration steps are complete for your jurisdiction.
- The loaded trailer and intended towing setup are consistent with the tow vehicle’s limits.
Product prices and availability are accurate as of the date/time indicated and are subject to change. Any price and availability information displayed on Amazon at the time of purchase will apply.




