What’s actually slowing this PC down?
Pick the symptom - the matching free tool is one click away.
Blotchy stain is usually an absorption problem, not simply an application mistake. In pine and other unevenly porous woods, more absorbent areas take in more pigment and turn darker while denser areas remain lighter. The most reliable prevention is to prepare the surface uniformly, test the complete finishing schedule, and use a compatible pre-stain conditioner, washcoat, or gel stain when the wood calls for it.
If the stain is already blotchy, do not keep adding penetrating stain. Either return to clean bare wood and start again, or—when the defect is mild and the surface is structurally sound—seal the surface and correct the color with a controlled gel-stain glaze.
As an Amazon Associate I earn from qualifying purchases.
Why wood stain turns blotchy
Penetrating stain does not color every part of a board equally. It follows the wood’s absorption pattern. Areas with more open grain, lower density, resin variation, knots, end grain, or exposed fibers accept more liquid and pigment. Those areas become dark patches, while denser areas absorb less and remain comparatively pale.
This is especially common with pine, cherry, maple, birch, poplar, alder, and aspen. Oak and walnut are generally more forgiving, but neither is guaranteed to stain uniformly. Different boards of the same species can have different natural color and porosity, so a sample test is still essential.
#1 Best Overall
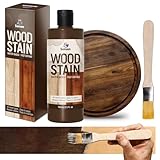
- Professional Results: Achieve rich, even color and enhanced wood grain with just a single application. SENVEN wood stain fast-drying, high-concentration formula provides excellent coverage and deep penetration, instantly revitalizing old wood with a natural matte finish
- Enhances Natural Wood Grain: SENVEN wood stain has a semi-transparent finish that highlights the wood’s inherent natural grain, adding color to furniture and effortlessly enhancing overall aesthetics. (To ensure a more even coloring effect, it is recommended to shake it well before application)
- Water Based & Safe To Use: Breathe easy with SENVEN wood stain non-toxic, water-based formula. Ultra-low in VOCs and free from harsh fumes, it’s safe for families, pets, and the environment. SENVEN wood stain Perfect for kitchen cabinets, furniture, decks, and more—use anywhere with confidence.
- Wide Application & Uniform Coloring: SENVEN wood stain provides excellent staining effects with even color distribution, and is widely applicable to various indoor and outdoor wooden surfaces. It easily handles furniture, cabinets, doors, windows, floors, and more.
- Complete Kit with Guaranteed Satisfaction: Everything you need in one box: high-concentration wood stain, brush. Friendly Reminder: Due to differences in absorption across various wood types, slight variations in staining color results may occur. It is recommended to test on a hidden part of the wood before staining. Proceed with large-area staining only after confirming satisfaction with the test results. If you have any questions regarding our wood stain, please feel free to contact us.
Some apparent blotches have a different cause. Scratches, random-orbit sanding swirls, glue spots, grease, wax, dust, and remnants of an old finish can all interfere with absorption or make defects more visible after stain is applied.
First determine what is actually on the wood
Stain is normally applied to clean, bare, sound wood. Before choosing a fix, identify whether you are working with:
- Bare wood: You can correct the sanding and use a compatible conditioner, washcoat, or gel stain.
- Previously stained but unfinished wood: You may need to remove the existing color or use a controlled surface-coloring technique.
- Wood with a clear finish, wax, paint, or other film: A penetrating stain may not be able to absorb consistently. Cleaning, scuff-sanding, stripping, or glazing is usually more appropriate than simply applying more stain.
- Veneer or thin stock: Use extra caution when sanding. The goal is to remove the defect without sanding through the face.
Do not assume a darker patch means the wood needs another coat. If the problem is uneven absorption, more penetrating stain commonly makes the contrast worse.
Crashes, No Sound, or Screen Glitches?
Random freezes, missing sound and display glitches usually trace back to one bad driver. Find and replace yours safely.Free scan · under a minuteWindows Errors? Fix Them Before They Spread
Repair common Windows errors and clear accumulated junk for a smoother, more stable PC - no reinstall needed.Free scan · no reinstallThe prevention workflow
1. Sand to a uniform surface
Sand the face grain evenly with the grain. A practical target for many interior projects is approximately 180 grit on the face grain and approximately 220 grit on end grain. After using a random-orbit sander, hand-sand in the direction of the grain to remove circular marks and to blend the surface.
Use progressive grits rather than jumping directly from a coarse abrasive to a fine one. Do not polish isolated areas or sand some sections much more heavily than others. A uniform surface matters more than choosing the finest possible final grit.
End grain absorbs stain more readily than face grain, which is why it often becomes very dark. Sand it somewhat finer than the face, and test the treatment on a cutoff before working on the finished piece.
2. Remove contamination and inspect before staining
Remove sanding dust thoroughly. Check for glue squeeze-out, filler, oily fingerprints, wax, and old finish. Glue spots are particularly easy to miss because they may not be obvious on dry wood but can repel stain and leave pale marks.
Do these 3 things before closing this tab:
1Repair Windows errors before they cause bigger problems2Fix the driver behind crashes, sound loss and screen glitches3Clear out junk files and repair common Windows errorsRank #2

- Restor-A-Finish is a unique finish-penetrating formula that restores wood finishes while blending out minor scratches, blemishes and abrasions
- Available in nine colors to match almost any wood finish tone; Neutral, Maple-Pine, Golden Oak, Cherry, Walnut, Mahogany, Dark Walnut, Dark Oak, and Ebony Brown
- With a simple wipe-on, wipe-off process, most finished wood surfaces that seem to need a complete refinishing job can be restored in a few minutes
- Removes white heat rings and water marks, sun fade, oxidation, smoke damage and most other blemishes
- Restor-A-Finish restores the finish without removing any of the existing finish
Wiping bare wood with mineral spirits can expose sanding scratches, swirls, glue spots, and likely color variation before stain permanently emphasizes them. Allow the solvent to evaporate completely before applying stain or finish, and follow the product label for compatibility, ventilation, and safe handling.
3. Make a representative test board
A test on a different piece of wood is useful only if it behaves like the actual project. Ideally, test on the same species and grade, using the same sanding schedule and the same products. Include the features most likely to change the result:
- Face grain and end grain
- Plywood or veneer, if those materials are part of the project
- Wood filler repairs
- Knots, resinous areas, or contrasting boards
- The exact conditioner, stain, glaze, and topcoat sequence
Let the sample dry for the stated time before judging it. The underlying wood color affects the final result, so one stain color can look substantially different on two boards.
Choose the right blotch-control method
oil-based pre-stain conditioner
For bare, blotch-prone wood followed by an oil-based penetrating stain, an oil-based pre-stain conditioner can partially fill or seal the most absorbent areas. This reduces the amount of pigment those areas accept and is particularly useful on pine, alder, birch, and maple.
Application details vary, but the manufacturer’s directions commonly call for applying the conditioner, allowing it to penetrate for roughly 5–15 minutes, and wiping off the excess. The stain then needs to be applied within the product’s specified window. Do not let the label’s timing become an afterthought: a conditioner that dries too far or is left unevenly on the surface can produce its own color variation.
The trade-off is color intensity. Conditioned wood may look lighter or less saturated because less pigment enters the surface. A second coat of stain or a different stain color may be necessary, but test that choice rather than guessing.
For projects in this category, a pre-stain wood conditioner is the most direct supply to evaluate. Choose the formulation for the stain system rather than treating all conditioners as interchangeable.
Water-based pre-stain conditioner
Use a water-based conditioner with a water-based stain when the product system specifically calls for it. Water-based conditioners are designed to partially seal porous areas before water-based color products and can be useful on maple, pine, cherry, and similar woods.
Recommended Free Tools
Rank #3

- From cold, plain white or simple solid, paint your garage door to look like wood in a single morning or afternoon with Giani Wood Look Paint for Garage Doors!
- The Giani Wood Look Paint Kit is a simple, two-step application that will transform smooth, embossed, flat or raised panel doors in just three hours.
- Giani Wood Look Paint is a Water-Based Acrylic, Safe, Low on Odor and VOCs, but designed for outdoor durability and weather resistance while covering up to 180 sq. ft
- Each kit contains: Two 16 oz. Giani English Oak Wood Tone Base Coat, Two 16 oz. Giani English Oak Wood Grain Finish Coat, Giani Paint Mitt, 2" Brush, 2 Plastic Tarps, 6" Roller Arm & Cover, and 2 Stir Sticks
- Add instant curb appeal to your home in just 3 hours with Giani Wood Look Paint Kits!
Water-based products often have a shorter penetration period—commonly about 1–5 minutes—followed by removal of excess. Once the fibers have dried and swollen, the surface may require light sanding. Exact timing and sanding requirements vary by formulation, so follow the label for the product you are using.
Do not put an oil-based conditioner beneath a water-based stain unless the manufacturer explicitly approves that combination. For example, Minwax states that its oil-based pre-stain conditioner is not intended for use beneath water-based stain. Chemistry and drying behavior matter more than the generic name “conditioner.”
Shellac-based washcoat or sealer
A washcoat is a deliberately thin sealing layer that reduces differences in absorption before coloring. Commercial dewaxed shellac-based sealers are one option; products such as Zinsser Bulls Eye SealCoat are marketed for interior wood and as a pre-stain sealer or conditioner for pine and softwoods.
A washcoat must be thin enough to reduce blotching without completely blocking the stain. Too much sealer can leave the result lighter than expected because insufficient pigment reaches the wood. Always test the exact number of coats and the intended stain over it.
The Tool Desk
Outbyte PC Repair FREEClear out junk files and repair common Windows errorsFree Scan →Outbyte Driver Updater FREEScan for outdated or missing drivers - takes under a minuteDriver Scan →There are also homemade washcoat approaches, including a thin mixture of varnish and mineral spirits for certain oil-compatible systems. Do not improvise by thinning a water-based finish to create a washcoat unless the manufacturer specifically supports that use. The resin, solvent, drying behavior, and compatibility all affect the result.
A washcoat or sealer is not the same thing as sanding sealer. Sanding sealer is generally intended for bare wood that will receive a clear finish and is formulated to make sanding easier. A pre-stain conditioner or washcoat is selected specifically to moderate stain absorption.
Gel stain
Gel stain is often the best option when you want more control over surface color and less deep penetration. Its thicker carrier keeps pigment in suspension and slows absorption. You can leave more color on pale areas and wipe excess from areas that are becoming too dark.
Mix the product thoroughly, apply a consistent coat, observe the manufacturer’s recommended dwell time—often only a few minutes—and wipe with the grain. Work deliberately, especially around edges and end grain. Gel stain can still emphasize growth-ring contrast in some pine, so it is not a substitute for testing or proper sanding.
Rank #4

- Restor-A-Finish is a unique finish-penetrating formula that restores wood finishes while blending out minor scratches, blemishes and abrasions
- Available in nine colors to match almost any wood finish tone; Neutral, Maple-Pine, Golden Oak, Cherry, Walnut, Mahogany, Dark Walnut, Dark Oak, and Ebony Brown
- With a simple wipe-on, wipe-off process, most finished wood surfaces that seem to need a complete refinishing job can be restored in a few minutes
- Removes white heat rings and water marks, sun fade, oxidation, smoke damage and most other blemishes
- Restor-A-Finish restores the finish without removing any of the existing finish
Because gel stain remains more near the surface, it can also be useful for a controlled glaze over a sealed finish. That is a different technique from using it as a penetrating stain and should be tested separately.
Quick decision tree
| Situation | Best starting approach |
|---|---|
| Bare pine, cherry, maple, birch, poplar, alder, or aspen with oil-based stain | Sand evenly, test, then use a compatible oil-based pre-stain conditioner or test gel stain. |
| Bare blotch-prone wood with water-based stain | Use the manufacturer’s compatible water-based conditioner and account for fiber raising and light sanding. |
| You want maximum control or a stronger surface color | Test gel stain, using a consistent coat and controlled wipe-off. |
| The project is already stained, blotchy, and structurally sound | Test a sealed-surface gel glaze before committing to complete stripping. |
| Severe blotching, scratches, glue contamination, or failed product compatibility | Return to clean wood and restart the preparation and staining process. |
How to fix blotchy stain after it happens
Option 1: Return to bare wood—the most reliable reset
When blotching is severe, uneven, or combined with scratches and sanding marks, the dependable repair is to remove enough stain and finish to reach clean, bare wood. Then repeat the preparation process:
- Remove the existing stain and finish carefully.
- Sand only as aggressively as necessary to reach clean, even wood.
- Remove all dust and inspect the surface under good light.
- Test the chosen conditioner, washcoat, stain, and topcoat on a representative sample.
- Apply the compatible blotch-control method and restain according to the product directions.
On furniture, veneer, edges, and thin panels, avoid aggressive belt sanding. It can create deep scratches, low spots, rounded edges, or sand-through. Use the least aggressive method that removes the defect, and check your progress frequently.
Option 2: Use a gel-stain glaze over a sealed surface
A glaze can correct mild blotching without stripping the entire project, but it is a surface-coloring technique rather than a restoration of the original absorption pattern.
Quick wins for a faster PC:
Clear out junk files and repair common Windows errorsFree Scan →Fix the driver behind crashes, sound loss and screen glitchesFind Drivers →Repair Windows errors before they cause bigger problemsFix Now →- Apply a full-strength coat of the intended clear finish as a sealer and allow it to dry completely.
- Lightly roughen the surface in the direction of the grain so the glaze can bond. Do not cut aggressively into the stained wood.
- Test an oil-based gel stain as a glaze on a hidden area or sample panel.
- Apply the gel evenly, then wipe off excess to reduce a dark patch.
- For a stronger correction, work the gel with the tip of a dry natural-bristle brush, blending the transition rather than creating a hard edge.
- If the result is wrong, remove mistakes with mineral spirits before the glaze dries, following appropriate ventilation and handling precautions.
- Allow the glaze to dry, then apply the required compatible topcoats.
This approach can disguise and rebalance mild color differences, but it cannot repair deep sanding scratches, glue contamination, finish failure, or a surface that was never prepared evenly. Test first because the sealed surface changes how the gel behaves.
Diagnose the pattern before choosing a repair
- Dark patches on pine or other softwood
- Likely causes include density and porosity differences, resin, knots, or other changes in absorbency. Use a compatible conditioner, washcoat, or gel stain on the next attempt.
- Dark scratches or random swirls
- These usually indicate incomplete sanding or machine marks. More stain will emphasize them; correct the surface preparation instead.
- Dark end grain
- End grain absorbs more readily. Sand it finer than the face grain and control the color on a test piece.
- Uneven color even after conditioner
- The conditioner may have been applied inconsistently, excess may not have been removed, the timing may have been wrong, or the conditioner and stain may not be chemically compatible.
- Blotching over an existing finish
- A film finish may be blocking absorption. Clean, scuff-sand, strip, or use a controlled glaze depending on the condition of the surface.
Common mistakes to avoid
- Adding more penetrating stain to dark areas: This often deepens the contrast rather than evening it.
- Skipping the test board: This is especially risky with pine, cherry, maple, birch, poplar, alder, aspen, veneer, filler, and mixed boards.
- Using the wrong conditioner chemistry: Match oil-based conditioner to the approved stain system and water-based conditioner to the approved water-based system.
- Confusing sanding sealer with pre-stain conditioner: They serve different purposes and are not automatically interchangeable.
- Over-sanding isolated areas: Polished or low spots can absorb differently even when the whole surface appears smooth.
- Expecting gel stain to hide poor preparation: It offers more color control but will not erase machine marks, rough end grain, or glue spots.
- Applying a washcoat too heavily: Excessive sealing can prevent the stain from reaching the wood and produce a washed-out result.
Compatibility and safety checklist
- Confirm whether the surface is bare wood, stained wood, or already sealed.
- Use a conditioner intended for the stain’s chemistry and follow the product’s application window.
- Check the label before placing a water-based or oil-based topcoat over the cured color layer.
- Allow mineral spirits and other solvents to evaporate fully before applying a finish.
- Provide strong ventilation when using solvent-based stain, conditioner, shellac, glaze, or cleanup products.
- Wear label-recommended eye and skin protection, and use appropriate respiratory protection where required.
- Control sanding dust with local exhaust or suitable dust collection and avoid blowing dust through the workspace.
- Use products such as shellac-based sealers only within their stated scope. For example, Zinsser SealCoat is described for interior wood and is not recommended as an exterior sealer unless the product documentation specifically permits the intended use.
- Keep rags and solvent-soaked materials handled and disposed of according to the product label and local requirements.
A practical product checklist
For a typical interior staining project, gather only what the tested finishing schedule requires:
- Progressive abrasives suitable for the wood and finish
- Dust removal supplies
- A representative test board or offcut
- A compatible oil-based or water-based pre-stain conditioner, if testing shows it is needed
- Penetrating stain or gel stain
- A compatible clear sealer or topcoat
- Clean lint-free wiping cloths and suitable brushes
- Ventilation and label-directed personal protective equipment
Buy the conditioner and stain as a system, not as unrelated products chosen only by color name. The best-looking result is usually determined before the first coat reaches the project: consistent sanding, clean wood, a realistic sample, and controlled absorption.
Best Value

- Ideal for use on all interior wood projects: furniture, cabinets, doors, trim and paneling
- One-coat coverage, fast-drying oil based formula
- Dries to the touch in just 1 hour and covers up to 275 square feet
- High performance stain system enhanced with nano pigment particles
- Highlights natural wood grain to reveal wood's beauty
Frequently Asked Questions
Can I fix blotchy stain by applying another coat?
Usually not if the problem is uneven absorption. Another coat of penetrating stain often makes dark areas darker. Severe defects generally require sanding back to clean wood; mild defects may be corrected with a sealed-surface gel glaze.
Should I use pre-stain conditioner with every type of wood?
No. Conditioner is most useful on blotch-prone woods such as pine, cherry, maple, birch, poplar, alder, and aspen. Test first, because conditioner can reduce color intensity and is not automatically compatible with every stain.
Can oil-based pre-stain conditioner go under water-based stain?
Not unless the manufacturer explicitly approves that combination. Some manufacturers, including Minwax for its oil-based conditioner, specifically state that it should not be used beneath water-based stain.
Is sanding sealer the same as pre-stain conditioner?
No. Sanding sealer is generally intended to make bare wood easier to sand before a clear finish. Pre-stain conditioner or a washcoat is used to moderate absorption before coloring.
Is gel stain guaranteed not to blotch?
No. Gel stain offers more controllable, surface-level color and usually penetrates less deeply, but it can still show growth-ring contrast and will not hide poor sanding or glue contamination.
The Bottom Line
To avoid blotchy stain: identify the existing surface, sand uniformly with the grain, inspect with mineral spirits, and test the complete finish schedule on representative wood. Match an oil- or water-based conditioner to the stain system, or test a washcoat or gel stain when greater control is needed. To fix blotching: return to bare wood for the most dependable repair, or seal the surface and use a carefully tested gel-stain glaze for a mild cosmetic correction.
Quick Recap
Product prices and availability are accurate as of the date/time indicated and are subject to change. Any price and availability information displayed on Amazon at the time of purchase will apply.

